Citrix® Synchronizer™ 1.0 Service Pack 1
Administrator Guide
This document serves as a guide for system administrators to the Citrix®
Synchronizer™ 1.0 Service Pack 1 release.
Citrix® Synchronizer™ 1.0 Service Pack 1 Administrator Guide
Copyright © 2010 Citrix All Rights Reserved. Version: 1.0 Service Pack 1
Citrix, Inc.
851 West Cypress Creek Road Fort Lauderdale, FL 33309 United States of America
Disclaimers
This document is furnished "AS IS." Citrix, Inc. disclaims all warranties regarding the contents of this document, including, but not limited to, implied warranties of merchantability and fitness for any particular purpose. This document may contain technical or other inaccuracies or typographical errors. Citrix, Inc. reserves the right to revise the information in this document at any time without notice. This document and the software described in this document constitute confidential information of Citrix, Inc. and its licensors, and are furnished under a license from Citrix, Inc.
Citrix Systems, Inc., the Citrix logo, Citrix XenClient, are trademarks of Citrix Systems, Inc. in the United States and other countries. All other products or services mentioned in this document are trademarks or registered trademarks of their respective companies.
Table of Contents
Concepts ... 1
Introducing Synchronizer ... 1
Devices ... 1
Users ... 1
User roles ... 1
VM images ... 1
Assignments ... 2
Installation and upgrade ... 3
Installing Synchronizer ... 3
Upgrading Synchronizer ... 5
Administration ... 7
Synchronizer user interface overview ... 7
User administration ... 10
Creating a local Synchronizer user ... 10
Creating a local Synchronizer user group ... 11
Adding a user to a group ... 12
Linking in an existing AD user ... 12
Linking in an existing AD user group ... 13
Changing the user name registered with Synchronizer ... 13
Creating a VM image ... 13
Assigning VM images ... 14
Deleting a VM image ... 21
Enabling VM image download and upload over HTTP ... 21
Device administration ... 22
Marking a device as lost ... 22
Experimental Synchronizer features ... 24
Dynamic VM image mode ... 24
Troubleshooting ... 26
Changing the role of a user to Admin outside of the Synchronizer UI ... 26
VM upload issues ... 26
Active Directory issues ... 27
Licenses ... 28
FastCGI ... 28
mod_fastcgi license terms ... 28
Concepts
Introducing Synchronizer
Synchronizer is the central point for the management and distribution of virtual machine (VM) images to XenClient devices. Synchronizer provisions, enables policy enforcement, backs up and manages images. It radically simplifies the deployment and maintenance of desktop images and applications to users in a way that provides secure computing and ease of use for users and administrators alike.
Synchronizer is a virtual appliance - a Citrix XenServer virtual machine which consists of a Debian Linux distribution, the Synchronizer components, and a database that maintains the relationships between virtual machine images, devices, and users and groups.
Once a XenClient device is registered with Synchronizer a user can: • Download VM images assigned to them
• Upload VMs to Synchronizer
Note:
Only a user that has been granted Admin rights in the Synchronizer UI can upload VMs or changes to VMs
to Synchronizer.
• Backup VMs
A system administrator can use Synchronizer to manage users, VM images (operating system images) and devices (computers, laptops). The rest of this section explains the key concepts involved in working with Synchronizer.
Devices
A device is a computer that has XenClient installed on it. Synchronizer maintains records of the relationship between devices and users, and enables secure communications between devices and Synchronizer.
Users
A Synchronizer user can be either a Microsoft Active Directory (AD) user or a user created locally in Synchronizer. When a user connects to Synchronizer for the first time, a record of their user device is created. Synchronizer keeps track of the relationship between users, their registered devices, and the VM images assigned to them.
User roles
A Synchronizer user can be assigned either a Standard role or an Admin role. A user must have Admin rights to be able to author VMs and upload them to Synchronizer.
VM images
A VM image consists of:
• Image files stored in the Microsoft Virtual Hard Disk (VHD) format. XenClient makes use of VHD chaining to allow a single large VHD to act as a parent to a large set of copy on write (CoW) children. This approach is also used to efficiently store subsequent versions of VM image files and backups of user data.
• Policy and configuration describing how the VM should act when it is instantiated on a client device including, for example, limitations about what USB devices can be used with it.
Note:
A VM image does not run on Synchronizer. The VHD(s) of the VM image, along with policy and other metadata is stored locally, and when you run a VM on your device, it runs locally on the XenClient hypervisor. When a VM image or backup is uploaded to Synchronizer, the data is encrypted using AES CBC 128bit encryption. A new key is created each time an upload is initialized. The keys are stored in a secure user key store, protected by the device key and the user passphrase.
Synchronizer can host multiple immutable versions of a VM image. VMs in Dynamic VM image mode share a common OS installation and set of programs that can be updated centrally. See the section called "Dynamic VM image mode"
for more information about Dynamic VM image mode.
Assignments
Assignment creates a relationship between a VM image and a user. An assignment allows a user to instantiate a specific VM image version on their device as a VM by downloading it to their registered XenClient device.
When creating an assignment, the types of USB devices that are allowed to be connected to the user device can be specified. You can, for example, disallow the connection of external USB hard drives, optical media, and wireless networking to inhibit the user installing unauthorized software. Similarly if the user device comes with a built-in optical media device with write capacity, VM policy can be used to disable the ability to write to optical media, thus ensuring that sensitive data does not leave the network.
VM assignments can also be time-limited, so that, for example, a VM can be made available to a temporary worker for the length of a contract and then cease to be bootable when the contract is finished.
Using XenClient with Synchronizer involves the five stages described below to create new VM images, and deploy them onto client devices.
Registration
Register the XenClient device with Synchronizer. Authoring
Install and configure an operating system and a set of applications in a VM on the XenClient device. Uploading
Using Citrix Receiver for XenClient, upload the VM to Synchronizer. This creates a VM image that can be assigned to multiple users.
Assignment
Using the Synchronizer UI, assign a VM image version to a user. Synchronization
Installation and upgrade
This chapter explains how to install or upgrade Synchronizer.
Synchronizer is provided as a Xen Virtual Appliance (XVA) file, which can be imported into XenServer. Synchronizer is a VM appliance that requires minimal installation procedures at startup. If you do not already have XenServer in your environment, you will need to install XenServer onto a physical server to host your Synchronizer. You can download XenServer for free from www.citrix.com.
Note:
Synchronizer is supported on XenServer 5.5 or later.
Installing Synchronizer
Note:
The following installation and upgrade procedures may differ depending on which version of XenServer you are using. This procedure is relevant for XenServer 5.6.
To download, import, and prepare the virtual appliance
The following procedure assumes that you are working on a Windows machine that has XenCenter installed. 1. Download the Synchronizer appliance from the http://deliver.citrix.com/go/citrix/tryxenclientsynchronizer. This
is a compressed archive which contains a .xva file.
2. Uncompress the file and double-click the .xva file to import it into XenCenter. 3. XenCenter launches, and the Import Source page of the Import wizard is displayed. 4. Click the Next button. The Home server page is displayed.
5. Choose a pool or a server on which to start the Synchronizer VM, then click Next. The Storage page is displayed.
6. Choose a storage repository on which the imported VM's virtual disks will be created, then click Import. The Importing VM... progress bar is displayed. After a short time, the Network page of the Import wizard is displayed.
7. Select the network that you want the VM to have access to, then click Next. The Finish page is displayed.
8. At the bottom of the Finish page is a checkbox labeled Start VM after import which is checked by default. Uncheck this if you want to increase the size of the virtual disk assigned to hold your VM images (which is 18GB by default). You can then choose to increase the size of the virtual disk before starting the VM and stepping through the various steps of the Synchronizer installation.
You can also change the virtual CPU properties and virtual memory assigned to the appliance at this point (the default RAM assigned is 1 GB).
The import process begins. This can take several minutes. When the VM is finished being imported, it will appear under the selected host node, or under the node of the host which the system chose if you selected a pool to import it into rather than a specific host.
10. If you want to change the properties of the Synchronizer VM or resize the virtual disk to be used for VM image storage, complete the following steps. If not you can continue to the next step.
a. If you do want to resize the virtual disk for the VM, select it on the left pane, then click the Storage tab, then select the virtual disk named xt-data-vol and click the Properties button.
b. The Properties dialog box is displayed for the selected virtual disk.
c. Click Size and Location on the left side, and use the Size control to set the disk size to the desired value. d. Click the OK button.
The dialog box closes and, after a few moments, the Size column in the Storage tab is updated to the new size. e. If you do want to modify the CPU properties, select the VM on the left pane, then click the General tab. f. Click the Properties button at the top of the window. The Properties dialog box of the selected VM is
displayed.
g. Click CPU and Memory on the left side.
Use the Number of VCPUs control to set the number of virtual CPUs to the desired value. You can also set the VCPU priority and the amount of RAM to be assigned to the Synchronizer VM on this page.
Note:
1024 MB is the default amount of memory, but Synchronizer can work with as little as 256 MB, so you can reduce the amount of RAM if desired.
h. Click OK.
i. If you changed the VM memory or the Number of VCPUs setting the VM General Changes dialog box is displayed, stating that the VM must be restarted for the new settings to take effect. Click the OK button to dismiss this dialog box.
j. If required, right-click on the VM and select Reboot, then click Yes to confirm the reboot action. 11. If your VM is not already started, right-click on the VM and select Start.
12. Once the Synchronizer VM has started, click the Console tab to access the command line console.
13. The VM console displays startup messages, and then pauses to prompt you to set the root password and the hostname of the VM. Enter the desired root password and hostname.
14. Next, the Synchronizer installation script begins.
To complete the installation
1. If you had canceled the Synchronizer software installation script previously, restart the Synchronizer software installation by running the command:
./installer.sh
2. The Synchronizer software license agreement is displayed. To accept the license agreement, use the Tab key to select I AGREE and press Enter.
4. Select Synchronizer DNS name to set the Synchronizer server hostname. The virtual hostname is a fully qualified domain name (with no trailing dot), for example synchronizer.example.org, on which the Synchronizer will be configured to serve requests. Your DNS servers must be set up to resolve the hostname you specify here to the IP address of the VM on which the Synchronizer is installed.
5. Select Network and press Enter to set a static IP address. The default is to use DHCP to obtain an IP address. 6. Select Transfer Mode and press Enter if you want to generate a new HTTPS certificate. To generate a new
certificate select HTTPS and press Enter. By default the certificates generated by this installer are self-signed and filled in with default values (for example, with CN=<virtual hostname>), but you are also offered the choice to customize these values. The CN field should match the fully qualified virtual hostname of the Synchronizer. Fill in the applicable fields and select OK.
7. Select Windows AD Domain if you want to connect the Synchronizer server to a Microsoft Active Directory (AD) server, which allows existing AD users to be linked in as Synchronizer users.
8. Select Admin Password if you want to change the password for the Synchronizer admin user.
Note:
The admin user is set by default to admin and the default password is admin. This is the username and password you can use to log in to the Synchronizer UI. This is not the same as the root password to the appliance which you set during the earlier part of the installation.
9. Select Install Now and OK and then Yes to complete the customization of Synchronizer for your environment and complete the installation. You can restart the installation at any time by logging in again and typing the command./installer.sh.
10. When installation is complete, the message Installation of Synchronizer completed successfully is displayed, along with the address to point your browser to to access the Synchronizer UI, and the authentication code for your certificate if you have configured Synchronizer access over HTTPS. The authentication code is displayed to a user when the user first connects to Synchronizer so that the user can be sure that they are connecting to the correct Synchronizer instance.
Upgrading Synchronizer
If you already have a Synchronizer 1.0 installation, use the following procedure to upgrade to Synchronizer 1.0 Service Pack 1.
To upgrade Synchronizer from 1.0
1. Download Synchronizer_1_0_SP1_upgrade.zip from http://www.citrix.com/xenclient/pkg/ upgradesynchronizerv1sp1 to a location on your network accessible over ssh.
2. Log in to the Synchronizer command window as the local administrator account (usually root).
3. Use SCP command securely copy the upgrade package from the downloaded location to the Synchronizer VM:
scp [[user@]host1:]<path to Synchronizer_1_0_SP1_upgrade.zip> \ Synchronizer_1_0_SP1_upgrade.zip
4. Extract upgrade.sh from Synchronizer_1_0_SP1_upgrade.zip:
unzip Synchronizer_1_0_upgrade.zip
5. Next, take a snapshot of your VM as a backup.
a. Right-click on the VM in the tree view and select Shut Down.
c. Enter a Name and optionally a Description for the snapshot and click Take Snapshot. 6. Run the upgrade script in a console on your Synchronizer VM:
chmod +x upgrade.sh ./upgrade.sh
7. Select I AGREE. 8. Select Yes.
9. The upgrade process begins. When the upgrade has completed, you can run installer.sh to configure your Synchronizer:
./installer.sh
If you do run the installer script, the remaining steps in this procedure are applicable.
10. The Synchronizer software license agreement is displayed. To accept the license agreement, use the Tab key to select I AGREE and press Enter.
11. The next screen lists a series of settings that can be made. For each of these settings you need to make, use the arrow keys to select the setting and Enter to edit the value.
12. Select Synchronizer DNS name to set the Synchronizer server hostname. The virtual hostname is a fully qualified domain name (with no trailing dot), for example synchronizer.example.org, on which the Synchronizer will be configured to serve requests. Your DNS servers must be set up to resolve the hostname you specify here to the IP address of the VM on which the Synchronizer is installed.
13. Select Network and press Enter to set a static IP address. The default is to use DHCP to obtain an IP address. 14. Select Transfer Mode and press Enter if you want to generate a new HTTPS certificate. To generate a new
certificate select HTTPS and press Enter. By default the certificates generated by this installer are self-signed and filled in with default values (for example, with CN=<virtual hostname>), but you are also offered the choice to customize these values. The CN field should match the fully qualified virtual hostname of the Synchronizer. Fill in the applicable fields and select OK.
15. Select Windows AD Domain if you want to connect the Synchronizer server to a Microsoft Active Directory (AD) server, which allows existing AD users to be linked in as Synchronizer users.
16. Select Admin Password if you want to change the password for the Synchronizer admin user.
Note:
The admin user is set by default to admin and the default password is admin. This is the username and password you can use to log in to the Synchronizer UI. This is not the same as the root password to the appliance which you set during the earlier part of the installation.
17. Select Install Now and OK and then Yes to complete the customization of Synchronizer for your environment and complete the installation. You can restart the installation at any time by logging in again and typing the command./installer.sh.
Administration
This section contains the procedures required for administering Synchronizer, using the web-based Synchronizer user interface (UI), which can be accessed by pointing a web browser at the Synchronizer server IP address or host name. Citrix recommends using one of the following browsers:
• Internet Explorer 8 • Internet Explorer 7 • Firefox 3.6
Synchronizer user interface overview
To connect to the web interface, enter the IP address or DNS host name of the Synchronizer VM in your browser address bar. Log it using the administrator username admin and the administrator password. The default administrator password is admin.
After logging in successfully, the Welcome to Synchronizer for XenClient dialog box is displayed. This dialog box contains some useful information to quickly get you started working with Synchronizer. To dismiss this dialog, click the cross at the top right. If you do not want to see this dialog every time that you log in, check the Don't show at logon checkbox before dismissing it. You can view this dialog box at any time by clicking Settings and then clicking the Show Help button.
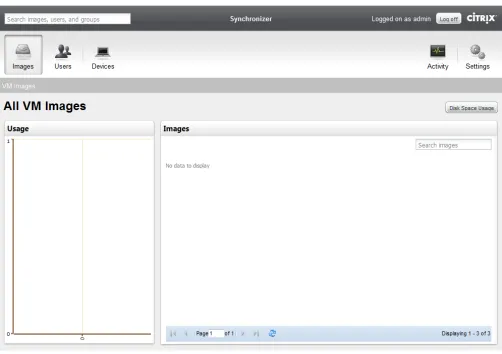
Next, the VM Images screen is displayed. When the Synchronizer user interface is first displayed, only the admin
Figure 1. Synchronizer after installation
To navigate through the Synchronizer user interface, click on the buttons along the top to access the corresponding pages of the user interface.
On the left side, there are three buttons corresponding to the types of objects that you work with in Synchronizer: Images
This page shows a list of available VM images in the image library. You can select and assign them to users and view their disk usage.
Also on this page you can:
• Filter the images displayed by entering text in the Search images text box. All images that contain the text that you enter in their name or description will be displayed.
• View the number of VMs deployed in the graph on the left hand side.
• Click the Disk Space Usage button to display a graph of how much disk space the VM images are taking up on the Synchronizer VM disk.
Users
Also on this page you can filter the users and groups displayed by entering text in the Search Users text box. Devices
This page shows a list of available devices and allows you to mark them as missing. On the right side, there are two more buttons:
Activity
This page shows a list of active VM image transfers or a system log. Settings
This page shows a list of available image repositories or a list of device activations. From here you can add new image repositories and edit existing image repositories.
Also on this page you can:
• Click the Generate Diagnostic Report button to generate a status report.
The Synchronizer administrator makes VM images available to users and groups on their assigned devices. In general, this workflow goes as follows:
User administration
Synchronizer users can be managed using the Synchronizer UI, or in Microsoft Active Directory (AD).
To create a local Synchronizer user
1. In the Synchronizer UI, click Users.
2. Click Add Local User. The Add Local User dialog is displayed.
3. Enter the user details.
4. To grant the user Admin rights, select Admin from the Role dropdown list. Admin rights allow the user to publish VMs to Synchronizer and log in to the Synchronizer UI.
5. Click the Add button.
Creating a local Synchronizer user group
To make the management of VM images easier, Synchronizer supports user groups. An administrator can assign a VM image or a set of VM images to a group of users that have similar computing needs.
To create a Synchronizer user group
1. In the Synchronizer UI, click Users. 2. Click the Groups tab.
3. Click Add Local Group.
4. Complete the following fields: Name
The name of the group. Description
5. Click Add.
Adding a user to a group
Once a group has been created, you can add new users to it, who will inherit the VM images already assigned to the group.
Note:
Synchronizer does not support adding both local and AD users to the same group.
To add a user to a group
Note:
XenClient does not provide the facility to edit the membership of AD groups. Any changes to AD groups or users must be performed using your interface to AD.
1. In the Synchronizer UI, click Users. 2. Click the Groups tab.
3. Click the group that you want to add the user to.
4. Click Edit Group. The Edit Group Membership window is displayed.
5. Select the user or users that you want to add to the group in the list on the left. You can hold down Ctrl and click to add multiple users.
6. Click Add selected to add the selected users. 7. Click OK.
Linking in an existing AD user
You can link in an existing AD user to Synchronizer. When the user logs in they will be authenticated against the AD server.
Note:
This feature is only available in the UI if your Synchronizer is connected to an AD server.
To link in an existing AD user
1. In the Synchronizer UI, click Users.
3. Enter the Username and the Domain.
4. Select the user role from the Role dropdown list.
5. Click Link. Synchronizer connects to the AD domain specified, and creates the link if a valid user has been specified.
Linking in an existing AD user group
You can link in an existing AD user group to Synchronizer. When a user in this group logs in they will be authenticated against the AD server.
Note:
This feature is only available in the UI if your Synchronizer is connected to an AD server.
To link in an existing AD user group
1. In the Synchronizer UI, click Users. 2. Click the Groups tab.
3. Click the Add Link to AD Group button. The Add Link to Domain Group window is displayed.
4. Enter the Group Name and click OK. Synchronizer connects to the AD domain specified, and creates the link if a valid group has been specified.
Changing the user name registered with Synchronizer
If the user name of an AD user with a device that is registered with Synchronizer changes, it is necessary to manually change the user name under which the device is registered on the XenClient device itself. To do this, press Ctrl+Shift +t in Citrix Receiver for XenClient to open the terminal. Then run the following command:
set_platform_username <new_username>
This changes the user name on the device so that the user can authenticate with Synchronizer using the new credentials.
Note:
Installing Microsoft Windows Server 2003 Service Pack 1 (SP1) on your Domain Controller is known to change authentication behavior so that users can authenticate using their old password for up to an hour after changing it. For more information about this issue and for a workaround, see Windows Server 2003 Service Pack 1 modifies NTLM network authentication behavior.
To add an image to the image repository, add a VM to a device running Citrix Receiver for XenClient, register and connect the device to Synchronizer, and upload the VM. See the XenClient User Guide for information about how to install a VM on Citrix Receiver for XenClient.
To connect a XenClient device to Synchronizer
1. In Citrix Receiver for XenClient, click System. The System Settings dialog box is displayed. 2. Click Synchronizer on the left side of the dialog box.
3. Provide the URL of the Synchronizer and click Register. Provide the your user name and password. Connecting as a user with Admin rights allows you to upload the VM image to the Synchronizer.
To upload the VM to Synchronizer
1. In Citrix Receiver for XenClient, shut down the VM that you want to upload to the Synchronizer. 2.
If necessary, click to switch to VM Detail view.
3. In the box for the VM you want to upload, click View Details. 4. Select the Synchronization tab.
5. Click Upload VM. The Upload to Synchronizer dialog box is displayed. 6. Provide a VM name and Description
7. Click Next.
8. Select the VM image mode.
9. The transfer of the image to the Synchronizer commences, and a progress bar is displayed. (A similar progress bar is displayed in the Synchronizer web interface if you click Activity).
Assigning VM images
Once a VM has been uploaded to Synchronizer, it is shown on the VM images screen. You can now assign this VM image to users or groups, which allows them to install it on their device.
To assign VM images
3. Select either User or Group from the Assign To pulldown, then select a specific user or group from the User or Group pulldown.
4. Click Continue.
7. On the Settings page, you can set the following:
Setting Default Description
Lease Time 14 days The number of days that the VM image is leased to the user. If the user does not authenticate with the Synchronizer before the lease time expires, the leased VM shuts down and the REMOTE LOCKED message is displayed. Connecting to and authenticating with Synchronizer will renew the lease. To ensure that lease times are not renewable, the administrator of the Synchronizer needs to manually revoke the assignment of the VM image to the user when they wish the lease to expire and not be renewable anymore.
Setting Default Description
Update Check 60 minutes The number of minutes that the registered XenClient device should check for policy updates from the Synchronizer. Allow Manual
Backups
Not enabled Allows the user to manually perform VM backups.
Allow Authorship Enabled for users with the
admin role; disabled for other users
Sets whether the user can upload a VM to the Synchronizer.
Allow Changing VM Properties
Enabled Sets whether or not this user can change a VM's properties like disk size, number of virtual CPUs, etc.
8. Click System resources and select Memory in MiB and Number of Virtual CPUs.
9. Click Disk encryption and select whether to use encryption for the VM on the client device disk. The contents of the VHD files used by the VM will be encrypted using the AES XTS (256bit) cypher.
Disk encryption is only applied when a VM is first deployed to a device. Editing an assignment at a later point will not cause the disk to be encrypted.
10. Click USB permissions and select which classes of USB devices are allowed to be used. Warning:
Because many USB devices are composite USB devices which expose multiple devices of different device classes, not allowing a particular device class can affect the ability of the user to use USB devices which one otherwise might expect to work. For example, some USB modems initially present themselves as mass storage devices to allow the user to install drivers contained on the mass storage embedded in the device. It is only after the drivers are installed that the USB modem is recognized as a USB modem. However, if mass storage USB is disallowed under the policy you set, the user will not be able to install the drivers and will therefore not be able to use the USB modem.
USB device class Description
Audio Devices for interfacing external audio devices (microphones, audio line level signals, etc.) to the computer
USB device class Description
Printers USB printers
Mass Storage external hard drives, DVD burners, USB sticks, etc.
Video Devices for capturing video data (web cams, digital video cameras) Unclassified USB
devices
All devices which do not have a standard USB class ID
11. Click Network permissions and select whether or not to enable for this user Wired and Wireless access.
13. Click Finish.
If you want to change any of the user settings for this assignment, click on the user or group in the Users list, then click View, Edit, or Revoke next to the image name in the Actions column.
Deleting a VM image
Deleting a VM image removes the VM from Synchronizer. It does not affect any deployed VMs that are based on the VM image.
To delete a VM image
1. In the Synchronizer UI, click Images.
2. Click on the name of the VM image you want to delete. 3. Click the Delete VM Image button.
Enabling VM image download and upload over HTTP
Enabling transfer over HTTP
1. In XenCenter, click the Console tab of your Synchronizer VM. 2. Enter the command:
vi /xt/config/site.conf
3. Change the line:
imagelibrary.bulk_transfer_scheme = "https"
4. To read:
imagelibrary.bulk_transfer_scheme = "http"
5. Reboot the VM. VM images will now transfer using HTTP over port 80.
Device administration
Marking a device as lost
To ensure that sensitive data is not compromised when a device is lost or stolen, XenClient provides the ability to remotely ensure that managed VMs on a missing device cannot be started.
To mark a device as lost
1. In the Synchronizer UI, click Devices.
2. Click Mark as Lost next to the lost device and click Yes.
When the VM next connects to Synchronizer the status of all managed VMs on the device is changed to Remote Locked, all managed VMs are forcibly shut down, and no managed VMs can be booted.
Warning:
As with a bare-metal operating system, if a managed VM is attempting to update using Windows Update while it is forcibly shut down, the VM may suffer from corruption caused by the interruption to the update.
Working with image repositories
By default, Synchronizer is installed with a local image repository in an 18G partition on a 20G Logical Volume Manager (LVM) volume. You can add NFS image repositories using the Synchronizer UI.
Note:
The local image repository size cannot be modified from the Synchronizer UI. It must be changed by resizing the virtual disk in XenCenter as described in the Synchronizer installation procedure.
Adding an NFS image repository
Name
A name to identify the repository. Server Address
The IP address or DNS name of the NFS server, for example, nfs.mycompany.com. Server Path
The path to the exported share on the server (for example, /exports/xc-images). Mount Options
Mount options can be ignored. These are standard Linux NFS mount options. 4. Click OK.
Experimental Synchronizer features
Dynamic VM image mode
Dynamic VM image mode allows you to maintain a single VM image which is shared by multiple users. To author a Dynamic VM image mode, use the following procedure:
To author a VM in Dynamic VM image mode
1. On a XenClient device, ensure that you are connected to Synchronizer as a user with Admin rights. 2. Shutdown the VM that you want to use as a template for the Dynamic VM image mode VM.
Note:
The VM must not already be registered with Synchronizer.
3. In VM details view mode, click View Details on the VM that you want to author as a Dynamic VM image mode VM.
4. Click the Synchronization tab. 5. Click Upload VM.
6. Enter a name and description for the VM, and select the Dynamic radio button.
7. Click Finish. The VM is uploaded to Synchronizer as a Dynamic VM image mode VM.
Note:
When a newly created Dynamic VM image mode VM is first started, new driver software is automatically installed. Because this driver software cannot persist on reboot for a user without Admin or VM authoring
rights, please complete the following steps to now create a second version of the Dynamic VM image mode VM to assign to users. If this VM image is destined for use on multiple types of device, it may be necessary to download the Dynamic VM image mode VM onto each device in succession, allow the device drivers required by that device to install, and then upload a new version to Synchronizer.
8. Click Edit and ensure that Save changes for Reboots is set to Enabled. 9. Click Save.
10. Start the VM. When the VM has started, the required drivers install automatically. 11. Reboot the VM.
12. Shut down the VM and upload it to Synchronizer. Use this version to assign to users.
Note:
The user must manually join an Active Directory domain if required after downloading a Dynamic VM image mode VM.
To update a Dynamic VM image mode VM
1. In Synchronizer, assign the Dynamic VM image mode VM image to your administrator user account.
2. On your XenClient device, in Citrix Receiver for XenClient, create a new VM from Synchronizer, selecting the Dynamic VM image mode VM image.
3. When the VM has downloaded, in VM detail view, click View Details. 4. Click the Synchronization tab.
5. Click Edit and ensure that Save changes for Reboots is set to Enabled. 6. Click Save.
7. Start the VM and perform maintenance work. When you are finished, shutdown the VM. 8. Upload the new version of the VM to Synchronizer.
9. Assign the new version of the VM to the relevant user(s), setting the VM policy. Users will be able to upgrade to the new version using Citrix Receiver for XenClient.
To edit an assignment
1. In the Synchronizer UI, click Users. 2. Click the relevant user name.
10. Next to the relevant assignment in the Available Assignments table, select the Edit action. Follow the steps of the Assign VM Image wizard to edit the assignment.
Note:
Troubleshooting
This section describes some solutions for common problems. You may also want to visit the XenClient Forums at
http://forums.citrix.com/category.jspa?categoryID=219 for solutions not found in this chapter.
Changing the role of a user to Admin outside of the Synchronizer UI
Through the Synchronizer web interface it is possible to remove the admin privilege from all users, including the admin user. If this happens to you, there is a command line script make-user-admin that you can run to grant yourself admin user rights.
To grant a user admin rights
1. At the console for the Synchronizer appliance, run the following command as root.
./make-user-admin
The following output is displayed:
This program will grant Synchronizer admin privileges to a user of your choice. Provide the user information at the prompt below:
1) To specify a local synchronizer user, simply enter the username with no prefix. e.g. 'jane'
2) To specify a synchronizer user that is linked to an AD user, prefix the username with the NETBIOS name of the domain and a backslash character. e.g. 'MYDOMAIN\jane'
Enter username (CTRL-C to cancel):
2. Enter the username as prompted and press Enter.
The user role is changed in the Synchronizer database to have admin privileges.
VM upload issues
VM upload will fail if there is insufficient space in the Synchronizer image repository, and if the VM that you attempt to upload was not shut down cleanly. Use the following procedures to troubleshoot VM upload issues.
To fix VM upload failure due to insufficient space
1. In XenClient, shutdown the Synchronizer VM. 2. Click the Storage tab.
3. Select the xt-data-vol virtual disk and click Properties. 4. Click Size and location and increase the disk size. 5. Click OK and restart the Synchronizer VM.
To fix VM upload failure due to a dirty file system
Active Directory issues
If you encounter problems linking in Active Directory users and groups, first check that the username is spelled correctly. If you are still unable to link in a user or group, try restarting the AD link services by using the following procedure:
To restart the Active Directory client services
1. Open a console to the Synchronizer and log in as root 2. Run the command:
Licenses
FastCGI
This package was debianized by Davide Puricelli (evo) <[email protected]> on Sat, 3 Jun 2000 22:50:10 +0200. It was downloaded from http://www.fastcgi.com/
Copyright:
Copyright (c) 1995-1996 Open Market, Inc. Authors:
• Patches for Apache-1.1 provided by Ralf S. Engelschall <[email protected]> • Patches for Linux provided by Scott Langley <[email protected]>
• Patches for suexec handling by Brian Grossman <[email protected]> and Rob Saccoccio <[email protected]>
mod_fastcgi license terms
This FastCGI application library source and object code (the "Software") and its documentation (the "Documentation") are copyrighted by Open Market, Inc ("Open Market"). The following terms apply to all files associated with the Software and Documentation unless explicitly disclaimed in individual files.
Open Market permits you to use, copy, modify, distribute, and license this Software and the Documentation solely for the purpose of implementing the FastCGI specification defined by Open Market or derivative specifications publicly endorsed by Open Market and promulgated by an open standards organization and for no other purpose, provided that existing copyright notices are retained in all copies and that this notice is included verbatim in any distributions. No written agreement, license, or royalty fee is required for any of the authorized uses. Modifications to this Software and Documentation may be copyrighted by their authors and need not follow the licensing terms described here, but the modified Software and Documentation must be used for the sole purpose of implementing the FastCGI specification defined by Open Market or derivative specifications publicly endorsed by Open Market and promulgated by an open standards organization and for no other purpose. If modifications to this Software and Documentation have new licensing terms, the new terms must protect Open Market's proprietary rights in the Software and Documentation to the same extent as these licensing terms and must be clearly indicated on the first page of each file where they apply. Open Market shall retain all right, title and interest in and to the Software and Documentation, including without limitation all patent, copyright, trade secret and other proprietary rights.
Index
A
AD user group linking, 13 Assignment about, 2
D
Device about, 1 Devicesmarking as lost, 22
I
Image repositories adding, 22 working with, 22
N
NFS image repository, 22
S
Synchronizer administering, connecting, 14 installing, 3 overview, 1 upgrading, 5user interface overview, 7
U
User groups creating, 11 user name changing, 13 Users about, 1adding to a group, 12 administration, 10
changing registered user name, 13 creating, 10
linking from Active Directory, 12 linking in group, 13
V
VM image repository, 1 VM images about, 1 versions, 2 VMs assigning, 14 creating, 13 deploying, 2
Dynamic VM image mode, 24 updating , 25
Citrix Worldwide
Worldwide headquarters
Citrix Systems, Inc. 851 West Cypress Creek Road Fort Lauderdale, FL 33309 USA
T +1 800 393 1888 T +1 954 267 3000
Regional headquarters
Americas
Citrix Silicon Valley 4988 Great America Parkway Santa Clara, CA 95054 USA
T +1 408 790 8000
Europe
Citrix Systems International GmbH Rheinweg 9
8200 Schaffhausen Switzerland T +41 52 635 7700
Asia Pacific
Citrix Systems Hong Kong Ltd. Suite 3201, 32nd Floor One International Finance Centre 1 Harbour View Street Central
Hong Kong T +852 2100 5000
Citrix Online division
5385 Hollister Avenue Santa Barbara, CA 93111 USA
T +1 805 690 6400
http://www.citrix.com
About Citrix
Citrix Systems, Inc. (NASDAQ:CTXS) is a leading provider of virtual computing solutions that help companies deliver IT as an on-demand service. Founded in 1989, Citrix combines virtualization, networking, and cloud computing technologies into a full portfolio of products that enable virtual workstyles for users and virtual datacenters for IT. More than 230,000 organizations worldwide rely on Citrix to help them build simpler and more cost-effective IT environments. Citrix partners with over 10,000 companies in more than 100 countries. Annual revenue in 2009 was $1.61 billion.