March,, 2003 DRTC, Bangalore
Paper: Q
Installing Greenstone Digital Library on
Windows Platform
Jaba Das
Documentation and Research Training Centre Indian Statistical Institute
Bangalore 560 059 email: [email protected]
Abstract
Paper: Q A R D Prasad
1.
INTRODUCTION
The Greenstone Digital Library software is fairly comprehensive in providing major facilities in undertaking a Digital Library Initiative. One can create a DL of PDF, PostScript, Ms-Word or even e-mails. One of the greatest advantages of this software is that it is distributed under General Public License free of cost. Even the libraries with modest budget can attempt to create digital libraries using this software. The software can be downloaded from www.cs.waikato.ac.nz/~nzdl/gsdl-docs/Download.html or fromwww.greenstone.org.
This paper describes how to install and run the software in MS-windows environment.
2.
INSTALLATION oF PERL
Perl is a programming language. As the Greenstone Digital Library Software uses Perl programs, Perl compiler should be loaded. Fortunately, you do not have to know Perl at all. You only have to make Perl available for the DL software i.e. you have to install Perl.
Step 1: To load Perl, in Windows Explorer right click on the file named ActivePerl-5.6.0.618-MSWin32-x86-multi-thread
and follow the instructions on the screen. The latest version of Perl can be downloaded from http://www.activestate.com
Step 2: Make sure C:\Perl\bin directory is in the path. To set path in Win9x/Me, open the
“autoexec.bat” file in the root directory, add “C:\perl\bin” to the existing directory path Or simply add the following line as the last line in autoexec.bat file.
PATH=%PATH%;C;\perl\bin.
DO NOT forget to reboot the system to affect the changes to the path.
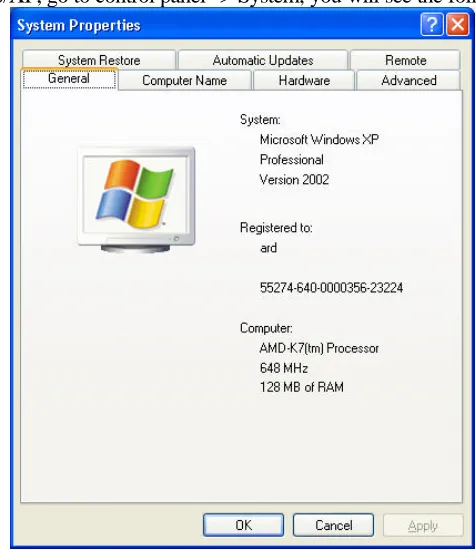
In case of NT/2000/XP, go to control panel -> System, you will see the following screen
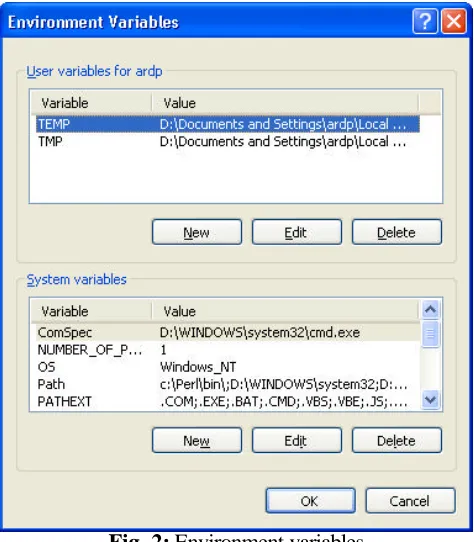
In the above screen choose advanced and you will see the following screen
Fig. 2: Environment variables
In the above screen under ‘System Variables’ add C:\perl\bin to the existing path. Press OK and come out the screens and REBOOT the system to affect the changes
3.
INSTALLATION OF GREENSTONE DIGITAL LIBRARY
SOFTWARE
Step 1:
In windows explorer double click the file compressed file
gsdl-2.37-win32
to uncompress the software files.
Step 2:
The following screen appears, displaying the Software License Agreement. A few words about GNU General Public License: This is a major trend in the field of IT. Many organizations and individuals are coming forward to offer software free of cost including the source code. This encourages the development of the software by actively participating in the use and also offering programming expertise. Linux operating system is very good example of this trend, so is Apache web server, PostgreSQL DBMS, the list goes on. Greenstone Digital library software is offered under GPL. Please read the license completely by using the scroll bar. If you are more interested, visit the site www.gnu.org.
Paper: Q A R D Prasad
Fig. 3: Software license agreement
Step 3:
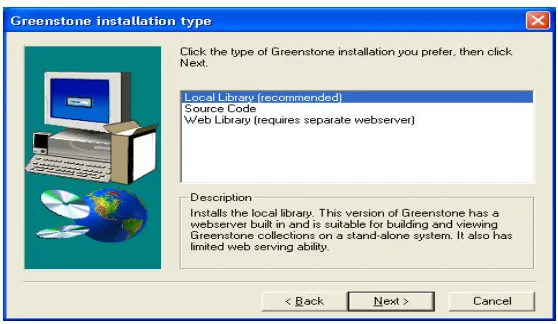
In the following screen you will have three choices. If you do not have a web server and do not intend to offer your digital library collection on a network and would like to use it as a stand-alone version, you should choose, “local library”. In other words, the digital library works on the system where it is loaded and will not be accessible from other systems on a network.
If you wish to make your digital collection available either on Internet or Intranet, you should choose “web library”. However, in this case you are required to install a web server. In case of MS-Windows, it can be either IIS (Internet Information Server) or PWS (Personal Web Server). In case of Linux, it is normally the Apache Web server. This tutorial covers only the IIS in MS-operating systems. In case of XP, the IIS is normally loaded at the time of OS installation. In case of Win9x/Me, it should be loaded separately.
The option ‘Source code’ loads the DL software source code. You have to compile the source code to get the binary executable files. This is meant for experts and those you would like modify or improve the DL software.
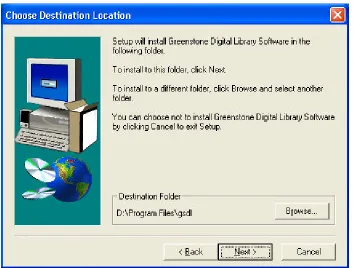
Step 4:
Once the choice is made in the earlier screen, the next screen allows you to choose the directory where the DL software is to be loaded. By default, it takes “C:\program files\gsdl” as the home directory of the DL software. You can change to another directory by clicking on “Browse” button.
Fig. 5: Choosing Greenstone file destination directory
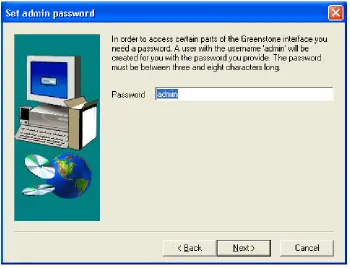
Step 5:
The next screen allows you to set the administrator password. By default, the password is “admin”. Definitely, it is a bad idea to choose the default. You should choose another password, so that others can not add or delete files to you DL Collection.
Step 6:
Paper: Q A R D Prasad
Fig. 6: Setting up a password
Step 7:
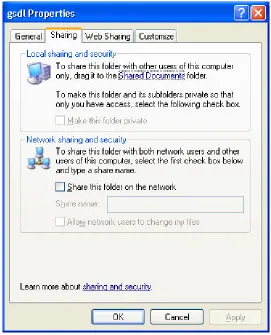
In case of Local library setup, this step is not needed. This is applicable only for “Web Library” installation, which is meant for making the Digital Collection available over a network. It is essential that the Green Stone Digital Library (GSDL) directory (C:\Prgram Files\gsdl”) should be made sharable on the web. Use the Widows Explorer and right click on the “c;\Prgram Files\gsdl” directory, the following screen appears. Choose “Web Sharing” by click the button.
Fig. 8: Properties window of gsdl directory
Paper: Q A R D Prasad
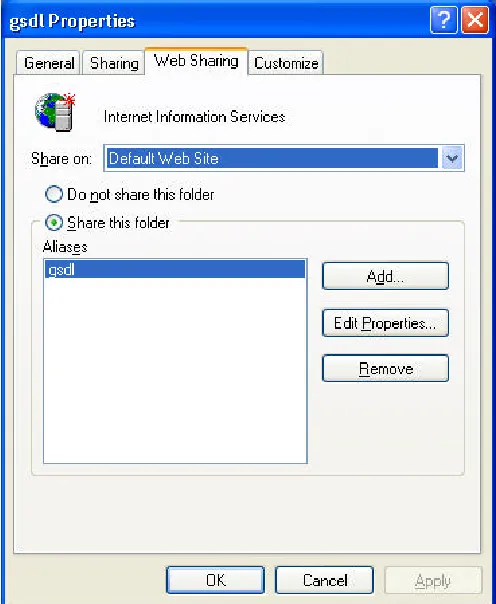
Fig. 9: Web sharing of directory gsdl
Once the radio button “Share this folder” is clicked, the following screen appears
In the above screen click the radio button “Execute (includes scripts)”. This is essential to run the “library.exe” program form the URL of the web page. In summary, in this step, we are making the “gsdl” directory web-sharable and the scripts/programs of DL software available through the web server.
4.
RUNNING GREENSTONE
4.1. Local Library
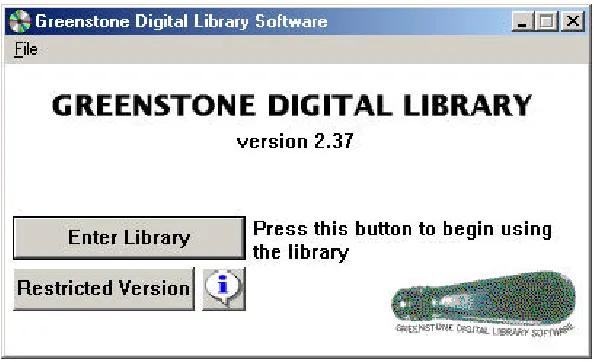
Running the Greenstone DL as a local library is straight forward. Press the “Start” button of the windows and go to programs, you will see “Green Stone Digital Library” in the menu with a submenu having the items “Readme.txt”, “Uninstall Greenstone” and “Greenstone Digital Library”. If you chose “Green stone Digital Library” the following screen appears.
Fig. 11: Running the Greenstone
In the above screen, you require Netscape browser installed to use the “Restricted Version” and is only useful when the software does not work straight away. If there are no problems during the installation, click “Enter Library”. The Greenstone software does many required procedures automatically and opens the software in a browser.
4.2. Web Library
In case of Web Library, open your Internet browser (IE or Netscape), enter either
http://localhost/gsdl/library.exe (If you do not know your site address and wants to use on the same machine where Greenstone is loaded)
OR
http://127.0.0.1/gsdl/library.exe (same as above) OR
http://192.168.1.116/gsdl/library.exe (if you do not have an IP address, but you know the IP number of the host having the Greenstone software)
OR
Paper: Q A R D Prasad
Whether you are using Local Library or web Library the following screen should appear after invoking the software
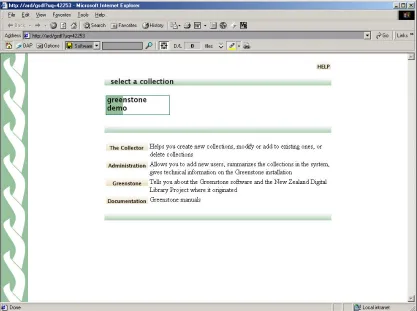
Fig. 12: First page of Greenstone
In the above screen, if you click “Greenstone Demo”, the system will show you the demonstration database files, which is worth trying to have an understanding of the facilities Greenstone software provides and also to have some idea of the how Digital Library software works.
In the same screen you can find a menu of items having “The Collector” meant for building your own digital library. “Administration” meant for administering you Digital Library; “Greenstone” to know about this software and “Documentation” which contains all the necessary manuals. The most important item in the menu is “The collector”.
4.3. Collector
Fig. 13: The collector of Greenstone
Once singed in, you will be presented with a menu of items/steps (at the bottom of the screen), which are to be followed in the same sequence.
1) Collection Information 2) Source Data
3) Configure Collection 4) Build Collection 5) View Collection
Paper: Q A R D Prasad
Fig. 14: Creation of new collection in Greenstone
4.4. Collection Information
Fig. 15: Building collection information in Greenstone
4.5. Source Data
This is the most important step in the digital library creation. Here you will be informing the system what constitutes your DL collection. The Collection may comprise of web sites, Web pages, ftp sites, ftp documents or simply your files in PDF or PostScript or even MS-Word format.
Paper: Q A R D Prasad
Fig. 16: Locating the source data
4.6. Configure Collection
Fig. 17: Configuring collection
4.7. Build Collection
This step builds the digital library, creates search and browsing facilities and completes the Digital Library creation. The next step is only to view the collection to check whether the system has built the way have configured it.
4.8. View Collection
Paper: Q A R D Prasad
Fig. 18: Viewing collection in Greenstone
5.
CONCLUSION
The Greenstone Digital Library software is fairly comprehensive. This paper gives only a very rudimentary approach to creating a Digital Library. It is strongly recommended that one should read all the manuals provided with software for customizing the system to suite to your requirement. The system also allows you to create a CD of your digital library collection. There is a growing library user community of this software. The following are some of the digital libraries created using Greenstone.
Ø The New Zealand Digital Library Ø Russian Greenstone Library Ø Project Gutenberg
Ø The University of Applied Sciences Stuttgart - Hochschule der Medien Ø Gresham College Archive