SPECIAL COLOR INK GUIDE
( Metallic Silver & White )
This document describes the characteristics of special color inks (white ink and metallic silver ink) for VS-640, the important notes on the usage of these inks, and the maintenance and printing method in using these inks. For other information, refer to the VS-640 Setup Guide and the VS-640 User's Manual.
When you use metallic silver ink and white ink, be
sure to read this first.
Thank you very much for purchasing this product.
To ensure correct and safe usage with a full understanding of this product's performance, please be sure to read through this manual completely and store it in a safe location.
Unauthorized copying or transferal, in whole or in part, of this manual is prohibited.
The contents of this operation manual and the specifications of this product are subject to change without notice.
The operation manual and the product have been prepared and tested as much as possible. If you find any misprint or error, please inform us.
Roland DG Corp. assumes no responsibility for any direct or indirect loss or damage which may occur through use of this product, regardless of any failure to perform on the part of this product.
Roland DG Corp. assumes no responsibility for any direct or indirect loss or damage which may occur with respect to any article made using this product.
1
Contents
Chapter 1 Getting Started ...3
1-1 What This Document Assumes and Related Manuals ...4
What This Document Assumes ... 4
Related Manuals ... 4
VersaWorks Online ... 4
1-2 Before Starting Operations ...5
Important: Characteristics of Inks and Important Notes... 5
Before Starting the Day's Work ... 5
1-3 Important Notes on Printing ...6
Using the middle pinch rollers in printing and cutting ... 6
Important notes in using transparent media ... 6
Important notes on using media take-up system ... 6
Chapter 2 Getting Ready ...7
2-1 Preparing VersaWorks ...8
Starting VersaWorks ... 8
Creating a Folder for Saving PS Files ... 8
2-2 Creating Printing Data ...9
Basic Approach for Creating Printing Data ... 9
Creating Data for Printing ... 9
2-3 Printer Preparations ...15
Making the Printer Settings and Loading Media ...15
Chapter 3 Printing ...17
3-1 Using the Metallic Silver Ink ...18
Printing With Metallic Silver/CMYKLcLm Color (Both or Individually) ...18
3-2 Using the Metallic Silver Ink and White Ink ...21
Printing With Metallic Silver/White/CMYK Color in a Single Pass ...21
Printing With White/CMYKLcLm Color (Both or Individually) ...25
Chapter 4 When Performing Maintenance/Printing ...29
4-1 Maintenance ...30
Message for Ink Circulation ...30
When Dot Drop-out Etc. Cannot be Corrected ...30
http://www.rolanddg.com/
Copyright © 2010 Roland DG Corporation
Copyright and property of this Software and this manual belong to Roland DG Corp. No part of this publica-tion may be reproduced, stored in a retrieval system or transmitted, in any from or by any means, electron-ic, mechanical, photocopy, recording or otherwise, without the prior written permission of the publisher. VersaWorks is a registered trademark of Roland DG Corp.
Windows is a registered trademarks or trademarks of Microsoft® Corporation in the United States and/or other countries.
Pentium are registered trademarks of Intel Corporation in the United States. Macintosh is a registered trademark of Apple Inc.
Adobe, the Adobe logo, PostScript, PostScript 3, and Illustrator are either registered trademarks or trade-marks of Adobe Systems Incorporated in the United States and/or other countries. ©2007 Adobe Systems Incorporated. All rights reserved.
Other company names and product names are trademarks or registered trademarks of their respective holders.
Chapter 1
Getting Started
1-1 What This Document Assumes and Related Manuals ...4
What This Document Assumes ...4
Related Manuals ...4
VersaWorks Online ...4
1-2 Before Starting Operations ...5
Important: Characteristics of Inks and Important Notes ...5
Before Starting the Day's Work ...5
1-3 Important Notes on Printing ...6
Using The Middle Pinch Rollers in Printing and Cutting ...6
Important Notes in Using Transparent Media ...6
Important Notes on Using Media Take-up System ...6
4
Chapter 1 Getting Started Chapter 1 Getting Started1-1 What This Document Assumes and Related Manuals
What This Document Assumes
Before performing any operations described in this guide, make sure that all the following preparations have been complete.
Assembling and installing the VS-640 unit
Installing VersaWorks on your computer, and connecting the computer to the VS-640 via a network
Related Manuals
Read the following documentation for information about setting up the VS-640 unit and VersaWorks.
VS-640 Setup Guide
This manual covers details about how to use the VS-640, including how to set up the printer and where to locate the printer, etc. Be sure to read this manual.
VS-640 User's Manual
This manual describes operation methods in detail. After you have read the VS-640 Setup Guide, be sure to read this manual.
VersaWorks Quick Start Guide
Chapter 1 of this manual, “Setting for VersaWorks,” provides you with instructions necessary to perform print-ing with VersaWorks, includprint-ing how to install the software. Be sure to read this chapter followprint-ing the above “VS-640 User’s Manual.
You are also recommended to read Chapter 2, “Getting Started,” to become familiar with how to use this program.
VersaWorks Online
This document describes the important notes to use the metallic silver ink and white ink as well as the basic printing method using these inks. You can get the latest information about Roland VersaWorks and the in-formation on printing methods requiring more complex settings by viewing VersaWorks Online. If you want to learn more about the features of Roland VersaWorks, or if you want to use metallic silver ink and white ink more effectively, be sure to visit VersaWorks Online.
5
Chapter 1 Getting Started Chapter 1 Getting Started
1-2 Before Starting Operations
Important: Characteristics of Inks and Important Notes
The usage and handling of white ink and metallic silver ink involve some important considerations that do not apply to ink of other colors. Be sure to familiarize yourself with the characteristics of the inks before you use them.
White ink and metallic silver ink precipitate.
If they are allowed to stand, the precipitates in them may solidify and cause clogging of the print head or other malfunction. Be sure to observe the cautions in this manual.
Maintenance must be performed.
Always keep the main power switched on. If the main power is switched off, the automatic maintenance function stops working, and it may result in malfunction.
We recommend that you operate the printer at least once a week.
If the printer is left unused for a long period of time, ink precipitation may occur, causing unstable ink discharge, which may result in dot drop-out, etc. In such cases, the precipitated and solidified ink needs to be cleared.
P.30, "When Dot Drop-out etc. Cannot be Corrected"
Drying inks
After output, allow the ink to dry sufficiently. Note that white ink and metallic silver ink in particular require printing at a high density, and so are more difficult to dry than CMYKLcLm inks.
We strongly recommend lamination.
Depending on conditions, the weatherability of metallic silver ink and white ink may be inferior to that of CMYKLcLm inks. Therefore, laminating is strongly recommended.
Before Starting the Day's Work
Remove just the white and metallic silver ink cartridges, shake them gently, then reinsert
them.
You do not have to shake the cyan, magenta, yellow, black, light-cyan, and light-magenta ink
cartridges every day, but be sure to shake them when you install new cartridges for these colors.
The ingredients in white and metallic silver inks tend to settle. Each day, before starting the day's operations, be sure to carry out the above steps. Allowing the ink to stand without carrying out these steps can cause the settled material to harden, resulting in malfunction or other problems.
6
Chapter 1 Getting Started1-3 Important Notes on Printing
Using The Middle Pinch Rollers in Printing and Cutting
Since metallic silver ink and white ink are difficult to dry, the middle pinch rollers will smudge the printed surface when printing and cutting are performed. Thus, when you perform printing and cutting using metal-lic silver ink and/or white ink, secure the media in place using only two pinch rollers on the right and the left. However, some types of the media may partially float and it may cause bad effect on printing, feeding and/ or cutting. Use the media after confirmation of the nature of your media.
Important Notes in Using Transparent Media
Loading transparent media
Set the [EDGE DETECTION] menu item to "DISABLE". Transparent media cannot be loaded unless this set-ting is made.
Ensure a margin of at least 75 mm from the leading edge of the media to the printing- or cutting-start location.
Important notes on the amount of media remaining
When you use transparent media, the presence of media cannot be detected. In such cases, printing opera-tion does not stop when the media runs out, and there is a chance that the platen or the like may become soiled with ink or that ink may get inside and damage the machine. If media runs out while printing is in progress, immediately press to stop printing.
Using the middle pinch rollers
The middle pinch rollers scratch media slightly, and on transparent media such scratches can be very no-ticeable. Also, the middle pinch rollers will smudge the printed surface when transparent media is pulled back after printing. When you use transparent media, secure the media in place using only two pinch rollers on the right and the left.
Automatic crop-mark detection
Automatic crop-mark detection does not work with transparent media. In such cases, perform alignment manually.
"VS-640 User's Manual"
Important Notes on Using Media Take-up System
Since metallic silver ink and white ink are difficult to dry, if you use the media take-up system (at your option), media and/or the printed surface may be smudged depending on the type of media you use. If you use the media take-up system leaving the middle pinch rollers removed, some types of the media may not be taken up normally and/or cause bad effect on printing, feeding and/or cutting quality as well as partial float of the media. Be sure to use the media take-up system on confirmation of the nature and compatibility of your media.
Chapter 2
Getting Ready
2-1 Preparing VersaWorks ...8
Starting VersaWorks ...8
Creating a Folder for Saving PS Files ...8
2-2 Creating Printing Data ...9
Basic Approach for Creating Printing Data ...9
Creating Data for Printing ...9
2-3 Printer Preparations ...15
Making the Printer Settings and Loading Media ...15
8
Chapter 2 Getting Ready Chapter 2 Getting Ready2-1 Preparing VersaWorks
Starting VersaWorks
On the computer you are using, start VersaWorks. For information on how to start the program, see the Roland VersaWorks Quick Start Guide. After starting the program, go to the upper left of the main screen and check to make sure that "Model (or Nickname) of Your Printer" is displayed, and that "Status" is set to "Ready to Print."
Creating a Folder for Saving PS Files
Before you actually print an image you draw using application software such as Adobe Illustrator, it is necessary to save the image as a PS file(s). And then, you can print the image by loading the PS file(s) on VersaWorks. Because of this, you should create a folder for saving PS files in advance. It is recommended to locate the folder in the root directory on your computer's local disk.
Procedure
Open [Computer] ( or [My Computer]), and then open [Local Disk (C:)].
On the [Organize] menu, click [New Folder]. (Or on the [File] menu, click [New], and then click [Folder].)
Enter the name for the folder, and then press the Enter key.Here you name the folder "MT-WH_print", for ex-ample.
Chapter 2 Getting Ready Chapter 2 Getting Ready
9
2-2 Creating Printing Data
Basic Approach for Creating Printing Data
When Using Metallic Silver Ink
When you print using metallic silver ink, you can create the printing data according to the two methods below.
Specify the spot color so as to use only the metallic silver ink.
Apply the spot color named "RDG_MetallicSilver" to the areas you want to print using the metallic silver ink.
Use the exclusive metallic color special colors library.
From the exclusive metallic color special colors library, select the metallic color to be used which is the combination color of CMYKLcLm ink and metallic silver ink.
When Using White Ink
Apply the spot color named "RDG_WHITE" to the areas you want to print using the white ink.
Creating Data for Printing
Create the data for printing using the metallic silver ink and white ink.
The program used to create the printing data is Adobe Illustrator CS3. For detailed information on drawing methods and how to work with palettes, refer to the documentation or online help for Adobe Illustrator CS3. If you are using another version of Adobe Illustrator, operations may be somewhat different from those explained here.
1.
Open the exclusive swatch library.
At the swatch palette menu, select [Open Swatch Library], then [Other Libraries].The "Select Library" window appears.
The swatch palette is displayed by going to the menu, selecting [Window], and then selecting [Swatch].
2-2 Creating Printing Data
Chapter 2 Getting Ready Chapter 2 Getting Ready Chapter 2 Getting Ready
10
Open folders in the order of [Computer] (or [My Computer]) → [Local Disk (C:)] → [Program Files] → [Roland VersaWorks] → [Swatch] → [Illustrator], then select "Roland VersaWorks.ai"Depending on the settings of your computer, the extension ".ai" might not be shown.
Click [Open].
The swatch library containing "RDG_MetallicSilver" and "RDG_WHITE" is displayed.
Open the same folders as in step
, and then select "Roland Metallic Color System Library.ai."Depending on the settings of your computer, the extension ".ai" might not be shown.
Click [Open].
The swatch library is displayed which is containing the "metallic color" created by mixing the metallic silver ink and CMYKLcLm ink.
By saving the ".ai" file selected in steps
and
into the folder below, you can register each swatch library to the Adobe Illustrator's library.C:\Program Files\Adobe\Adobe Illustrator CS3\Preset\Swatch ("C" is the name of your computer's local disk.)
Once the registration is performed, you can open the library directly from the swatch palette menu, eliminating the need to search the file every time you start Adobe Illustrator.
Chapter 2 Getting Ready Chapter 2 Getting Ready Chapter 2 Getting Ready
2-2 Creating Printing Data
11
2.
Create the illustration, and specify the spot color that matches the color you want to print.
Create the illustration.Be sure to draw the illustration in the CMYK mode.
Specify each spot color that matches the color you want to print.Desired ink or color Spot color name
Metallic silver ink RDG_MetallicSilver
White ink RDG_WHITE
Metallic color
(Metallic silver/CMYKLcLm combination color) RVW-MT-Silver, RVW-MT-Bronze, RVW-MT-TitanBlack, etc.
Areas where you want to use metallic color
From the metallic color special colors library (Roland Metallic Color System Library), specify the color such as "RVW-MT-Bronze"
Specify "RDG_WHITE" for the areas where you want to use white ink.
Specify " RDG_MetallicSilver " for the areas where you want to use metallic silver ink.
2-2 Creating Printing Data
Chapter 2 Getting Ready Chapter 2 Getting Ready Chapter 2 Getting Ready
12
3.
Create the PS (PostScript) file.
Select [Print] from the [File] menu. Select [Roland VW].When a nickname is set, or when more than one printer is connected, select “Roland VW_(the nick-name of the printer used for output).”
Click [Setup]. Click [Continue].
Chapter 2 Getting Ready Chapter 2 Getting Ready Chapter 2 Getting Ready
2-2 Creating Printing Data
13
Turn on the [Print to file] option.Click [Preferences].
Click [Advanced] in the [Layout] tab.
For Windows 2000: In the "Print" dialog box
(the window at the very top of this page), go
to the "Layout" tab and click [Advanced].
Click the down arrow to the right of the [Paper Size] box, and then click [PostScript Custom Page Size] from the list that ap-pears.
For "Custom Page Size Dimensions," enter the values in the "Width" and "Height" fields.
Enter values for the same size as the illustration you created in step
2.
.2-2 Creating Printing Data
Chapter 2 Getting Ready Chapter 2 Getting Ready Chapter 2 Getting Ready
14
Click [OK] three times to close the "PostScript Custom Page Size Definition," "Roland VersaWorks Advanced Options," and "Printing Preferences" dialog boxes.The "Print" dialog box returns.
Click [Print].Click [Print].
Specify the destination and file name forsaving,
Example: " C:\MT-WH_print " for the folder to save to, and " mt-wh.ps " as the file name
Click [Save].
The CMYK layer of the image is saved as a PS file.
Open the folder you saved to and make sure the file has been created.Select the folder you created in "Creating a Folder for Saving PS Files" on page 8.
Assign the name you want. It may be a good idea to assign a name that indicates that the
Chapter 2 Getting Ready Chapter 2 Getting Ready Chapter 2 Getting Ready
15
2-3 Printer Preparations
Making the Printer Settings and Loading Media
When Using Transparent Media
When you are using transparent media, make the necessary printing settings on the printer and load the media accordingly.
Procedure
Press and make the following settings.[EDGE DETECTION] to "DISABLE."
Load transparent media into the printer. When the media you are loading into the printer warps or partially floats from the platen, load it into the printer so that its front end goes about 20 cm (8 in.) from the starting edge of the print area.
Be sure to use the media clamps when you load media.
When Using Media Other Than Transparent Media
Chapter 3
Printing
3-1 Using the Metallic Silver Ink ...18
Printing With Metallic Silver/CMYKLcLm Color
(Both or Individually) ...18
3-2 Using the Metallic Silver Ink and White Ink...21
Printing With Metallic Silver/White/CMYK Color
in a Single Pass ...21 Printing With White/CMYKLcLm Color
(Both or Individually) ...25
18
Chapter 3 Printing Chapter 3 Printing3-1 Using the Metallic Silver Ink
Printing With Metallic Silver/CMYKLcLm Color (Both or Individually)
This section describes how to perform either of the printing methods below. Using metallic silver ink and CMYKLcLm ink (printing all the metallic colors such as
RDG_Me-tallicSilver and RVW-MT-Bronze as well as CMYKLcLm colors)
Using metallic silver ink only (printing RDG_MetallicSilver only) Using CMYKLcLm ink only
In order to use the metallic silver ink, printing data containing metallic colors such as "RDG_MetallicSilver" and "RVW-MT-Bronze" must be used.
P. 9, “Creating Printing Data”
Procedure
Make sure that you have finished making the preparations for VersaWorks, creating theprinting data, and getting the printer ready ( page 7, "Chapter 2 -- Getting Ready").
Double-click .Queue A Properties" window appears.
Click .For [Media Type], select names with [MT]
attached such as "Generic Vinyl 1 [MT]".
Make the selection that matches the media to be used. Selecting an item attached with [MT] enables you to choose the print mode that can use the me-tallic silver ink.
With [Mode], select the print mode. CMYKLcLmMt (v)
This prints with all the metallic colors such as RDG_MetallicSilver and RVW-MT-Bronze as well as CMYKLcLm colors.
MetallicSilver (v)
This prints with RDG_MetallicSilver only.
CMYKLcLm (v)
Chapter 3 Printing Chapter 3 Printing
19
3-1 Using the Metallic Silver Ink
Click .Turn on the [Convert Spot Color] option.
Click .In [Operation Mode], select the operation of the printer.
NOTE: Only the settings necessary for the use of the metallic silver ink are described in this section. For other settings, refer to the online help provided for VersaWorks. When you want to use the white ink, refer to p. 21, "3-2 Using the Metallic Silver Ink and White Ink ".
Click [OK] to close the "Queue A Proper-ties" window.
When You Want to Display the Side Opposite the Printed Surface by Using Clear Film.
Click .
Turn on the [Mirror] option.
When the printing data with mirror image is prepared beforehand, you do not need to turn on this option.
20
Chapter 3 Printing3-1 Using the Metallic Silver Ink
Chapter 3 Printing
Go to “Job List” and click the “Queue A” tab, and drag the printing data to the queue A job list.The contents of the data are displayed in the preview window, and the layout on the media is displayed in the layout window.
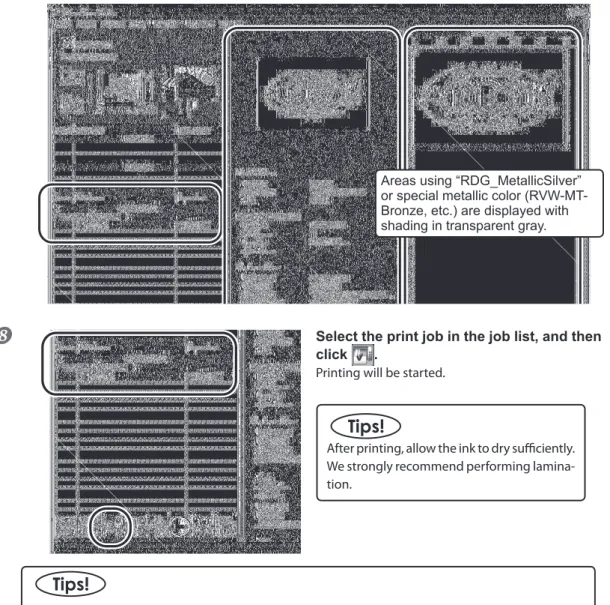
Select the print job in the job list, and then click .Printing will be started.
After printing, allow the ink to dry sufficiently. We strongly recommend performing lamina-tion.
To continue printing another data using metallic silver and CMYKLcLm colors, repeat steps
and
.Also, if you want to modify detailed settings for each job, it will be convenient to perform modifications in the “Job Setting” window (which you can display by double-clicking the print job in the job list)Areas using “RDG_MetallicSilver” or special metallic color (RVW-MT-Bronze, etc.) are displayed with shading in transparent gray.
21
Chapter 3 Printing Chapter 3 Printing
3-2 Using the Metallic Silver Ink and White Ink
Printing With Metallic Silver/White/CMYK Color in a Single Pass
This section describes how to perform single-pass printing using metallic silver ink, white ink, and CMYK color ink. Printing is performed in a single pass, but the printing settings vary depending on which of white ink or all the other inks (metallic silver and CMYK colors) is used as the undercoat.The printing data containing metallic colors such as “RDG_MetallicSilver” and “RVW-MT-Bronze” must be used in order to use the metallic silver ink, and the printing data containing “RDG_WHITE” must be used in order to use the white ink.
P. 9, “Creating Printing Data”
Procedure
Make sure that you have finished making the preparations for VersaWorks, creating theprinting data, and getting the printer ready ( page 7, "Chapter 2 Getting Ready").
Double-click .Queue A Properties" window appears.
Click .For [Media Type], select “xxx[MT]: Clear Film” or “xxx[MT]: Clear Film, Adhesive.”
* “xxx” indicates “ESP-CL” and others.
With [Mode], select the print mode. White -> CMYKMt (v)
Inks are overprinted in the sequence of white and then metallic silver/CMYK Color.
CMYKMt -> White (v)
Inks are overprinted in the sequence of white and then metallic silver/CMYK Color.
22
Chapter 3 Printing3-2 Using the Metallic Silver Ink and White Ink
Chapter 3 Printing
Image of overprinting in the sequence of white and then metallic silver/CMYK Color
(Print Mode "White -> CMYKMt (v) ")
* The white data and the metallic silver/CMYK color data are actually printed simultaneously, but they are shown here as separate layers in order to indicate the printing sequence.
Image of overprinting in the sequence of metallic silver/CMYK Color and then white
(Print Mode "CMYKMt -> White (v) ")
* The white data and the metallic silver/CMYK color data are actually printed simultaneously, but they are shown here as separate layers in order to indicate the printing sequence.
The printed image is to be seen from this side (the printed surface of
the finished results).
The printed image is to be seen from this side (the opposite side of the printed surface of the
finished results).
Transparent film
White Metallic silver/CMYK
Transparent film
White
Chapter 3 Printing Chapter 3 Printing
23
3-2 Using the Metallic Silver Ink and White Ink
Click .Turn on the [Convert Spot Color] option.
Click .In [Operation Mode], select the operation of the printer.
NOTE: Only the settings necessary for the use of the metallic silver ink and white ink are described in this section. For other settings, refer to the online help provided for VersaWorks.
Click [OK] to close the “Queue A Proper-ties” window.When You Want to Display the Side Opposite the Printed Surface by Using Clear Film.
Click .
Turn on the [Mirror] option.
When the printing data with mirror image is prepared beforehand, you do not need to turn on this option.
24
Chapter 3 Printing3-2 Using the Metallic Silver Ink and White Ink
Chapter 3 Printing
Go to “Job List,” click the “Queue A” tab, and drag the printing data to the queue A job list.The contents of the data are displayed in the preview window, and the layout on the media is displayed in the layout window.
Select the print job in the job list, and then click .Printing will be started.
After printing, allow the ink to dry sufficiently. We strongly recommend performing lamina-tion.
To continue printing similar data (with single-pass printing of white, metallic silver, and CMYK colors), repeat steps
and
. Also, if you want to modify detailed settings for each job, it will be conve-nient to perform modifications in the “Job Setting” window (which you can display by double-clicking the print job in the job list).Areas using “RDG_MetallicSilver” or special metallic color (RVW-MT-Bronze, etc.) are displayed with shad-ing in transparent gray.
Areas using “RDG_WHITE” are displayed with shading in transparent magenta.
Chapter 3 Printing Chapter 3 Printing
25
3-2 Using the Metallic Silver Ink and White Ink
Printing With White/CMYKLcLm Color (Both or Individually)
This section describes how to perform either of the printing methods below using a transparent film. Using white ink and CMYKLcLm ink. Using white ink only
Printing is performed in a single pass, but the printing settings vary depending on which of white ink or CMYKLcLm ink is used as the undercoat. The printing data containing “RDG_WHITE” must be used in order to use the white ink.
P. 9, “Creating Printing Data”
Procedure
Make sure that you have finished making the preparations for VersaWorks, creating theprinting data, and getting the printer ready ( page 7, "Chapter 2 -- Getting Ready").
Double-click .Queue A Properties" window appears.
Click .For [Media Type], select “xxx: Clear Film” or “xxx: Clear Film, Adhesive.”
“xxx” indicates “ESP-CL” and others.
With [Mode], select the print mode. White -> CMYKLcLm (v)
Inks are overprinted in the sequence of white and then CMYKLcLm Color.
CMYKLcLm -> White (v)
Inks are overprinted in the sequence of white and then CMYKLcLm Color.
White (v)
This prints with white only.
*The image of overprinting in the sequence of white and CMYKLcLm is the same as that of overprinting in the sequence of white and metallic silver/CMYK on page 22. (The description of “metallic silver/CMYK” is to be replaced with “CMYKLcLm” only.)
26
Chapter 3 Printing3-2 Using the Metallic Silver Ink and White Ink
Chapter 3 Printing
Click .Turn on the [Convert Spot Color] option.
Click .In [Operation Mode], select the operation of the printer.
* Only the settings necessary for the use of the white ink are described in this section. For other settings, refer to the online help provided for VersaWorks.
Click [OK] to close the “Queue A Proper-ties” window.When You Want to Display the Side Opposite the Printed Surface by Using Clear Film.
Click .
Turn on the [Mirror] option.
When the printing data with mirror im-age is prepared beforehand, you do not need to turn on this option.
Chapter 3 Printing Chapter 3 Printing
27
3-2 Using the Metallic Silver Ink and White Ink
Go to “Job List,” click the “Queue A” tab, and drag the printing data to the queue A job list.The contents of the data are displayed in the preview window, and the layout on the media is displayed in the layout window.
Select the print job in the job list, and then click .Printing will be started.
After printing, allow the ink to dry sufficiently. We strongly recommend performing lamina-tion.
To continue printing similar data (with white only or single-pass printing of white and CMYKLcLm colors), repeat steps
and
. Also, if you want to modify detailed settings for each job, it will be convenient to perform modifications in the “Job Setting” window (which you can display by double-clicking the print job in the job list).Areas using “RDG_WHITE” are displayed with shading in transparent magenta.
Chapter 4
When Performing
Maintenance/Printing
4-1 Maintenance ...30
Message for Ink Circulation ...30 When Dot Drop-out Etc. Cannot be Corrected ...30
30
Chapter 4 When Performing Maintenance/Printing4-1 Maintenance
Message for Ink Circulation
With this machine, white ink and metallic silver ink are circulated periodically to prevent the ink precipitation. When the following message appears, please wait until the display changes.
[CIRCULATING INK]
In order to allow the automatic maintenance such as above to be performed, please observe the items be-low.
Leave the main power on at all times.
Never leave the front cover open for long periods.
After making the settings for the various menu items, go back to the top screen.
When Dot Drop-out Etc. Cannot be Corrected
When using metallic silver ink and white ink, ink discharge may become unstable (resulting in dot drop-out, etc.) if the machine is left unattended for a long period. This is due to the properties of metallic silver ink and white ink containing ingredients which tend to settle and separate, which will cause the precipitated ingredients to solidify when the machine is left unattended for a long period. In such cases, perform "ink renewal" menu. For information on how to operate the "ink renewal" menu, refer to the VS-640 User's Manual.
“VS-640 User’s Manual” ("When Problems Such As Dot Drop-out are not cleared up")
If the problems, such as dot drop-out, cannot be corrected even after performing cleaning above, then contact your authorized Roland DG Corp. dealer.