Every effort has been made to eliminate errors and ambiguities in the information contained in this guide. Any questions concerning information presented here should be directed to SAMSUNG TELECOMMUNICATIONS AMERICA, 1301 E. Lookout Dr. Richardson, TX. 75082 telephone (972) 761-7300. SAMSUNG TELECOMMUNICATIONS AMERICA disclaims all liabilities for damages arising from the erroneous interpretation or use of information presented in this guide.
Samsung Telecommunications Publication Information
SAMSUNG TELECOMMUNICATIONS AMERICA reserves the right without prior notice to revise information in this publication for any reason. SAMSUNG TELECOMMUNICATIONS AMERICA also reserves the right without prior notice to make changes in design or components of equipment as engineering and manufacturing may warrant.
Copyright 2005
Samsung Telecommunications America
All rights reserved. No part of this manual may be reproduced in any form or by any means—graphic, electronic or mechanical, including recording, taping, photocopying or information retrieval systems—without express
TABLE OF CONTENTS
INTRODUCTION 1
Introduction... 1
Document Content and Organization... 1
Conventions... 2
References ... 2
CHAPTER 1. Introduction to the OfficeServ Operator 3 Overview ...4
Introduction to the OfficeServ Operator... 4
System Requirements ... 5
Functions of the OfficeServ Operator ...5
CHAPTER 2. OfficeServ Operator Installation 7 Preparations Before Installation ...7
Installation ...7
Procedures for Installing the OfficeServ Operator...8
CHAPTER 3. Description of the OfficeServ Operator 13 Starting the OfficeServ Operator ...13
Main Window ...14
Menus ...16
Information Window...17
Incoming Calls Window...18
Active Calls Window ...18
Modifying the Caller Information... 19
Saving New Customer Information ... 20
Using the Recently Forwarded Number ... 20
Call Features ... 21
Held Calls Window...22
Call Button Window ...22
DID Inter-Working BLF Group Settings... 24
BLF (Busy Lamp Field) Window ...25
Searching a BLF Group... 26
BLF Group Management... 28
Device Management ... 31
Calling Functions... 36
Icons for Status Display... 39
Status Bar ...39
CHAPTER 4. OfficeServ Operator Settings 41 Changing Telephone Line ...41
Option Settings ...42
General... 43
Key Telephone... 44
Columns ... 45
Display... 46
Toolbar... 47
Station Group... 48
Contact Information ... 48
Call Control... 49
Blocked CIDs... 50
Urgent/VIP CIDs... 51
Color ... 52
Advanced... 53
Function Key ... 54
Message Handling ...55
Enable Message... 55
Send Message ... 55
Add Outgoing BLF Group ...56
CHAPTER 5. Call Control 58 General Functions ...59
Dial ... 59
Unhold ... 62
Transfer ... 63
Consultation Transfer ... 64
Station Park ... 65
Attempt/Cancel a Conference ... 66
Add/Remove Participants or Leave a Conference Call... 67
Page ... 68
Additional Functions ...68
Hold with Note ... 68
Target Hold (Transfer Reservation) ... 69
Orbit Park ... 70
Call Back ... 72
Leave Message ... 73
Camp On ... 73
OHVA... 74
Connect to Voice Mailbox... 74
Leave Voice Message ... 74
Transfer to a Voice Mailbox... 75
Record Voice Messages... 75
Redirect ... 75
Pickup... 76
Repeating the Last Action Once a Call is Reconnected... 76
ANNEX A. Retrieving the Call Log 78 Log Viewer Start...78
Log Viewer Menus...79
Retrieving Logs...80
Retrieving Statistical Logs ... 80
Retrieving All Logs... 81
Retrieving Inbound Calls Logs ... 82
Retrieving Outbound Calls Logs ... 83
Retrieving Trunk Calls Logs ... 83
Retrieving Station Calls Logs ... 84
Retrieving DID Logs ... 84
Retrieving CID Logs ... 85
ANNEX B. Importing/Exporting Excel Files 86
Importing Data in an Excel File Format Into a Phone Book...86 Exporting Phone Book Data to an Excel File...90
ABBREVIATION 92
INTRODUCTION
Introduction
This manual describes the functions of the OfficeServ Operator, that include installation, service settings, and operations.
Document Content and Organization
This document consists of five chapters and two annexes as follows:
CHAPTER 1. Introduction
This chapter provides an overview of the OfficeServ Operator and describes its functions and system requirements.
CHAPTER 2. OfficeServ Operator Installation
This chapter describes preparations before the OfficeServ Operator installation and procedures for installing the OfficeServ Operator.
CHAPTER 3. Description of the OfficeServ Operator
This chapter describes the menus and windows of the OfficeServ Operator.
CHAPTER 4. OfficeServ Operator Settings
This chapter describes the method of changing phone lines, setting various options, processing messages, and adding an originating Busy Lamp Field (BLF) group by using the OfficeServ Operator.
CHAPTER 5. Call Control
This chapter describes the method of using the general and additional system functions by using the call control buttons, mouse, keyboard, or popup menus.
ANNEX A. Retrieving the Call Log
ANNEX B. Importing/Exporting Excel Files
This chapter describes
y Method of importing Excel data into a phone book.
y Method of exporting phone book data into an Excel file.
Conventions
The following special paragraphs are used in this document to point out information that must be read. This information may be set-off from the surrounding text, but is always preceded by a bold title in capital letters.
CHECKPOINT
Provides the operator with checkpoints for stable system operation.
NOTE
Indicates additional information as a reference.
References
iDCS 100 R2, iDCS 500 R2, and OfficeServ 7200 General Description Guide
The iDCS 100 R2, iDCS 500 R2, and OfficeServ 7200 General Description Guide describes the main functions of the systems, product descriptions, cabinet configuration, board description.
iDCS 100 R2, iDCS 500 R2, and OfficeServ 7200 Installation Manual
The iDCS 100 R2, iDCS 500 R2, and OfficeServ 7200 Installation Manual describes system hardware and installation method.
iDCS 100 R2, iDCS 500 R2, and OfficeServ 7200 Programming Manual
The iDCS 100 R2, iDCS 500 R2, and OfficeServ 7200 Programming Manual describes MMC list and how to set MMC.
OfficeServ Link User Guide
The OfficeServ Link User Guide describes the functions of the OfficeServ Link and method of installing or using the OfficeServ Link.
CHAPTER 1.
Introduction to the
OfficeServ Operator
OfficeServ Operator
The OfficeServ Operator is a Windows based operator console for the Samsung iDCS 100 R2, iDCS 500 R2, and OfficeServ 7200 products.
It provides a complete call control facility for operators and reception staff within the company, and provides an easy to use and intuitive interface for handling calls.
Multiple operators can be installed in a single node enterprise and individual operators can manage the whole telephone system or individual work groups if required.
The key features are as follows:
y Configurable Busy Lamp Fields which can show the whole company, or individual departments or workgroups.
y Clear indication of incoming calls, active calls and held calls.
y Mouse or keyboard operation, with “drag and drop” functionality
y Easy to use buttons for advanced functions such as conference and paging.
OfficeServ Link
The OfficeServ Link application is a software application that links the Samsung iDCS and Samsung OfficeServ telephone system to a Windows based computer.
The Link enables other software applications (both Samsung and third party) to interface with the Samsung iDCS and Samsung OfficeServ product line of telephone systems, and allows these applications to add additional functions and capabilities to the system.
The Link application includes a licensing module which must be used to register and authorize which applications are running on the system and the total number of users.
Overview
Introduction to the OfficeServ Operator
The OfficeServ Operator is a PC-based console, which is a telephony application that interfaces with the iDCS 100 R2, iDCS 500 R2, and OfficeServ 7200 systems. Once the operator receives a request for call operation from the iDCS system the operator connects or transfers the call using the OfficeServ Operator.
For instance, when a caller dials a business phone, the operator answers the call, and transfers it to the requested number through the iDCS or OfficeServ system.
The OfficeServ Link transfers events between the iDCS 100 R2, iDCS 500 R2 or OfficeServ 7200 systems and OfficeServ Operator.
Network configuration diagram of the OfficeServ Operator:
OfficeServ Link
TCP/IP TCP/IP
• • •
OfficeServ Operator #n iDCS or
OfficeServ
OfficeServ Operator #1
OfficeServ Operator #2 Intranet
System Requirements
The PC where the OfficeServ Operator will be installed should meet the requirements below:
Category Specifications
Operating System Windows 2000 Series(Professional, Server, and Advanced Server), Windows XP Professional
Processor(CPU)
Pentium 4 / 1.6 GHz or higher
(A dual Pentium processor is recommended for the system with more than 300 devices.)
Memory 512 MBytes or higher
Monitor Resolution 1024×768 or higher Network Interface Card 100/10 Base-T
Functions of the OfficeServ Operator
The OfficeServ Operator performs the functions described below:
Call Processing by Using the Keyboard/Mouse
The user can use the keyboard or mouse to operate calls. If the operator answers a call by lifting the handset, the operator can use the OfficeServ Operator and phone by turns when required.
Drag-and-Drop Call Processing
The operator can drag and drop a call on the station icon to transfer the call. For detailed information about the drag and drop, refer to the sections about drag-and-drop call processing in this manual.
Call Processing by Call Status
Calls are displayed in the <Incoming Calls> window, <Active Calls> window, and <Held Calls> window depending on call status. Caller information such as a caller ID is displayed in each window. Particularly in the <Active Calls> window, the caller information stored in the database is also displayed.
Real-time Display of Station Status
The station status registered with Busy Lamp Field (BLF) is displayed in the format of icons in real-time so that the user can easily check station status such as busy, dialing, and Do Not Disturb (DND).
Display of the OfficeServ System Information
Direct Inward Dialing (DID), Calling Line Identification Presentation(CLIP), station groups, speed dial numbers, and the Direct Trunk/Direct Station (DT/DS) button information of an operator station, which are set in the OfficeServ system, are displayed. The DID information is displayed in the DID list. The station groups, speed dial numbers, and DT/DS information are displayed in the BLF list.
Online Support and Message Exchange
The <Information> window of the OfficeServ Operator gives the user useful information to help the user acquire knowledge of the OfficeServ Operator application. The OfficeServ Operator allows the user to exchange messages with another OfficeServ Operator user or an OfficeServ Call user.
Call Log
The call logs of the OfficeServ Operator are maintained for all the incoming/outgoing calls made while operating the application. A call log includes the Notes field where data on a specific call are recorded. Use the log view to view a call log and search the log by categories.
CHAPTER 2.
OfficeServ Operator Installation
Preparations Before Installation
Preparations before installing the OfficeServ Operator are described below:
OfficeServ Licensing
To operate the OfficeServ Operator, an available license should be registered to OfficeServ Link. The license number is granted by the reseller of the OfficeServ Operator or a Samsung reseller and should be entered into the PC that operates the OfficeServ Link. If any license number is not registered, the OfficeServ Operator will not operate properly.
Checking the Specifications of the PC where the OfficeServ Operator will be Installed
Check the PC requirments where OfficeServ Operator will be installed. For detailed information about the system requirements, refer to ‘System Requirements’ of ‘CHAPTER 1. Introduction to the OfficeServ Operator’.
How to Install
Before you run setup, locate the IP address of the PC on which the OfficeServ Link application is installed, you will need this information to complete the installation of OfficeServ Operator. OfficeServ Link distributes the messages from the telephone system to each client. You may need to ask your system administrator for this IP address.
Insert the OfficeServ Applications CD-ROM and follow the onscreen menus to locate the OfficeServ Operator setup link.
Procedures for Installing the OfficeServ Operator
Follow the steps below to set up the OfficeServ Operator:
1 Double-click the execution file of OfficeServ Operator installation CD, or downloaded OfficeServOperator.exe to see the installation screen below:
2 Click [Next>].
4 Select the destination folder for the OfficeServ Operator installation, and click [Next>].
By default, the folder for the program installation is ‘C:\..\Samsung Electronics\OfficeServ Operator’. If the user wants to install the program in another folder, click [Browse...] to select a folder.
5 Enter the name of the program folder (e.g. OfficeServ Operator) in the window below, and click [Next>].
6 Once the window below appears, click [Edit...] to modify the information about phone numbers or modem options: The window that displays phone numbers and modem options depends on the user’s operating system.
Parameter Description
General Allows the user to select the country that is using the OfficeServ Operator.
Area Code Rules
Allows the user to enter an area code except for ‘0’.
The user must enter the numbers set in the iDCS 100/500 R2 system.
Calling Card Select one of tone dialing and pulse dialing.
8 Once the window below appears, enter the IP address of the OfficeServ Link in [Server IP Address] and click [OK]. If an invalid IP address is entered, the OfficeServ Operator will not be connected to the OfficeServ Link. As for [Server Port No] and [Trace Type], maintain the default settings. For detailed information about each parameter, refer to the ‘OfficeServ Link User Guide’.
Connection Settings between the OfficeServ Operator and OfficeServ Link: To properly connect the OfficeServ Operator with the OfficeServ Link, the IP address of the OfficeServ Link must be entered accurately.
9 Click [Finish] from the window below to terminate the OfficeServ Operator setup.
Once the OfficeServ Operator setup is completed, a shortcut icon for the OfficeServ Operator is created on the desktop of the PC.
CHAPTER 3.
OfficeServ Operator Description
This chapter describes the menus and windows of OfficeServ Operator.
OfficeServ Operator Menus
The OfficeServ Operator menus include File, Call, Tools, View, and Help.
y File: Allows the user to start or exit the OfficeServ Operator application.
y Call: Allows the user to make a call.
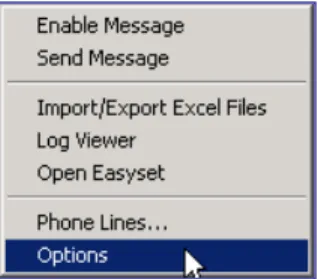
y Tools: Allows the user to use message functions through the OfficeServ Link or create a phone book by using an Excel file, retrieve the call log, or set the options of the OfficeServ Operator.
y View: Displays the status of calls in the <Active Calls> window, <Incoming Calls> window, <Held Calls> window, <Information> window, or Status Line.
y Help: Displays Help for using the OfficeServ Operator application and version information of the OfficeServ Operator.
Each Window of the OfficeServ Operator Main Window
The main window of the OfficeServ Operator consists of the <Information> window, <Incoming Calls> window, <Active Calls> window, <Held Calls> window, <Call Button> window, <DID> window, <BLF> Window, and Status Line.
Starting the OfficeServ Operator
Follow the steps below to start the OfficeServ Operator.
1 Double-click the ‘OfficeServ Operator shortcut icon’ on the desktop where the OfficeServ Operator is installed or select [Start]Æ[Programs(P)]Æ[OfficeServ Operator] to see the initialization screen below:
Operator, the window that allows the user to set a station number during initialization appears as shown below:
2 Select an extension number to be used from the OfficeServ Operator and click [OK].
Initialization Process
The initialization process means that the OfficeServ Operator downloads the data required to operate the OfficeServ Operator from the iDCS or OfficeServ system through the OfficeServ Link. It takes 1 to 5 minutes to download the data depending on the system configuration.
Main Window
Once the initialization ends, the <OfficeServ Operator> main window is displayed as shown below:
NOTE
Information Window
Active Calls window Incoming Calls
window
Call Button window
DID window
Busy Lamp Field
Each window of the <OfficeServ Operator> main window is described below:
Window Function
Information Helps the OfficeServ Operator users learn the OfficeServ Operator by giving the users necessary useful information. Also, displays the messages received from other station subscribers.
Incoming Calls Displays the calls connected to the OfficeServ Operator in sequence.
Active Calls
Displays a call connected to the operator. Also, displays the customer name, company, title, phone number, and the information on the recent called party from the stored customer database. The user can take notes of calls on hold or calls.
Held Calls Displays the calls on hold in sequence. The <Held Calls> window displays the saved/restored calls.
Call Button This window includes the call control button required to operate the OfficeServ Operator and the input field for a destination number. The user can adjust the displayed buttons.
DID
Displays the DID information set in the iDCS or OfficeServ system. The DID information is displayed in the <Incoming Calls> window, <Active Calls> window, and <Held Calsl> window as well ; thus, the information can be used very usefully for supporting multiple companies or departments.
BLF
Displays the devices of the OfficeServ Operator in the format of cards or lists. If the station port is the same as the C.O.line port, this window will show the current status of the device.
The device types are as follows:
- Station port/C.O.line port of the iDCS or OfficeServ system. - Member of the station group
- Speed dial number of the operator station - DT/DS button set in the operator station - A random number set by the user
Status Line
Displays the current status of the user station such as voice message number, whether voices are recorded or not, Do Not Disturb (DND), message list (list of stations where messages are left), call back (busy station where a call is reserved), and ring plan setting status
Menus
The menus of the OfficeServ Operator are described below:
Main
Menu Submenu Description
Restart Restarts the OfficeServ Operator. File
Exit Terminates the OfficeServ Operator. Dial~Page Controls calls.
De-allocate the disconnected calls on the operator line
Deletes all the disconnected calls from the operator lines.
De-allocate All Calls on operator line
Initializes the operator lines used by the OfficeServ Operator. Even if the operator lines are initialized, the actual port status of the operator lines is not changed.
De-allocate
disconnected Calls of all lines
Deletes all the disconnected calls from all the lines. Call
De-allocate All Calls lines
Initializes all the lines (station and C.O.Line). Even if all the lines are initialized, the port status of the iDCS or OfficeServ system is not changed.
Message Login Logs into the OfficeServ Operator to send/receive messages to/from the OfficeServ Link.
Send Message Sends messages to another station. For details, refer to ‘Message Processing’
Import/Export Excel Files
Imports or exports an Excel file to be used by a phone book. For details, refer to ‘Annex B. Importing/Exporting Excel Files’.
Add Outgoing BLF Group
Imports a phone number from a phone book and adds the number to the incoming BLF group.
Log Viewer Allows the user to view the call log. For details, refer to ‘Annex A. Retrieving the Call Log’.
Open EasySet Runs the EasySet.
Phone Lines Selects a line to be used in the OfficeServ Operator. Tools
Main
Menu Submenu Description
Refresh Active View
Refreshes and displays the status of calls displayed in the <Active Calls> window.
Refresh Incoming View
Refreshes and displays the status of calls displayed in the <Incoming Calls> window.
Refresh Held Calls
Refreshes and displays the status of calls displayed in the <Held Calls> window.
Clear Info View
Clear the messages displayed in the <Information> window.
BLF Tooltip Put the mouse on the BLF device to see the phone numbers, names, and notes in the format of balloon help.
View
Status Bar Displays the status of the operator station. Contents and
Index
Displays the OfficeServ Operator Help.
User’s Guide Displays the manual for using the OfficeServ Operator. Help
About Displays the version information of the OfficeServ Operator.
Information Window
The information window gives OfficeServ Operator users necessary information. This window also displays messages received from other station subscribers.
The figure below shows the example of the information, which is displayed in the <Information> window when a new call is connected.
Incoming Calls Window
The figure below shows the calls connected to the OfficeServ Operator in sequence.
The columns displayed in the <Incoming Calls> window are described below:
Column Description
CID Caller Identification. Phone number and name of the caller DID Phone number and name of a call connected to the DID Duration Elapsed time since call connection
Details Other information
Display of Columns in Each Window
The columns displayed in each window can be set in [Tools]Æ[Options]
Æ[Columns].
Active Calls Window
Once the calls displayed in the <Incoming Calls> window are answered or outgoing calls are connected, the connected calls (except for forwarded calls or calls on hold) are displayed in the <Active Calls> window as shown below: The <Active Calls> window imports the customer information stored in the customer database and displays the name, company, title, and representative phone number of the caller and the information and three phone numbers of the recently called party.
The user can take notes of calls in [Note] and view the notes for calls from the data on calls on NOTE
The columns displayed in the <Active Calls> window are described below:
Column Description
CID Phone number and name of the caller
DID Phone number and name of a call connected to the DID
State Call status
Duration Elapsed time since call connection
Details Other information
Caller Information Information about the caller
Recently Forwarded To Recently forwarded phone number (up to 3)
Using the caller information and recently forwarded phone number To use the caller information and recently forwarded phone number, select [Contact Info.] of [Active Calls] from the [Columns] tab of [Options].
Modifying the Caller Information
Right-click on the <Active Calls> window and select [Save Contact] to save or modify and save the caller information.
Only if the <Active Calls> window is in a conversation phase and information exists in [Name] and [Tel No.], the [Save Contact] menu will be enabled.
Saving New Customer Information
To save new customer information, enter an extension number or external phone number in [Tel No.]. Select the [Save Contact] menu to see the window below:
Select the table to save and click [OK]. Create a new table. Select the checkbox of [New], enter the table name, and click [OK] to save the information in the table.
Separator of the Phone Number
When entering an external phone number, all of the country area code-phone number (e.g. : 1-214-555-1212) must be entered. Separate the country code from the area code by using ‘-’.
When entering a number of less than four digits without ‘-’, the number is saved in [Extension Number]. An external phone number is saved in [Business Phone]. If the saved number is the same as the number of an incoming/outgoing call, the external phone number saved in [Business Phone] will be displayed in [Phone Number].
If only an extension number is saved, ‘Country Code-Area Code-’ will be displayed in [Phone Number].
Using the Recently Forwarded Number
The list of the recently forwarded numbers shows three different numbers whose forwarding has been attempted. Also, if the recently forwarded number is an extension number, the station status will be displayed in the format of an icon. The icon for status display is the same as the one in the <BLF> window.
NOTE
Select a number of the list of the recently forwarded numbers and click the [T] button at the right of the window to forward a call to the number.
Using the Recently Forwarded Number
To use the recently forwarded number, the caller information must be displayed. If caller information does not exist in the database, the recently forwarded number will not be saved in the database and cannot be used.
Call Features
Right-click on the <Active Calls> window and select [Drop] to release a connected call.
Only if the <Active Calls> window is in a conversation phase , the call features menu such as [Drop] will be enabled. Available call features are Drop, Complete Transfer, Callback, Leave Message, Camp On and OHVA.
NOTE
Held Calls Window
When an active call is on hold, the call will be displayed in the <Held Calls> window.
The columns displayed in the <Held Calls> window are described below:
Column Description
CID Phone number and name of the caller
DID Phone number and name connected to the DID Duration Elapsed time since call hold
Note Notes on call hold
Call Button Window
This window displays the input field for the destination number and call buttons required to control calls in the OfficeServ Operator.
Press a number of the keyboard without putting the mouse cursor on [Destination] to see the number entered in the [Destination].
The call buttons are described below: Button Description Dial Answer Drop Hold Unhold
, Transfer, Toggle Station Park Orbit Park Conference Page Camp On
Transfer to Voice Mail
, Call Recording with Voice Mail Callback
Leave Message Redirect
Off Hook Voice Announcement (OHVA) Complete Transfer
Redial Reestablish
DID Window
The <DID> window imports and displays the DID information set in the iDCS or OfficeServ system. Only the selected DID is displayed in the DID columns of <Incoming Calls> window, <Active Calls> window, and <Held Calls> window. Other calls are forwarded to the ‘DID call forwarding number not being serviced’ set in the options.
Also, the DID information exists in the DID column of the <Active Calls> window. If a BLF group is set in the DID, the <BLF> window will be automatically changed to the set BLF. The user can select one of the DID list or Queue list from the options.
The columns are described below:
Column Description
Tel DID number set in the system Name DID name set in the system
BLF BLF group name that inter-works with the DID
Use of the Queue List
The Queue list is used for the operator program of the call center. Currently, the list is not supported.
DID Inter-Working BLF Group Settings
Click the BLF column of the DID to set the DID inter-working BLF group. Then, a combo box that allows the user to select a BLF group appears as shown in the figure below:
Click [▼] of the combo box to select a BLF group. NOTE
BLF (Busy Lamp Field) Window
The <BLF> window shows that the device is being used. Also, this window displays the status of the office users who use the iDCS or OfficeServ system. OfficeServ Operator users can create the desired BLF group by using the device information received from the system. The users can set an environment for use by changing the names displayed in each device.
The BLF device is displayed in the format of a card, list, or number. Icons are displayed at the left of phone numbers depending on device status. If the device of the selected BLF group is more than 100, the device will be displayed only in the format of a list or number.
The BLF device in the format of a card displays the status of absent messages or voice messages and notes. The device can be searched based on phone number, name, or note.
The BLF device in the format of a list displays the device status, phone numbers, and names.
The devices for the OfficeServ Operator consist of multiple groups. ‘*’ is displayed at the left of the BLF group created by default.
Group Description
*Total Station Entire system station *Total Trunk Entire system C.O.line
*DTDS DT/DS button set in the operator station *Speed Speed dial button set in the operator station *Station Group
Number/Name
Station group selected optionally from the station groups of the system
Searching a BLF Group
The user can search a BLF group based on phone number, name, or note. When pressing [F5] of the keyboard, the [Find] text field next to <Note> is focused in the window. Enter the phone number, name, or note of the BLF the user wants to search and click the [Find] button or [Enter] key to search the BLF.
Searching by Phone Number
Press [F5] of the keyboard and enter 0 to 9. Then, a phone number will be automatically selected and a BLF device starting with the number will be searched and displayed. The method of searching the ‘201’ device is described below:
Enter ‘2’. Then, a phone number is automatically selected and only the BLF device starting with ‘2’ is displayed.
Enter ‘0’. Only the BLF device starting with ‘20’ is displayed.
When clicking the [Find] button or [Enter] key, the window focus moves to BLF ‘201’ and ‘201’ is entered in the destination box.
If multiple search destinations exist, use arrow keys.
Searching by Name
When pressing [F5] and entering characters except for 0 to 9, a name is automatically selected and the BLF device starting with the character is searched and displayed. The method of searching a name, ‘Suzy Beth Smith’ is described below:
Enter ‘R’. Automatically, a name is selected and the BLF device with a name starting with ‘R’ will be displayed.
Next, ‘Ro’. The BLF device with a name starting with ‘Ro’ will be displayed.
Click the [Find] button or [Enter] key. Then, the window focus moves to the BLF device with a name of ‘Rob Wylie’. ‘202’, which is the phone number of ‘Rob Wylie’, is entered in the destination field of the call button window.
If multiple search destinations exist, use arrow keys.
BLF Group Management
Creating the BLF Group
Put the mouse cursor and right-click on the list box of the <BLF> window and select the [New Group] menu.
Enter the name of the BLF group to be created in the window below and click [OK] to create a new group.
Deleting the BLF Group
Select a BLF group to be deleted from the list box of the <BLF> window and right-click on the group to select the [Delete] menu.
Once the window that prompts the user to delete the group appears, click [Yes] to delete the selected BLF group.
Changing the BLF Group Name
Select the BLF group whose name will be changed from the list box of the <BLF> window. Right-click and select the [Rename] menu. Otherwise, press the selected group by using the mouse to change the name.
Enter the name to be changed once input is active. The name of the default group marked as ‘*’ cannot be changed.
Refreshing the BLF Group
Right-click on the list box of the <BLF> window and select [Refresh] to change the list of the BLF group to the recent data.
Selecting the Refresh Menu
Select a BLF group from the <BLF> window and [Refresh] to import and display the list of the devices included in the selected group. To import the group data newly, select the blank from the group list of the <BLF> window and [Refresh].
Adding the Existing Device to the BLF Group
The method of adding the devices included in the existing BLF group such as ‘*Total Station’ to another BLF group is described below:
Select a device to be added while pressing [Ctrl] in the BLF group. The user can select a device list only from the list view.
Drag and drop the selected device on a new BLF group (Group 3) by using the mouse. The selected device will be added to the group.
Device Management
Adding a Device
Right-click on the BLF group and click [New Device] to add a system device to the BLF group.
Click [OK] to add the newly created device to the BLF group.
Adding a Speed Dial Number
Right-click on the BLF group and select [New Speed Dial] to add a number including a C.O.line connection number (e.g. mobile phone, external phone) to a speed dial number.
Enter a speed dial number to be added in [Number] in the window below and fill out [Name] and [Note] : If the user wants to dial an external phone number, enter the C.O.line connection number first (e.g. 9).
Modifying the Device
Select and right-click the BLF device to be modified. Then, select [Edit Lamp].
Modify [Name] and [Note] in the window below and click [OK].
Deleting the Device
Once the window that prompts the user to delete the device appears, click [Yes] to delete the selected device.
Device View Type
The device view types in the BLF area include Card View, List View, and Number View.
Right-click on the BLF area and select the desired view type from [View] to select a device view type.
Sorting out Devices
The BLF devices are sorted in the sequence of number or name. Right-click on the BLF area and select the desired sorting method (number or name) from the [Arrange Lamps By] menu to change the device sorting method.
Refreshing the Device
Right-click on the BLF area and select [Refresh] to change the status of the BLF device to new data.
Selecting the Refresh Menu
Select a BLF device from the <BLF> window and [Refresh] to import and display the status of the selected device. Select [Refresh] without selecting a device to import and display the status of all the devices included in the current group.
Adjusting Device Size
The user can adjust the size of the BLF device in [Card View]. When putting the mouse cursor to the corner of the first device as shown below, the arrow that allows the user to adjust device size appears.
Drag the arrow to change the device to the desired size. Then, drop the mouse. NOTE
Applying Device Size
The changed device size is applied to other BLF groups the same.
Calling Functions
Dialing
Select and right-click a device to dial and select or double-click [Dial].
Pickup
Select and right-click a BLF device that is being connected and can be picked up and click or double-click [Pick Up].
Transfer/Complete Transfer
Select and right-click a BLF device and click or double-click Transfer/Complete Transfer during being connected.
Setting/Releasing Do Not Disturb (DND)
Select and right-click a station device the user wants to set or release DND and click [DND].
Setting Call Forwarding Unconditional
Right-click on the station device for call forwarding unconditional and select [All Call Forward].
Releasing Call Forwarding Unconditional
Select and right-click on the station device where call forwarding unconditional has been set and select [All Call Forward].
Icons for Status Display
Device status is displayed at the left of the BLF device numbers.
Icon Description
Blank Idle Status Busy
Out of Service
In conference
Off-Hook or Ringback Disconnected
Do Not Disturb
On hold
Station lock
A phone is ringing
Shows that all forwarding has been set
Outgoing speed dial number created from the database Speed dial number set by the user
Speed dial number set in the operator station and system
Unknown status
Status Bar
When a variety of station functions supported by the iDCS or OfficeServ system are set, the station status such as DND, callback, or messages is displayed in the status bar as shown below:
Status displayed in the status bar is described below:
Status Description
Status Description CBK(X) Number (X) of callback that has been set.
MSG(X) Number (X) of the messages left in the user’s station.
VM(X) Number (X) of the voice messages saved in the user’s voice mailbox.
DND ON/OFF
Shows whether the station of the operator is in a DND state or not. Double-click DND ON to release DND. Double-click DND OFF to set DND.
AVAIL/UNAVAIL
Shows whether the OfficeServ Operator is used or not.
When double-clicking AVAIL, UNAVAIL (unavailable) is displayed. A call connected to the user’s station in an UNAVAIL (unavailable) status is transferred to the destination number for transfer when busy.
CRL/RP1~RP6
Allows the user to select either day or night mode.
When double-clicking CRL (Clear)/RP1~RP6, the window that prompts the user to select a Ring Plan (RP) is displayed. The OfficeServ Operator runs depending on selected RPs.
CAP Shows that the <Caps Lock> key is set. NUM Shows that the <Num Lock> key is set. SCRL Shows that the <Scroll Lock> key is set.
CHAPTER 4.
OfficeServ Operator Settings
This chapter describes the procedures for setting various options through the OfficeServ Operator.
Changing Telephone Line
This section describes the procedures for changing the telephone lines of the OfficeServ Operator.
Option Settings
This section describes the procedures for setting functions such as General, Key Telephone, Columns, Display, Toolbar, Station Group, Contact Information, Call Control, Blocked CIDs, and Urgent/VIP CIDs.
Message Handling
This section describes the procedures for connecting to the OfficeServ Link and for transmitting messages.
Adding Outgoing Call Information to the BLF Group
This section describes the procedures for adding the outgoing call information saved in the phonebook to the BLF group.
Changing Telephone Line
Select [Phone Lines] from the [Tools] menu to change the telephone line of the OfficeServ Operator.
Option Settings
Select [Options] from the [Tools] menu to set various options for using the OfficeServ Operator.
The [Options] window is composed of many tabs as described below:
Tab Description
General Sets general option values.
Key Telephone Selects the information to be received from the OfficeServ system. Columns Determines if each list should have columns.
Display Selects display format.
Toolbar Selects buttons for controlling calls.
Station Group Selects a station group to be used for the BLF group. Contact Information Selects customer information to be displayed. Call Control Sets options for the call control.
Blocked CIDs Sets blocked CIDs. Urgent/VIP CIDs Sets an urgent or VIP CID.
Color Sets the color for the title bar of the sub-window.
Advanced Set a password to prevent common users from changing the option settings.
General
This tab enables the user to set general option values of the OfficeServ Operator.
Parameters of the [General] tab are described below:
Parameter Description
Extension Passcode Enter the passcode of the extension phone.(default : 1234)
OfficeServ Link IP Addr. Enter the IP address of the OfficeServ Link connected to the iDCS or OfficeServ system.
OfficeServ Link Port Enter the port number of the OfficeServ Link.(default : 6000)
Calls with out of Service DID Redirect to
Enter the number of the station to which incoming calls connected to the unselected DID number are transferred. If this value is not entered, the incoming calls above will be connected to the OfficeServ Operator.
On Unavail Redirect to
Enter the extension number to which incoming calls are transferred when the OfficeServ Operator is not available. Or, Double-click AVAIL/UNAVAIL from the status bar to select an extension number.
Blocked Calls Redirect to
Enter the extension number to which blocked calls are transferred.
If ‘Automatic Drop’ is selected, a blocked call is transferred to the entered extension number and is dropped automatically. In this case, a virtual port of the system can be conveniently used.
Default Page Zone
Enter a value for the default page zone.
If a user makes a page without designating a zone while the default page zone is not set, the page will be made to Zone 0.
Parameter Description EasySet URL Enter the URL address of the Easyset Server
Recommendations when ‘Automatic Drop’ is selected
If ‘Automatic Drop’ is selected while an extension number is set for transferring blocked calls, all incoming calls to the extension number will be dropped and making a call from the extension number will be limited. Thus, it is recommended that a virtual port be used when ‘Automatic Drop’ is set.
Key Telephone
This tab enables the user to select information to be retrieved from the switch whenever the user starts the OfficeServ Operator.
Parameters of the [Key Telephone] tab are described below:
Parameter Description
Station Setup
Retrieves information such as DND or Lock set in the station from the iDCS or OfficeServ system.
(DND Do Not Disturb, Forward : Automatic Transfer, Lock : Station Lock)
DT, DS Buttons on the Operator Extension
Retrieves information on the DT/DS button set in the operator’s phone.
DID Groups Retrieves the DID group information from the iDCS or OfficeServ system.
Parameter Description
Station Speed Dials Retrieves the speed dial information set in the operator’s phone.
Reflect the configuration changes of the switch in real time except DT/DS buttons and Station Speed Dials
Sets whether to apply in real time the changes in system information, such as the DID table, CLIP table or station group setup.
Number of Set Parameters
Selecting more parameters will extend the initialization time since more information must be retrieved from the system.
Columns
This tab enables the user to select the information to be displayed on the Incoming Calls, Active Calls, and Held Calls windows.
Parameters of the [Columns] tab are described below:
Category Parameter Description
CID Telephone number and name of the other party DID DID number and name
Duration Time elapsed since the call was displayed on the list Incoming Calls
Active Calls Held Calls
Detail Additional information such as re-termination or transfer NOTE
Category Parameter Description State Status of the call
Active Calls Contact Info. Displays the CID and the number most recently transferred
Note Call-related notes entered by the operator Held Calls
Orbit Park Displays the [Orbit Park] button
Display
This tab enables the user to select the display format.
Parameters of the [Display] tab are described below:
Category Parameter Description
Display messages
Determines the number of messages to be displayed, which are received from the OfficeServ Operator or the OfficeServ Call.
Information
Window Display help appropriate for the situation
Determines whether to display instructions for effectively using the OfficeServ Operator.
DID DID, Queue
Selects information to be displayed on the DID/Queue list.
Queue should be selected for using the OfficeServ Operator as the operator/agent of the call center.
Category Parameter Description Hide ‘Total
Station’ Group
Does not display the ‘Total Station’ group on the <Busy Lamp Field> window.
Hide ‘Total Trunk’ Group
Does not display the ‘Total Trunk’ group on the <Busy Lamp Field> window.
Toolbar
This submenu enables the user to select the [Call Control] buttons to be used in the <OfficeServ Operator> main window. Seven call control buttons, ‘Dial’, ‘Answer’, ‘Drop’, ‘Hold’, ‘Retrieve a held call’, ‘Transfer’, and ‘Park’, are initially selected by default.
After selecting target call control buttons, click the [OK] button. Click the [Discard Change] button to return to the original settings or click the [Restore Initial Setup] button to load the default values.
Station Group
This tab enables the user to select a station group from the station groups set in the iDCS or OfficeServ system. Then the selected station group will be displayed on the BLF group list of the OfficeServ Operator.
After selecting a station group to be displayed in the BLF group list, click the [OK] button.
Contact Information
This tab enables the user to set whether to display the CID of an incoming station call, incoming external line calls, or an outgoing call on the Active Calls window.
Parameters of the [Contact Information] tab are described below:
Parameter Description
Internal Inbound Calls
If an intercom call arrives, the system retrieves the CID data from the DB.
External Inbound Calls
If an external call arrives, the system retrieves the CID data from the DB.
- Search CLI Table for external calls, if a match has not found in the Smart Console phonebook: If the CID is not found on the DB, the system attempts to retrieve the information from the CLI data of the iDCS or OfficeServ system.
Outbound Calls If the call was originated from an operator, the system retrieves the CID data from the DB.
Call Control
This tab is used to determine how the OfficeServ Operator should handle the current call when a common call or a held call arrives while the user is busy.
Parameters of the [Call Control] tab are described below:
Parameter Description
Hang up the connected call Hangs up the current call and answers the new call.
Hold the connected call Automatically holds the current call and answers the new call.
Parameter Description Do not allow to answer other
calls when a call exists
Any newly incoming calls will be rejected when the user is busy.
Blocked CIDs
This tab enables the user to block undesired calls. Calls from the phone numbers registered to the block list are automatically transferred to the station set in the [Blocked Calls Redirect to] tab of the [General] menu.
Parameters of the [Blocked CIDs] tab are described below:
Parameter Description
Type a CID
Enter a phone number and click [Add] to register the number to the block list.
If ‘2*’ is entered, all calls from numbers starting with 2 are blocked.
If ‘21#’ is entered, all calls from numbers ranging from 210 to 219 are blocked.
The external numbers should be entered in a format as same as that of the CLIP table.
Block List
Displays the registered block list.
Urgent/VIP CIDs
This tab enables the user to set an urgent or important call. Since calls from the phone numbers registered to the Urgent/VIP CIDs list are displayed red on the Incoming Calls window, the calls can be easily recognized.
Parameters of the [Urgent/VIP CIDs] tab are described below:
Parameter Description
Type a CID
Enter a phone number and click [Add] to register the number to the urgent/VIP list.
If ‘2*’ is entered, all numbers starting with 2 are registered to the urgent/VIP list.
If ‘21#’ is entered, the numbers ranging from 210 to 219 are registered to the urgent/VIP list.
The external phone number should be entered in a format as same as that of the CLIP table.
Urgent/VIP List
Displays the registered urgent/VIP list.
Select a phone number from the urgent/VIP list and click [Delete]. Then, the number will be deleted from the list. Up to ten phone numbers can be registered to the urgent/VIP list.
Color
This tab enables the user to change the color of the title bar and the color of trunk calls and the colors for BLF statuses on the <Incoming Calls> window and, <Active Calls> window and <Held Calls> window.
Select a basic color or click [Define Custom Colors>>] to select a desired color and click [OK].
The options are described below:
Category Parameter Description
Background Background color of the title bar
Text Text color for the incoming calls, active calls, or held calls Choose the title
bar colors
Focused Color of the border that surrounds the title bar when the user presses the [F2], [F3], or [F4] key
Inbound
Background color for external inbound calls displayed on the <Incoming Calls> window and the <Held Calls> window
Choose trunk call colors
Outbound
Background color for outbound calls displayed on the <Incoming Calls> window and the <Held Calls> window
DND/Locked Color indicating that BLF station is set to DND/Locked
Forward All Color indicating that all BLF stations are set to Locked
Ringing Color indicating that the BLF device is set to ‘Ringing’ Choose the BLF
Status colors
Click [>>] on the right side of each color to change the color setting.
Category Parameter Description External
Connection
Color indicating that the BLF device is set to ‘External Connected’
Common Restore Initial Color Sets to default color.
Advanced
This tab enables the user to set a password that inhibits common users from changing the current options.
Parameters of the [Advanced] tab are described below:
Parameter Description
Limit Option Setting
If this check box is checked, users must enter a password into a window that appears by selecting [Options] from the [Tools] menu to open the <Option Setting> window. The <Option Setting> window appears only when the password matches the password entered in this tab.
Password
Enter the password to be used for opening the <Option Setting> window. This field is enabled only when the [Limit Option Setting] check box is selected.
Function Key
This tab enables the user to set the function keys from [F7] to [F12], which are used for call control.
Click a function key.
After assigning a function to the selected key, press the selected key to execute the assigned function.
Message Handling
This function enables the user to exchange messages with another OfficeServ Operator user or with other OfficeServ applications, such as the OfficeServ Call, which supports message functions.
Enable Message
This menu enables the user to login to the OfficeServ Link, which serves as a message server, and exchange messages. However, messages can be exchanged only while the user is logged in to the OfficeServ Link. Select [Enable Message] from the [Tools] menu.
If the user selects this menu when the menu is not checked, a login message is sent to the OfficeServ Link. This menu will be checked if the login is successful.
If the user selects this menu when the menu is checked, a logout message is sent to the OfficeServ Link. This menu will be unchecked if the logout is successful.
Send Message
This menu enables the user to send messages to another logged user.
If the user is logged in to the OfficeServ Link, the <Send Message> window will be displayed as shown below: If the user is not logged in to the OfficeServ Link, the user can automatically login to the OfficeServ Link by selecting the [Send Message] menu.
Enter the extension number of the recipient in the [To] text box at the upper section of the window. Separate numbers with semi-colons (;) when entering multiple numbers (e.g. 202;203;204). Clicking the [Send] button without specifying a destination in the [To] text box will send the message to all logged-in stations.
My messages and messages received from the other stations while this window is open are displayed in the text box on the center of the window. Messages that arrive while the message window is closed are displayed on the <Information> window.
Enter the message to be sent in the text box at the bottom section of the <Send Message> window. Then, click the [Send] button or press the [Enter] key to send the message.
Add Outgoing BLF Group
Select [Add Outgoing BLF Group] from the [Tools] menu to retrieve the outgoing call information from the phonebook and to add the information to the BLF group.
Select the table to be added, and click the [Run] button.
If a valid external outbound call information exists in the selected table, the <Outgoing BLF> window is displayed as shown below:
Click the [OK] button to register the outgoing BLF group with the ‘^Business’ name to the BLF group window. The outgoing group is automatically displayed with the ‘^’prefixed to the group name.
CHAPTER 5.
Call Control
This chapter describes the procedures for using the general functions and additional functions of the system through the call control buttons, mouse, keyboard, and popup menu.
The progress of a call is displayed accordingly on the <Incoming Calls> window, <Active Calls> window, or <Held Calls> window. OfficeServ Operator users can control calls by using call control buttons or the [Call] menu.
General Functions
This section describes the procedures for executing general functions such as <Dial>, <Answer>, <Drop>, <Hold>, <Transfer>, <Park>, and <Conference Call> from the <Incoming Calls> window, <Active Calls> window, or <Held Calls> window.
Additional Functions
This section describes the procedures for executing additional functions such as <Hold with a Note>, <Target Hold>, <Orbit Park>, <Leave Message>, <Camp On>, and <OHVA>.
The call control buttons and [Call] menu are described below:
Button Call Menu Description
Dial Makes a call
Answer Answers an incoming call
Drop Disconnects the current call
Hold Holds a call
Unhold Answers a held call
, Transfer, Toggle Transfers a call, call alternation Station Park Parks a call in a station
Orbit Park Parks a call by using number keys ranging from 0 to 9 or reanswers the held call Conference Makes a conference call
Page Broadcasting
Camp On Call waiting
Button Call Menu Description
Leave Message Leaves a message in a busy/unanswered station
Redirect Transfers a call without answering the incoming call
OHVA Urgent notification
Complete Transfer Complete Transfer
Redial Redial Reestablish Reestablish
General Functions
Dial
Dialing methods provided by the system are as follows:
Dialing a Call by using the Call Control Button
Enter a phone number, and click the [Dial] button( ). Then, the status of the corresponding call will be displayed as ‘Ringback’ as shown below:
Dialing a Call by using the [Enter] Key
Enter a phone number. And then press the [Enter] key.
Dialing a Call by Double-Clicking
Dialing a Call by using the Popup Menu
Select and right-click a device from the <BLF> window. And then select the [Dial] menu.
Entering Numbers and Special Characters from a Keyboard
The OfficeServ Operator enables the user to conveniently enter the numbers from 0 to 9 and special characters such as # and * using the keyboard without putting the cursor on the text box. However, other special characters cannot be entered.
Answer
Once a call is connected to the operator’s station, the connected call is displayed on the <Incoming Calls> window. If more than two incoming calls are connected, the user can select a call to answer. The first connected call is displayed on the top of the list.
The [F2] key is used for selecting the first call listed on the <Incoming Calls> window. NOTE
Answering a Call by using the Call Control Button
Select a call to answer, and click the [Answer] button ( ).
Answering a Call by using the [Enter] Key
Select a call and press the [Enter] key to answer the call.
Answering a Call by Double-clicking
Double click an incoming call from the <Incoming Calls> window to answer the call.
Answering a Call by Drag and Drop
Drag an incoming call from the <Incoming Calls> window and drop the call on the <Active Calls> window to answer the call.
Answering a Call by using the [+] Key
Press the [Insert] key to answer the first call listed on the incoming call list.
Drop
The [F3] key is used for selecting the first call on list of the <Active Calls> window.
Disconnecting a Call by using the Call Control Button
Select a call and click the [Drop] button ( ) to disconnect the call.
Disconnecting a Call by using the [-] Key
Select a call and press the [-] key to disconnect the call.
Disconnecting a Call by using the Popup Menu
Selecting the Call on the Top of the <Active Calls> Window
Press the [F3] key to select the first call on the list of the <Active Calls> window. Press the [F4] key to select the first call on the list of the <Held Calls> window.
Hold
The [F3] key is used for selecting the first call on list of the <Active Calls> window.
Holding a call by using the Call Control Button
Select a call from the <Active Calls> window, and click the [Hold] button ( ) to hold the call. Then the <Held Calls> window will be displayed as shown below:
Holding a Call by using the [/] Key
Select a call from the <Active Calls> window and press the [/] key to hold the call.
Holding a Call by Drag and Drop
Drag a call from the <Active Calls> window and drop the call on the <Held Calls> window to hold the call.
Unhold
The [F4] key is used for selecting the first call on list of the <Held Calls> window. NOTE
Answering a Held Call by using the Call Control Button
Select a held call and click the [Unhold] button ( ) to answer the held call.
Answering a Held Call by using the [Enter] Key
Select a held call and press the [Enter] key to answer the held call.
Answering a Held Call by Double-clicking
Double-click a held call to answer the held call.
Answering a Held Call by Drag and Drop
Drag a held call from the <Held Calls> window and drop the call on the <Active Calls> window to answer the held call.
Transfer
The OfficeServ Operator provides two types of call transfer, the Blind Transfer and Consultation Transfer. The OfficeServ Operator uses Consultation Transfer by default. Blind Transfer is applied when a call is transferred by dragging and dropping the call to the BLF.
y Blind Transfer: Transfers a call regardless of the recipient’s will.
y Consultation Transfer: Transfers a call under the agreement of the recipient
Transferring a Call by using the Call Control Button
Enter an extension number, and click the [Transfer] button ( ).
Transferring a Call by using the [Enter] Key
Enter an extension number, and press the [Enter] key.
Transferring a Call by Dragging and Dropping
Press the [Ctrl] key and drag-and-drop a call from the <Active Calls> window to the target device on the BLF window.
Canceling Call Transfer by using the [-] Key
The extension number of the caller and the extension number of the final recipient are displayed in <Active Calls> window when the call transfer is attempted. Press the [-] key to cancel the call transfer.
Canceling Call Transfer by using the Popup Menu
The extension number of the caller and the extension number of the final recipient are displayed in <Active Calls> window when the call transfer is attempted. Right-click a device and then select the [Drop] menu to cancel the call transfer.
Blind Transfer by using the [Enter] Key
The extension number of the caller and the extension number of the final recipient are displayed in <Active Calls> window when the call transfer is attempted. Press the [Enter] key to complete the call transfer.
Blind Transfer by using the Popup Menu
The extension number of the caller and the extension number of the final recipient are displayed in <Active Calls> window when the call transfer is attempted. Right-click a device and then select the [Complete Transfer] menu to complete the call transfer.
Blind Transfer by Drag and Drop
Drag a call from the <Active Calls> window and drop the call on the target device displayed on the <BLF> window.
Troubleshooting when call transfer fails
If the recipient is absent or does not answer the transferred call, the call will be returned to the operator. In such cases, a ‘Reconnected’ message is displayed as detail information.
Consultation Transfer
This menu is used to transfer calls under the consent of the recipient. When the recipient answers the call, the call state will be displayed as below.
The operator can toggle a call between a ‘Connected’ station and a station ‘On Transfer ’, or complete the call transfer.
Toggling a Call by using the Call Control Button
Once the [Transfer] button changes to the [Toggle] button, press the [Toggle] button ( ).
Completing Consultation Transfer by using the [Enter] Key
Press the [Enter] key to complete the consultation transfer. When the consultation transfer is completed, the call is deleted from the <Active Calls> window.
Canceling Consultation Transfer by using the [-] Key
Press the [-] key to cancel the consultation transfer and to connect the call to the original recipient.
Station Park
The operator can park a call on a station connected to an external call. In such cases, the external (C.O. line) call becomes a held call. However, if the station is idle, a blind transfer is performed for the call.
Parking a Call by using the Call Control Button
Enter the target extension number, and click the [Station Park] button ( ). When the station park is completed, the call is deleted from the <Active Calls> window.
Parking a Call through Drag-and-Drop
Drag a call from the <Active Calls> window and drop the call on a busy station in the <BLF> window to park the call on the busy station.