User's Guide
Product Version: 4.0.0Contents
Contents 2 Welcome 9 Getting Started 10 First Steps 10 Logging In 10 Screen Tips 11 Dashboard 12 Quick Links 13 Administration 14 Global Settings 14 Server Configuration 22 Listener Configuration 23 Database Configuration 27Edit Database Configuration 28
Switch Database 29
Database Backup 32
Database Tuning 33
Custom Tasks 34
Install Custom Task 35
Edit Custom Task 36
View Custom Task 36
License 37
Display License 37
Install License 38
Uninstall Licence 38
Request License 38
Check for Updates 39
No Updates Available 39
Update Found 39
Upgrade Download Complete 40
Server Log 41 Security 42 Users 42 User Management 42 Add User 43 Edit User 45
Reset User Password 46
View User 47
User Groups 48
Roles 52
Role Management 53
View Role 53
Edit Role 54
Change Login Configuration 55
Security Settings 56
Resources 57
Resource Permissions 58
Adding Resource Permissions 59
Edit Resource Permissions 60
Work with Resources 61
Add Resource 62
Edit Resource 62
View Resource 63
View Resource Details 64
Search Resources 65
Export Resource 65
Promoting a Resource 66
Delete Resource 67
Network Shares Resource 68
Database Servers Resource 70
FTP Servers Resource 71
FTPS Servers Resource 74
SFTP Servers Resource 80
SCP Servers Resource 84
AS2 Servers Resource 88
SMTP Servers Resource 91
Mail Boxes Resource 92
HTTP Servers Resource 94
HTTPS Servers Resource 96
MQ Servers Resource 100
OpenPGP Key Rings Resource 102
IBM i Servers Resource 103
Local Files 128
Rowsets 128
Email Lists 129
AS2 Task Output 131
MQ Message List 132
Expressions 133
Expression Wizard 136
Functions 137
Expression Syntax 1.0 144
Dates, Times and Timestamps 146
IF Condition 149 Loops 151 For Loop 152 For-Each Loop 155 While Loop 159 Do-While Loop 162 Iterate Loop 165 Exit Loop 165 Workspaces 166
Select Multiple Files using a File Set 168
File Paths 170
Sharing Common Logic between Projects (Snippets) 171
Working with Projects 172
Project Folders 174
Add Folder 174
Edit Folder 175
Deleting a Folder 175
Folder Permissions 175
Add Folder Permissions 176
Edit Folder Permissions 177
Change Project 178 Copy Projects 179 Move Projects 180 Promote Projects 181 Export Project 182 Import Project 182 Search Projects 183 Delete Projects 184 Upgrade Project 184 Executing Projects 186
Execution from IBM i Scheduler 191
Execution from an ILE Program 192
Execution from Windows, Linux, AIX, HP-UX and Solaris 193
Project Execution History 194
Scheduling Projects 196
Holiday Calendars 196
Add or Edit a Calendar 197
View Calendar 198
Work with Scheduled Jobs 199
Adding or Editing a Scheduled Job 201
Working with Repeating Scheduled Jobs 206
View Scheduled Job 207
Scheduled Job History 208
Show Schedule 210
Monitors 211
Work with Monitors 212
Adding or Editing Monitors 213
Monitor Example 216
View Monitor 218
Jobs 219
Monitoring Active Jobs 220
Work with Queued Jobs 222
Completed Jobs 223
Task Reference 225
Database Tasks 228
SQL Task 228
Data Translation Tasks 229
Read CSV Task 229
Read Excel Task 231
Read Fixed-Width Task 233
Read Flat File Task 235
Read XML Task 236
Write CSV Task 238
Tar Task 250 Untar Task 251 Unzip Task 252 Zip Task 253 FTP Tasks 255 FTP Task 255 FTPS Task 257 SCP Task 259 SFTP Task 261 AS2 Tasks 263 AS2 Task 263 E-Mail Tasks 264
Retrieve E-mail Task 264
Send E-mail Task 265
HTTP Tasks 266
GoAnywhere Services HTTPS Task 266
HTTP Task 267
HTTPS Task 268
MQ Tasks 269
Open MQ Session Task 269
Commit/Rollback MQ Session Task 270
MQ Send Message Task 271
MQ Send Message Task - Property Element 272
MQ Retrieve Message Task 273
Close MQ Session Task 274
Local File System Tasks 275
Copy Task 275
Create File List Task 276
Delete Task 276
Make Directory Task 277
Merge Files Task 278
Move Task 279
Rename Task 280
Search and Replace Task 281
Native Call Tasks 282
Execute IBM i Command or Program Task 282
Execute Native Command Task 284
Job Control Tasks 285
Call Module Task 285
Call Project Task 286
Miscellaneous Tasks 290
Close Rowset Task 290
Create Workspace Task 290 Delete Workspace Task 290 Print Task 291 Set Variable Task 292 Timestamp Task 292 Task Versions 293 Encryption Overview 295
Encryption Options in GoAnywhere Director 296
Choosing the Right Encryption Method 297
OpenPGP Encryption 298
Digital Signatures 299
Quick Start for OpenPGP Encryption 300
Quick Start for OpenPGP Decryption 302
OpenPGP - Standards 304
SFTP (FTP over SSH) 305
Quick Start for SFTP 306
SFTP (FTP over SSH) - Standards 307
FTPS (FTP over SSL) 308
Quick Start for FTPS 309
FTPS (FTP over SSL) - Standards 310
AS2 (S/MIME over HTTP(S)) 311
Quick Start for AS2 311
Quick Start for Secure Email 313
Key Management 315
OpenPGP Key Manager 315
OpenPGP Key Ring 315
Work with OpenPGP Keys 316
Open an OpenPGP Key Ring 317
Create an OpenPGP Key Ring 317
Add an OpenPGP Key Pair 318
Export an OpenPGP Public Key 319
Import CA Reply 333
Export SSL Certificates and Private Keys 334
Import Certificate 335
Import Private Key 336
View Certificate 337
Create Key Store 338
Change Key Store Password 339
Change Key Store Preferences 340
File Manager 342
Uploading Files 343
Appendix 344
Stopping and Starting GoAnywhere 344
Date and Time Patterns 345
Number Patterns 346
Advanced Network Shares Configuration 348
MQ Connection URL 351
MQ Message Filters 353
SSH Handshake Process 354
SSL Handshake Process 355
Encryption Tool 355
Wildcards and Regular Expressions 356
Remote Files 360 SQL Wizard 361 JDBC URL Wizard 364 Email Templates 366 FTP FAQs 368 Additional Help 369 Glossary 370
GoAnywhere License Agreement 376
Welcome
GoAnywhere Director™is a managed file transfer solution that will automate and secure the exchange of data with your trading partners, customers and internal systems.GoAnywhere Directoris a flexible solution that connects to almost any server or data source using a wide variety of standard and secure protocols.
WithGoAnywhere Director’sintuitive interface and comprehensive features, it can eliminate the need for custom programs, scripts and single-function tools which were traditionally required for moving and translating data. This innovative solution will reduce costs, improve the quality of your data transmissions and help your organization to comply with data security policies and regulations.
GoAnywhere Directorfeature summary:
l Simplifies and automates FTP (File Transfer Protocol) processes
l Connects to secure FTP servers (SFTP, FTPS, SCP) for protected communications
l Guarantees delivery with automatic connection retries and file resume (for interrupted transfers) l Exchanges files with web servers using HTTP and HTTPS protocols
l Monitors folders with options to scan for new, changed or deleted files l Accesses files and directories on network shares using SMB/CIFS protocol l Sends AS2 messages with support for multiple file attachments
l Encrypts and decrypts files using the Open PGP encryption standard l Compresses and decompresses files using the ZIP, GZIP and TAR standards
l Connects to popular database servers including DB2, DB2/400, SQL Server, Oracle, Informix, MySQL,
PostgreSQL and Sybase
l Translates data to/from database tables, Excel, XML, Delimited text and Fixed Width file formats l Replicates data between database servers
Getting Started
Authorized users can utilizeGoAnywhere Director’s browser-based Administrator to perform configuration and monitoring within the product. The following primary functions are available within the Administrator:
l Configure global settings forGoAnywhere Director
l Set up and manage Users, User Groups and their authorities (Roles) withinGoAnywhere Director
l Set up and maintain the connections to the servers with which you want to exchange data (for example,
database servers, FTP servers, HTTP servers, mail servers, etc.)
l Set up Keys and Certificates for any encryption requirements
l Define Projects of the work to be performed (for example, data transfers, data conversions, file encryption,
compression, etc.)
l Execute Projects
l Schedule Projects to run at future dates and times l Monitor actively running Projects
l View the logs of completed Projects
First Steps
Follow these steps to get started withGoAnywhere Director.
1. Loginto theGoAnywhere DirectorAdministrator through your browser. 2. Review (or modify) theGlobal SettingsforGoAnywhere Director.
3. Set up theUser GroupsandUsersauthorized to work withGoAnywhere Director.
4. Define the connection settings for the servers (Resources) with which to exchange data (for example, database servers, FTP servers, HTTP servers, mail servers, etc.).
5. Create Projectswhich describe the work to be performed (for example, data transfers, data conversions, file encryption, compression, etc.)
6. Executethe Projects from within the Administrator, scheduler or using the supplied commands. Read theScreen Tipssection to learn basic tips on how to use the screens.
Logging In
Follow the steps below to log in toGoAnywhere Director.
1. From your browser, type the URL[protocol]://[hostname]:[portnumber]where:
l [protocol]can be HTTP or HTTPS.
l [hostname]is the host name or IP address of theGoAnywhere Directorapplication server. l [portnumber]is the port number of theGoAnywhere Directorapplication server. The default
port for HTTP is 8000 and the default port for HTTPS is 8001. Example: http://myserver:8000 or https://myserver:8001
2. Log in with your user name and password. The default user name isadministratorand the default password isgoanywhere. The password is case-sensitive.
Screen Tips
l While in theGoAnywhere Directoradministrator screens,do notpress the browser's Back, Forward or Refresh
buttons. These actions may cause theGoAnywhere Directoradministrator to get out of sync with your
browser, which may require you to log back into the administrator. Instead, use the buttons and links provided in the administrator to move from screen to screen.
l When entering information on a screen, any required fields will be indicated with an asterisk *. l On-line help text is available on each screen by clicking the icon.
l Additional Help is available within each Task screen when clicking the Field name. The pointer changes to a
hand when field level help is available.
l If a variable can be used within a field, the icon appears beside the field when the field is selected. Click
the icon to open a drop-down list of available system and user-defined variables in the open Project.
l By default, theGoAnywhere Directoradministrator will timeout your browser session after 60 minutes of
inactivity. If you have made changes on a screen in the administrator, you will want to save those changes if you plan to leave the administrator for more than 60 minutes.
Dashboard
TheGoAnywhere Directordashboard is the first screen displayed after login. This dashboard provides menus and links to quickly accessGoAnywhere Director’scomponents. It also shows vital system statistics.
Drop-Down Menus
To access a component, click a drop-down menu (located on the top of the dashboard), and then select the menu item for the component to launch.
Quick Links
You can optionally launch popular components by clicking their correspondingQuick Linksicons in the middle portion of the dashboard. The Quick Links are described on the next page.
System Statistics
System statistics are shown on the bottom of the dashboard (for users that have the appropriate authority to view this information). These statistics will show the number of jobs (job counts) which are active and have completed. For the completed jobs, it will break out the job counts by their status of Successful, Failed and Canceled.
Statistics will initially be shown for today’s activity. Click the available tabs to view statistics for yesterday, the last 7 days or last 30 days. You can drill into a particular job count by clicking its corresponding number. For instance, to view more details about the failed jobs, click the number to the right of the “Failed Jobs” heading .
If links or icons appear to be inactive, you do not have permissions for those functions based on your user roles. Contact yourGoAnywhere Directoradministrator for assistance with Roles and Permissions.
Quick Links
Listed below are descriptions of the Quick Links, available from theGoAnywhere Directordashboard.
Icon Component Description Security Role
Required *
Resources
For working with the Resources, which are the connection properties of the servers to exchange data with - including FTP servers, database servers, HTTP servers, etc. This component provides functions to view, create and maintain Resources.
• Resource Manager • Security Officer
Projects
Used to work with Projects, which are the definitions of the transfers and business processes to be performed inGoAnywhere Director. This component provides functions to view, create, maintain and run Projects.
• Project Designer • Security Officer • User
Scheduler
Used to work with Scheduled Jobs, which you can use to automate the execution of Projects for future dates/times. This component provides functions to view, create and maintain scheduled Jobs.
• Job Manager
Active Jobs
Used to work with active Jobs, which are the projects that are currently running inGoAnywhere Director. This component provides functions to display job status information, display job logs and cancel jobs.
• Job Manager • User
Completed Jobs
Displays the Jobs which have finished executing. Includes functions to search for completed jobs by date range, project name, user name and status. Allows viewing job status information and job logs.
• Job Manager • User
Users
Used to work with the Users who are authorized to utilizeGoAnywhere Director. This component provides functions to view, create and maintain Users.
• Security Officer
Administration
The Administration menu provides access to administrative settings including the global settings, database configuration options, license information and server logs.
The Administration menu is only available to a user with theProduct Administratorrole.
Global Settings
Global settings are used to control the overall behavior and attributes of GoAnywhere Director. These settings can be viewed and modified by a user with the Product Administrator role.
From the main menu bar, point toAdministrationand then clickGlobal Settings. Listed below are the field descriptions within each tab of the Global Settings.
General Tab
Instance Name
The name for this instance (installation) ofGoAnywhere Director. The instance name is displayed when logging in to the application, as well as on the top right side of the page and in the browser's title bar. This is helpful to allow a user to quickly determine which instance they are connected to (if multiple instances ofGoAnywhere Directorexist).
Locale
The user's environment (based on a specific language or dialect) that defines conventions such as time formatting and numeric formatting. If a Locale is not specified, then the Locale will be determined from the system on which GoAnywhere Directoris installed.
Changes to the "Locale" setting will require arestartofGoAnywhere Director.
Date Pattern
The pattern to use for formatting dates on screens and reports inGoAnywhere Director. View theDate and Time Patternssection in the Appendix for more information.
Changes to the "Date Pattern" setting will require arestartofGoAnywhere Director.
Time Pattern
The pattern to use for formatting times on screens and reports inGoAnywhere Director. View theDate and Time Patternssection in the Appendix for more information.
Changes to the "Time Pattern" setting will require arestartofGoAnywhere Director.
Timestamp Pattern
The pattern to use for formatting timestamps on screens and reports inGoAnywhere Director. View theDate and Time Patternssection in the Appendix for more information.
Data Tab
Projects Directory
The location on theGoAnywhere Directorserver where the Project definitions will be stored. This location is relative to theGoAnywhere Directorinstallation directory. For example, if theGoAnywhere Directorproduct is installed in the directory of/linoma/goanywhere, then the default location for the Projects directory would be
/linoma/goanywhere/userdata/projects.
Workspace Directory
The location on theGoAnywhere Directorserver where any Projectworkspaceswill be created. This location is relative to theGoAnywhere Directorinstallation directory. For example, if theGoAnywhere Directorproduct is installed in the directory of/linoma/goanywhere, then the default location for the Workspace directory would be
/linoma/goanywhere/userdata/workspace.
Changes to the "Workspace Directory" setting will require arestartofGoAnywhere Director.
Documents Directory
The location on theGoAnywhere Directorserver where files can be uploaded and downloaded through theFile Manager. This location is relative to theGoAnywhere Directorinstallation directory. For example, if theGoAnywhere Directorproduct is installed in the directory of/linoma/goanywhere, then the default location for the Documents directory would be/linoma/goanywhere/userdata/documents.
Changes to the "Documents Directory" setting will require arestartofGoAnywhere Director.
Monitors Directory
The location on theGoAnywhere Directorserver where files related to the Monitor function are stored. This location is relative to theGoAnywhere Directorinstallation directory. For example, if theGoAnywhere Directorproduct is installed in the directory of/linoma/goanywhere, then the default location for the Monitors directory would be /linoma/goanywhere/userdata/monitors.
Logging Tab
File System Logging Logs Directory
The location on theGoAnywhere Directorserver where any logs will be written. This location is relative to theGoAnywhere Directorinstallation directory. For example, if theGoAnywhere Directorproduct is installed in the directory of/linoma/goanywhere, then the default location for the Logs directory would be/linoma/goanywhere/userdata/logs.
Global Log Level
The logging level used by the global log inGoAnywhere Director.
Log Levels
Level Description
Normal Logs all messages with INFO, WARN and ERROR severity levels.
Debug Logs all messages from the Normal setting and includes all messages with the DEBUG severity level. Typically, the Debug log level should only be used when more detailed
messages are needed to solve problems in the application since the log can quickly grow and consume disk space.
Global Log File Extension
The file extension to use for the global log file (namedgoanywhere). If the default extension of .log is specified, then the global log file will be namedgoanywhere.log.
Maximum Global Log Size
The maximum size (in MB) to which the global log file can grow, before a rotation takes place. When a rotation occurs, the active log file (named goanywhere.log by default) will be renamed with a numeric suffix (for example, goanywhere 2.log) and then an empty file will be created to store any new log entries. The purpose of rotation is to prevent log files from growing indefinitely.
Job Log Format
The format of any job logs created byGoAnywhere Director.Text= The logs will be written in plain text format.HTML= The logs will formatted with HTML tags for viewing through a web browser. The default
Days to Keep Job Logs
The number of days to keep the job logs and any associatedworkspacedirectories. All job logs that are older than the specified value will be deleted automatically. A value of 0 (zero) will keep the job logs indefinitely.
Syslog Logging Enabled
If selected, options are available to sendGoAnywhere Directorlogs to an Enterprise Syslog server. By default, logging to a Syslog server is not enabled.
Host
The host name or IP address of the Syslog server to which various log events are sent.
Port
The port number on which the Syslog server is listening for incoming connections and/or log events. The Port value must be a number between 1 and 65535. For UDP protocol, the default port number is 514.
Protocol
The transfer protocol used for communicating with the Syslog server. UDP connections are faster than TCP since they simply push data to the Syslog server, but do not have the error control capability of TCP. If using UDP and a packet is lost or received in the wrong order, nothing is recorded in the server log. When using TCP, if a packet fails while being sent to the Syslog server, an error message is logged in the [installdirectory]/tomcat/logs folder (where [installdirectory] is the installation directory ofGoAnywhere Director). The TCP connection will keep resending the packet until successful. The default setting is UDP.
Facility
The Facility name is a way of determining which process was responsible for creating the message. The default setting is User.
Application ID
The Application ID is the name that is assigned to this application. All entries sent to the Syslog server will contain the Application ID to help identify it in the Syslog. The default application id is "goanywhere".
Application Log Level
The Application Log Level is the severity level of the application messages that will be sent to the Syslog server. The default setting is ERROR, in which any error messages generated by GoAnywhere Director would be sent to Syslog. The WARN log level will include errors and warnings. The INFO log level will include errors, warnings and informational messages. The DEBUG log level will include errors, warnings, informational and debug messages.
SMTP Settings Tab
The SMTP settings indicate the mail server thatGoAnywhere Directorshould use for sending email notifications. As an example, an email notification can be sent byGoAnywhere Directorwhen a scheduled job fails.
Host
The host name or IP address of the SMTP server.
The SMTP host name can typically be found in your email application's account settings.
Port
The port number to use to connect to the SMTP server. The specified value must be between 0 and 65534. The default SMTP port number is 25.
User
The user name (login name) to use to connect to the SMTP server. If the User field is left blank, then it is assumed that the SMTP server does not require authentication for its email clients.
Password
The password to use for connecting to the SMTP server, if required.
From Name
The name from which any emails will appear to be sent.
From Email
The email address from which any emails will appear to be sent.
Connection Type
The type of connection made to the SMTP server.
l Normal - The connection is not encrypted and messages are sent in plaintext.
l Explicit SSL - After initial authentication with the SMTP server, the connection is encrypted with SSL. l Implicit SSL - The entire connection and transmission is encrypted using SSL.
Maximum Connections
By default,GoAnywhere Directoruses one SMTP connection for sending email. When multiple processes send email at the same time, messages will queue until the connection is available. Increasing the number of connections provides the ability to send multiple email messages concurrently. The number of supported connections is 1 through 50.
Projects Tab
Enable File Locking
File locking allows you to protect the integrity of files while they are being processed byGoAnywhere Director.
If enabled, Project tasks inGoAnywhere Directorthat read local or network files will attempt to acquire a "shared" lock on the files before processing them. This shared lock will prevent other applications from locking a file (for write access) while it is in use byGoAnywhere Director.
If enabled, Project tasks that write or modify files will attempt to acquire an "exclusive" lock on the files before processing. This exclusive lock will prevent other applications from locking a file (for read or write access) while it is in use byGoAnywhere Director.
File Lock Timeout
The amount of time (in seconds) that the File Lock process inGoAnywhere Directorwill wait to obtain a lock on a file. A value of -1 indicates that there is an unlimited wait time. A value of 0 indicates that a lock attempt will only be tried once. Otherwise, specify a value up to 86,400 seconds (24 hours).
If a lock cannot be obtained within the specified timeout period, then an error will be generated in the Project task which is attempting to obtain the lock.
Runtime Tab
Jobs
Maximum Pool Size
The maximum number of threads that are allocated for active batchJobs. Each active job utilizes a separate thread (a slice of CPU) inGoAnywhere Director. Therefore, if the Maximum Pool Size is set to 20, then up to 20 batch jobs can be active at one time. Once the Maximum Pool Size is reached, any new batch jobs will be placed in theJob Queueuntil threads become available.
Increasing the Maximum Pool Size will likely causeGoAnywhere Directorto consume more server CPU and memory. However, more batch jobs will be able to execute at one time.
Thread Keep Alive Time
The amount of time (in seconds) in which an idle thread will wait before it is destroyed. When aJob completes, the thread it utilized will remain idle until another job uses it, or until the "Thread Keep Alive Time" is reached.
Increasing the Thread Keep Alive Time will likely causeGoAnywhere Directorto consume more CPU and memory. However, jobs will start up quicker since they will not have to create new threads as frequently.
Monitors
Maximum Pool Size
The maximum number of threads that are allocated for active Monitors. Each Monitor utilizes a separate thread (a slice of CPU) inGoAnywhere Director. Therefore, if the Maximum Pool Size is set to 20, then up to 20 Monitors can be active at one time. Once the Maximum Pool Size is reached, any new Monitors will be held until threads become available.
Increasing the Maximum Pool Size will likely causeGoAnywhere Directorto consume more server CPU and memory.
Thread Keep Alive Time
The amount of time (in seconds) in which an idle thread will wait before it is destroyed. When a Monitor completes, the thread it utilized will remain idle until another Monitor uses it or until the "Thread Keep Alive Time" is reached.
Increasing the Thread Keep Alive Time will likely causeGoAnywhere Directorto consume more CPU and memory. However, Monitors will start faster since they will not have to create new threads as frequently.
HTTP Proxy Tab
The HTTP Proxy Settings are only needed if your system uses a proxy server to make HTTP connections. These settings are primarily utilized when a Product Administrator checks for new product updates from Linoma Software's server.
Proxy Type
The type of proxy to use. Specify eitherDIRECT,HTTP, orSOCKS. DIRECT represents a direct connection, or the absence of a proxy. HTTP represents proxy for high level protocols such as HTTP or FTP. SOCKS represents a SOCKS (V4 or V5) proxy.
Proxy Host
The host name (or IP address) of the proxy server on the network.
Proxy Port
The port number of the proxy server on the network.
Proxy Username
The user name (login name) used for connecting to the proxy server.
Proxy Password
Server Configuration
The Server Configuration screen provides options to configure HTTP/s Listeners for theGoAnywhere Directorserver. These listeners allow users to connect toGoAnywhere Director(through their browser) to perform administration and monitoring in the product, as well as accept requests to execute Projects from remote systems.
A default HTTP listener is configured inGoAnywhere Director, which listens on port 8000. The default port for the HTTPS listener is 8001. You can change the port number and other settings for the default listeners, as well as add additional listeners, by following the instructions below.
To manage Listeners, login as a user with theProduct Administratorrole.
From the main menu bar, point toAdministrationand then clickAdmin Server Configuration.
Functions Available
l Add a Listenerby clicking the Add Listenerlink in the sub-menu bar. l View or Modifya Listener by clicking the Listener name in the left column.
Changes made to any Listeners will require aRestartofGoAnywhere Directorbefore those changes take effect.
The default shutdown port number forGoAnywhere Directoris 8005. The shutdown port number can only be changed by making a modification to the server.xml file, which will require a Restart.
Listener Configuration
Follow the instructions below to add or modify a HTTP/s Listener inGoAnywhere Director:
1. From the main menu bar, point toAdministrationand then clickAdmin Server Configuration.
2. Edit an existing Listener by clicking on the Listener in the tree outline. Otherwise, you can add a new Listener by first clicking on the Server, and then clicking the Add Listenerlink.
3. Type in the desired values for the Listener on the General tab. If this will be a HTTPS connection, also specify the SSL settings on the SSL tab.
4. Click theSavebutton to add/update the Listener and stay on the screen. Otherwise click theSave And Finishbutton to add/update the Listener and return to theGoAnywhere DirectorHome screen.
If you wish to Delete a Listener entry, select the Listener and click theDeletelink in the sub-menu bar.
General Tab
Name
An identifiable name for the Listener (to show in the tree outline).
Port
The port number which the HTTP/s Listener will run under. For HTTP, the default port number is 8000.
Local Address
The IP address on the Server (which is hostingGoAnywhere Director) for the listener to bind to.
Enable Lookups
Available options:
l Yes - The Lookup setting will search for and report servers by their DNS name l No - Only the IP address is returned on a lookup
Disable Upload Timeout
No Compression User Agents
This option allows a System Administrator, in certain instances, to specify the header data of a browser for which files will never be compressed.
Connection Timeout
The number of seconds this connection will remain open before closing, if no requests are sent. The default is 60 seconds.
Maximum Threads
The maximum number of simultaneous requests (threads) that can be created on this Listener. The default is 200 threads.
Minimum Spare Threads
The minimum number of threads that will be created when this Listener is first started. The default is 4 threads.
Changing the Thread values can alter performance. If the Maximum Threads is too low, then that may limit the number of active connections toGoAnywhere Director. On the other hand, if the Minimum or Maximum threads are too high, thenGoAnywhere Directormay consume more resources than is needed.
SSL Tab
SSL Enabled
Available options:
l Yes - A Secure Socket Layer is used to secure transmissions (for HTTPS connections) l No - Transmissions are not secured with SSL
SSL Protocol
Available options:
l SSL - A traditional Secure Socket Layer protocol is used to secure the transmission l TLS - Transport Layer Security will be used to secure the transmission (default)
Algorithm
The field is pre-populated based on your installation. Available options:
l IbmX509 - Only used for IBM-based installations l SunX509 - Used for Sun and most other installations
Enabled Cipher Suites
By default, all Cipher Suites are enabled to provide the most options for various HTTPS clients. However, depending on your security policies, you may want to restrict the connections to use only highly secure Cipher Suites like AES. Follow the instructions below to allow only certain cipher suites:
1. In the left column, click to select (highlight) the Cipher Suites to use. Multiple entries can be selected by pressing theCtrlorShiftkey while clicking the mouse.
2. When the desired Cipher Suites are selected, click the arrow between the group boxes to move the Cipher Suites from left to right.
Key Store File
This file contains the private key and associated certificates that a client uses to authenticate to a server. There are default key store files provided withGoAnywhere Directoror you can create your own. Type the name or click the icon to browse for the file. Clickherefor more information about the SSL handshake process.
Key Store Password
The password to use for accessing the key store. If unknown, contact a user with a Key Manager role.
Key Store Type
The type of key store.GoAnywhere Directorsupports both the JKS (Java Key Store) and PKCS12 (Public-Key Cryptography Standards) key store types.
Key Store Provider
Depending on your installation, not all Key Store providers may be available. The correct Key Store provider should have be loaded whenGoAnywhere Directorwas installed. However, if this Key Store provider needs to be changed, then select the appropriate option from the list:
l SUN - The classic Java cryptographic service
l SunJSSE - The Java Secure Socket Extension provides an RSA layer to the cryptology
l SunJCE - The Java Cryptographic Extension is the export compliant variation of the SUN provider
l SunMSCAPI - This provider allows access to the Microsoft CryptoAPI (CAPI) for: Accessing private keys and
certificates stored in CAPI and using CAPI's cryptographic algorithm implementations
l BC - Bouncy Castle is an export compliant set of algorithms for the Java Framework including RSA, DSA, x509
Key Alias
The key alias identifies a key pair and its associated certificate from all the ones within a Key Store.
Trust Store File
The Trust(ed) Store File contains the public keys and certificates used by a server to authenticate a client. There are default Trust Store files that are provided withGoAnywhere Director, or you optionally create your own. Type the name or click the icon to browse for the Trusted Store file.
Trust Store Password
The password to use for accessing the Trust Store. If unknown, contact the Key Manager.
Trust Store Type
The type of trust store.GoAnywhere Directorsupports both the JKS (Java Key Store) and PKCS12 (Public-Key Cryptography Standards) trust store types.
Trust Store Provider
Based on your installation, not all Key Store providers may be available. The correct Trust Store provider should have been loaded whenGoAnywhere Directorwas installed. However, it can be changed to one of these values:
l SUN - The classic Java cryptographic service
l SunJSSE - The Java Secure Socket Extension provides an RSA layer to the cryptology
l SunJCE - The Java Cryptographic Extension is the export compliant variation of the SUN provider
l SunMSCAPI - This provider allows access to the Microsoft CryptoAPI (CAPI) for: Accessing private keys and
certificates stored in CAPI and using CAPI's cryptographic algorithm implementations
Database Configuration
By default,GoAnywhere Directorstores its configuration settings and application data in an embedded Derby database. This database includes most everything whichGoAnywhere Directorneeds to operate, including user-defined Global settings, Resource definitions, User account information, Permissions, Project header information, Scheduled Jobs, Completed Jobs header information and more.
The Database Configuration screen provides options to edit the current database configuration or migrate the GoAnywhere Directorembedded database to an external database. The Database Configuration screen also provides configuration options for the backup and tuning settings for theGoAnywhere Directorembedded database.
To manage the database configuration, login as a user with theProduct Administratorrole. From the main menu bar, point toAdministrationand then clickDatabase Configuration.
Edit Database Configuration
The Database Configuration screen allows a user (with the Product Administrator role) to change the database user credentials and connection settings for the current database used byGoAnywhere Director.
If you need to switch (migrate) the connection to a new or different database, then use theSwitch Database process.
Listed below is the edit database screen, which is accessible from theDatabase Configurationoption from the Administration menu. After making any changes on this screen, you can press theSavebutton to apply the changes. Please note that any changes will not be recognized until after a restart ofGoAnywhere Director.
JDBC Driver
The JDBC driver used to connect to the target database.
JDBC URL
The connection URL string for the database. This URL should contain the host name (or IP address) of the database server. Depending on the type of database server, you may additionally need to specify the database port number, database name and other properties in the URL. The URL string must be formatted properly. Use theJDBC URL Wizard to generate this URL string correctly. Click the button (located on the right side of the field) to launch this wizard.
User
The name of the user to connect (log in) to the database server.
Password
The password to use for connecting to the database server. After typing the password, you can optionally click the Encryptbutton, which will encrypt the password.
Is Password Encrypted?
Indicates whether or not the password is encrypted. SelectYesif you clicked the Encrypt button for the Password.
Minimum Connections
The minimum number of connections whichGoAnywhere Directorwill maintain with the database.
Maximum Connections
The maximum number of connections whichGoAnywhere Directorcan make to the database at any time.
Maximum Idle Connections
The maximum number of idle connections that can remain open at any time.
Maximum Wait Time
The time (in milliseconds) which a database connection request will wait for a connection before the request fails.
If changes are made to the database configuration, thenGoAnywhere Directorwill create a new database.xml file in the[installdirectory]/configfolder where [installdirectory] is the default installation location of
Switch Database
TheGoAnywhere Directordatabase can utilize (connect to) one of the following database types for storing its configuration settings and application data:
l DB2/400 (IBM i) - V5R4 and later
l Derby (Embedded) - 10.4.1.3 (preferred) l Derby (Network) - 10.4.1.3 (preferred)
l Microsoft SQL Server - SQL Server 2005 and later l MySQL - 5.1 and later
The Switch Database function provides a guided process for changing the GoAnywhere Directorconnection to one of these supported databases. This function can create the necessary tables and indexes, as well as migrate the existing GoAnywhere Directordata to the new database.
The Switch Database process is comprised of six steps. No changes will be applied until clicking the Finish button on the final step. After the Switch Database Wizard completes, you will need torestartGoAnywhere Directorin order to connect to the new database.
A database switch may take several minutes to execute if you plan to migrate the existing data from the current database. The data migration time will depend on the amount of data in the current database.
WARNING:Only perform the database switch when no other users are usingGoAnywhere Directorand when no active jobs, scheduled jobs or file monitors are running.
Step 1 - Select Target Database
Select a Database Server from the list of available database server types and then clickNext.
Step 2 - Prerequisites
Based on the selected database server, some prerequisites may need to be completed before proceeding. The required steps are listed on the screen for the selected database server. To ensure a smooth database conversion, complete the prerequisites before continuing.
IBM i (iSeries)
1. Open a Terminal session
2. Start an SQL session by running the commandSTRSQL
3. Run the SQL StatementCREATE COLLECTION GADDATA. This command will create an SQL collection named GADDATA. You can choose a different name for the collection if needed.
Microsoft SQL Server
1. Open the Microsoft SQL Server Management Studio 2. Log in to the target database as a database administrator 3. Create a new database named GADDATA
4. Create a new database login named GADDATA and set the default database for this login to the database created in the step 3.
5. Create a new user named GADDATA under the database (created in step 3). During this user creation, make sure to attach this user to the login (created in step 4). Set the default schema for this user as GADDATA (this schema will be created by the switch function), and assign this user the role of db_owner.
6. Create a new schema named GADDATA under the database created in step 3. While creating this schema, make sure to set the schema owner as gaddata that was created in step 5.
MySQL
1. Create a new database (also called schema) by running the statementCREATE DATABASE GADDATA CHARSET=UTF8
2. Create a new database user by running the statementCREATE USER GADDATA IDENTIFIED BY 'password'
3. Grant full permissions to the new database created in step 1 to the user created in step 2, by running the statementGRANT ALL ON GADDATA.* to 'GADDATA'
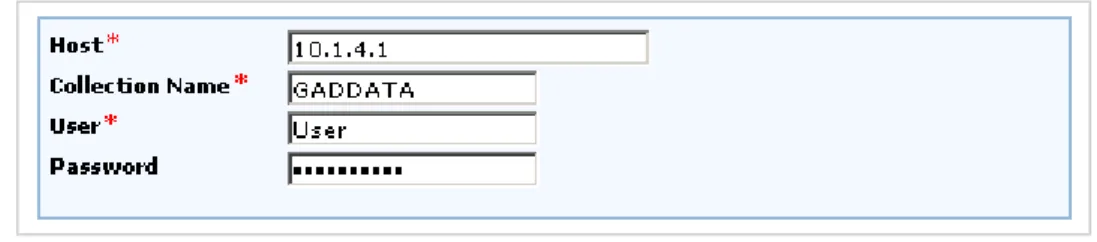
Step 3 - Connection Information
Based on the selected database server, provide the requested connection information. The connection credentials are verified after clicking theNextbutton. If there are connection errors, a description of the connection error is displayed on the screen. Connection errors must be corrected before continuing.
Step 4 - Customize JDBC URL
Based on the database server selected and the connection information from Step 3, a JDBC URL is automatically composed. If needed, the JDBC URL can be modified on this screen or through theJDBC URL Wizardby clicking the button.
Step 5 - Select Operations
Table Creation and Data Population
With the connection configuration complete, select how the Switch Database process will migrate the database. The first option will make a copy of the existingGoAnywhere Directordata to the new database. The second option will create a new database configured for use byGoAnywhere Directorwith the default data, just as it was when it was first installed. The third option will not configure the new database or populate any data.
The third option is commonly used when configuring GoAnywhere Directoron an HA or DR system. These installations only need to point their connection to the Production database in use by the running system.
Character Encoding
GoAnywhere Directorcan create tables using either the default encoding of the external database server (using CHAR/VARCHAR for all character columns) or the National Character Set (using NCHAR/NVARCHAR for all character columns). The National Character Set is typically used for double-byte languages, such as Chinese or Japanese, and will use more space for character fields.
Step 6 - Review Changes
When all the required information for the database change is specified, those settings will then be displayed for review. If you wish to change any of these settings, then click thePreviousbutton to return to the screen where the change is needed.
If the settings are correct, clickFinishto perform the database switch. The Switch Database process will stop any active jobsand will disable allscheduled jobsandmonitors.
Switch Database Complete
After clicking the Finish button, a Progress box opens to display the switch database progress. When complete, click theDonebutton.
Database Backup
TheGoAnywhere DirectorDatabase Backup screen provides the options to automatically schedule database backups or manually backup theGoAnywhere Directordatabase. These database backup options are only available if the embedded Derby database is used.
Last Backup Time
Displays the last backup time for theGoAnywhere Directordatabase.
Next Backup Time
Displays the next scheduled time for the backup.
Enable Database Backup
Indicates whether or not the database should be backed up automatically on a scheduled basis. The automatic backup runs without the need to shut downGoAnywhere Director. It is highly recommended that the database backup remains enabled.
Backup Directory
The database backup files are created in the folder of [installdirectory]/userdata/database/backups, where [installdirectory] is the installation directory forGoAnywhere Director.
Keep Backups For
The number of days (1–30) to keep the database backup files. Backup files that are older than the specified number of days will be automatically deleted following each backup process. By default, database backup files are retained for 7 days.
Schedule Type
The backup schedule can be run Hourly or Daily. The schedule options toggle based on this selection.
Options
Run Every
Indicates the number of hours or days to wait between database backups.
Run Time
When the backup schedule is set to Daily, the time of day the backup runs is set here.
Manual Backup of the Embedded GoAnywhere Director Database
To manually backup the embeddedGoAnywhere DirectorDerby database:
1. From theGoAnywhere Directormenu bar, point toAdministration, and then clickDatabase Configuration.
Database Tuning
Tuning theGoAnywhere Directordatabase will compress the indexes, which keeps queries running at maximum speed. The Database Tuning screen provides options to schedule database tunings or manually tune the database. A consistency check can also be performed to ensure that the database tables are not corrupt.
These database tuning options are only available if the embeddedGoAnywhere DirectorDerby database is being utilized.
Last Tuning Time
Displays the last tuning time for theGoAnywhere Directordatabase.
Next Tuning Time
Displays the next scheduled time that the tuning will take place.
Enable Database Tuning
Specify whether or not the database should be tuned automatically on a scheduled basis. The automatic tuning runs without the need to shut downGoAnywhere Director. It is highly recommended that the database tuning remains enabled. If a database backup and tuning are scheduled at the same time, the backup will run first. The automatic tuning option both tunes the database and runs a Consistency Check.
Schedule Type
The tuning schedule can be run Daily or Weekly.
Options
Run Every
Indicates the number of days or weeks to wait between database tunings.
Run On
Custom Tasks
GoAnywhere Directorincludes over 60built-in tasksto satisfy most of the business processes needed for managed file transfer. In some cases you may need a custom task in order to provide additional functionality. For example, a custom task could be built to integrate with other internal applications through a proprietary connection.Contact Linoma Software for more information and assistance with building custom tasks.
The Custom Tasks screen provides a method to install and manage these custom tasks. Once a task is installed, a user with the Project Designer role will be able to add the custom task to Projects.
To work with Custom Tasks, login as a user with theProduct Administratorrole. From theAdministrationmenu, clickCustom Tasks.
Functions Available
l Installa custom task by clicking the Install Custom Tasklink in the sub-menu bar. l Edita custom task by clicking the icon.
l View more Custom Task Actions by clicking the icon. A drop-down menu provides additional options.
More Actions
l Edita custom task by clicking the icon. l Viewthe task information by clicking the icon. l Uninstall the custom Task by clicking the icon.
Install Custom Task
To install a Custom Task follow the steps below:
1. Copy the Java Archive (.jar) file(s) containing the custom task to the[installdirectory]\userdata\lib folder. 2. RestartGoAnywhere Director.
3. Login as a user with theProduct Administratorrole.
4. From theAdministrationmenu, click theCustom Taskslink. 5. Click the Install Custom Tasklink in the sub-menu.
6. In the Install Custom Task screen, specify the Implementation Class name and then clickNext.
l Implementation Class- The Fully Qualified Class Name (FQCN) is composed of the package name and
the classname of the custom task. The format is [packageName][ClassName]. The package and class name are provided by the task vendor.
7. In the following Install Custom Task screen, type a name for the custom task and a description.
Edit Custom Task
The Edit Custom Task screen provides options to edit the custom task details and to deprecate the task. When a task is deprecated it will no longer appear in the Add Task screen unless the Include Prior Versions option is selected. When finished making changes to the custom task, click theSavebutton.
Name
The name which will be displayed when selecting a task from the Custom Tasks folder on the Add Task screen from the Project Designer.
Description
An optional description of the task.
Deprecated
If this task has been replaced by a newer version, you can indicate to have this task deprecated. Projects can still use this task, but it will not be shown in the Add Task screen unless the Include Prior Versions option is selected.
View Custom Task
The Custom Task Details screen displays information about when the custom task was created, modified and more. When finished viewing the custom task details, click theDonebutton.
License
Your organization must have a valid product license (either evaluation or permanent license) in order to run Projects inGoAnywhere Director. The License screens allows you to manage these product licenses forGoAnywhere Director.
The License screens are only available to a user with theProduct Administratorrole.
Display License
Follow the instructions below to display yourGoAnywhere Directorlicense:
1. From the main menu bar, point toAdministration,License, and then clickDisplay License.
2. License information is displayed on the screen. Click theDonebutton to return to theGoAnywhere Director Home screen.
Install License
If you do not have a product license file forGoAnywhere Director, then first run theRequest Licenseoption. Follow the instructions below to install aGoAnywhere Directorproduct license:
1. From the main menu bar, select theAdministrationoption. 2. Select theLicenseoption and then clickInstall License.
3. In theInstall Licensescreen, click theChoose Filebutton to select the location of the license file. 4. Once the file is selected, click theInstallbutton.
Uninstall Licence
Follow the instructions below to uninstall aGoAnywhere Directorproduct license: 1. From the main menu bar, select theAdministrationoption.
2. Select theLicenseoption and then clickUninstall License.
3. Click theUninstallbutton to remove theGoAnywhere Directorlicense.
Request License
Follow the instructions below to request aGoAnywhere Directorproduct license: 1. From the main menu bar, select theAdministrationoption.
2. Select theLicenseoption and then clickRequest License. 3. Follow the instructions on the screen to request the license.
Check for Updates
To check if there are any updates available forGoAnywhere Director, login as a user with theProduct Administrator role.
From the main menu bar, point toAdministrationand then clickCheck for Updates. The system will check for any updates and provide you with further Update options.
No Updates Available
If no updates are available, the current version will be displayed. Click theDonebutton to return to theGoAnywhere DirectorDashboard.
Update Found
When an update is available, the download and upgrade instructions will be shown on your screen. Click the links on the screen to view the upgrade instructions and release notes. If you are not ready to download theGoAnywhere Directorupdate at this time, click theCancelbutton to return.
You can choose to download the update files to either the server (on whichGoAnywhere Directoris installed) or download the update files to your workstation.
This screen will only download the update files. You must follow the upgrade instructions (provided in the link) to actually apply the update.
Upgrade Download Complete
During the download, a progress meter will display the download progress. When the download is complete, click theFinishbutton.
WARNING:It is highly recommended to apply the update when no other users are logged in toGoAnywhere Director and when no active jobs, scheduled jobs or monitors are running. It is important to carefully follow the upgrade instructions that will be provided in the link.
Server Log
The server log inGoAnywhere Directorcontains product-level log (audit) messages, including messages for when the product is started, when users log in and out, when Projects start and end, when errors occur, etc. For each log entry, it will show the date, time, message severity and message text.
The server log can be viewed by a user with either a Product Administrator or Security Officer role.
To view the Server Log, from the main menu bar, point to theAdministrationmenu and then clickDisplay Server Log.
Functions Available
l Download Server Log- downloads the Server Log to your workstation as a text file.
l Refresh- refreshes the Server Log, which will display any new entries that were written to the log. l Done- returns to theGoAnywhere DirectorDashboard.
Security
GoAnywhere DirectorimplementsRoles,UsersandUser Groupsto control access to specific functions in the product.
Users
In order to work withGoAnywhere Director, a user must login with a valid user name and password. These user names must be defined inGoAnywhere Director. Users can be added and managed only by a user with the Security Officer role.
The passwords for these users can be stored and authenticated withinGoAnywhere Director'sdatabase, or can be authenticated against an IBM i, LDAP or Windows Active Directory.
Each user may belong to one or moreUser Groups. The user will adopt theRoles(authorities) from any User Groups to which they belong. A user can also be granted individual roles.
The user's roles (permissions) will determine which functions the user can access inGoAnywhere Director.
The user namesadministratorandrootare included with the installation ofGoAnywhere Director. These "administrative level" users have authorization to all functions inGoAnywhere Director. After installation of GoAnywhere Director, a user with the Security Officer role should change thedefault passwordsor disable the administratorandrootaccounts, according to their corporate data security policy.
User Management
To manage User accounts, login as a user with theSecurity Officerrole. From the main menu bar, point toSecurityand then clickUsers.
Functions Available
l Adda user by clicking the Add Userlink in the sub-menu bar. l Edit a user by clicking the icon.
l Viewthe details for a user by clicking the icon. l Reseta user's password by clicking the icon.
l Delete a user by clicking the icon. Delete one or more users by selecting the appropriate check boxes and
Add User
A user can be created using theAdd Userscreen. Follow the instructions below to add a new user: 1. Login as a user with theSecurity Officerrole.
2. From the main menu, point toSecurityand then clickUsers. 3. In theUsersscreen, click the Add Userlink in the sub-menu bar. 4. Type the user information in the appropriate boxes.
5. If needed, select the individualRolesto be assigned to the user. See note below.
6. Assign the user to one or more Groups. The user will adopt the Roles from any groups to which it belongs. 7. Click theSavebutton to add the user record.
For ease of user management, it is generally not recommended to give individual Roles to a user. Instead, you should assign each user to one or more groups, in which the user will adopt the Roles from those groups. This
E-Mail Address
The user email address.
Roles
IndividualRolesfor the user.
Groups
The User Groups are split into two sections. The groups in which the user does not belong are shown on the left side of the screen. The groups in which the user does belong are shown on the right side of the screen.
The user will adopt the Roles from any groups it belongs to.
Home Directory
The home directory that this user should see when launching theFile Manager. *DOCROOT/*USER is the user's default home directory located in the global documents directory. *DOCROOT is the global documents directory. *OTHER allows the specification of a custom home directory on the file system.
Restrict to Home Directory
Indicates if the user is restricted to the specified home directory or has access to the entire file system when using the File Manager. If selected, the user will only have access to the specified home directory and its sub-directories.
File Permissions
Indicates if the user will have Read Only access to files or Read/Write access to files when using theFile Manager. Read Only means the user can only browse and download files. Read/Write means the user can browse, download, upload, copy, move, delete, and rename files.
TheHome Directory,Restrict to Home DirectoryandFile Permissionsattributes are only applicable if the user has a File Manager role.
Edit User
Follow the instructions below to edit the properties for a user: 1. Login as a user with theSecurity Officerrole.
2. From the main menu, point toSecurityand then clickUsers. 3. In theUsersscreen, click the icon next to the user.
4. Modify the field values for the user.
5. Click theSavebutton to apply the changes.
For ease of User management, it is generally not recommended to give individual Roles to a user. Instead, you should assign each user to one or more groups, in which the user will adopt the Roles from those groups. This allows you to quickly adjust Roles for several users at once by changing the Roles for the group(s) which they belong.
Roles
IndividualRolesfor the user.
Groups
The User Groups are split into two sections. The groups in which the user does not belong are shown on the left side of the screen. The groups in which the user does belong are shown on the right side of the screen.
The user will adopt the Roles from any groups it belongs to.
Home Directory
The home directory that this user should see when launching theFile Manager. *DOCROOT/*USER is the user's default home directory located in the global documents directory. *DOCROOT is the global documents directory. *OTHER allows the specification of a custom home directory on the file system.
Restrict to Home Directory
Indicates if the user is restricted to the specified home directory or has access to the entire file system when using the File Manager. If selected, the user will only have access to the specified home directory and its sub-directories.
File Permissions
Indicates if the user will have Read Only access to files or Read/Write access to files when using theFile Manager. Read Only means the user can only browse and download files. Read/Write means the user can browse, download, upload, copy, move, delete, and rename files.
TheHome Directory,Restrict to Home DirectoryandFile Permissionsattributes are only applicable if the user has a File Manager role.
Reset User Password
If user passwords are authenticated against another system (for example, IBM i or Active Directory), then only the passwords for theadministratorandrootusers should be changed from this screen. Passwords specified for users when they are authenticated against another system are ignored. Users can change their own password by clicking theChange Passwordlink, which is located in the upper-right corner of theGoAnywhere DirectorAdministrator screen.
Follow the instructions below to change (reset) the password for a user: 1. Login as a user with theSecurity Officerrole.
2. From the main menu bar, point toSecurity, and then clickUsers.
3. In theUsersscreen, click the icon next to the user for whom you wish to change the password. 4. Type the new password for both thePasswordandConfirm Passwordfields.
View User
TheUser Detailsscreen shows the properties for the user, when the user was created and when it was last modified. It also shows the Roles assigned to the user and the groups to which it belongs. Follow the instructions below to view the properties for a user:
1. Login as a user with theSecurity Officerrole.
2. From the main menu bar, point to Securityand then clickUsers. 3. In theUsersscreen, click the icon next to the user you wish to view.
User Groups
A User Group is an association of one or moreUsers. Each User Group can be assigned specificRolesfor controlling access to variousGoAnywhere Directorfunctions. Any users belonging to a User Group will adopt the Roles from the Group.
For instance, you may want to create a User Group for the developers in your organization and assign Roles (authority) to design Projects, create Resources, run Projects and work with Jobs. Another User Group could be created for any end-users that would only have authority to execute Projects.
Group Management
To work with Groups, login as a user with theSecurity Officerrole. From the main menu bar, point toSecurityand then clickGroups.
Functions Available
l Adda Group by clicking the Add Grouplink in the sub-menu bar. l Edita Group by clicking the icon next to the Group.
l Viewa Group by clicking the icon next to the Group.
l Delete a Group by clicking the icon next to the Group. You can additionally delete one or more Groups by
Add Group
Follow the instructions below to add a new Group: 1. Login as a user with theSecurity Officerrole.
2. From the main menu bar, point toSecurityand then clickGroups. 3. In theGroupsscreen, click the Add Grouplink in the sub-menu bar. 4. Type the Group information in the appropriate boxes.
5. Click to select theRolesthat will be assigned to the group. 6. Assign the members (users) to the Group.
7. Click theSavebutton to add the Group.
Assigning Members (Users) to a Group:
Perform the following steps to assign users to a Group:
1. On the left side of the screen, select (highlight) the users to assign to the group. Multiple entries can be selected by holding down the Ctrl or Shift key while clicking the mouse.
2. Click the arrow.
3. The selected users will move to the right side of the screen. 4. Click theSavebutton to apply the changes.
Removing Members (Users) from a Group:
Perform the following steps to remove users from a Group:
Edit Group
Follow the instructions below to edit a Group:
1. Login as a user with theSecurity Officerrole.
2. From the main menu, point toSecurityand then clickGroups.
3. Open theGroupsscreen and then click the icon next to the Group to edit. 4. Modify the field values for the Group.
5. Click theSavebutton to apply the changes.
Assigning Members (Users) to a Group:
Perform the following steps to assign users to a Group:
1. On the left side of the screen, select (highlight) the users to assign to the group. Multiple entries can be selected by holding down the Ctrl or Shift key while clicking the mouse.
2. Click the arrow.
3. The selected users will move to the right side of the screen. 4. Click theSavebutton to apply the changes.
Removing Members (Users) from a Group:
Perform the following steps to remove users from a Group:
1. On the right side of the screen, select (highlight) the users to remove from the group. Multiple entries can be selected by holding down the Ctrl or Shift key while clicking the mouse.
2. Click the arrow.
3. The selected users will move to the left side of the screen. 4. Click theSavebutton to apply the changes.
View Group
Follow the instructions below to view the properties for a Group: 1. Login as a user with theSecurity Officerrole.
2. From the main menu bar, point toSecurityand then clickGroups. 3. In theGroupsscreen, click the icon next to the Group you wish to view.