SANGFOR WOC
(Version 9.0-9.1)
User Manual
Table of Contents
Table of Contents...1
Declaration...6
Preface...7
About This Manual ...7
Document Conventions...8
Graphic Interface Conventions ...8
Symbol Conventions...9
CLI Conventions...9
Technical Support ...10
Acknowledgements...10
Chapter 1 Knowing Your Sangfor Device... 11
Operating Environment... 11
Product Appearance ... 11
Connecting Sangfor Device ...12
Chapter 2 Initial Login to Admin Console...14
Logging in to Admin Console...14
Modifying Administrator Password ...16
Chapter 3 Deployment and Configuration ...17
Device Deployment...18
Deploying WOC in Gateway Mode...18
Deploying WOC in Single Arm Mode...22
Deploying WOC in Double Arm Mode ...25
Deploying WOC in Bridge Mode ...26
Deploying WOC in Double Bridge Mode...31
System Settings...33
System Time...33
NTP Servers ...33
Web UI Settings ...34
Advanced System Settings...34
Network Settings...36
Local Subnet ...36
Creating Local Subnet...36
Policy-Based Route...37
Creating Static Route ...41
Dynamic Routing...41
Windows Domain...43
VPN Interface ...44
VLAN Setting ...45
CDP Settings...46
WCCP Settings...46
Configuring Multiline ...50
Network Interface Card (NIC) ...51
Users ...52
Creating User ...54
Creating IP Group ...54
Creating Application ...55
Creating Schedule ...57
Viewing Algorithms...58
Configuring IP Assignment Options (DHCP)...59
Configuring Syslog Server...61
Configuring SNMP Server...62
Adding SNMP Traps...63
Central Management...64
Chapter 4 Sangfor VPN...66
Viewing VPN Status ...65
Setting Up Inbound VPN Connection...67
Basic Setting ...67
Sangfor VPN Users...70
Searching for VPN Users...71
Creating VPN User ...72
Creating User Group...75
Importing Users ...76
Importing Users from Text File...76
Importing Users from LDAP Server...77
Exporting Users ...77
Virtual IP Pool...78
Creating Virtual IP Pool for Mobile VPN Users...78
Creating Virtual IP Pool for Branch VPN Users...81
Creating Schedule ...82
Creating Multiline Policy...85
Configuring LDAP Server ...90
Configuring RADIUS Server...93
Configuring VPN Local Subnet...93
Configuring LAN Service...95
Configuring Multicast Service...98
Configuring Tunnel Route ...100
Configuring Tunnel NAT ...103
Generating Certificate...105
Chapter 5 WAN Optimization...106
Application Proxy ...106
HTTP Proxy ...106
CIFS Proxy...107
SMTP Proxy...108
POP3 Proxy...108
Exchange Proxy ...109
Oracle EBS Optimization...109
Citrix Optimization ... 112
RDP Optimization... 114
Video Optimization... 114
Byte Cache... 117
Setting Up Inbound Acceleration Connection...121
Creating User ...121
Acceleration Policy...123
Acceleration Policy Group...124
Setting Up Outbound Acceleration Connection...127
Creating Profile of Peer WOC ...127
Prefetching ...131
Certificates...134
Server Certificate ...134
CA Certificate ...136
Exclusion Rule...139
Creating Exclusion Rule ...139
Viewing WAN Optimization Status ...142
Chapter 6 Bandwidth Management ...143
Application Identification ...143
Intelligent Identification...145
URL Group ...146
File Type Group ...147
User Group...148
Access Control Policy...152
Creating Access Control Policy ...152
Bandwidth Control...159
Virtual Line ...160
Creating Virtual Line...160
Bandwidth Channel...163
Creating Assured Bandwidth Channel ...163
Creating Limited Bandwidth Channel ...165
Creating Bandwidth Control Exclusion Rule...167
Viewing Bandwidth Usage...169
Troubleshooting ...171
Proxy Server...172
Excluded IP...172
Internal Rule Auto Update ...173
Chapter 7 Firewall ...174
Configuring Source NAT Rule...174
Configuring Destination NAT Rule ...175
Creating Firewall Rule...177
Anti-DoS...180
ARP Protection ...181
Chapter 8 High Availability...183
Chapter 9 IPSec VPN...185
Configuring Peer Device (Phase I) ...185
Creating Inbound/Outbound Policy (Phase II)...187
Security Options...189
Chapter 10 Maintenance ...194
Licensing Sangfor WOC and Function Modules ...194
Backing Up or Restoring System Settings...196
Backing Up or Restoring WANO Settings...196
Shutdown ...198
Web Console ...200
Viewing Logs...201
Appendix B: PACC & Mobile VPN Client ...203
Software Installation ...203
Network Deployment...207
Deployment of WOC for Use of PACC&PDLAN...207
Deployment of WOC for Use of PACC ...208
Configuration...208
System Settings... 211
Mobile VPN Settings ...212
Setting Up Outbound VPN Connection ...214
PACC Settings & WAN Optimization Status...216
Appendix C: Sangfor Firmware Updater ...220
Updating Your Sangfor Device ...220
Declaration
Copyright © 2013 Sangfor Inc. All rights reserved.
No part of the contents of this document shall be extracted, reproduced or transmitted in any form or by any means without prior written permission of SANGFOR.
SINFOR, SANGFOR and the Sangfor logo are the trademarks or registered trademarks of Sangfor Inc. All other trademarks used or mentioned herein belong to their respective owners.
This manual shall only be used as usage guide, and no statement, information, or suggestion in it shall be considered as implied or express warranty of any kind, unless otherwise stated. This manual is subject to change without notice. To obtain the latest version of this manual, please contact the Customer Service of Sangfor.
Preface
About This Manual
This WAN Optimization Controller (WOC) User Manual includes the following chapters:
Chapter Describe…
Chapter 1 Knowing Your The product appearance, features and performance parameters of Sangfor Device Sangfor WOC, wiring and cautions before installation
Chapter 2 Initial Login to Admin Console
The configuration steps required when administrator accesses the Web administrator console of Sangfor WOC for the first time
Chapter 3 Deployment and Configuration
How to deploy the physical Sangfor WOC and configure system and network related settings through the administrator console
Chapter 4 Sangfor VPN How to configure Sangfor VPN to establish inbound/outbound secure VPN connection to a remote Sangfor WOC
Chapter 5 WAN Optimization
How to configure WAN optimization module to accelerate data transmitted across the WAN
Chapter 6 Bandwidth Management
How to configure bandwidth management module to ensure or restrict bandwidth usage of specific application, user or IP address.
Chapter 7 Firewall
How to configure firewall related settings
Chapter 8 High Availability
How to configure the high availability (HA) feature, which makes the system redundant and run more stable
Chapter 9 IPSec VPN How to set up IPSec VPN connection between Sangfor WOC and third-party VPN device
Chapter 10 Maintenance How to license the Sangfor WOC, maintain and debug the system, etc.
Appendix A: Internal
How to enter and use the internal WOC Report Center Report Center
Appendix B: PACC & Mobile VPN Client
The installation and usage of the Portable Acceleration (PACC) client and Mobile VPN client
Appendix C: Sangfor Firmware Updater
How to use Sangfor Firmware Updater 6.0 to update the Sangfor device
Document Conventions
Graphic Interface Conventions
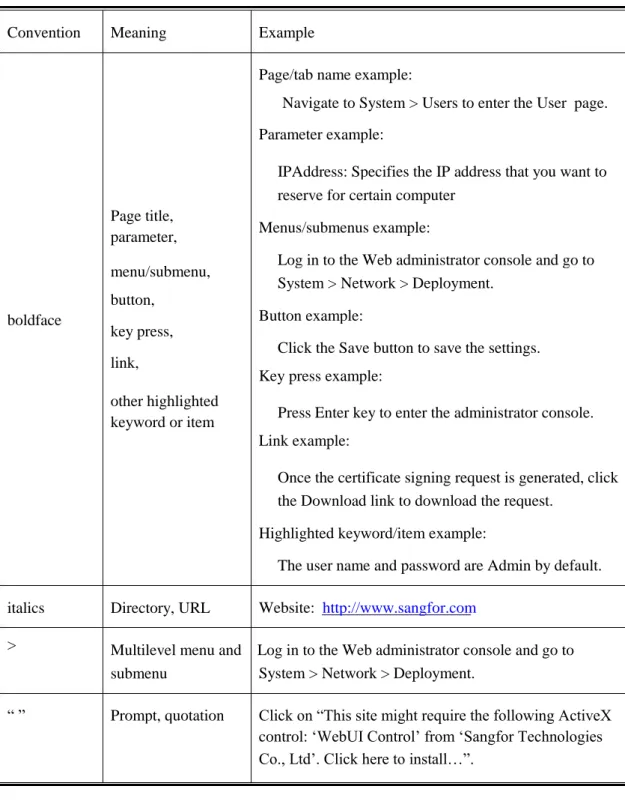
This user manual uses the following typographical conventions for special terms and instructions:
Convention Meaning Example
Page/tab name example:
Navigate to System > Users to enter the User page. Parameter example:
IPAddress: Specifies the IP address that you want to reserve for certain computer
Page title,
parameter, Menus/submenus example:
Log in to the Web administrator console and go to menu/submenu,
button,
key press, link,
System > Network > Deployment.
Button example: boldface
Click the Save button to save the settings. Key press example:
other highlighted
keyword or item Press Enter key to enter the administrator console. Link example:
Once the certificate signing request is generated, click the Download link to download the request.
Highlighted keyword/item example:
The user name and password are Admin by default.
italics
>
Directory, URL Website: http://www.sangfor.com
Multilevel menu and Log in to the Web administrator console and go to submenu System > Network > Deployment.
“ ” Prompt, quotation Click on “This site might require the following ActiveX control: ‘WebUI Control’ from ‘Sangfor Technologies Co., Ltd’. Click here to install…”.
Symbol Conventions
This manual also adopts the following symbols to indicate the parts which need special attention to be paid during the operation:
Convention Meaning Description
Indicates actions that could cause setting error, loss of data or damage to the device
Caution
Warning
Note
Indicates actions that could cause injury to human body
Indicates information
helpful suggestion or supplementary
CLI Conventions
Command syntax on Command Line Interface (CLI) applies the following conventions:
Content in brackets ( ]) is optional Content in {} is necessary
If there is more than one option, use vertical bar (|) to separate each option, for example, ip wccp 60 redirect { in | out }
CLI command appears in bold, for example: configure terminal
Variables appear in italic, for example: interface e0/1
Technical Support
For technical support, please contact us through the following:
Website: http://www.sangfor.com
MSN, Email: [email protected]
Skype: sangfor.tech.support
Tel: + 60 3 2282 1206
Acknowledgements
Thanks for using our product and user manual. If you have any suggestion about the product or user manual, please provide feedback to us through phone call or email. Your suggestion will be much appreciated.
Chapter 1 Knowing Your Sangfor Device
This chapter introduces the Sangfor WAN Optimization Controller (WOC) and the way of connecting Sangfor WOC. After proper hardware deployment and installation, you can configure and debug the system.
Operating Environment
Voltage input: 110V/230V (AC, alternating current) Temperature: 0-45°C
Humidity: 5%-90%
To ensure endurance and stability of the Sangfor WOC, please ensure the following:
The power supply is well grounded Dustproof measures are taken
Working environment is well ventilated Indoor temperature is kept stable
This product conforms to the requirements on environment protection. The placement, usage and discard of the product should comply with the relevant national laws and regulations of the country where it is applied.
Product Appearance
Front Panel of SANGFOR WOC 2050
Above is the front panel of SANGFOR WOC 2050. The interfaces from left to right are described in the following table:
Interface Description
CONSOLE Network interface used for high availability (HA) feature or used by device supplier to debug system.
ETH0
ETH1
ETH2
ETH3
LAN interface, connecting to the LAN network segment; orange LED on the left side indicates link status, while green LED on the right side indicates data flow.
DMZ interface, connecting to the DMZ network segment; orange LED on the left side indicates link status, while green LED on right side indicates data flow.
WAN1 interface, connecting to the first Internet line; orange LED on the left side indicates link status, while green LED on the right side indicates data flow.
WAN2 interface, connecting to the second Internet line; orange LED on the left side indicates link status, while green LED on the right side indicates data flow.
POWER
ALARM
Power LED
Alarm LED
The picture above is just for reference. The actual product you purchased and received may vary.
Connecting Sangfor Device
After deploying the Sangfor WAN Optimization Controller (WOC) in your network (for details, please refer to the Device Deployment section in Chapter 3), follow the instructions below to connect the Sangfor WOC.
1. Plug the power cable into the power interface on the rear panel of the device. Attach and turn on power supply, and then watch the LEDs on the front panel of the Sangfor WOC.
When the device starts up, ALARM LED will turn on and keep on for 1 to 2 minutes, then turn off; POWER LED (in green) will turn on; connection status LEDs (in orange) next to WAN and LAN interface will also turn on.
After successful bootup, POWER LED (in green), connection status LEDs (in orange) WAN and LAN interface will stay on. If data are being transferred through a port, the data flow LED (in green, beside connection status LED) will blink.
If ALARM LED stays on always, please switch off the power supply and reboot the device. If ALARM LED still keeps on after reboot, contact SANGFOR Customer Service.
If the corresponding LED indicates normal working status, turn off and unplug the power supply, and perform the following steps.
2.
3.
4.
Use RJ-45 straight-through Ethernet cable to connect the LAN interface to the internal network.
Use RJ-45 Ethernet crossover cable to connect the WAN1 interface to the external network, (i.e., router, optical fiber transceiver or ADSL Modem for external network).
If you want the Sangfor WOC to provide secure protection for DMZ (Demilitarized Zone), use RJ-45 Ethernet cable to connect DMZ interface to the DMZ network from which Web server, SNMP Server are providing services to external networks.
Use crossover cable to connect WAN interface to the router for external network. Use straight-through cable to connect LAN interface to switch in the internal network. For direct access to administrator Web console, use crossover cable to connect LAN interface to the computer.
In case session cannot be established but the corresponding LED indicates normal working status, please check whether the right type of cables are being used. The differences between straight-through cable and crossover cable are shown in the figures on the following page.
Chapter 2 Initial Login to Admin Console
Sangfor WAN Optimization Controller (WOC) provides Web-based administration. The initial URL for Web administrator console access is http://10.254.254.254.
Before logging in to administrator console of WOC, please ensure the following:
Deploy a computer in the subnet where the Sangfor WOC resides.
Connect the PC’s network interface card (NIC) and LAN interface of Sangfor WOC to a same layer-2 switch, or connect the PC’s NIC to LAN interface directly with a network cable.
Ensure IE browser is installed on the PC. Non-IE browsers Opera, Firefox, Safari and Chrome are not supported.
Logging in to Admin Console
1. Turn on the PC and the Sangfor WOC. Add an IP address on the PC, an IP address that resides in the network segment 10.254.254.X (for instance, 10.254.254.100) with subnet mask 255.255.255.0, as shown below:
2. Open the IE browser and enter the URL address (http://10.254.254.254) into the address bar. Press Enter key to visit the login page to Web administrator console, as shown below:
3. Before login, you may install the required ActiveX control, as shown below:
Click on “This site might require the following ActiveX control: ‘WebUI Control’ from ‘Sangfor Technologies Co., Ltd’. Click here to install…” and then click on “Install ActiveX Control…” to install the control, as shown below:
If no pop-up appears, click the link ActiveX on the login page to download the required ActiveX controls.
4. Enter the administrator username and password and click the Log In button. The default administrator username is admin (case-insensitive) and password is Admin (case-sensitive).
5. 6.
To download root CA certificate, click on the link Root CA.
Modifying Administrator Password
We strongly recommend you to change the administrator password on initial login, so as to prevent others from logging in to the administrator Web console and using default admin credentials to make unauthorized changes on the administrator account and initial configurations.
To modify default administrator password, perform the following steps:
1. Navigate to System > Users to enter the Users page. The default administrator account is admin, super administrator of the system.
2. Click the account name admin to edit information of the administrator account:
3. Enter and confirm the new password and click the OK button.
Password of the account admin should not be shared with anyone.
If the Sangfor WOC is to be maintained by several administrators, create multiple administrator accounts for segregation of duty.
Chapter 3 Deployment and Configuration
After logging in to the administrator console, you will see the left tree of configurable modules, including System, Sangfor VPN, IPSec VPN, WAN Optimization, Bandwidth Management, Firewall, High Availability and Maintenance.
What needs to be noted is that some modules may be invisible to you if the corresponding licenses are not purchased.
During configuration, if there is an OK, Save or Save and Apply button on a page, click it after modifying or configuring the parameters to save or apply the settings on that page. This will not be illustrated again in the subsequent parts in this user manual.
Device Deployment
The first thing you need to consider before deploying the physical Sangfor WAN Optimiztion Controller (WOC) in your network is what deployment mode you should use, in that system and network setting are subject to the deployment mode you choose. Take CDP and WCCP for example. The two pages are available only in Acceleration Only service mode and Single arm deployment mode.
Sangfor WOC supports Gateway Mode (or in-line mode in another term), Bridge Mode, Double Bridge mode, Single Arm mode and Double Arm mode with Acceleration Only functionality, as well as Gateway mode and Single Arm mode with VPN and Acceleation functionalities.
The followings sections describe what each mode is like and how to perform the essential configuration.
Deploying WOC in Gateway Mode
Posit your Sangfor WOC on your network. Connect it to the other network (for details, please refer to the section
1. Connecting Sangfor Device in Chapter 1). The network topology with WOCs deployed in Gateway mode is as shown in the figure below:
2. Log in to the Web administrator console and go to System > Network > Deployment. Select service mode Acceleration Only or VPN and Acceleration, and deployment mode Gateway mode, as shown in the figure below:
3. Configure the fields on the above page. The following are the contents included on the Deployment page with Gateway mode selected:
Service Mode: Service mode falls into Acceleration Only and VPN and Acceleration.
Acceleration Only: If this option is selected, only acceleration feature is enabled, which means the Sangfor VPN feature does not work. Under this service mode, you can deploy the WAN Optimization Controller (WOC) in Gateway mode, Bridge mode, Double Bridge mode, Single Arm mode and Double Arm mode.
VPN and Acceleration: If this option is selected, both Sangfor VPN and acceleration features are enabled. This service mode is suitable for the environment that the local and peer WAN Optimization Controllers are deployed in public networks and need to establish VPN connection in between. The Sangfor VPN module can help to build VPN tunnel on which acceleration connection is established between the two terminals.
LAN Interface: Configures the IP address of the internal interface, LAN interface, which is protected by the firewall. This IP address must be identical as that of the physical LAN interface on the Sangfor WOC.
corresponding to an WAN link.
Line: Select a line and the configured IP address, network mask and gateway are applied to that internet line.
Line Type: Defines how the specified WAN link connects to the Internet and how the public IP address is assigned. Options are Ethernet, PPPoE and DHCP. Prarameters of each type vary. You can select Ethernet and configure the IP address, netmask and default gateway by hand, or select PPPoE to have it dial up or auto-dialup to the the Internet, or simply select DHCP to use DHCP to automatically assign a public IP address to the WAN interface.
Dial Up: Before new PPPoE settings take effect, all the services will restart. After restart, you can go to this page again and click the Dial Up button to connect the Sangfor WOC to the Internet. If Auto Dial-up is enabled, the WOC will automatically dial up again once it disconnects from the Internet.
Advanced: Click this button to configure the advanced options of PPPoE, handshake times, timeout and maximum attempts, which are 20, 80 and 3 by default.
Multi-IP: If WAN interface uses static IP address, you can bind multiple IP addresses to it by clicking this button and add the IP address/netmask entry.
The IP address binding to WAN interface cannot be the same as the WAN interface IP you configured previously, yet should be in the same network segment as that WAN interface; otherwise, the binding IP address will not work properly.
None of the binding IP addresses should be used by VPN settings.
MTU: It is Minimum Transmission Unit in short. Default is the Ethernet standard value 1500 bytes. In some network environment, if the MTU of certain network device is lower than 1500, the related data packets might be discarded; in that case, you can manually modify this MTU value and keep it relevant with other network devices.
DMZ Interface: Configures the IP address and netmask of the internal interface, DMZ inteface. DMZ is a network segment on a local area network. Some servers are located in DMZ, such as web server, mail server, FTP server and external DNS server and so on, providing services for the external networks. The firewall allows the services from this network segment to be delivered over WAN and protects them from attacks at the same time.
IP addresses of LAN interface, WAN interface and DMZ interface must be coherent with the actual IP addresses of the physical interfaces.
If the physical DMZ interface is not connecting to the DMZ, keep the default settings unchanged.
DNS Servers: Indicates the Domain Name Server provided by the local Internet Service Provider (ISP) to solve domain names. Preferred DNS is required while Alternate DNS is optional.
4. 5.
Configure Sangfor VPN (for details, please refer to Chapter 4 Sangfor VPN).
Go to WAN Optimization to complete WAN optimization settings (for details, please refer to the section Chapter 5 WAN Optimization).
6. If your network is divided into several network segments and deployed with a layer 3 switch, go to System > Network > Local Subnet to add route for each network segment (except the network segment in which the LAN interface resides) on the WOC to ensure normal communication between this WOC and the hosts on other network segments.
Deploying WOC in
Single Arm Mode
Sangfor WOC can be deployed in Single Arm mode in two situations, Internet environment and leased line environment, which are slightly different in network topology and configuration.
The following are the steps of how to deploy WOC in Internet environment:
Posit your Sangfor WOC in your network. Connect it to the other network devices (for details, please refer to the section
1. Connecting Sangfor Device in Chapter 1).
The network topology with WOCs deployed in Single Arm mode is as shown below:
2. Log in to the Web administrator console and go to System > Network > Deployment. Select service mode Acceleration Only or VPN and Acceleration, and deployment mode Single arm.
3. Configure the fields on the above page. The following are the contents included on the Deployment page with Acceleration Only and Single Arm selected:
Service Mode: Service mode falls into Acceleration Only and VPN and Acceleration.
Acceleration Only: If this option is selected, only acceleration feature is enabled, which means the VPN feature does not work. Under this service mode, you can deploy the WOC in Gateway mode, Bridge mode, Double Bridge mode, Single Arm mode and Double Arm mode.
VPN and Acceleration: If this option is selected, both VPN and acceleration features are enabled. This service mode is suitable for the environment that the local and peer WAN optimization controllers are deployed in public networks and need to establish VPN connection in between. The Sangfor VPN module can help to build VPN tunnel on which acceleration connection is established between the two terminals.
LAN Interface: Configures the IP address of the internal interface, LAN interface, which is protected by the firewall. This IP address must be identical as that of the physical interface on the Sangfor WOC.
Arm Interface: Select a internet line that this interface is corresponding to, and configure the IP address, subnet mask and default gateway. This section is missing if the service mode is Acceleration Only.
DMZ Interface: Configures the IP address and netmask of the internal interface, DMZ inteface. DMZ is a network segment in an enterprise network. Some servers are located in DMZ, such as web server, mail server, FTP server and external DNS server and so on, providing services for the external networks. The firewall allows the services from this network segment to be delivered over WAN and protects them from attacks at the same time.
DNS Servers: Indicates the Domain Name Server provided by the local Internet Service Provider (ISP) to solve domain names. Preferred DNS is required while Alternate DNS is optional.
4. 5.
Configure Sangfor VPN (for details, please refer to Chapter 4 Sangfor VPN).
Configure WAN Optimization module (for details, please refer to Chapter 5 WAN Optimization).
6. Configure the gateway IP address on the internal computers to have the gateway of internal computers direct to the LAN interface of the WOC, or enable the policy-based routing or WCCP function on the frontend switch or router.
The following are the steps of how to deploy WOC in leased line environment:
Posit your Sangfor WOC in your network. Connect it to the other network devices (for details, please refer to the section
2. Log in to the Web administrator console and go to System > Network > Deployment. Select service mode Acceleration Only or VPN and Acceleration, and deployment mode Single arm. The Deployment page is the same as that when WOC is deployed in Internet environment. Please refer the Step 3 in the above section.
3.
4.
Configure WAN Optimization module (for details, please refer to Chapter 5 WAN Optimization).
Configure the gateway IP address on the internal computers to have the gateway of internal computers direct to the LAN interface of the WOC, or enable the policy-based routing or WCCP function on the frontend switch or router.
If your network is divided into several subnets, go to System > Network > Local Subnet and Sangfor VPN > Advanced > VPN Local Subnet to add the all the subnets into the local subnet list except the one in which the LAN interface of the WOC resides.
For Single-arm WOC deployed in leased line environment, routing loop may appear and disable data transfer between the devices at both ends. You may ensure the following to avoid routing loop:
a. b.
In Layer 2 environment, have the gateway of the internal PCs direct to the Sangfor WOC;
In Layer 2 environment, add a route for each PC that directs to the peer terminal, the local WOC as the gateway of the route;
c. d.
Enable policy-based routing and CDP on the frontend device; Enable WCCP function on the frontend device.
Deploying WOC in
Double Arm Mode
Posit your Sangfor WOC in your network. Connect it to the other network devices (for details, please refer to the section
1. Connecting Sangfor Device in Chapter 1).
2. Log in to the Web administrator console and go to System > Network > Deployment. Select service mode Acceleration Only, and deployment mode Double arm.
3. Configure the fields on the above page. The following are the contents included on the Deployment page with Acceleration Only and Double arm mode selected:
Service Mode: Service mode falls into Acceleration Only and VPN and Acceleration. However, Double arm mode is available only in Acceleration Only service mode, which indicates acceleration feature is enabled and VPN feature does not work.
Working IP: Configures virtual IP address of the double arms. It should be able to communicate with the peer WOC. The local WOC uses this IP address to establish acceleration connections with other remote WAN Optimization Controllers.
Arm Interface: Configures the IP address, subnet mask and default gateway of the two arm interfaces respectively. The IP addresses of Arm 1/Arm 2 and the working IP could (or not) be on a same network segment, but they should be able to communicate with the internal network.
Manage Interface: Select a interface as the Manage interface of the WOC.
DNS Servers: Indicates the Domain Name Server provided by the local Internet Service Provider (ISP) to solve domain names. Preferred DNS is required while Alternate DNS is optional.
4. Configure WAN Optimization module (for details, please refer to Chapter 5 WAN Optimization).
If the peer WOC initiates acceleration connection to the local WOC that is deployed in Double single arm mode, you need to enable pre-connection on the peer WOC.
Deploying WOC in
Bridge Mode
Posit the Sangfor WOC in your network. Connect it to the other network devices (for details, please refer to the section
1. Connecting Sangfor Device in Chapter 1). The network topology with WOCs deployed in Bridge mode is shown in the figure below:
2. Log in to the Web administrator console and go to System > Network > Deployment. Select service mode Acceleration Only or VPN and Acceleration and deployment mode Bridge.
3. Configure the fields on the above page. The following are the contents included on the Deployment page with Acceleration Only and Bridge mode selected:
Service Mode: Service mode falls into Acceleration Only and VPN and Acceleration. However, Bridge mode is available only in Acceleration Only service mode.
Acceleration Only: Under this service mode, acceleration feature is enabled, which means the VPN feature cannot work.
VPN and Acceleration: If this option is selected, both Sangfor VPN and acceleration features are enabled. This service mode is suitable for the environment that the local and peer WAN Optimization Controllers are deployed in public networks or lease line environment and need to establish VPN connection in between. The Sangfor VPN module can help to build VPN tunnel on which acceleration connection is established between the two terminals.
30-bit mask network: This option is for when the router and core switch in 30-bit subnet and no more available IP address. After enable this option you can insert another segment IP in bridge interface. (Make sure this IP is able to reach by route) After that make sure to configure a manage interface to manage WANO and join domain for Exchange optimization. If Domain controller is different range with the manage IP, you may configure a static route.
Bridge Interface: Select an interface pair to form a bridge between the external network and internal network. Options are LAN(eth0)->WAN1(eth2) and DMZ(eth1)->WAN2(eth3).
Logic Interface: Configures the IP address, subnet mask and default gateway of the logic interface, Br0.
Manage Interface: Configures the IP address of the Manage interface of the WOC. You can select any interface as the Manage interface except the interface pair used for bridging.
DNS Servers: Indicates the Domain Name Server provided by the local Internet Service Provider (ISP) to solve domain names. Preferred DNS is required while Alternate DNS is optional.
Under Bridge mode, LAN interface (eth0) and WAN (eth2/3) interface cannot be mixed up; otherwise, no acceleration effect will be achieved.
The IP address of the logic interface must be on the same subnet segment as the firewall device/ router for external network and the core switch for internal network.
The Manage interface can only be used for managing the Sangfor WOC, not supporting other uses such as connecting to the Internet.
To configure Bridge mode, you need to ensure that the two WAN Optimization Controllers are able to communicate with each other through the VPN tunnel established by a VPN device or through a leased line.
Deploying WOC in
Double Bridge ModePosit your Sangfor WOC in your network. Connect it to the other network devices (for details, please refer to the section
1. Connecting Sangfor Device in Chapter 1). The network topology with WOCs deployed in Double Bridge mode is as shown in the figure below:
2. Log in to the Web administrator console and go to System > Network > Deployment. Select service mode Acceleration Only and deployment mode Double bridge. The Deployment page is as shown in the figure below:
3. Configure the fields on the above page. The following are the contents included on the Deployment page with Double Bridge mode selected:
Service Mode: Service mode falls into Acceleration Only and VPN and Acceleration. However, Double Bridge mode is available only in Acceleration Only service mode, which indicates acceleration feature is enabled and VPN feature does not work.
30-bit mask network: This option is for when the router and core switch in 30-bit subnet and no more available IP address. After enable this option you can insert another segment IP in bridge interface. (Make sure this IP is able to reach by route) After that make sure to configure a manage interface to manage WANO and join domain for Exchange optimization. If Domain controller is different range with the manage IP, you may configure a policy route.
environment (such as VRRP). Once the system detects that any interface of the bridge pair falls out, it will automatically disconnect the other interface of the bridge pair, to ensure smooth data transmission and switch between the clustered WAN optimization controllers.
Logic Interface: Configures the working IP address, subnet mask, default gateway and MTU of the two bridge pairs respectively.
If IP addresses of the two logic interfaces Br0 and Br1 are on a same network segment, the Working IP should be on the same network segment. If IP addresses of the two logic interfaces Br0 and Br1 are NOT on a same network segment, the Working IP should not be on the same network segment as either of them, and you need to ensure that the peer Sangfor WOC can connect to this working IP address.
If there is a layer 3 switch on the local area network, Default Gateway(LAN/DMZ) must be filled in; otherwise, leave the two fields empty.
System Settings
System settings include System Time, NTP Server, Web UI and Advanced settings.
System Time
1. Navigate to System > System to enter the System Time page, as shown below:
2. Configure the following:
Time Zone: Specifies the time zone of the country or region where your Sangfor device is resides.
Date: Specifies the date. To select date, click the icon.
Time: Specifies the time. Enter the time into this field and set it as the current time of this Sangfor WOC. Date format should be hh: mm: ss.
3. Click the Save and Apply button to save the settings. This operation leads to service restart.
NTP Servers
Enter the addresses of the Network Time Protocol (NTP) servers, and then click the Sync Now button to synchronize time with the server right now.
Web UI Settings
Web UI settings include Web service port of the administrator console and the inactivity timeout.
The following are the contents included on the Web UI tab:
HTTPS Login Port: Configures the HTTPS port used for logging in to the Web administrator console. If HTTPS port is modified, you need to log in through the new port.
Page Timeout: If no operation is performed on the administrator console for so long a period of time, the console user will be logged out. In unit of minute.
Operation Timeout: If a page fails to open after loading so long a period of time, it will get timed out.
Advanced System Settings
Advanced system settings includes listening port for acceleration service, device name and others.
Listening Port: Configures the listening port of acceleration service. It is TCP and UDP 5400 port by default. WOC at both ends must be able to access its peer listening port normally; otherwise, acceleration connection cannot be established between the two WOCs.
Device Name: Configures the name of the WOC, which distinguishes it from the peer or the WOC at other sites. You can view device name and version information by clicking on About at the upper-right of the page.
Track MAC address: Select this option so that the MAC address could be tracked in Single bridge mode, even there is a layer-3 switch is involved. In that case, you need not to add packet-return route.
Track MAC address feature takes effect only in Single bridge mode.
Enable High-Speed TCP Protocol: Select this option to enable High-Speed TCP Protocol (HTP). HTP is a variable TCP protocol that is enhanced by SANGFOR.
Enable HTP (tcp packet) in VPN TCP tunnel: Select this option to enable use of HTP in VPN TCP tunnel.
Network Settings
In addition to deployment settings, you may need to complete the other network related configuration after configuring the Deployment page, such as local subnet, static route, dynamic route, Windows Domain, VPN interface, VLAN, multi-line, CDP and WCCP settings.
Local Subnet
The so-called local subnet is any network segment thought on the LAN where the WAN Optimization Controller (WOC) is deployed, yet excluding the network segment in which the LAN interface of the WOC resides. Connecting VPN users can access the machines in those subnets even those machines and the Sangfor WOC are on different subnets physically.
Creating Local Subnet
Suppose the enterprise network is divided into two subnets, 192.168.10.0/24 and 192.168.20.0/24, and the Sangfor WOC is deployed in Single Arm mode, LAN interface IP and subnet mask is 192.168.10.0/24.
Perform the following steps to add the other subnet into the local subnet list.
1. 2.
Go to System > Network > Local Subnet page and click New.
Enter the 192.168.20.0 into the IP Address field and 255.255.255.0 into the Subnet Mask field.
Policy-Based Routing
Policy route can base on the policy (application type, source IP, destination IP, etc.) to achieve the purpose multiple lines routing, load balancing and backup lines.
The Policy-Based Routing page is as shown below:
Lines : Define transfer line
Name of these line name
Outgoing Interface Select corresponding physical network interface, vpn interface, pppoe interface.
Next-Hop Next-Hop IP address, available on bridge mode only
Link state detection Detect link status. DNS detection method suitable for dial-up lines and not able Ping link. Ping detection method suitable for leased line or vpn line.
Detection Interval Max Attempts
Interval of detection packet.
Maximum attempts on detection packet.
Name Description
Source IP Source IP group, define in Objects->IP Group. Destination IP group, define in Objects->IP Grou. Rule Description
Dst IP Rule Desc Match Clause Line
Matching policy, can match with protocol or application. Select route to which line
Priority Precedence
Static Route
Static route is intended to route the data packets (both VPN relevant and irrelevant) that need to be forwarded by the WAN Optimization Controller (WOC) and the data packets from or to the WAN WOC itself.
Creating Static Route
Perform the following steps to add a static route entry:
1. 2.
3.
Go to System > Routing > Static Route page and click New. Configure Destination IP, Subnet Mask and Gateway. Click the OK button to save the settings.
Dynamic Routing
Dynamic RIP settings on Dynamic Route page will enable the Sangfor WAN Optimization Controller (WOC) to notify other routing devices of the routing information by using RIPv2 protocol, and therefore, to ensure that the RIP routing information on the routing devices in the internal network can be dynamically updated.
The following are the contents included on the Dynamic Routing page:
Enable Routing Information Protocol (RIP): Select this option to enable dynamic routing. The WOC will inform the routing device in the internal network of the network information of
the peer VPN network if it has established VPN connection with a remote network.
Enable password based authentication: Configures the password needed for exchanging RIPv2 protocol information. You can configure it according to your specific case.
IP Address, Port: Configures the IP address and port of the routing device to which the WOC sends routing updates initiatively.
Trigger periodic updates: Select this option and the WOC will trigger an update when the routing information changes; in that case, the Interval(sec) will get invalid.
Log events: Select this option and the WOC will log the RIP routing update information.
The routing device itself does not accept dynamic update by RIP protocol. If the WOC needs to communicate with other routing devices in the internal network that have enabled RIP, you should add static route on the WOC directing to that device.
Windows Domain
You can add the Sangfor WAN Optimization Controller (WOC) into the windows domain of enterprise network, so that some corporate applications (such as Exchange, CIFS) can also be optimized.
The following are the contents included on the Windows Domain page: Domain Name: Configures the domain name of Windows Domain.
Domain Controller: Configures the domain controller of the Windows Domain. Username: Configures the admin account used for logging into the Windows Domain. Password: Configures the password of the admin for logging into the Windows Domain. Confirm Password: Enter the password again to confirm the password.
Preferred DNS: Displays the DNS server address configured on the Deployment page. This DNS server address must be the same as that in the domain.
Status: Displays the status whether it has joined any Windows Domain. Join: Click this button to have the WOC join the specified Windows Domain.
Exit: Click this button to have the WOC exit from the Windows Domain. Reset: Click this button to reset the settings on this page.
Only the server-end Sangfor WOC needs to join Windows Domain.
VPN Interface
The VPN Interface page allows you to set the IP address of the virtual adapter for VPN service. Go to System > Network > VPN Interface to enter the VPN Interface page, as shown below:
The following are the contents included on the VPN Interface page:
VPN Settings: If either LAN interface netmask and DMZ interface netmask is selected and configured, the local WOC will only inform the peer VPN device of its subnet mask (of LAN or DMZ interface).
VPN Interface: Select the Default option if you want to use the default IP address and subnet mask; or select Specified and specify an idle IP address if the default IP address conflicts with any working machine.
VLAN Setting
VLAN tab is visible only when the Sangfor WAN Optimization Controller (WOC) is deployed in Bridge mode.
The following are the contents included on the VLAN page:
Enable VLAN support: Select this option, and the peer Sangfor WOC can restore the original VLAN ID of the data packet that has been processed by the local WOC previously, and thus ensures the peer device to distinguish the data packet (which VLAN it belongs to).
When the LAN interface of the local WOC receives a request data packet from the peer device, the local device removes the VLAN ID of the packet and sends the processed packet (accelerated) back to the peer device through its WAN interface. After that, the peer device receives the returned packet and also handles the packet, and then forwards the processed data to its local area network, at the same time, the peer device restores the original VLAN ID of the data packet according to the records made by the local device.
Enable VLAN ID Settings: Select this option to apply the VLAN ID settings. It requires the option Enable VLAN Support be selected.
New: Click this button to add a new VLAN ID entry. Enter the VLAN ID and Destination IP (single IP address or IP range), so that the data packet destined to this IP address labeled with the ID after being handled by the WOC.
CDP Settings
C0DP setting is only available when service mode is Accelerator Only and deployment mode is Single arm, as shown below:
Enter the gateway name and detection time.
The purpose of checking the Support CDP Protocol option is to enable the single-arm WAN Optimization Controller (WOC) (VPN function is not supported) to associate with the CDP-supported frontend device, so as to implement policy-based routing. As the front-end device will be unable to detect the existence of the WAN Optimization Controller (WOC) with CDP when the single-arm WAN Optimization Controller (WOC) is in failure, the frontend device itself will invalidate the policy-based routing and restore the previous data flow direction, so as to avoid impact caused by the failure of the WAN Optimization Controller (WOC).
At present, the only supplier supporting CDP is CISCO.
WCCP Settings
WCCP (Web Cache Communication Protocol) is a communication protocol specifying communication between a router and Cache Engine. The Cache Engine is a specific device (such as the SANGFOR WAN Optimization Controller) for data cache; while the router is in association with the Cache Engine redirecting TCP data flow to the Cache Engine, achieving the purpose of improving data transfer efficiency and shortening TCP process time.
WCCP uses UDP 2048 port to perform data communication, with two versions, WCCP V1 and WCCP V2. Currently, SANGFOR WOC only supports WCCP V2. To enable the WCCP function, the switch or router must support WCCP protocol; otherwise, the WCCP function is disabled.
For devices of other venders, please contact your hardware device supplier.
CISCO HARDWARE CISCO IOS
ISR and 7200 Routers 12.1(14), 12.2(26), 12.3(13), 12.4(10), 12.1(3)T, 12.2(14)T,12.3(14)T5, 12.4(9)T1
12.2(18)SXF12
12.1(27)E, 12.2(18)SXF10 12.2(31)SG
Catalyst 6500 with Sup720 or Sup32 Catalyst 6500 with Sup2
Catalyst 4500
Catalyst 3750 12.2(37)SE
* The information in the above table is only for reference. They are subject to change without notice. Please refer to the CISCO official website.
Enabling WCCP (Web Cache Communication Protocol) can help to restore the network structure in case of network fault. Network structure could be kept unchanged when the routing table on the core switch is modified because of the single arm deployment, ensuring the robustness of the network.
The typical network topology of WCCP deployment is as shown below.
WCCP settings is only available when service mode is Accelerator Only and deployment mode is Single arm. Go to System > Network > WCCP page and the WCCP page is seen, as shown in the figure below:
The following are the contents contained on the WCCP page:
Transmission Mode: Transmission mode specifies the data encapsulation method when the Sangfor WOC and the router are communicating. Options are GRE and Layer 2.
GRE can work in layer-3 network, while Layer 2 can only communicate in layer 2 environment. Selection of transmission mode is subject to the actual topology, and the transmission method of the switch or router supported.
The following table contains the transmission modes supported by CISCO devices respectively. For devices of other venders, please contact your hardware device supplier:
CISCO HARDWARE ISR and 7200 Routers
Catalyst 6500 with Sup720 or Sup32 Catalyst 6500 with Sup2
Catalyst 4500
Redirection and Return Method GRE
GRE or L2 GRE or L2 L2 Catalyst 3750 L2
* The information in the above table is only for reference. They are subject to change without notice. Please refer to the CISCO official website.
Weight: When there are several local Sangfor WOCs deployed in your network, this parameter helps to allocate weight for these devices with TCP traffic, according to certain ratio. For example, if the weight of device A is 100 and the weight of device B is 200, device A is responsible for about 33.3% [100/(100+200)] percent of the total traffic while device B is responsible for about 66.6%[200/(100+200)] percent of the total traffic. When there is only one Sangfor WOC, you can set the weight to any value.
New: Click this button to add a new router or switch IP address to enable WCCP protocol; you can also add more than one IP addresses.
Service Group ID: Configures WCCP service group to which the Sangfor WOC and router/switch belongs. This service group IP must be the same as that configured on the router/switch; otherwise, the WCCP protocol cannot be used.
Password, Confirm Password: Configures the password for WCCP interaction. If the password is incorrect, relevant information of WCCP protocol will not be interacted properly. DO keep the password the same as that set on the router/switch.
Data Flow Type: TCP and ICMI options are available. It defines the types of data that the router/switch redirects to the Sangfor WOC. If no type of data traffic is selected, system will redirect the types of data according to the routing table of the router/switch. TCP data is recommended for general cases, while ICMP is mainly used for checking the validity of WCCP function with ping/tracert command.
Priority: Priority is required if there are several different service groups. In case that the different service groups have the same redirection policy, select the service group policy with higher priority to redirect the data. If there is only one service group, the priority can be set to any value.
Policy Mark: Enable Hash policy when there are several Sangfor WOCs, assigning data redirection by different policies. With this approach, it can avoid the situation that multiple connections originated from a same IP address to a same server are redirected to a different WOC. Hash policies can be created by defining and combining the Source IP, Destination IP, Source port, or Destination port. If there is only one Sangfor WOC, you can ignore this option.
Port Mode: All port mode and Application mode are available. WCCP can define the ports to redirect data. Select All port mode and all the data at TCP 1-65535 will be redirected to the WOC; select Application port mode, and only the data at the allocated 8 TCP ports are to be redirected. In this mode, ports are separated from each other by comma (,).
Route Device Address: Indicates the IP address of router/switch interacting with WCCP. This route device address should be the same as the route device address configured in System > Network > Deployment.
Select the check box next to Enabled, and then click the OK button to save the settings.
Configuring Multiline
If Sangfor WAN Optimization Controller (WOC) is deployed in Gateway mode and connects to multiple WAN links, or the WOC is deployed in Single-arm mode with multiline function being enabled, you need to add the lines on the Multiline page and configure the line selection policy, as shown in the figure below:
1. 2.
Select the Enable Multiline option.
Click New to enter the Line Attributes dialog and configure the Internet line, as shown below:
3. Configure attributes of the Internet line. The following are the attributes:
Line: Select a line and configure the connection mode of the line. Line Alias: Enter a name for this Internet line.
Testing DNS1, Testing DNS2: Configures the preferred and alternate DNS servers respectively. They are required and should be public IP addresses if line type is Ethernet.
Otherwise, leave them empty.
Connection Mode: Specify whether the line is directly connected to the Internet.
Use static Internet IP: Enter the IP address according to your case. If it is using dynamic IP address, unselect this option.
IP Address: If Use static Internet IP is selected, this field is required. Enter the IP address you want to assign to the WAN interface corresponding to this Internet line.
4. Click the Advanced button to configure the advanced settings, as shown below:
Enabled extranet connection detection: Select this option and enter the Interval in seconds if the network is connected to multiple Internet lines and you want line status to be detected regularly. Not recommended if the Internet lines are activated and in good status.
Network Interface Card (NIC)
For each network interface card on the Sangfor WAN Optimization Controller (WOC), transfer rate and mode are configurable, as shown in the figure below:
We recommend you select Auto-negotiation for general cases.
If the network interface card of WOC is incompatible with that of interface on other network devices, deselect Auto-negotiation and set the transfer rate and mode.
Users
The users on Sangfor WAN Optimization Controller (WOC) indicate either the administrator accounts that are used to log in to the WOC Web administrator console or the user accounts that are used by the client-end WOC to establish acceleration connections with the local WOC.
Go to System > Users to enter the Users page, as shown in the figure below:
To add a new user account, click the New button, and the attributes appear, as shown below:
Username: Enter a name for this user. This field is required. Password: Enter the password of this user account.
Type: Specifies the type of the account. Type falls into WOC, PACC, System Administrator and Guest. The former two options are client types of acceleration users that can be referenced by acceleration policy group while the latter two options are the roles of administrator account, indicating varying privileges of administrators (such as edit, view and so on).
WOC type of user account is intended to establish acceleration connection between two networks that are deployed with Sangfor WAN Optimization Controllers (hardware). PACC
type of user account is intended to set up acceleration connection between Sangfor WAN Optimization Controller (hardware) and mobile user whose PC is installed Sangfor Portable Acceleration (PACC) client software. The attributes are as shown in the figure below:
There is a built-in user named Auto, which is used to discover inbound connections from the peer WOC that can be accelerated. This user cannot be deleted nor be edited.
Guest type of administrator account is the account with certain privilege of viewing or editing the settings on the WOC.
The system administrator with View privilege cannot change the settings on the WOC Report Center. Only the administrator with Edit privilege can do so.
The default account admin is an administrator account with Edit privilege, which cannot be deleted and nor its attributes be altered (except password).
Active Admin: Click the button to view the current active administrators that are under the realm of the logging in administrator account, , as shown below:
Creating User
To add a user account for a branch site to establish acceleration connection with the local WOC, perform the steps below:
1. 2.
Navigate to System > Users to enter the Users page.
Enter the username (for example, wanotest) and password, select type WOC, and click OK to save the settings.
3. Navigate to WAN Optimization > Server > Users page, select the newly-created user account wanotest, and click Edit. Select the option Enable user and click OK.
You can also create user account in WAN Optimization > Server > Users, simply by clicking the New button and complete the above basic configuration and selecting the desired policy group (for more information, refer to the section Creating User in Chapter 5).
Creating IP Group
An IP group may be composed of single IP address, IP range or subnet. It is predefined object that can be referenced by acceleration policy and firewall rule.
To add a new IP group, perform the following steps:
Click the New button and the attributes appear, as shown in the figure below: 2.
3. Configure attributes of the IP group. The following are the attributes:
Name: Enter a name for this IP group. This field is required. Description: Enter brief description for this IP group.
IP Address: Enter the IP addresses to be included in this IP group. IP address can either be typed in manually or filled in automatically. Select action Add, address type IP address, IP range or Subnet, enter the address into the IP Address field and click Add. If you only know the domain name, select action Auto parse, and enter the domain name into the Domain Name field and click Parse to have the WOC parse the domain name and fill in the corresponding IP address into the IP Address field. Max Attempts indicates the maximum number of attempts that parsing operation can be executed.
4. Click the OK button to save the settings.
Creating Application
Application will be predefined and referenced by application policy and firewall rule. Some common applications are already built in the system, as shown in the figure below:
To add a new application, perform the steps below:
1. 2.
Navigate to System > Objects > Application to enter the Application page.
Click the New button and the attributes appear, as shown in the figure below:
3. Configure attributes of the application. The following are the attributes:
Name: Enter a name for this application. This field is required. Description: Enter brief description for this application.
Ports: Click the New button to define the protocol and port so that packets with the specified feature will (not) be associated with acceleration policy.
Protocol: Select protocol applied by this application.
Port: Specifies the whether the following port range is included or excluded from this application.
Start Port: Specifies the start port of the port range. End Port: Specifies the end port of the port range.
New: Click this button again to add another port entry. Click OK to save the settings.
4.
Scenario: Accelerating ERPApplication
To accelerate branch users’ access to ERP system at the head office, create the ERP application and associate it with an acceleration policy by performing the following steps:
1. 2. 3.
Navigate to System > Objects > Application, click the New button. Enter application name ERP and description.
Click the New button above the table to specify protocol and port. In this scenario, select protocol TCP, Included port and port 8000 (start port and end port are 8000) for the ERP application.
4. 5.
Click the OK buttons.
Navigate to WAN Optimization > Server > Policy to create an acceleration policy and associate it with the ERP application created above by selecting ERP application.
Creating Schedule
A schedule is a combination of time segments, which can be referenced by bandwidth control policy. The date and time are based on the system time on the WAN Optimization Controller.
To create a schedule, perform the following steps:
2.
3.
Click New to add a new schedule. Enter the name into the Name field. Description is optional.
Click and drag over the grids to select the desired time segments.
4.
5.
To deselect and remove a time segment from the schedule, click on and drag over the green grids (selected time segments) to select the time segment that you want to deselect. Click Deselect.
Click OK to save the settings.
Viewing Algorithms
The Algorithm page displays data encryption algorithms supported by the Sangfor WAN Optimization Controller (WOC). The encryption algorithms listed here will be used to encrypt the data transferred over the VPN network constructed by Sangfor devices to ensure the security of the data transmission. You can upload other algorithms through this page.
Configuring IP Assignment Options (DHCP)
Navigate to System > DHCP to complete the DHCP related configuration, as shown below:
The following are the contents included on DHCP page:
Enable DHCP: Select this option to enable the DHCP service.
Interface: Select the interface through which the IP address are assigned, LAN interface or DMZ interface.
Gateway: Enter the IP address of the interface you have selected above, LAN interface or DMZ interface.
DNS1, DNS2: Enter IP address of the preferred and alternate DNS servers provided by the local Internet Service Provider (ISP).
selected interface. To add a new IP range, click New to enter the IP range page and specify the start IP and end IP, as shown in the following figure.
The IP address should not conflict with IP address occupied by any runing machine, including LAN and DMZ interface IP.
The the IP range should not contain the IP addresses ended with 0 or 255, for thery are ntwork port and broadcase IP.
Reserved IP Address: Addresses in this table are assigned to specific hosts and will not be automatically assigned to any other hosts. To reserve IP address for a host, click New to enter the Reserve IPAddress page, as shown below:
User Name: Specifies the username that you want to assign this IP address to. IPAddress: Enter the IP address that will be assigned to the specified user or host.
Obtain: If Reserve IP for the host with the following MAC address or Reserve IP for the host with the following host name is selected, click the corresponding Obtain button to get the MAC address or host name of the host for which this IP address is reserved.
Lease: Indicates the DHCP IP address lease, the life cycle that an assigned IP address will be used by the corresponding user.
To view DHCP status, navigate to Status > DHCP Status, as shown in the figure below:
Configuring Syslog Server
By configuring an external Syslog server, you can export the logs generated on the Sangfor WOC to the Syslog server.
Navigate to System > Syslog & SNMP to enter the Syslog page appears, as shown below:
The following are the contents included on the Syslog page:
Enable: Select this option to enable the specified Syslog server.
Syslog Server(s): Enter the IP address of Syslog server. Maximum 10 server IP addresses support.
Lowest Severity: Select an option from the pull-down list and select a severity level so that log messages higher that this severity level will be exported to the specified Syslog server.
Configuring SNMP Server
Navigate to System > Syslog & SNMP > SNMP to enter the SNMP page.
The following are the contents included on SNMP page:
Enable SNMP: Select this option to enable the SNMP service. Community: Enter the community name of SNMPv1 and SNMPv2.
Accept SNMP Packets From: Specifies the hosts from which the SNMP packets will be accepted by this WOC. Options are Any host and Specified hosts.
USM User: Specifies the USM user of SNMPv3.
authentication algorithm and password. Whether the authentications related fields need to be configured is up to the SNMP settings on the SNMPv3 server.
Privacy: Select his option to enable encryption settings and configure the privacy algorithm and password. Same with authentication, whether the privacy related fields need to be configured is up to the SNMP settings on the SNMPv3 server.
Download MIB: Click this button to download the Management Information Base (MIB) on the WOC. The extension of the downloaded file should be .tar. Before importing to third-party SNMP software, you need to decompress it.
Adding SNMP Traps
SNMP traps helps to report the anomaly of the WOC to the SNMP server proactively.
To add a SNMP trap, navigate to System > Syslog & SNMP > SNMP Traps, click the New button and configure the attributes of the SNMP trap, as shown below:
Central Management
Sangfor WAN Optimization Controllers (WOC) scattered over WAN can be managed centralizedly by one Sangfor CMC (Center Management Console) device once they joined central management.
Navigate to System > CM Options to enter the Central Management page, as shown below:
The following are the contents included on Central Management page:
User Account: Enter the username and password for connecting to the CMC. The name and password should be the site name and password corresponding to the site created on the CMC.
Shared Key, Confirm Key: Enter and confirm the shared key used for encrypting data transferred between the site and CMC device. The key should be the same as that configured for the corresponding site on the CMC. Ignore it if no shared key is specified.
CMC Address Probe: Enter the physical IP address or domain name (if available) of the CMC into the Primary WebAgent field (in format of IP:Port or URL). The WebAgent will be used by the site to obtain information of the network in which the CMC device resides.