NI DIAdem
TMData Mining, Analysis, and Report Generation
NI DIAdem: Data Mining, Analysis, and Report Generation
July 2014 373082M-01
Worldwide Technical Support and Product Information
ni.com
Worldwide Offices
Visit ni.com/niglobal to access the branch office Web sites, which provide up-to-date
contact information, support phone numbers, email addresses, and current events. National Instruments Corporate Headquarters
11500 North Mopac Expressway Austin, Texas 78759-3504 USA Tel: 512 683 0100 For further support information, refer to the Technical Support and Professional Services
appendix. To comment on National Instruments documentation, refer to the National Instruments Web site at ni.com/info and enter the Info Code feedback.
Legal Information
Warranty
The media on which you receive National Instruments software are warranted not to fail to execute programming instructions, due to defects in materials and workmanship, for a period of 90 days from the invoice date, as evidenced by receipts or other documentation. National Instruments will, at its option, repair or replace software media that do not execute programming instructions if National Instruments receives notice of such defects during the warranty period. National Instruments does not warrant that the operation of the software shall be uninterrupted or error free.
A Return Material Authorization (RMA) number must be obtained from the factory and clearly marked on the outside of the package before any equipment will be accepted for warranty work. National Instruments will pay the shipping costs of returning to the owner parts which are covered by warranty.
National Instruments believes that the information in this document is accurate. The document has been carefully reviewed for technical accuracy. In the event that technical or typographical errors exist, National Instruments reserves the right to make changes to subsequent editions of this document without prior notice to holders of this edition. The reader should consult National Instruments if errors are suspected. In no event shall National Instruments be liable for any damages arising out of or related to this document or the information contained in it.
EXCEPTASSPECIFIEDHEREIN, NATIONAL INSTRUMENTSMAKESNOWARRANTIES, EXPRESSORIMPLIED, ANDSPECIFICALLYDISCLAIMSANY WARRANTYOFMERCHANTABILITYORFITNESSFORAPARTICULARPURPOSE. CUSTOMER’SRIGHTTORECOVERDAMAGESCAUSEDBYFAULT ORNEGLIGENCEONTHEPARTOF NATIONAL INSTRUMENTSSHALLBELIMITEDTOTHEAMOUNTTHERETOFOREPAIDBYTHECUSTOMER.
NATIONAL INSTRUMENTSWILLNOTBELIABLEFORDAMAGESRESULTINGFROMLOSSOFDATA, PROFITS, USEOFPRODUCTS, ORINCIDENTAL ORCONSEQUENTIALDAMAGES, EVENIFADVISEDOFTHEPOSSIBILITYTHEREOF. This limitation of the liability of National Instruments
will apply regardless of the form of action, whether in contract or tort, including negligence. Any action against National Instruments must be brought within one year after the cause of action accrues. National Instruments shall not be liable for any delay in performance due to causes beyond its reasonable control. The warranty provided herein does not cover damages, defects, malfunctions, or service failures caused by owner’s failure to follow the National Instruments installation, operation, or maintenance instructions; owner’s modification of the product; owner’s abuse, misuse, or negligent acts; and power failure or surges, fire, flood, accident, actions of third parties, or other events outside reasonable control.
Copyright
Under the copyright laws, this publication may not be reproduced or transmitted in any form, electronic or mechanical, including photocopying, recording, storing in an information retrieval system, or translating, in whole or in part, without the prior written consent of National Instruments Corporation.
National Instruments respects the intellectual property of others, and we ask our users to do the same. NI software is protected by copyright and other intellectual property laws. Where NI software may be used to reproduce software or other materials belonging to others, you may use NI software only to reproduce materials that you may reproduce in accordance with the terms of any applicable license or other legal restriction.
End-User License Agreements and Third-Party Legal Notices
You can find end-user license agreements (EULAs) and third-party legal notices in the following locations: • Notices are located in the <National Instruments>\_Legal Information and <National Instruments>
directories.
• EULAs are located in the <National Instruments>\Shared\MDF\Legal\license directory.
• Review <National Instruments>\_Legal Information.txt for more information on including legal information
in installers built with NI products.
Trademarks
Refer to the NI Trademarks and Logo Guidelines at ni.com/trademarks for more information on National Instruments
trademarks.
ARM, Keil, and µVision are trademarks or registered of ARM Ltd or its subsidiaries. LEGO, the LEGO logo, WEDO, and MINDSTORMS are trademarks of the LEGO Group. TETRIX by Pitsco is a trademark of Pitsco, Inc.
FIELDBUS FOUNDATION™ and FOUNDATION™ are trademarks of the Fieldbus Foundation.
EtherCAT® is a registered trademark of and licensed by Beckhoff Automation GmbH.
CANopen® is a registered Community Trademark of CAN in Automation e.V.
DeviceNet™ and EtherNet/IP™ are trademarks of ODVA.
Go!, SensorDAQ, and Vernier are registered trademarks of Vernier Software & Technology. Vernier Software & Technology and vernier.com are trademarks or trade dress.
Xilinx is the registered trademark of Xilinx, Inc.
Taptite and Trilobular are registered trademarks of Research Engineering & Manufacturing Inc. FireWire® is the registered trademark of Apple Inc.
Linux® is the registered trademark of Linus Torvalds in the U.S. and other countries.
Handle Graphics®, MATLAB®, Real-Time Workshop®, Simulink®, Stateflow®, and xPC TargetBox® are registered
Tektronix®, Tek, and Tektronix, Enabling Technology are registered trademarks of Tektronix, Inc.
The Bluetooth® word mark is a registered trademark owned by the Bluetooth SIG, Inc.
The ExpressCard™ word mark and logos are owned by PCMCIA and any use of such marks by National Instruments is under
license.
The mark LabWindows is used under a license from Microsoft Corporation. Windows is a registered trademark of Microsoft Corporation in the United States and other countries.
Other product and company names mentioned herein are trademarks or trade names of their respective companies. Members of the National Instruments Alliance Partner Program are business entities independent from National Instruments and have no agency, partnership, or joint-venture relationship with National Instruments.
Patents
For patents covering National Instruments products/technology, refer to the appropriate location: Help»Patents in your software, thepatents.txt file on your media, or the National Instruments Patent Notice at ni.com/patents.
Export Compliance Information
Refer to the Export Compliance Information at ni.com/legal/export-compliance for the National Instruments global
trade compliance policy and how to obtain relevant HTS codes, ECCNs, and other import/export data.
WARNING REGARDING USE OF NATIONAL INSTRUMENTS PRODUCTS
(1) NATIONAL INSTRUMENTS PRODUCTS ARE NOT DESIGNED WITH COMPONENTS AND TESTING FOR A LEVEL OF RELIABILITY SUITABLE FOR USE IN OR IN CONNECTION WITH SURGICAL IMPLANTS OR AS CRITICAL COMPONENTS IN ANY LIFE SUPPORT SYSTEMS WHOSE FAILURE TO PERFORM CAN REASONABLY BE EXPECTED TO CAUSE SIGNIFICANT INJURY TO A HUMAN.
(2) IN ANY APPLICATION, INCLUDING THE ABOVE, RELIABILITY OF OPERATION OF THE SOFTWARE PRODUCTS CAN BE IMPAIRED BY ADVERSE FACTORS, INCLUDING BUT NOT LIMITED TO FLUCTUATIONS IN ELECTRICAL POWER SUPPLY, COMPUTER HARDWARE MALFUNCTIONS, COMPUTER OPERATING SYSTEM SOFTWARE FITNESS, FITNESS OF COMPILERS AND DEVELOPMENT SOFTWARE USED TO DEVELOP AN APPLICATION, INSTALLATION ERRORS, SOFTWARE AND HARDWARE COMPATIBILITY PROBLEMS, MALFUNCTIONS OR FAILURES OF ELECTRONIC MONITORING OR CONTROL DEVICES, TRANSIENT FAILURES OF ELECTRONIC SYSTEMS (HARDWARE AND/OR SOFTWARE), UNANTICIPATED USES OR MISUSES, OR ERRORS ON THE PART OF THE USER OR APPLICATIONS DESIGNER (ADVERSE FACTORS SUCH AS THESE ARE HEREAFTER COLLECTIVELY TERMED “SYSTEM FAILURES”). ANY APPLICATION WHERE A SYSTEM FAILURE WOULD CREATE A RISK OF HARM TO PROPERTY OR PERSONS (INCLUDING THE RISK OF BODILY INJURY AND DEATH) SHOULD NOT BE RELIANT SOLELY UPON ONE FORM OF ELECTRONIC SYSTEM DUE TO THE RISK OF SYSTEM FAILURE. TO AVOID DAMAGE, INJURY, OR DEATH, THE USER OR APPLICATION DESIGNER MUST TAKE REASONABLY PRUDENT STEPS TO PROTECT AGAINST SYSTEM FAILURES, INCLUDING BUT NOT LIMITED TO BACK-UP OR SHUT DOWN MECHANISMS. BECAUSE EACH END-USER SYSTEM IS CUSTOMIZED AND DIFFERS FROM NATIONAL INSTRUMENTS' TESTING PLATFORMS AND BECAUSE A USER OR APPLICATION DESIGNER MAY USE NATIONAL INSTRUMENTS PRODUCTS IN COMBINATION WITH OTHER PRODUCTS IN A MANNER NOT EVALUATED OR CONTEMPLATED BY NATIONAL INSTRUMENTS, THE USER OR APPLICATION DESIGNER IS ULTIMATELY RESPONSIBLE FOR VERIFYING AND VALIDATING THE SUITABILITY OF NATIONAL INSTRUMENTS PRODUCTS WHENEVER NATIONAL INSTRUMENTS PRODUCTS ARE INCORPORATED IN A SYSTEM OR APPLICATION, INCLUDING, WITHOUT LIMITATION, THE APPROPRIATE DESIGN, PROCESS AND SAFETY LEVEL OF SUCH SYSTEM OR APPLICATION.
© National Instruments Ireland Resources Limited | v
Contents
About This Manual
Related Documentation ... ix
Chapter 1
Working with DIAdem
DIAdem Panels... 1-1 DIAdem User Interface ... 1-1 DIAdem Introduction Screen... 1-2 NI License Manager ... 1-3
Chapter 2
Finding and Managing Data
Mining External Data ... 2-1 Extending the Search ... 2-2 Entering Search Conditions ... 2-3 Configuring DataFinders ... 2-4 Configuring the Local DataFinder... 2-4 DataFinder Server Edition ... 2-6 Navigating in Data Stores... 2-7 Adding Data Stores... 2-7 Loading Data from Files and Data Stores ... 2-7 Managing Internal Data in the Data Portal... 2-9 Working with Channels ... 2-9 Creating New Channels ... 2-10 Numeric Channels, Waveform Channels, Time Channels, and
Text Channels... 2-10 Organizing 2D Data and 3D Data... 2-11 Editing and Creating Data Properties ... 2-11 Using the Units Catalog... 2-12 Saving Internal Data ... 2-13
Chapter 3
Analyzing and Editing Data Graphically
Worksheet Design... 3-1 Editing Layouts... 3-2 Entering and Editing Data in Channel Tables ... 3-3 Viewing Data as Curves ... 3-3 Zooming Curve Sections ... 3-4 Analyzing Curves ... 3-4 Editing Curves ... 3-5
Contents
vi | ni.com
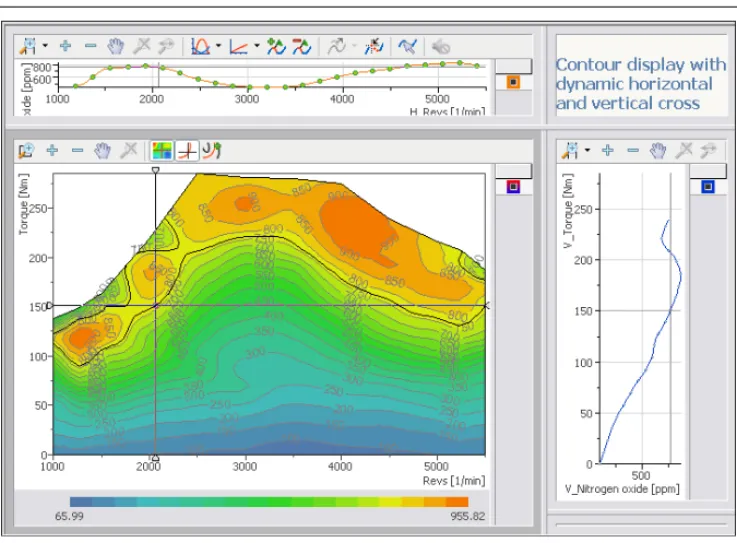
Selecting an Axis System ...3-6 2D Axis Systems...3-6 Polar Axis Systems ...3-6 Bode Axis System...3-6 Orbit and Shaft Centerline Axis Systems ...3-6 Synchronizing Curves with Videos and Maps...3-7 Evaluating Videos and Curves...3-7 Synchronizing Videos and Data ...3-7 Evaluating Maps and Curves ...3-8 3D Data Display...3-9 Contour Display with Isolines ...3-9 Projecting Data onto 3D Models ...3-10
Editing the Display ...3-11 Interactively Evaluating with Dialog Boxes...3-12 Using Text and Graphics for Design ...3-12
Chapter 4
Analyzing Data with Mathematical Functions
Using Standard Functions...4-1 Calculating Formulas in the Calculator ...4-2 Entering Formulas...4-2 Calculating with Channels ...4-3 Calculating with Variables and Single Values ...4-4 Calculating in Scripts...4-4 Calling Standard Functions...4-4 Calculating Your Own Formulas...4-5 Assigning Single Values...4-5 Using Variables...4-5 Program Variables ...4-5 VBS Variables ...4-6 Quantity-Based Calculations ...4-6 Calculating with the Calculation Manager ...4-7 Defining MathScripts...4-8 Calculating with Invalid Values ...4-9 Function Libraries...4-10
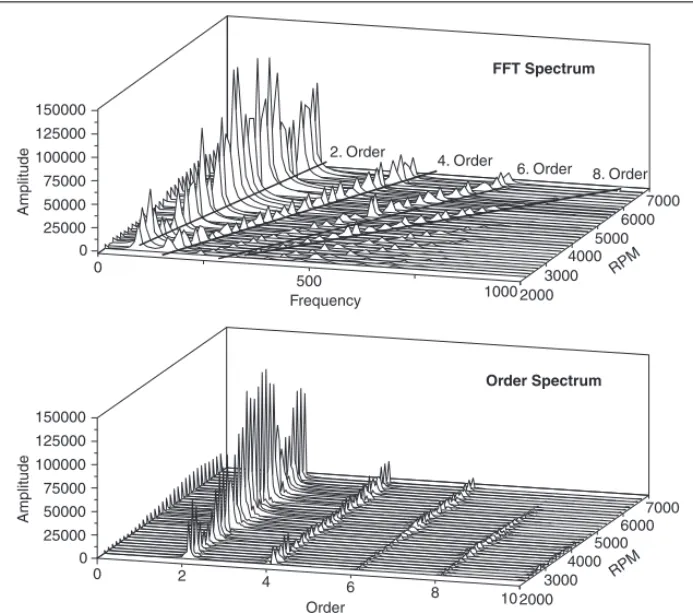
Basic Mathematical Functions...4-10 Channel Calculation Functions...4-11 Curve Fitting Functions ...4-12 Signal Analysis Functions ...4-13 Fast Fourier Transform (FFT)...4-13 Vibration Characteristics and SINAD Analysis ...4-14 Digital Filters ...4-14 Shock Response Spectrum (SRS) ...4-15 Frequency-Weighted Acceleration ...4-15 Order Analysis ...4-15
NI DIAdem: Data Mining, Analysis, and Report Generation
© National Instruments Ireland Resources Limited | vii
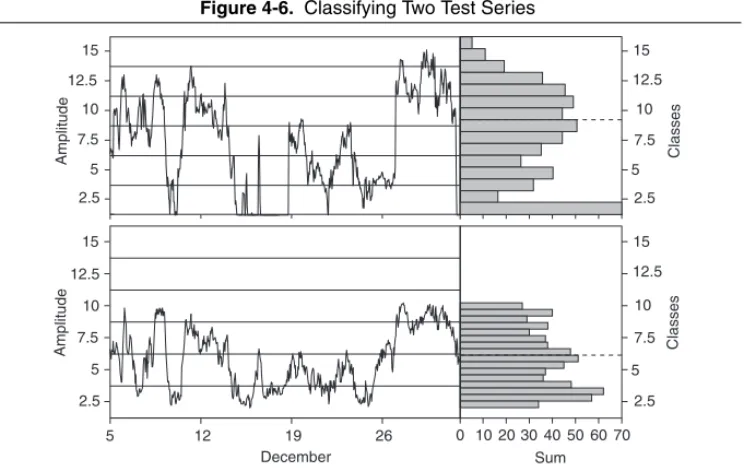
Statistics Functions ... 4-17 Classification Functions ... 4-17 Rainflow Classification ... 4-18 3D Analysis Functions... 4-18 Crash Analysis Functions ... 4-20
Chapter 5
Creating Reports
Worksheet Design... 5-1 Using the Chart Wizard ... 5-2 Editing Objects ... 5-2 Displaying Objects ... 5-3 Numeric Formatting ... 5-3 Variable Formatting... 5-4 Formatting with User Commands... 5-4 Editing Layouts... 5-5 Creating Templates... 5-5 Page Format... 5-6 Inserting Report Objects... 5-6 Inserting Axis Systems ... 5-7 2D Axis Systems ... 5-7 Polar Axis Systems... 5-9 3D Axis Systems ... 5-10 Inserting Tables ... 5-11 2D Tables... 5-11 3D Tables... 5-12 Adding Text, Comments, and Formulas... 5-13 Text... 5-13 Text Objects... 5-14 Comments... 5-14 Formula Graphics ... 5-14 Adding Graphics, Lines, and Predefined Objects... 5-14
Chapter 6
Automating Sequences
Working with Scripts... 6-1 Editing Scripts ... 6-1 Testing and Saving Scripts ... 6-2 Creating Scripts ... 6-3 Executing Commands... 6-3 Using Variables ... 6-4 Program Variables ... 6-4 VBS Variables ... 6-4
Contents
viii | ni.com
Calculating Formulas...6-5 Controlling the Script Sequence ...6-5 Creating User Interfaces ...6-6 Calling Program Dialog Boxes ...6-6 Creating User Dialog Boxes ...6-7 Defining User Dialog Boxes...6-8 Controlling User Dialog Boxes...6-8 Saving and Testing User Dialog Boxes ...6-9 Accessing Object-Oriented Interfaces ...6-9 DIAdem NAVIGATOR...6-9 Finding and Loading External Data...6-9 Changing the Data Portal View ...6-10 Editing Internal Data...6-11 Creating DataPlugins ...6-11 Converting Bus Log Files ...6-12 DIAdem VIEW ...6-12 DIAdem REPORT ...6-13 LabVIEW VIs ...6-14 Calculation Templates ...6-14 Units Catalog ...6-14 Accessing User Dialog Boxes...6-15 Function Groups and Toolbars ...6-15 Context Menus...6-16 Special Functions...6-16 Defining User Commands ...6-17 Evaluating a Series of Files ...6-18 Loading DIAdem Configurations ...6-18
Appendix A
Technical Support and Professional Services
Index
© National Instruments Ireland Resources Limited | ix
About This Manual
The NI DIAdem: Data Mining, Analysis and Report Generation manual describes the structure of DIAdem as well as how to use the DIAdem functions to find data, to run analyses, to generate reports, and to compile all the functions into a script.
The first chapter provides an overview of the DIAdem structure. The subsequent chapters describe the functions of the individual DIAdem panels.
Related Documentation
For more information on DIAdem, refer to the following documentation:
• Getting Started with DIAdem
You can use this DIAdem manual to familiarize yourself with DIAdem features and how to use them. The manual includes exercises for mining, analyzing, presenting data, and combining work steps to one script.
• The DIAdem Help which you can open in every dialog box with the Help button, on the toolbar with Help»Contents, or with <F1>.
The DIAdem Help offers procedures and dialog box help for each panel, references for programmers.
• NI DataFinder Server Edition: Search Engine for Technical Data
This manual describes how you use the DataFinder server to index data files in networks. DIAdem connects to DataFinder servers as a client in order to search in the indexed data.
© National Instruments Ireland Resources Limited | 1-1
1
Working with DIAdem
DIAdem is the interactive National Instruments software for finding and managing technical data, mathematically and graphically analyzing the data, and presenting the data in reports. You search for data on your computer drives or on the network, and navigate in data files and databases to load data into DIAdem. You view the loaded data to decide on which data to run mathematical analyses. You present calculation results together with the raw data in a report. If you frequently use the same method to evaluate data, you create a script that automates evaluations.
DIAdem Panels
DIAdem consists of several panels. You use the panel bar, which is always available on the left edge of the DIAdem screen, to switch panels. With each panel you deal with a particular type of task. You use DIAdem NAVIGATOR to mine and load data in different file formats. You use DIAdem VIEW to view data, to graphically analyze curve sections, and to edit data, for example, to correct errors. You use DIAdem ANALYSIS to evaluate data mathematically with standard functions or with your own formulas. You use DIAdem REPORT to create multi-page reports that document data and present results. DIAdem SCRIPT combines all the panel functions in scripts. You use scripts to create your own applications that process tasks automatically.
Figure 1-1. Panel DIAdem REPORT
All the panels work with the data that you load into the Data Portal. DIAdem VIEW, DIAdem ANALYSIS, and DIAdem SCRIPT can modify data and store the result data as data channels in the Data Portal. You can display and edit the contents of the data channels in channel tables in DIAdem VIEW.
DIAdem User Interface
When you switch DIAdem panels, the user interface changes so that you can quickly access the functions you want. Each DIAdem panel has its own group bar to the right of the panel bar. Click a button on the group bar and select a function from the function group that opens. The workspace also changes with the DIAdem panel and, for example, displays a folder and file overview or a worksheet. Each panel has its own toolbar, menus, and context menus, which contain frequently-used functions.
1-2 | ni.com
Chapter 1 Working with DIAdem
To create a report, select DIAdem REPORT on the panel bar. Click the 2D Axis Systems group bar to open the function group with the predefined 2D axis systems. Click 2D Axis System with Frame in this function group. The function group disappears and a small rectangle appears next to the cursor.
Figure 1-2. 2D Axis System with Frame
Click and drag open a frame where you want to position the 2D axis system in the worksheet. In the Data Portal you select the channels you want to display, and drag and drop the selected channels into the axis system. DIAdem displays the channels as curves. Double-click the axis system to open the dialog box for the axis system and define the display. The settings are grouped into subject areas on several tabs.
You can use the context menu to change the predefined settings for the functions in the function group. If you frequently calculate the arithmetic mean and the standard deviation, for example, change the predefined settings for the Descriptive Statistics function. Select the DIAdem ANALYSIS panel and click Statistics on the group bar to open the function group. Now right-click the Descriptive Statistics button. Select Predefine Setting from the context menu. Click All Off in the dialog box and select the two characteristic values Arithmetic mean and
Standard deviation. Click Change. If you now click the Descriptive Statistics button, the arithmetic mean and the standard deviation are already enabled in the dialog box.
The bottom function group is the same in all the panels. You can assign your own scripts to the buttons of this function group and then call the scripts in all panels. You also can use the keyboard to call these scripts. For example, press <Shift-F1> to call the script assigned to the first button.
You can drag and drop one or more files from other programs, such as the Windows Explorer to DIAdem, in order to load these files in DIAdem. If you drag and drop files to the workspace of the active DIAdem panel, you can only drag and drop the file types that the panel can process. For example, you can load only TDV layout files in DIAdem VIEW and only TDR layout files in DIAdem REPORT. If you drag and drop files outside of the workspace onto the title bar, the menu bar, the toolbar, or the status bar, you can load any file type. DIAdem automatically opens the panel that matches the file type. If you drop a file onto the button of a DIAdem panel while keeping the mouse button pressed, DIAdem opens the panel and you can drop the file into the workspace.
DIAdem Introduction Screen
When you launch DIAdem, the DIAdem introduction screen appears. On the left side of the introduction screen you find tutorials and examples you can execute which show you how to work successfully with DIAdem. The information on the right side contains details for newcomers to DIAdem and also for advanced users and leads you to further websites.
© National Instruments Ireland Resources Limited | 1-3 NI DIAdem: Data Mining, Analysis, and Report Generation
If the introduction screen does not appear when DIAdem launches, select Help»Introduction
to open the introduction screen. Use the Don't show this screen again checkbox to specify whether DIAdem displays the introduction screen the next time DIAdem starts.
• Tutorials: Run the short tutorials to see how to use DIAdem. Use the buttons below the tutorials to control the tutorial. The DIAdem panels contain tutorials in the tutorials function group that explain the respective panel. Use Help»Tutorials Visible to hide or show the function groups with the tutorials in all panels.
• Examples: Select Examples Gallery to open a preview of examples on DIAdem REPORT and DIAdem VIEW. Click one of the previews to load the example automatically into DIAdem. <Ctrl>-click the report picture to open the description of the example. The contents tree of the ExampleFinder contains simple solutions and also more complex applications on data analysis, report generation, and script creation. Click Copy example files in the description of the example to use the files as a template for your own solutions. Press <Esc> to stop an example.
• Manuals: Use the DIAdem manuals to familiarize yourself with DIAdem features and how to use them. You need a PDF reader such as Adobe Reader to open the PDF files. • New Features in DIAdem: Under this heading you find descriptions of new features in the
current DIAdem version.
• Additional Resources: Under this heading you find the DIAdem Help which helps you use functions and automate processes. You also can find the website for National Instruments DIAdem Training Courses and the website with the DataPlugins. DataPlugins are file filters for loading or saving file formats in DIAdem.
NI License Manager
The NI License Manager helps you manage your NI software product licenses. To work with DIAdem after your evaluation version expires, select Start»All Programs»National Instruments»NI License Manager and enter your serial number. To add new DIAdem components, select Help»Activate License in DIAdem and extend your license. The NI License Manager only enables functionality that is included in your license. For example, you cannot use the 3D functions from DIAdem ANALYSIS in the DIAdem Base Edition. Then the buttons of this function are dimmed. To use the 3D functions, you must obtain at least a license for the DIAdem Advanced Edition.
© National Instruments Ireland Resources Limited | 2-1
2
Finding and Managing Data
Use DIAdem NAVIGATOR to find, to load, and to manage data. You use the DataFinder to browse data files in different file formats on your computer and on the network. You use the file browser to navigate through external data in data files and in databases. You load the data you need into the Data Portal, which manages all internal data. The data in the Data Portal is arranged in channels, each representing a data series. All DIAdem panels work with the channels in the Data Portal.
Figure 2-1. DIAdem NAVIGATOR
Mining External Data
In DIAdem NAVIGATOR you use the DataFinder to browse data files on your computer and on the network. In the search results, DIAdem lists the files, channel groups, or channels it finds. You can drag and drop the data you find into the Data Portal or navigate through the files with the file browser.
To find data from a series of tests or data relating to a specific subject, enter an appropriate search term in the search input area. If you search for meteorological data, for example, enter
Precipitation in the search input area if the data set you want contains the term
Precipitation as a channel name or in the comments. DIAdem browses through all the data
files for the text Precipitation and lists the data files it finds on the Search Results tab.
Refer to Configuring DataFinders in this chapter for information on specifying the folders that the DataFinder searches.
The properties display below the search results displays the properties of a selected file, selected channel group, or selected channel. Click one of the files to view the file properties. In the properties display, DIAdem displays file properties such as filename, path, creation date, name, and author. Drag up the top edge of the properties display to view the entire properties list. To browse the files, right-click the file in the search results and select Display in File Browser. DIAdem opens the file browser and selects the file. The file browser offers a tree view of the folders which you browsed. You can navigate down to channel level in the folders that have the appropriate file formats.
If you navigate in a file down to channel level, DIAdem displays the channel data as a curve in the channel preview. For example, select a channel in a TDM file to display the channel values
2-2 | ni.com
Chapter 2 Finding and Managing Data
as a curve in the channel preview on the right edge of the properties display. Drag the right edge of the properties display to the left to enlarge the channel preview.
Extending the Search
To define a detailed search, click Advanced Search. You can enter several search conditions in the search input area. For example, if you search for meteorological data that includes a channel called Precipitation and that is more than one month old, specify two search conditions in
the search input area. As soon as you specify a search condition in one line, DIAdem
automatically creates a second line. To view all the search conditions, drag the bottom edge of the search input area down.
Click in the first line of the entry field under Level and select Channel. Click <Enter a
property> in the Property column and select Name. Click the third column and select
the = operator. Click the button with the three dots at the end of the first line. DIAdem lists the names of all the indexed channels. Enter the letter P under Search in list and select Precipitation. DIAdem enters the channel name Precipitation in the Value column.
In the second line, select File in the Level column and select Creation date in the
Property column. In the third column, select Date before <= as the operator. In the Value
column, first click the displayed date and then click the button with the arrowhead to open the calendar. Select a date that dates back at least one month. If you click the button with the three dots at the end of the second line, DIAdem displays the time range of the creation date for all the indexed files.
Click Search to find files that match both search conditions. DIAdem lists the files it finds on the Search Results tab. You can also search for channel groups and channels. If you want to find channel groups that match the specified search conditions, click the little triangle on the Search
button and select Search Groups. On the Search Results tab, DIAdem lists channel groups that have a channel called Precipitation, and whose files have the specified creation date. If you
want to view the corresponding channels in the results, select Search Channels. You can search for files, channel groups, and channels, because the Advanced Search is based on the TDM data model.
The search results display the names of the files, channel groups, or channels found, and also the path and the properties used in the search, for example, the creation date. To display more information, drag another property, for example, the channel minimum, from the properties display into the search results of the found channels. DIAdem adds a column with the channel minimum values to the search results. Click Channel.Minimum to move the column in the search results list. Click the two triangles on the right side of the column title to sort the channels in ascending or descending order according to the channel minimum values. Select Configure Results List from the context menu to edit the display of the properties.
The logical operations line below the search conditions displays the logical connectives of the individual search conditions. DIAdem numbers the search results from the top down with C1 to Cn and connects the search conditions by default with the AND operator. If you search for two
© National Instruments Ireland Resources Limited | 2-3 NI DIAdem: Data Mining, Analysis, and Report Generation
names in the Value column, DIAdem automatically uses OR to link the names. You can use the logical operations line, for example, to search simultaneously for files that contain the channel
Name1 (search condition C1) or Name2 (search condition C2), and which are not older than
one day (search condition C3):
(C1 AND C3) OR (C2 AND C3)
Entering Search Conditions
If you enter text in the search input area of the Quick Search or in the Value column of the
Advanced Search, DIAdem automatically displays a list of the previous entries that start with the same letters. You can enter the search text in uppercase or lowercase because the DIAdem search is not case-sensitive.
In the Quick Search, you can also search for fragments if you do not know the complete filename or if the filenames all start with the name of a test series. For example, enter the fragment tr_m17_qt for a test series in which the test program automatically generates the
filenames of the measurement results from the test series identification. DIAdem finds all the data sets that have the fragment tr_m17_qt at the beginning of a name or at the beginning of
another property.
In the Advanced Search, you must use wildcards to search for fragments. Use a question mark (?) as a wildcard for one character, and an asterisk (*) as a wildcard for any number of
characters. For example, to search for the fragment m17, enter *m17*. DIAdem finds all the data
sets that have the fragment m17 at the beginning, in the middle, or at the end of a property. If you
search for files with a specific filename extension, enter *.TDMS, for example, for the filename.
In the Advanced Search, depending on the type of property you search for, you can use the various operators listed in the following table. For text properties such as the Name, you use the
= operator; for numeric properties such as the Maximum values, you use the usual comparative
operators; for date properties such as the Creation date, you also can use the # operator for
the Relative range, where you can select today, yesterday, the last 7 days, the last 14 days,
or the last 30 days.
Table 2-1. Where to Use the Operators in an Advanced Search
Operator Meaning Numeric Date Text
= Equal to ✔ ✔ ✔
<> Not equal to ✔ ✔
> Greater than ✔
>= Greater than or equal to ✔ ✔
2-4 | ni.com
Chapter 2 Finding and Managing Data
If you load data from a test series into the Data Portal and you want to find and compare more data sets from the same test series, you can drag and drop a file, a group, or a channel from the Data Portal into the search input area. DIAdem enters the name of the file, of the group, or of the channel as a search condition. You can also drag and drop properties from the properties display of the Data Portal or of the file browser into the search input area.
If you select several channels in the Data Portal and drag these channels into the search input area, DIAdem combines the channel names with the OR operator and creates a search condition. If you then drag a property such as the maximum value from the properties display of the Data Portal into the search input area, DIAdem combines the maximum values of these channels with
OR to a second search condition. If you look for channels of a test series whose maximum value,
for example, is between 4 and 12, you must define two search conditions. Combine the search
conditions Maximum>4 and Maximum<12 in the logical operations line with AND.
If you define a query you want to use later, you can save the entries of the current search with
Save Query As. DIAdem saves the parameters of the current query together with the configuration of the search results list in a file with the filename extension .tdq. Use Load
Query to load saved queries or the configuration of the search results list, or both. Click Delete Query on the toolbar to specify a new query in the search input area. Click Previous Query or
Next Query on the toolbar if you want to reuse a previous query. To delete individual search conditions from a query, select the search condition and press <Del>. The next time you start DIAdem, the search input area contains the query you entered last. If you want to change this setting, click Settings»Current Data Provider»Default Settings and specify that DIAdem does not show a query, or that DIAdem reads the query from a file when the program opens.
Configuring DataFinders
You execute the searches described above with the local DataFinder My DataFinder, which is located on your computer. You install the local DataFinder with DIAdem. The DataFinder
function group contains My DataFinder and three more buttons to which you can assign DataFinder servers if you use the Predefine Setting in the context menu.
Configuring the Local DataFinder
Use My DataFinder to search folders on your computer or on the network, with the local DataFinder. You cannot delete the local DataFinder and you cannot create additional local DataFinders. To edit the settings of the local DataFinder, select Settings»My DataFinder» Configure. In the configuration of the local DataFinder you specify the search areas and the indexing of the data files. You also can see which file formats the DataFinder includes in the search.
<= Less than or equal to ✔ ✔
# Relative range ✔
Table 2-1. Where to Use the Operators in an Advanced Search (Continued)
© National Instruments Ireland Resources Limited | 2-5 NI DIAdem: Data Mining, Analysis, and Report Generation
Search areas are the file system folders in which the DataFinder searches for files. Select these folders on the Search Areas tab. You can add and delete folders, exclude subfolders from the search, and change the order in which DIAdem displays the search areas in the file browser. You can also use the context menu of the file browser to create and to limit search areas. For example, if LabVIEW is installed on your computer, the LabVIEW Data folder is in the default search
area My Files or My documents. However, the folders My Pictures, My Music, and My Videos are not included in the search area because these folders do not usually contain data
relevant for the DataFinder.
The DataFinder only can search files in the search area if the DataFinder indexes the files first. Click the Indexer tab in the DataFinder configuration dialog box to specify when and how often the DataFinder indexes the search areas. In the file browser, DIAdem displays an hourglass next to files and search areas that the DataFinder has not yet indexed.
The File Extensions tab has two lists that contain all the filename extensions that the local DataFinder recognizes. The Indexable extensions list shows all the indexable file types
that correspond to the TDM data model. In indexable files the DataFinder can search for properties of data sets, groups, and channels. If the data is indexed, DIAdem can navigate to channel level. Click a filename extension to see which DataPlugins My DataFinder uses to index these files. If several DataPlugins are available for one data format, you specify the sequence of the DataPlugins. The Non-indexable extensions list shows all the
indexable file types. These file types do not correspond to the TDM data model. In non-indexable files, the DataFinder cannot search for properties of groups or channels. The DataFinder only can search for properties that the file system provides, such as the filename and the creation date. Specify which DataPlugins the DataFinder uses on the DataPlugins tab. You can optimize the search for custom properties for the local DataFinder. Custom properties are user-defined properties that you can create for data sets, groups, and channels of the data that is saved in the TDM data model. Open Settings»My DataFinder»Optimize Custom Properties and select the custom properties to be optimized on the tabs File, Group, and
Channel. DIAdem lists these custom properties in the selectable properties of the Advanced Search. If you select an optimized custom property, click the button with the three dots at the end of the entry field to include a suggested value in the search. You only can search for Date
type custom properties if these custom properties have been optimized.
Generally, you should not change the index location, where My DataFinder saves the index, and which is set up during installation. However, if the drive with the index has less than 20 MB free memory space, the DataFinder server stops indexing and displays an error message. You must then either delete files to make more space available, or change the index location as follows. Open Settings»My DataFinder»Configure»Advanced and change the Index location. If you change the index location, the DataFinder reindexes the search areas. If you delete large search areas or if the DataFinder can no longer access its index, the DataFinder must create a new index. To do so, select Settings»My DataFinder»Reset to delete the previous index. When you close this dialog box, the DataFinder automatically reindexes. Data indexing may take some time.
2-6 | ni.com
Chapter 2 Finding and Managing Data
In the right bottom corner in the information area of the Windows task bar you can open the context menu of the registered DataFinder. Select About My DataFinder to see when the last complete indexing was executed and how many files, groups, and channels are indexed. At this point you can configure or close every DataFinder, stop or restart indexing, and also reset the index.
DataFinder Server Edition
Use the DataFinder Server Edition to install DataFinder servers on a network server in order to index files in the network. DIAdem communicates as a client with DataFinder servers in order to search the index and to load the files it finds. In the DataFinder Server Edition you can specify several DataFinder servers in order to separately index the data areas of different work groups. You cannot do this with My DataFinder. You also profit from the faster indexing of parallel processes and the management of larger amounts of data through more powerful database connections.
Use the DataFinder Server Edition to find data on other computers and central servers on the network. To register a DataFinder Server in DIAdem, copy the client configuration created by the DataFinder manager onto your computer. The DataFinder Server Edition saves the connection parameters in a file with the filename extension .urf. Double-click this URF file to
register the connection parameters and the DataPlugins on your computer. Use Settings» DataFinder Server to import, configure and delete further DataFinder servers.
Use the context menu to assign one of the free buttons in the DataFinder function group to this DataFinder server in order to access the DataFinder server quickly. If you click this button, DIAdem opens the search areas of the DataFinder server in the file browser. In the search areas of the DataFinder server, you can search, navigate, and drag and drop the data into the Data Portal. You can test the connection to the DataFinder server in DIAdem in Settings»DataFinder Server and, if necessary, change the connection parameters.
If several work groups access the central data areas of a network server, you can use the Windows user accounts to manage the access rights of clients to the DataFinder server and data. The DataFinder Server Edition uses Windows access rights so that members of a work group can search for and load data only in the shared folders.
You can use DataFinder servers as an ASAM ODS Server in order to read the data through the Corba interface of ASAM ODS. The ASAM ODS interface makes it possible to connect ASAM conform programs as clients with this server. If you register the connection settings on a DIAdem computer, DIAdem can either access the data from the DataFinder server directly or can open the data as ASAM ODS data in the file browser in DIAdem NAVIGATOR. Register the DataFinder server under Settings»Data Stores as a data store in order to use the DataFinder server as an ASAM ODS server in DIAdem. The data browser in DIAdem NAVIGATOR uses a model hierarchy configured on the DataFinder server to display the data.
© National Instruments Ireland Resources Limited | 2-7 NI DIAdem: Data Mining, Analysis, and Report Generation
Navigating in Data Stores
DIAdem NAVIGATOR displays external data stores as an hierarchical structure. You can navigate data stores on your computer, on connected network drives, and on all registered databases. In the Data Stores function group in DIAdem NAVIGATOR, you can select and open file-based data stores and server-based data stores.
To load SQL data, open the Data Stores function group and click SQL Example. DIAdem NAVIGATOR opens the SQL example database. You can browse in the database and drag and drop single channels and channel groups into the Data Portal. DIAdem displays selected channels or channel groups, which you can load into the Data Portal, with a colored background. Use the filter function to limit the display of data from a server-based data store. Select Filter Settings from the context menu of the data store to open the dialog box for filter settings. To load ASAM data, click ASAM Pass Fail Analysis Example. DIAdem NAVIGATOR opens the ASAM example database in which you can browse in tests, measurements, matrices, and submatrices and drag and drop data into the Data Portal. A level which you can load into the Data Portal has a colored symbol in the file browser and, when it is selected, is highlighted in color. The ASAM model allows the definition of further levels such as engine, test condition, or operator, the display of which you can define and save in the file browser by clicking Settings» Current Data Provider»Browse Settings.
When an ASAM data store is open in the file browser, you can search in the data. You specify the level, such as TestRun, the property, such as Name, the operator, and the value searched for,
such as TR_M17_QT_33*. You can search for TestRun, Measurement, and MeaQuantity and
DIAdem lists the tests whose names start with TR_M17_QT_33 in the search results. You can
configure the search results list and show, for example, the test description.
Adding Data Stores
Settings»Data Stores lists all data stores available in DIAdem. Double-click a data store in order to open it in DIAdem NAVIGATOR Select Create Data Store to access further data stores in DIAdem and, for example, the data store type AOP to register an ASAM database. Enter your user name and password, and the server for the ASAM database. Assign this database and further data stores to the unassigned buttons in the Data Stores function group in order to have fast access to frequently used data stores.
Loading Data from Files and Data Stores
You drag and drop files, channel groups, or channels from the file browser and from the search results into the Data Portal. If you drag a file, a channel group, or channels onto the root element of the Data Portal, DIAdem deletes the internal data and loads the new data. If you drag a file or a channel group to another position in the Data Portal, DIAdem generates new groups with the loaded channels. If you drag only single channels into the Data Portal, DIAdem adds the channels to the group you worked with last.
When you drag and drop data into the Data Portal, DIAdem automatically uses the loader associated with the file type. If DIAdem cannot automatically load a file, a dialog box opens in
2-8 | ni.com
Chapter 2 Finding and Managing Data
which you specify the loader. Click Open With to see which file formats your DIAdem installation can load. To do so, disable the setting Display only Plugins with same extension. Select a loader, for example ASCII import, to load a special text format with the ASCII Import Wizard.
Click Search to find and load a loader on the NI DataPlugin website if DIAdem does not have a loader for a specific file format. If DIAdem does not have an appropriate loader on the DataPlugin website, you can create a DataPlugin for the specific file format. Click Wizard to open the DataPlugin wizard. A DataPlugin is based on a VBS script that analyzes files of a specific type and provides the data for DIAdem.
To refresh the DataPlugins available in DIAdem, open Settings»Extensions»DataPlugins and click Update. This dialog box contains all DataPlugins registered in DIAdem. You can import DataPlugins and also export them encrypted to a different computer. For more information about DataPlugins, refer to the section on Creating DataPlugins in Chapter 6, Automating Sequences. In earlier versions, DIAdem loaded all the data from a file to an internal storage area. Files with numerous and long channels took some time for this. Now DIAdem does not load the bulk data of a channel until you write to it for the first time. You can change the loading behavior by clicking Settings»Options»DIAdem Settings»NAVIGATOR. For faster processing of large files, only register the channels in DIAdem or execute reduced loading on data from long term measurements.
To register data in DIAdem, right-click the file in the file browser and select Register Data from the context menu. DIAdem creates write-protected channels in the Data Portal that refer to the data without loading the data into the internal memory. DIAdem displays these channel names in the Data Portal with a gray font and the displayed symbols. To edit a registered channel you must subsequently load the data with the function Expand Channel from the Data Portal context menu.
For reduced loading of large files in which the consecutive values only differ slightly, select
Data Reduction from the context menu of the file browser. You specify the width of the interval that DIAdem applies to each data channel in order to load one value from each interval. You can load the first value from each interval or you can calculate the mean, the maximum, or the minimum for each interval. If you use several reduction methods simultaneously on one channel, DIAdem creates a new data channel for each reduction method.
Use the Bus Log Converter to convert logfiles from CAN, LIN, and FlexRay buses into the TDM format and to load them into the Data Portal. The CAN bus (Controller Area Network), LIN bus (Local Interconnect Network), and FlexRay bus are used for the communication of intelligent sensors and actuators in vehicles. The data packages transported in the bus are saved in bus logfiles. DIAdem supports the logfile formats NI-XNET (.tdms), NI-CAN (.ncl),
GIN-Multilogger, Vector-Binary Log Format (.blf), Vector-LOG (.log, .mdf), Vector-ASCII
(.asc), Ipetronik-M-LOG/S-LOG (.bin), PCAN-Trace (.trc), Kvaser-LOG (.log), and
IOSiX-IOS (.ios) . In order to interpret the data packages, the convertor also needs the
© National Instruments Ireland Resources Limited | 2-9 NI DIAdem: Data Mining, Analysis, and Report Generation
Fibex (.xml), or LIN signal description (.ldf). Use the buttons in the Bus Log Converter
function group to simplify the conversion of logfiles with specific database files. To convert into the TDM format, connect the logfile with at least one database file. You save the settings necessary for the conversion of a logfile in a user file with the filename extension .tcc, which
you assign in the Predefine Setting context menu of a button.
Managing Internal Data in the Data Portal
The Data Portal manages the data that you load in DIAdem NAVIGATOR. All panels in DIAdem work with the internal data from the Data Portal. The Data Portal contains numeric channels, waveform channels, time channels, and text channels. The Data Portal organizes the channels in groups and displays the properties. The channel preview in the Data Portal displays the channel data as a curve and can play acoustic data saved in waveform channels on the computer loudspeakers. DIAdem only temporarily loads internal data from the Data Portal into the workspace. DIAdem does not store the changes you make to the internal data until you save the data to a file or to a database.
Working with Channels
DIAdem organizes data in channels: a numeric channel contains measurement values from a sensor, and a time channel contains the associated time values. All DIAdem panels work with channels. In DIAdem ANALYSIS you can calculate, for example, an FFT from two channels with time and amplitude values, and in DIAdem REPORT you display a channel as a curve above the channel index.
Create channel groups to organize channels in the Data Portal. When you drag and drop a data file from DIAdem NAVIGATOR into the Data Portal, DIAdem creates new channel groups. Channel groups help you prepare and describe data for evaluation and presentation. For example, a Results channel group can contain all the calculated result channels.
DIAdem designates the last channel group that you load into the Data Portal as the default group. DIAdem stores result channels for which you do not specify a channel group, such as the channels calculated in DIAdem ANALYSIS, in the default group. DIAdem displays the group name of the default group in bold in the Data Portal. For example, use the context menu to designate the channel group Results as the default group, and smooth the channel SensorData. DIAdem saves the result channel Smoothed in the Results default group.
Use the context menu in the Data Portal to edit the internal data. You can generate and delete channel groups and channels, change the names of channel groups and channels, and move or copy channel groups and channels. The structure view of the Data Portal orders channels in channel groups, whereas the list view lists all channels in tables according to a selected property. If you want to delete all data from the Data Portal, click Delete Internal Data on the DIAdem NAVIGATOR toolbar or select Delete from the context menu of the Data Portal root.
Use filtering and pinning to display only specific groups or channels in the Data Portal. Click the narrow bar with the double arrow at the top edge of the Data Portal structure view to open
2-10 | ni.com
Chapter 2 Finding and Managing Data
the filter area. If, for example, you only want to display the acoustic measurement channels, enter NOISE as a filter condition. While you enter the letters, the Data Portal already displays
those channels whose names start with these letters. To filter channels that contain a certain character sequence in the name, use the question mark (?) for one, and the asterisk (*) for several
optional characters. You can define group filters and channel filters, which must both be fulfilled, and you can link several filter conditions with OR. The filters are not case sensitive and
are not effective when the filter area is closed. To exclude groups and channels from filtering, you can use the context menu to pin groups and channels. Pinned groups and channels have a yellow pin symbol and are always visible. In the context menu you can select the pinned channels or show the pinned channels and groups only.
When DIAdem accesses channels in an axis system or in a calculation, the channel is normally referenced by the group index combined with the channel name. Select Settings»DIAdem Settings»General to specify the channel reference as another combination of the group name or the group index and the channel name or the channel index. The group index is the position of the group in the Data Portal and the channel index is the position of the channel in the group. Refer to the section on Calculating with Channels in Chapter 4, Analyzing Data with Mathematical Functions for more information about channel references.
Creating New Channels
The DIAdem panels create new channels for different actions. DIAdem NAVIGATOR creates new channels when you load data. In DIAdem ANALYSIS, calculations store results in new channels. In DIAdem SCRIPT you can create new channels with script commands for copying channels or for calculating channels.
In DIAdem VIEW you also can create channels manually. Select Create New Channel from the context menu of a channel table. You can enter single channel data in the channel table or you can use the Generate function to create data series. To create a channel group, select New» Group from the context menu of the Data Portal. You cannot use the same name twice for channel groups or for channels of one channel group. If you enter a name which is already used, DIAdem automatically adds an index and a separator to this name in order to ensure the uniqueness of the name. You can change this behavior in Settings»DIAdem Settings»General.
Numeric Channels, Waveform Channels, Time Channels, and
Text Channels
DIAdem works with different channel types: numeric channels, waveform channels, time channels, and text channels. The symbol that DIAdem displays before the channel in the Data Portal identifies the channel type.
Numeric channels contain acquired values, calculation results, input values, or values loaded from files. DIAdem can use any numeric channel from the Data Portal for calculations and displays.
Waveform channels contain the x-part and the y-part of a curve in a channel. The x-part is often the time information that LabVIEW, for example, saves as a linear generation specification with
© National Instruments Ireland Resources Limited | 2-11 NI DIAdem: Data Mining, Analysis, and Report Generation
a start value and a step width. The y-part can include measured values, calculation results, or input values. If you use waveform channels as the y-channel in calculations and curve displays, you do not need to specify an x-channel.
Time channels contain absolute time values of a measurement. In a time channel, DIAdem saves the seconds that have elapsed since the year zero up to the current time. Use the Generate Time Channel function in DIAdem ANALYSIS, for example, to create time channels. A time channel is often the x-channel for calculations and for displays of the associated measurement values. DIAdem saves relative time values, such as the duration of a test in seconds, in numeric channels.
Text channels contain text, for example, observations and comments. DIAdem saves text channels in Unicode. Unicode characters include Chinese, Japanese, and Arabic characters. Use text channels in tables and in 2D axis systems in DIAdem VIEW and DIAdem REPORT. You can edit text channels in DIAdem VIEW channel tables.
Organizing 2D Data and 3D Data
DIAdem works with single channels. To display curves in DIAdem VIEW and in DIAdem REPORT, use one or more channels. If you drag and drop one channel into a 2D axis system, DIAdem uses the index to display a numeric channel and uses the x-part to display a waveform channel. If you drag and drop several channels into a 2D axis system, the first channel selected in the Data Portal is the x-channel of the curves. Even if an axis system already displays a curve, you can still select one or more channels in the Data Portal and add more curves to the axis system.
DIAdem REPORT and DIAdem ANALYSIS read data as a matrix or as a triplet to display three-dimensional data. DIAdem uses three channels that are the same length to make a value triplet: one channel for the x-values, one channel for the y-values, and one channel for the z-values. A DIAdem matrix consists of an x-channel, a y-channel, and several z-channels. The number of z-channels corresponds with the length of the y-channel, and the length of the z-channels corresponds with the length of the x-channel.
Editing and Creating Data Properties
In the TDM file format, DIAdem saves properties and comments with the bulk data. For example, the data set properties in DIAdem contain the name of the author and the storage date, the channel group properties contain the name of the measurement and comments, and the channel properties contain the data type and the unit for the channels. DIAdem uses the data properties to manage the data. The DataFinder indexes the properties, which enables you to search for data efficiently.
In the structure view, DIAdem displays the properties of the data in the bottom area of the Data Portal. If the properties do not appear in the Data Portal, click the bottom edge of the Data Portal and drag open the properties window. If you click the root of the tree view in the structure view, you see the data set properties. If you click the name of a channel group, you see the properties of the channel group. If you click a channel name, you see the channel properties.
2-12 | ni.com
Chapter 2 Finding and Managing Data
Double-click a properties field to edit the property. Read-only channel properties, such as maximum length, and monotony, are dimmed in the properties area. Properties that you can change, such as name and unit, are in white display fields.
By default, DIAdem only reads the properties of the elements that you load into the Data Portal from a file or a data store. When loading channels, DIAdem only accepts the associated channel properties. You can change this loading behavior by clicking Settings»DIAdem Settings» NAVIGATOR, so that the element loaded into the Data Portal inherits properties from superordinate elements. When loading channels, DIAdem can, for example, add channel group properties or root element properties to the loaded channels.
In the Data Portal you can add additional properties to channels, channel groups, and the data set. Custom properties provide the data with additional characteristics that are not included in the standard data model, and that the DataFinder can search for. Right-click a channel and select
New»Custom Property from the shortcut menu to create a new property for this channel. Enter a name and select the data type. The property appears in the structure view and in the properties display of the Data Portal. Click the entry field in the property display and enter a value for the new channel property.
To ensure that every new channel or every new channel group always receives specific custom properties such as the sensor type or the component part number, you can create a template for the custom properties. Select Settings»DIAdem Settings»General to create a template for the custom properties of channels. Select the checkbox Data Portal»Template for custom properties and click Edit. Select the Channel tab and click New Entry to specify the name for a custom property and to select the data type and the initial value.
Using the Units Catalog
If you click the input field of the channel unit in the Data Portal, you can select a different unit when you click the button with the three dots at the end of the input field. For example, select the unit miles per hour [mi/h] to change a velocity that was saved in the unit kilometer [km/h]. If you click Convert, DIAdem converts the channel values to the new unit. If you click
Replace, you use the new unit without DIAdem having to recalculate the channel values. DIAdem manages the channel unit in the units catalog. The units catalog assigns a physical quantity and a unit to measurement values, for example, the quantity speed and the unit kilometers per hour. Other physical quantities are length, volume, mass, or frequency. Usually every quantity has several units, for example, to specify the length in meter, centimeter, foot, or inch. Every unit has a symbol such as [cm] for centimeter. DIAdem groups quantities into unit
sets. By default, DIAdem uses the SI unit set (SI: Système international d’unités). However, you also can select a different unit set, for example, the unit set with the country specific units. Select Settings»Units to open the DIAdem units catalog. The Unit Sets tab lists the available unit sets. If you want to view and to extend the SI unit set, select this line and click the
Quantities tab. This tab lists all the quantities that are defined in the unit set with the respective basic units, for example, length in meters, time in seconds, or temperature in Kelvin. Every quantity is followed by the dimension, which refers each quantity to the seven basic quantities
© National Instruments Ireland Resources Limited | 2-13 NI DIAdem: Data Mining, Analysis, and Report Generation
length, mass, time, electric charge, thermodynamic temperature, amount of substance, and luminous intensity. You use multiplication and division of the basic quantities to create new quantities. Enter integer exponents such as 2,0,0,0,0,0,0 for a surface as the product of
two lengths, or 1,0,-1,0,0,0,0 for a speed as the quotient of length divided by time.
Select the quantity Length and open the Units tab. This tab lists all the units that are defined for the quantity length. Select a default unit such as meter, in the Default column. If you create a new unit, enter the name, the symbol, and the scaling function for the conversion to the basic unit, for example, Ell with the symbol E and the conversion factor 1/3. This makes three ell as
long as one meter. Use the factor, the offset, linear scaling, or logarithmic scaling to specify how DIAdem converts the new unit to the basic unit.
Save the units you changed. DIAdem saves the units catalog in a file with the filename extension
.tuc. You can import units from other units catalogs or import the other units catalog
completely.
Saving Internal Data
You can drag and drop the internal data of the Data Portal to save the data. To save all internal data click the root in the structure view and drag the data set onto the file browser. To save selected channels, select the channels and channel groups you want to save, and drop the selected channels into the file browser. DIAdem saves the data in the folder into which you drop your internal data in the file browser. If you drop data into a data file, DIAdem suggests this filename for the new data file in the Save As dialog box. DIAdem does not create the new data file until you click Save.
Remove the write protection from a file because you cannot overwrite a protected file. To do so, select File Operations»Write Protected from the context menu of the target file in the file browser. The file operations in the file browser also include copy, move, rename, and delete. By default DIAdem saves data in TDM file format. The TDM file format saves the properties and the binary data in different files with the same name. DIAdem saves the data properties in a text file with the filename extension .tdm, and the numeric data in a binary file with the
filename extension .tdx. When you save TDM files under Settings»DIAdem Settings»
NAVIGATOR, you can specify that DIAdem automatically specifies the storage format of the numeric data to save memory space. Then DIAdem saves loaded integer data again as integer values.
In addition to the TDM format, the Save As dialog box also offers file formats that save the data for which a DataPlugin with write functions is registered in DIAdem. Select the TDMS file format to save binary data with the respective properties in one file for LabVIEW. LabVIEW can append measured data to an existing TDMS file. If you want to evaluate TDM data and TDMS data with Microsoft Office, use the NI TDM Excel Add-In, which converts the data of the Data Portal into the structure of the Excel spread sheets.
© National Instruments Ireland Resources Limited | 3-1
3
Analyzing and Editing Data
Graphically
You use DIAdem VIEW to inspect the data of the Data Portal, to graphically analyze curve sections, and to edit data. You inspect curves in axis systems, zoom curve sections, and delete or replace curve points. In channel tables, you edit and delete single values or entire channels. If you modify curves or edit channels, DIAdem saves the changes in the Data Portal.
If you record test videos or the route of a test drive simultaneously with the data, you can synchronize the curves with the videos and the geographical data. If you inspect a component, you can project the signals measured at various positions or simulated data, onto a model of the component as color shading or as deformation. You can display characteristic diagrams as color shading and with isolines.
Figure 3-1. DIAdem VIEW
Worksheet Design
You can combine various axis systems, channel tables, videos, maps, 3D models, contour displays, dialog boxes, text, and graphics in one worksheet in DIAdem VIEW. To do this, you partition the worksheet. The function groups contain predefined worksheet partitions with different numbers and arrangements of areas.
For example, if you want to display data as a curve in a 2D axis system and list the associated numeric values in a channel table, divide the worksheet into two areas. Open the Assigned Worksheet Partitions function group and click the 2D Axis System/Channel Table Horizontal button shown here. DIAdem inserts an axis system in the top area and a channel table in the bottom area.
Figure 3-2. Assigned Worksheet Partitions: 2D-Axis System/Channel Table Horizontal
3-2 | ni.com
Chapter 3 Analyzing and Editing Data Graphically
To display a curve, select a channel in the Data Portal and drag and drop the channel onto the 2D axis system. DIAdem VIEW displays numeric channels over the index and displays waveform channels over the x-part.
To display one or more curves with one x-channel, first click the x-channel, for example Time,
in the Data Portal. Then Ctrl-click the numeric y-channels, for example, Pressure and Temperature. Drag and drop these channels onto the 2D axis system. DIAdem VIEW displays
the pressure and the temperature as curves over time. If you drop a channel group onto an axis system, DIAdem selects the first channel in the channel group as the x-channel. If you drag and drop several waveform channels onto an axis system, DIAdem displays each waveform channel over its x-part.
To list data in channel tables, select the channels, a channel group, or the data set in the Data Portal, and drag and drop the data into the channel table. DIAdem VIEW lists each channel in a column, with the channel name as the heading.
Editing Layouts
You can load a prepared layout as a view template. The layout file contains the description of all the areas and references to the channels, videos, or graphics you want to display. Layout files can contain several worksheets and have the filename extension .tdv.
You can drag the separating bars to resize any area in a worksheet. However, you cannot move areas to another position in the worksheet. To add new areas, use the context menu to split an area, or select different worksheet partitions with more areas. If you select worksheet partitions with fewer areas, the contents of the surplus areas are deleted. If you select one of the worksheet templates in the Assigned Worksheet Partitions function group, DIAdem creates a new worksheet that contains areas with specific display types.
Use the context menu to specify and to change the display type of the area. To define an area as an axis system, right-click the area and select Display Type»2D Axis System from the context menu. If you select the display type Channel Table for an axis system, DIAdem lists the values of the channels that are displayed as curves in a channel table.
Which options the DIAdem VIEW context menu contains, depends on where you right-click. For example, to insert another worksheet right-click the name of a worksheet on the tab bar and select New from the context menu. Select Manage to change the order of the worksheets or to rename the tabs. To insert worksheets from an existing layout, select File»Append Layout. To document the current view of your data in a report, you can transfer your worksheet to DIAdem REPORT. Click the Transfer to REPORT button on the DIAdem VIEW toolbar. DIAdem REPORT creates a new worksheet with 2D axis systems, tables, video frames, 3D models, map sections, and dialog boxes in the same layout as in the DIAdem VIEW worksheet. DIAdem REPORT offers extensive functions for the final presentation and documentation of your results.