Building And Hosting A Computer Vision API On
AWS Using An EC2 Instance
Kaushik Arvind Jadhav
Abstract: This paper aims to propose a methodology to host a Computer Vision API that can recognize and classify various objects in a particular image on Amazon Web Services (AWS) using Amazon Elastic Cloud Compute (EC2) instances. The images that were used to train our deep learning model were collected from different sources. The API takes an input image from the user and generates an output of the object present in the image and its most abundant color. In order to run Python scripts via the web, the RESTful API protocol has been used. Before developing the API, a Web App was developed and tested locally using Flask. The final end product is able to detect objects present in images and determine the most abundant color in the frame of the image.
Index Terms: API, AWS, Cloud Computing, Computer Vision, EC2, Flask, Object Detection —————————— ——————————
1.
INTRODUCTION
IN recent years, the field of science and technology is seen to be ever expanding and has bestowed humans with the power to transcend knowledge at great speeds. Nowadays, it is not uncommon to see people accessing the internet on a daily basis. This has led to a tremendous increase in digital data in the world such as images, videos, etc. However, as the amount of digital data increases, there arises a need to process this data as effectively as possible. Advances in Computer Vision have made it possible to offer solutions to these problems. Computer Vision is a branch of Artificial Intelligence that enables machine to interpret and process visual knowledge about the real world [1]. Through Computer Vision, machines and computer systems can interpret the objects portrayed in an image, video or other forms of digital data. It also allows machines to understand human emotions by processing facial expressions displayed in images or videos [2]. With respect to other sensing technology, since Computer Vision systems can provide more information about their surroundings that cannot be provided by other subtle sensors, they definitely need more attention than other traditional technology. There are several methods by which Computer Vision analysis of digital data can be carried out. In papers [3], [4], many such useful methods were reviewed. The method proposed in this paper involves using Computer Vision for object detection in digital images. Computer Vision is implemented in Python scripts which are executed in the back end of a Web Application. For the PHP of the Web Application to interact with the back end Python scripts, the Flask framework was required to be used. The Web Application asks the user for an input image and then identifies the object in the image and determines the most abundant color in the image. In order to make it possible for the Web Application to be called from other applications, such as native Android or iOS,
an API was created. The RESTful API was deployed on AWS using EC2 instances and its testing was carried out using Postman on Linux OS [5], [6]. The rest of this paper is structured as follows. Section 2 describes the Proposed Approach. Section 3 describes the methodology adopted while designing and implementing the proposed system. Section 4 details testing our Computer Vision API on Linux system using Postman. Finally, Section 5 summarizes the results2 Procedure for Paper Submission
2
PROPOSED
SYSTEM
Fig. 1 shows the basic block diagram of our Proposed System. The user sends his data, in the form of images through his native application such as a browser hosted application or a native Android or iOS app. This data is recieved by AWS EC2 instances which forward the incoming traffic to our API. This data is sent via a RESTful API to our Web Application.
Fig 1. Proposed System
An IJSTR Once a connection to the Web Application is established, the user can then upload his images on to the Web Application. The Web Application communicates with the Python Scripts running in the back end using the Flask framework. The Python Scripts contain Computer Vision code which detect and classify the object in the image and identify the most abundant colour in the image. This output is sent back to the Web App and displayed to the user via his or her application.
3 DESIGN
AND
IMPLEMENTATION
The design and implementation phase of the system has been discussed below in detail as a sequence of 6 steps.
————————————————
Kaushik Arvind Jadhav is currently pursuing bachelors degree
3.1 Getting Started
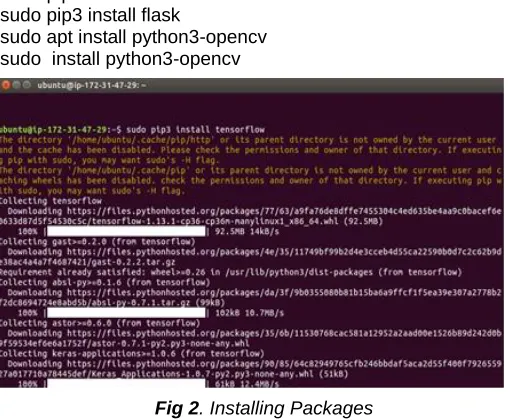
This section discusses the pre-requisites that must be set up before we proceed with the implementation of the proposed system. Firstly, we need to install Python packages and libraries such as keras, numpy, openCV and Flask. To do this, open terminal and run the following commands in sequence:
sudo apt install python3-pip sudo apt install filezilla sudo pip3 install tensorflow sudo pip3 install keras sudo pip3 install flask
sudo apt install python3-opencv sudo install python3-opencv
Fig 2. Installing Packages
Next, we need to set up an AWS account in order to create and access Amazon EC2 instances. So go to https://aws.amazon.com/ and create and sign in to your account.
Fig 3. AWS account
Once this is done, in order to test our Computer Vision API, we need to install postman. So, head over to store and install postman.
Fig 4. Installing postman
3.2 Building Web App
In order to build our Web App, we need to first import all the required packages that we would be using. Then, we need to define our file paths and set our Flask parameters and create a decorator and link it to our index page. Now, create a function for uploading files as follows:
def upload_file():
fname = secure_filename(file.fname) folder=app.config['UPLOAD_FOLDER'] file.save(os.path.join(folder, fname))
fpath=os.path.dirname(os.path.realpath(__file__)) image=cv2.imread(fpath+"/uploads/"+fname) col= getColor(image)
res = object_detect(image)
redirect(url_for('upload_file',filename=fname)) return '''
Now, we define two functions, one for detecting objects in image and the other for finding the most abundant color in image as follows:
def object_detect():
model = load_model('model.h5')
image = cv2.resize(image, (150,150), interpolation = cv2.INTER_AREA)
image = image.reshape(1,150,150,3)
res = str(model.predict_classes(image, 1, verbose = 0)[0][0])
return res
def getColor(image):
B, G, R = cv2.split(image)
B, G, R = np.sum(B), np.sum(G), np.sum(R) color_sums = [B,G,R]
color_values = {"0": "Blue", "1":"Green", "2": "Red"} return color_values[str(np.argmax(color_sums))]
3.3 Setting up EC2 instances
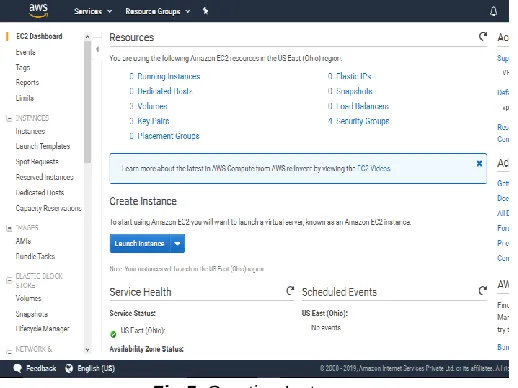
To configure your EC2 instances, open your Web Browser. Go to https://aws.amazon.com/console/. Now, sign in to the console using your AWS Account. Click on the Services Tab. In the Services Tab, click on the EC2 option. You will be redirected to the EC2 Dashboard. To start using Amazon EC2, you will want to launch a virtual server known as Amazon EC2 instance. So, click on Launch Instance.
Fig 5. Creating Instances
Next, choose an Amazon Machine Image (AMI) from the given list of Operating Systems for your Virtual Server.
Fig 6. Choosing AMI
Amazon provides a wide list of instance types to select different use cases. Instances are virtual servers that can run applications. So, choose an instance type from the list provided and then click on Review and Launch.
Fig 7. Choosing Instance Type
Create a new Key Pair for secure access to your instances and Virtual Server. Give a suitable key pair name and then click on Download Key Pair. After saving your Key Pair, click
on Launch Instances
Fig 8. Creating Key Pairs
Fig 9. Instances Running
Flask parameters and create a decorator and link it to our index page.
3.4 Changing EC2 Security Group
In order to deploy our API on EC2 instances, we need to have proper configuration of security group. Go to Instances on the left panel of your AWSÂ EC2 Console and click on Instances. Then click on the blue text under the Security Groups column. Right click on the security group, Click on Edit Inbound Rules and change the rules as shown below:
Fig 10. Edit inbound rules
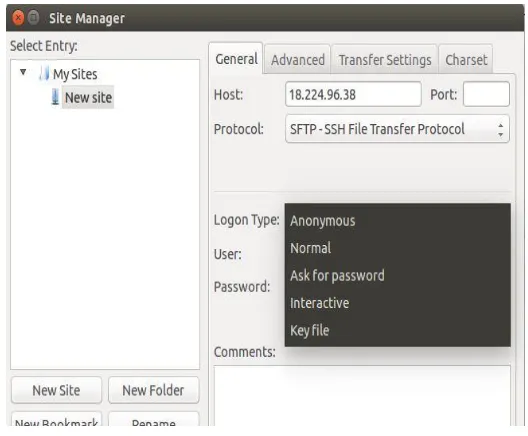
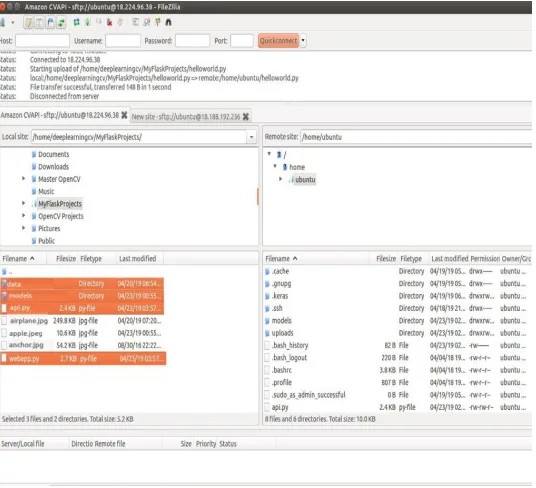
3.5 Connect to EC2 instances for transferring files
In order to transfer our Python scripts, models and other files to EC2 instances, we need to load our SSH Key into FileZilla. So, open FileZilla, and click Preferences in the main toolbar. In the left panel, select SFTP and then click Add key file button.
Fig 11. Loading SSH Key
Now that you've added your key we can create a new connection. On the main toolbar again, click File and Site Manager. This brings up the Site Manager window. Click New Site and enter your credentials according to your preference.
Fig 12. Creating SFTP connection
Fig 13. Transferring files to EC2
4 EXPERIMENTS
In this section, we will discuss the experiments carried out on the system. After following the steps in Section 3, our Computer Vision API must now be developed and ready to use. However, before it is augmented further, the entire system needs to be tested. This section involves first launching the Computer Vision API via AWS Amazon EC2 and then testing the API through a different user application
4.1 Launching the Computer Vision Web App
Open Terminal and connect to our EC2 system by running the following command:
ssh -i ~/.ssh/my_aws_key.pem [email protected]
Fig 14. Connecting to EC2
Launch our Web App by running the following line: sudo python3 webapp.py
Fig 15. Lanch Web App
Enter the EC2 IP in your web browser and your should see the following:
Fig 16. Computer Vision API-Input
Now, we have successfully launched a Computer Vision API for anyone in the world to use. Let's upload some test images to see our Web App in action and check its output
Fig 17. Computer Vision API-Output
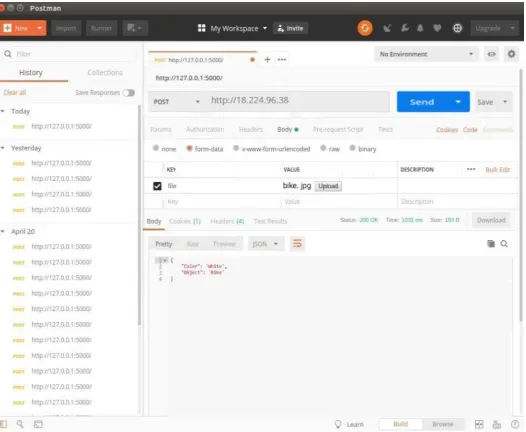
4.2 Testing the API on a different user application
After Postman is an extremely useful app used to test APIs. We'll be using it to test our Computer Vision API. Change the protocol to POST. Enter the Public IP Address of your EC2 Instance: http://18.224.96.38. Change Tab to Body. Select the form-data radio button. From the drop down, select Key type to be file. For Value, select one of our test images. Click send to send our image to our API
The output is JSON file containing: {
Fig 18. Testing API on different application
5 CONCLUSION
In this paper, a Computer Vision API which identifies the object and determines the most abundant color in a given image is implemented and deployed on AWS EC2 instances. Also, testing of the Computer Vision API is carried out by running it via a different user application. The API responded positively while testing as it was able to classify all images properly and function normally. The API also provides the flexibility of using different models by making minor changes in the code. In future, we will expand the API to more complex and dynamic applications and environments. Further, the work will be considered for extracting even more relevant data from the given image and identify and classify minute details in complex images involving multiple minute objects.
REFERENCES
[1] Paul Richard, Alexandru Telea, Alain Tremeau: Computer Vision, Imaging and Computer Graphics Theory and Applications. Springer, Portugal (2018)
[2] Suhas Athani and C.H.Tejeshwar: Face Identification and Face Classification Using Computer Vision and Machine Learning Algorithm. Springer, India (2017)
[3] Debalina Barik, Manik Mondal: Object identification for computer vision using image segmentation. IEEE, India (2010)
[4] Kanza Azhar, Fiza Murtaza, Muhammad Haroon Yousaf, Hafiz Adnan Habib: Computer vision based detection and localization of potholes in asphalt pavement images. IEEE, Canada (2016) [5] Chin-Yun Hsieh, Hong-An Hsieh, Yu Chin Cheng: A method for
web application data migration based on RESTful API: A case study of ezScrum. IEEE, Japan (2016)