20
17
TE
CH
N
IC
A
L G
U
IDE
Organic potatoes
Potatoes are very suitable for direct
marketing due to their popularity
and versatility. But good yields are
needed for commercial production to
cover the high costs of cultivation and
mechanisation. The very high quality
requirements at every stage of
market-ing require the highest care from seed
Cultivating quality – step by step
preparation to plant protection,
nutri-ent and water supply to harvest and
storage.
This guide provides a good basis for
achieving high-quality products.
Com-mercial potato farms complement their
knowledge with the help of experts
and further literature.
First/Second early potatoes
Only in places with suitable climatic conditions on quickly warming soil where planting is pos-sible from end of February / beginning of March onwards.
Requires equipment for chitting.
Cultivation under fleece can speed up develop-ment (see page 10).
If a pipe irrigation system is available, it can be used to prevent frost.
Careful harvesting is required.
Good for farms that can attain high prices for early produce.
Maincrop potatoes
Suitable for wholesale and direct marketers. Fairly stable prices.
Sufficient distance between fields with early and maincrop potatoes to prevent transmission of blight.
Processing potatoes
Depending on use, there are special requirements (variety, size, shape, starch content, test baking, etc.). Only cultivate in agreement with a buyer
(cultiva-tion and supply contracts). Increasingly important. Peeled potatoes
Direct marketing of peeled potatoes to industrial kitchens.
Marketing to peeling companies via contracted cultivation.
Direct marketing requires specialist knowledge of peeling processes.
Baby potatoes
Very small potatoes that have set skins.
Lower yields and higher prices than ware potatoes. Ideal for light and sandy soils without stones. Machinery needs to be adjusted (very close plant
spacing, fine sieve belt, boxes with small gaps). Varieties with a high number of tubers per plant
should be used.
Quality at every stage The quality of potato tubers can be significantly influenced before, dur-ing and after cultivation. Measures that have a significant effect on the final product quality are marked in this manual with the sign above.
Choice of production
Crop practices during the course of the year
Ploughing Basic fertilising (e.g. manure in autumn)
Harvest
Plant protection
General crop maintenance Nutrient supply
Planting Emergence Foliation/
Stem formation Main stemelongation coveringCrop Flowering Senescence destructionHaulm of tubers Ripening
Order boxes Sample dig
and tasting
Harrowing
Planting Presprouting
Organic/mineral fertilisers
Cover early potatoes Haulm destruction
Harvest Irrigation of early potatoes
for frost protection
Irrigation
Potato cyst nematode
Organic manure
Leaf blight
Field visit and assessment in seed potatoes
Rotary hoe
Ridge-shaping board
Apply horn silica compound Harrowing
• Light to medium soils that warm up easily, are not too stony, and are deep with even water supply and a pH of 5.5 to 7.
• Avoid compaction and poorly drained soils. • During flowering and formation of tubers,
pota-toes are sensitive to long wet or dry periods. Cultivation on plots with irrigation systems is beneficial in dry periods.
In organic farming, mainly varieties that are in mar-ket demand and accepted by retailers are cultivat-ed. Direct sellers have a bit more freedom in terms of variety.
Varieties that develop quickly at a young stage and form tubers early (so that a good yield has already been reached when blight starts to appear) should be chosen. They should also have low sus-ceptibility to diseases, low nitrogen requirements and quickly develop a canopy to suppress weeds. However, the intended use and the wishes of cus-tomers or buyers play the biggest role in selection. Choosing a new variety should be discussed with the buyer beforehand: before new varieties are cul-tivated, a market should be ensured. In direct mar-keting, customers should be gradually introduced to the new variety.
In the UK, the AHDB Potato Variety Database provides independent data on GB-certified potato varieties that have undergone independent resis-tance testing for key pests, diseases and patho-gens. Testing is undertaken through the AHDB Potatoes-funded Independent Variety Trials (IVT) programme.
Soil
Sandy, quick-drying soils lead to rougher skins and russeting as well as raised scab infection.
Moist soil conditions during formation of tubers lead to netted scab.
Acidic soils, soils heavy in clay or contamina-ted with spores can lead to powdery scab.
Variety selection
Seed potatoes
Only possible in contract with seed producing organisations; requires specialist knowledge. Cultivate with sufficient distance from other potato plots to avoid viral infection and blight. Production at higher altitudes results in more
slow-sprouting planting material. Heritage varieties
Speciality: only cultivate them in agreement with buyer or sell directly.
Conserving varieties: Organisations such as Skea Organics in the UK may be able to help with sourcing Heritage varieties, but demand is mainly from domestic gardeners.
Often lower yields than modern varieties, higher wholesale prices.
Planting material considerably more expensive than for modern varieties.
Some are rather susceptible to late blight as well as viral diseases (provide regular change of seed planting material, increase distance from other potato fields, choose separate fields).
Choice of production
Site requirements
Soil type affects the shape, colour and overall appeal of the tubers. On lighter soils, most tubers develop a nicer shape and colour as well as flatter eyes. On heavy soils that are slow to warm up, the tubers turn out more smooth-skinned and occurrence of scab is lower.
Crop practices during the course of the year
Ploughing Basic fertilising (e.g. manure in autumn)
Harvest
Plant protection
General crop maintenance Nutrient supply
Planting Emergence Foliation/
Stem formation elongationMain stem coveringCrop Flowering Senescence destructionHaulm of tubers Ripening
Order boxes Sample dig
and tasting
Harrowing
Planting Presprouting
Organic/mineral fertilisers
Cover early potatoes Haulm destruction
Harvest Irrigation of early potatoes
for frost protection
Irrigation
Potato cyst nematode
Organic manure
Leaf blight
Field visit and assessment in seed potatoes
Rotary hoe
Ridge-shaping board
Apply horn silica compound Harrowing
Biodynamic measures
Note:
In areas of high rainfall, ploughing and manure application in Autumn would be inadvisable due to the risks of leach-ing and erosion.
Variety selection The risk of scab, hollow hearts, dry core, late blight, silver scurf, black-leg etc. is reduced by selecting the appropriate variety. However, there is no variety immune to all these conditions. Hence, the growing conditions in the region and on single fields must be considered when making the selec-tion. Regional recommen-dations for varieties may be helpful in organic potato cultivation.
Notes:
The planting material must be derived from organic propagation (see ‘Planting material’ on page 5 and ‘Further reading’ on page 28).
Preceding crops Suitability Notes
Position within the crop rotation
• Keep a rotation break of at least 4 years (includes early potatoes).
• Avoid soil compaction when harvesting pre-ceding and catch crops.
• Potatoes have relatively high nutritional re -quire ments; moreover, the nutrients should be available shortly after emergence. Hence, potatoes develop especially well after preced-ing crops that support the looseness and struc ture of the soil and leave a high amount of easily degradable organic material. Suita-ble preceding crops include a one-year grass/ clover ley, one-year fodder and grain legumes (especially field beans and grain peas with a cover crop, field vegetables and other root crops, grains with legume cover crop).
• Tillage in spring before potato cultivation reduces the risk of nutrient leaching during
the winter months; however, tillage in spring is often necessary due to frost on soils that con-tain more clay. In the case of an early tillage, cover crops that are killed by frost in winter should be cultivated.
• Potatoes leave a lot of soluble nitrogen in the soil, with the potential risk of leaching. For this reason, the succeeding crop to be cultivated should be one that utilises the nitrogen in autumn, such as winter cereals / brassicas or green manure with late nitrogen absorption (e. g. rye).
• Potatoes generally leave a clean seed bed for the succeeding crop. Ploughless tillage pre-serves the soil structure and facilitates frosting of remaining tubers to avoid volunteers.
Pure stands of legumes such as vetches, or a brassica such as fodder radish (may help suppress PCN) are ideal as catch crops and green manure after grains.
Fodder radish and, on locations that do not tend to develop iron spots, also mustard are ideal as catch crops and green manure after grain legumes.
Pure grass or grains as catch crops should be avoided. The high carbon-to-nitrogen ratio in spring leads to a slow conversion of organic matter.
Grass /clover before potatoes should be for one year only. Longer-term grass/clover increases risk of infestation with wireworms and the rate of turnover is slower than with one-year grass /clover.
Potatoes are a good component of a vegetable rotation. There is an increased risk of slug infestation.
After late harvested vegetable varieties, sowing green manures is more difficult. On vegetable farms, vegetables often serve as follow-on crops to early potatoes. Since both maize and potatoes have a strong demand for nutrients, this
combina-tion is only recommended for farms with a high nutrient base. Soil compaction during maize harvesting can affect the soil structure.
Remaining stubble can increase the risk of Rhizoctonia in potatoes; hence, the stub-ble should be shredded as small as possistub-ble.
On lighter soils, barley, triticale and rye are more suitable than winter wheat or spelt due to the early sowing date and tillering in the year of sowing.
On heavy soils, winter wheat is more suitable (there is, however, a risk of nitrate loss).
Spring cropping is only recommended after a catch crop. Forage rye or grass are good catch crops. Mustard also tends to develop fast and captures nitrogen. Only choose cruciferous plants if there are no other brassica plants within the crop rotation. Possible succeeding crops are summer cereals (e. g. oat), maize or vegetables. Succeeding crops
Grains CC/
GM Potato
Vegetables
Grain legumes CC/GM
CC/ GM
Grass/clover
GM
Maize Undersown crop
Spring crop Winter cereal
Winter cereal
CC
General rules:
Crop rotation
Perennial grass/clover as a preceding crop may promote infesta-tion with wireworms, scab, dry core and slugs.
Intensive tillage in the crop rotation reduces the risk of wireworms.
Large amounts of organic matter with a high carbon-to-nitro-gen ratio as a preced-ing crop can lead to locked-up nitrogen and
Rhizoctonia.
CC = catch crop; GM = green manure Grains CC/
GM Potato
Vegetables
Grain legumes CC/GM
CC/ GM
Grass/clover
GM
Maize Undersown crop
Grains CC/
GM Potato
Vegetables
Grain legumes CC/GM
CC/ GM
Grass/clover
GM
Maize Undersown crop
Grains CC/
GM Potato
Vegetables
Grain legumes CC/GM
CC/ GM
Grass/clover
GM
Maize Undersown crop
Grains CC/
GM Potato
Vegetables
Grain legumes CC/GM
CC/ GM
Grass/clover
GM
Maize Undersown crop
Spring crop Winter cereal
Winter cereal
Work steps for chitting
1. Start chitting 4–6 weeks before the desired planting date (new potatoes up to 10 weeks). 2. Thermal treatment: 18–20 °C over 2–3 days. 3. Lower temperature to 10–12 °C (new
pota-toes: 15 °C, seed potapota-toes: 8–10 °C). 4. As soon as the sprouts start to show,
expose the potatoes to daylight or artificial light (lamps with warm tones, >100 W per t of planting material). 8–10 hours per day. Maintain a humidity of 70–80 %.
5. At the end of the chitting period, lower the temperature to 5–6 °C for hardening off. 6. Before planting, raise the temp. to 10–15 °C.
Planting material
In principle, the planting material must originate from organic propagation. Current availability of organic seed and planting material can be checked on the organic seed database www.organicxseeds. co.uk. The range of varieties from organic prop-agation as well as the description of the varieties and the ordering addresses can be requested from organic advisory services or directly from seed asso-ciations. If there is no organic seed material availa-ble for certain varieties, a special derogation from the inspection body is required before purchase. Sources of seed can be found on organicXseeds.
In general, only healthy and certified planting material (seed) should be used. After receiving the planting material, one should empty the bags and bulk packs and wash a sample of the seeds. Quali ty defects (e. g. black scurf (Rhizoctonia) marks, wet rot) should be reported to the supplier immedia tely (keep the labels).
The same quality criteria apply when using saved, non-certified planting material. It is strong-ly recommended to check it for viruses and other defects like Rhizoctonia, leaf blight, bacterial wilt, etc. Calibrating planting material facilitates cultiva-tion and improves the overall health of the crop.
Amount of planting material needed
• Seed rate and plant density can be estimated from target yield and optimum seed size, as well as seed age (time from emergence of seed crop to planting of current crop).
• Seed rate calculations are variety specific. For guides see on the AHDB website. Where specific varieties are unavailable interpolation is required. • Standard (emerged 1 June): Count 50 kg sam-ple to determine tuber seed count. Determine target yield (experience and field history) and optimum tuber size. This information will give you the seed rate. Multiplying this by the area to be planted gives you the total seed required. Within-row spacing (cm) can be calculated using plant density and row width (see page 9) according to the following formula: 100,000/ (plant density (000/ha) x row width (cm)) e. g. with a row spacing of 75 cm and planting space of 33 cm within the rows, about 40,000 tubers per ha are needed. With a grading between 35 and 55 mm, this will result in about 2,500 kg of planting material, depending on the variety. • Plant populations below 26,000 plants/ha are
not generally recommended. Planting at wide spacings can result in gappy crops particularly where planting is irregular or emergence poor. Total yield may be reduced as a result so
plant-ing at higher densities should be considered, although increasing plant density can be expect-ed to rexpect-educe the average tuber size.
Chitting
Chitting is one of the most important meas-ures for yield security: it shortens the time to harvest by 10 to 14 days, reducing the risk of late blight infection.
Chitting accelerates emergence and thus reduces the likelihood of the sensitive sprouts being infected with
Rhizoctonia (Black scurf) or Erwinia
(Blackleg). Planting material
Certified planting material reduces the risk of infection with tuber diseases.
Watch out for a low infection of Rhizoctonia.
Dressing of planting material with antago-nists (e. g Bacillus sub-tilis and Pseudomonas
sp.) may reduce infec-tion with Rhizoctonia
and dry core, but pota-to seed dressing is not common practice in the UK.
Preparation of planting material, chitting
• If possible, planting material should be chitted, or at least vernalised.
• Chitted plants emerge faster and are better weed suppressors. Moreover, chitting leads to fewer sprouts and thus to fewer stems per unit area of foliage. This, in turn, reduces the number of tubers, but increases their size.
• Disadvantages include: investment costs, addi-tional workload and the risk of too long sprouts. • The costs of £ 500 to £ 600 (or 500 to 600 ¤)
per ha are reclaimed through higher yields and yield security.
• The age of the planting material, the vernalisa-tion, the variety, the maturity group and the utili-sation all influence the chitting procedure. • Temperature has the largest influence on the
number of later sprouts.
• New potatoes should have fewer sprouts in order to reach the required size quickly. Seed potatoes should have more sprouts.
• Chitted tubers should be planted only with the appropriate technology (rolling-floor planter, belt planters) to prevent breaking off sprouts. • Empty chitting boxes and bags carefully, to
pre-vent sprouts from breaking.
Chitting containers Notes
Chitting boxes: white plastic trays, 60 × 40 × 18 cm, 4 piles on a Euro-pallet
• Fill-in 2, max. 3 layers; about 10 kg per box. • At planting, take tubers directly from the crates. • Sort out sick tubers during the transfer. • Large workload for transfer, stacking, transport. Chitting bags: hanging
mesh bags on metal frames, 125 kg capacity, 5 tubers are juxtaposed
• Hardly any manual work when using a fully automated machine.
• Low space requirement outside chitting period. • Clumping of tubers in case of delayed planting. Large boxes: flat (wire)
crates with a second 'cage' holding the inside
up to a coat of 30 cm
• Low workload.
Nutrient supply
Potassium
• Potatoes are among the most potassium-hun-gry plants in agricultural production. Potassium is the mineral with the highest concentrations in the potato plants and tubers.
• Potassium is important for the development of starch. Moreover, it improves the shelf life and reduces the number of damaged tubers. How-ever, too high a supply of potassium can have a negative impact on dry matter and starch con-tent.
• A sufficient supply of potassium increases the amount of organic acids and the vitamin C content in the tubers. This, in turn, leads to a decrease of discolouration in the raw state and after cooking, as well as a reduction in bruising. • Potassium from farm fertiliser (manure, slurry,
etc.) can be fully taken into account. If neces-sary, organically approved potassium fertilisers (potassium sulphate) are available with prior approval.
Nitrogen
• From planting to emergence, the potato lives off the mother tuber’s reserves.
• The potato crop needs the majority of the nitro-gen during the short period between emernitro-gence and tuber development. An optimal nitro gen supply within the first 35 to 50 days after emer-gence contributes to a good tuber growth and is the most important requirement for good yields. • The nitrogen demand of potatoes depends on
the variety, local conditions and yield expecta-tion. It varies between 80 and 140 kg available N per hectare.
• A good nitrogen supply results in stronger leaf growth. This leads to earlier crop covering and better weed suppression.
• The more nitrogen is stored in the leaves, the more tubers develop daily and the longer yield production lasts (unless leaf blight occurs). While during the formation of the tubers, the plant continues to extract nitrogen from the soil, the majority of the necessary nitrogen is trans-ferred from the leaves. When the nitrogen sup-ply in the leaves is exhausted, the tubers mature. • In healthy crops, a good N supply leads to an
increase in large tubers and to a higher indivi-dual weight of the tubers. However, it can also lead to an increase in hollow hearts, secondary growth, and growth tears.
• If the N supply is too high, the constant devel-opment of new leaves and stems can create a large, dense foliage. This can result in delayed formation of tubers and a decrease in growth rate. Early infestation of leaf blight could in this case lead to losses of revenue.
• An N supply that is too high, or rather too late, has a negative impact on dry matter and starch content, as well as processing properties and flavour.
• A too high release of N in late summer with a low K supply at the same time impairs matu-ration due to re-sprouting. This, in turn, compli-cates haulm destruction.
Release of nitrogen from the soil
• Biologically active soils deliver about 20 kg of N per ha (the higher the fertilisation or the amount of pre-crop residues, the higher is the N-mineralisation) under favourable mineralisa-tion condimineralisa-tions during the vegetamineralisa-tion period. • With the first two field operations
(ridging/hoe-ing), approximately 10–20 kg N per ha are addi-tionally mineralised.
Nitrogen from the preceding crop
• One-year fodder and grain legumes are among the most favourable preceding crops.
• Ploughed grass/clover provides 80–140 kg avail-able N per hectare, if the conditions for mineral-isation and timing are good. Ploughing of grass/ clover should be avoided in the autumn to limit the risk of leaching.
• Grain legumes leave, depending on the varie-ty, between 50 and 100 kg of available N per hectare to the succeeding crop (grain peas: 50–80 kg, field beans: up to 100 kg). After grain peas, a catch crop should be cultivated to organically bind nitrogen during the winter and protect it from leaching.
Nutrient supply
In order to prevent
Rhizoctonia, use only processed, well-rotted manure and apply it in autumn on the preced-ing or catch crop.
For fertilising in spring, use aerated slurry or nitrogen rich manure.
A good supply of potas- sium and magne sium increases the quality, prevents damage and internal bruises and improves shelf life.
Liming before or dur-ing the cultivation of potatoes increases the risk of scab infection.
A high nitrogen sup-ply in late summer can have a negative effect on dry matter and nitrogen content, and hence on the flavour. Furthermore, it increases susceptibility to damage, and to dis-colouration in the raw state and after cooking, as well as reducing storability.
Important to know
• Organic farming uses organically bound nutrients as fertilisers. Organic farmers ‘feed’ the microorganisms in the soil, which make the nutrients available for the plants.
• The release of nitrogen from fertilisers de pends on the amount of fertiliser, or rath-er the nitrogen content, the type of frath-ertilisrath-er and the conditions for mineralisation in the soil. The more active the soil is, the higher the soil organic matter content is, and the better the aeration and weather conditions (soil moisture) are, the higher nitrogen mine rali sation is.
Fertiliser
Manure
• Cattle manure is very rich in K; pig manure con-tains less K but higher amounts of P.
• A dose of manure can be recommended as basic fertilising. If there is danger of Rhizoctonia
infestation, the manure should be applied to the preceding crop in autumn and not directly to the potatoes. A reduced effect of the fertiliser and the risk of nitrogen leaching should be kept in mind!
• It is recommended to use at most 25–30 tonnes of manure per hectare. Too large a dose leads to a prolonged nitrogen supply, which impedes the maturation of the crop. In the case of dryness or heavy soils, only the succeeding crop might benefit from the nutrients. The regu-lations limit nitrogen use to 170 kg per hectare.
Slurry
• Cattle slurry has relatively high K and N contents; on the other hand, pig slurry has higher N and P contents. The nutrient contents of anae robic digestate depend heavily on the fermented sub-strates but are generally high in available N; they can be used effectively in potato farming.
kg per ha
Nutrient requirements
Nutrient supply with slurry
Nutrient supply with manure
Nutrient requirements for a yield of 25 tonnes per hec-tare and supply by typical farm fertilisers (15 t of manure and 20 m3 of slurry per ha). Soil and pre-crop also
supply nitrogen.
• Slurry should be applied ideally during the preceding crop or before planting. It should be worked into the soil immediately after applica-tion.
• 15–30 m3 of cattle slurry per hectare is
recom-mended if applied in spring and immediately worked in.
• As doses increase (up to 150 kg N or 45 m3
of slurry per hectare), yields decrease. These amounts should be applied to the preceding catch crop to avoid loss of quality and flavour.
Compost
• Like manure, composted manure and other composts provide a good supply of potassium and magnesium. Composted manure has a signi ficantly lower effect on N supply than fresh manure, or rather stacked manure.
• Composts from plant material can also be used. They deliver both macro- and micronutrients to
the soil.
• Compost may also offer additional benefits by suppressing phytopathogens in the soil to reduce crop disease.
The nitrogen supply has a significant impact on outer and inner quality features of the potato as well as on yield.
Fertilising
A balanced dose of manure can have a positive effect on the K content of the tubers, whereas excessive fertilising with manure leads to a decrease of starch and dry matter content in the tubers.
Doses of slurry and N that are too high can increase nitrate content and decrease dry matter and starch contents in the tubers.
Compost from plant material that is applied in the planting furrows can reduce Rhizoctonia
infestation.
Analytical methods for assessment of the N supply
Nmin-analysis:
• Nmin-levels in the soil at the beginning of the
vegetation period have only a small signifi-cance with regard to the estimation of the expected tuber yields.
• The Nmin-levels at the time of the
emer-gence of the potato plants are more suitable for the estimation of the tuber yields (ideal values: 110–140 kg Nmin per ha).
Leaf and stem juice analysis:
• Measurements in the growing plants can be used to derive future, site-specific cultivation recommendations.
• For leaf analysis the total nitrogen content and, if necessary, further nutrients are deter-mined in the uppermost, fully developed potato leaves. The analysis must be carried out in a laboratory. The total N content in the dry mass of the leaves at flowering of the potatoes should be between 4 % and 6 %. • The stem juice analysis can be carried out
rel-atively simply and cost-effectively directly in the field, by the farmer or the consultant. The stem juice is pressed out from the lower sec-tions of the main stems and the nitrate con-tent is analysed with the Nitracheck reflec-tometer. At flowering, the nitrate content should be between 3500 and 4000 ppm.
Note:
sory services if a specific mineral deficiency is identified. Magnesium is particularly important (particularly on lighter soils that may not supply enough), as are boron and manganese for yield and quality.
Plant and soil additives
In order to increase the plants’ resilience and soil fertility, plant strengtheners and tonics can be used on organic farms. Examples are whey, stone meal, compounds with microorganisms, her bal extracts, compost teas or herbal teas. In many cases, the effect and mode of action have not yet been studied or clarified, and the resulting yield increases have not been scientifically proven.
Purchased fertiliser
• Organic commercial N fertiliser enables fertilis-ing in sprfertilis-ing with a low risk of Rhizoctonia infes-tation.
• For potato farming, fertilisers that mineralise quickly should be used. They should be applied at time of planting, or at the latest when hoeing for the first time.
• When using ground legumes, field beans (fine-ly ground) are preferable to peas.
• Due to the high costs, the use of organic N fer-tiliser is only recommended if not enough farm manure is available and the soil is not suffi-ciently supplied with nitrogen.
• Phosphorus needs are normally met by manure or compost. If additional phosphorus is needed, rock phosphates or organic chicken manure can be used as supplements.
• The use of mineral K fertiliser is only allowed if the deficiency is proven (soil analysis). In case of need consult your certification body. Potas-sium is best applied as sulphate of potash (as potatoes are susceptible to chloride toxicity). • Lime should not be applied to potatoes or the
preceding crops.
• The need to use leaf and trace element fertil-isers must be documented clearly by the farm-er, e. g. by performing soil or leaf analyses. It is advisable to consult the Control Body or
Soil and seedbed preparation
Soil preparation
• During soil preparation, harvest ridges should be free of stones and clods because they inhib-it growth, deform the tubers and damage them during harvest. If the amount of clods in the ridge is 5–10 %, the proportion of tubers and clods within the crop is the same.
• When grass/clover is tilled or soils are heavy, the use of a plough is appropriate. Using a chisel plough is recommended on medium-heavy soils and in dry areas (to conserve water).
• Primary soil tillage should only be performed if the soil has dried sufficiently. The ideal time for primary soil tillage depends on the soil conditions and the location.
• In heavy soils, the primary soil tillage should be done in late autumn, so that the soil dries faster in spring.
• Lighter soils (sand, clayey sand or sandy clay) can be tilled in spring (after catch crop cultivation), possibly with reconsolidation.
Seedbed preparation
• The less the soil is compacted before planting, the better.
• On light soils, prepare the seedbed with a spring tine cultivator including a cage roller / packer. On heavier soils, use a rotary harrow (watch out for soil moisture within the tilled area, otherwise soil smearing might occur!).
• If possible, only one operation should be per-formed in spring: e.g. with a front-mounted rota-ry harrow (possibly with shaping board) and a rear-mounted potato planter.
Tillage
Tillage or planting during wet soil con-ditions leads to clods, deformed tubers and damage during harvest.
Cold, wet soils promo-te Rhizoctonia infection as early as during sprouting. To improve warming of soils, shal-low ridges should be built from the start.
Cost calculation (example) for applying 55 kg N per hectare of a purchased ferti liser containing N:
Fertiliser (11 % N): £ 65 (¤ 65) per 100 kg Application: £ 30 (¤ 30) per hectare Total: £ 355 (¤ 355) per hectare At a selling price of £ 60 per 100 kg and an 80 % share of expenses, these costs are com-pensated if there is additional yield of 700 kg per hectare. An additional yield can be achieved without problems despite a low N supply if the supply can be improved by N fertilisers.
Planting
Planting date
• The ideal planting date varies widely, depending on region and altitude. The most important factor to determine the planting date is soil temperature. It should be around 8 °C, or 6 °C for pre-sprouted potatoes. The soil should be sufficiently dry.
Planting depth
• The tops of seed potatoes should be level with the original soil surface.
• New potatoes should be earthed up less than ware potatoes to achieve quick emergence.
Spacing within the rows
• Basic rule: Less spacing between the plants leads to smaller tubers than more spacing. Standard: 30–35 cm
Seed potatoes: 22–26 cm Baby potatoes: 13–20 cm
• Varieties that tend to form large tubers, or devel-op growth tears or hollow hearts (e. g. Agria), should be planted more closely.
• Early potatoes should be planted further apart in order to achieve the necessary size faster.
Ridge spacing
• If all row crops on the farm (potatoes, maize, sugar beets and vegetables) have the same track width, the time-consuming rearrangement of the machinery can be avoided.
Spacing 75 cm
• Standard, since most machinery is designed for a track width of 1.5 m.
Spacing 90 cm
• Potatoes can also be planted with a spacing of 90 cm. In that case, the tubers should be plant-ed at a spacing of about 25 cm within the row, to achieve a favourable plant density. This spa-cing is an alternative for industrial potatoes, for which large tubers are desired.
• Advantages: larger ridges, fewer green tubers, better water storage in the ridge, better aeration of the plants, better nutrient supply, and wider tyres are possible. It may also help reduce the risk of late blight spread.
• Disadvantages: more complicated road trans-por tation of machinery (track width 1.8 m), crop covering will occur later or not at all; thus, there is a higher risk of late weed infestation.
Intact planting row Row with pressure damage Omitted rows
Planting
Quick emergence in warm soil, shallow earthing-up during planting and blind harrowing reduce the risk of infection with diseases during emer-gence (Rhizoctonia and
Erwinia).
To prevent sprouts from breaking off chit-ted tubers, the potato planter should be used with a horizontal belt for distribution.
Standard: no tramlines
Driving through is only possible with single tyres. Hence, long waiting times after precipitation on heavy soils. Otherwise, it can result in compaction of neighbouring planting rows, which can deform the tubers and impede their growth.
Damaging the plants along the tram-lines increases susceptibility to leaf diseases.
Tramline with one middle row Same advantages as tramline with
two middle rows, but without the compacted planting rows.
Recommended version when using tramlines.
Tramline with two middle rows Possible to drive on wide or twin
tyres.
Compaction on the inner rows. Loss of yield due to empty rows. Additional yield in remaining rows. Tramlines are not very common in organic potato farming,
but they do offer an advantage: it is possible to drive on the fields shortly after preci pi tation with wide or twin tyres with-out damaging the tubers or ridges. The yield loss from
omit-ting planomit-ting rows is partly compensated by additional yields in remaining rows. Tramlines are, however, only profitable when using larger spray booms. Repeated driving on tram-lines is usually enough to suppress weeds in vacant rows.
Intact planting row Row with pressure damage Omitted rows
Intact planting row Row with pressure damage Omitted rows
Tramlines for timely plant protection
• The ideal time for weed control is before the weeds become visible (in the white-thread stage /pre-emergence); at the latest when the weeds reach the two-leaf stage.
• Going through the rows with a harrow before emergence (blind harrowing) promotes fast emergence.
• The newly emerged plant is sensitive and should not be harrowed. As soon as the leaves turn green, only harrow gently up to a crop height of 10 cm. Plants of more than the size of a fist should not be covered anymore.
• In order to establish well-covering ridges, apply a ridge-shaping device during the last tilling round. • Preferably, hoeing should be carried out in the evening, when the leaves are upright (less chance of covering them with earth).
Covering early potatoes with a fleece, accel-erates development.
Covering requires work hours and material costs; moreover, it increases the risk of leaf blight and weed infestation. Covering is therefore only profitable for early planted potatoes and high value crops.
The cover must be removed temporarily for weed control.
As soon as the tubers reach the size of cherries or the temperature beneath the fleece / foil reaches more than 30 °C, the cover must be removed (choose a cloudy day or evening).
After removing the cover, check the crop for leaf blight infection.
Crop maintenance and weed control
Multipurpose device: harrowing, earthing up and possibly hoeing in one go.
Rotary hoe: makes well-covered ridges; has a tricky setting; not applicable on very stony soils; less suitable for ridging at the end of the rows. Ridgeshaping board: recommended for the last tilling round.
Rotary hiller: makes well-covering ridges; greater soil disturbance; risk of capping; only recommended for difficult, cohesive soils. Ordinary harrow: versatile and quickly employable; affects only the ridge crest (excep-tion: Treffler harrow).
Ridge harrow: only in combination with hoe; good adjustment to the ridge shape.
Harrow groom: compared to the tined weed-er, better effect in the entire row, very effective at pre-emergence stage, greater crop damage at post-emergence stage.
Hoeing equipment with rigidly mounted duckfootblades: employ only when no risk of damaging roots.
Possible devices to control weeds Covering early potatoes
Possible approach on different soils
Light soils Heavy soils
1st ridge formation Rotary hiller
1st harrowing Harrow (for a quick emergence) Harrow 2nd ridge formation (Harrow +) ridger /rotary hoe Disc ridger or
ridge-shaping board 3rd ridge formation Ridge harrow + ridger /rotary hoe
or ridge-shaping board
Often unnecessary
A strict adherence to this programme of equipment use is not a good idea. The equipment used and number of processes should take account of the
weather, the development stage of the crop and weeds, and the sensitivity of the varieties.
Weed control
Hoeing damages the delicate root hairs at the side of the ridge, and can also lead to damage on the leaves. Roots and leaves can thus become ways for diseases to enter the plant.
Potatoes that experien-ce damage on their root hairs respond with growth disturbance and lower yields.
The goal of measures for crop maintenance is to create a large, stable, centrally positioned ridge, to open up surface crusts for better aeration and to control weed growth until crop covering.
General guidelines:
(See also maintenance plan on pages 2 and 3)
• For driving though the crop, only light tractors with narrow tyres should be used.
• After planting, the ridges should be harrowed and earthed up, alternately. The harrow gets rid of the weeds on the ridges, while the hoeing device reaches the weeds between the ridges. If both techniques are combined, the number of passes through the field is reduced. Ideal speed: 5.5–7.0 km/h.
Protection of the leaves from diseases and pests
How to recognise
• Leaf surface: brown spots, partly looking oily, blurred transition to healthy tissue.
• Underside of the leaf: grey / black spots, and white fungal growth during wet weather (especially on the edge); the fungal growth can be cultured by keeping the leaf in a wet bag overnight to facilitate identification. • Stems: symptoms similar to the leaf surface • Not to be confused with frost damage, ‘sun
burn’ or grey mould (grey fungal growth on the surface /underside).
Important to know
• Optimal transmission (airborne spores) occurs when the relative humidity is over 90 % and the temperature around 18 °C. If the infec-tion is very likely, the fungus can infect an entire crop within a few days. Depending on the weather conditions, it takes between 2–3 weeks and 2 months for the plants to die off after initial infection. In dry weather, the infection stops spreading; in wet weather, the infection increases.
• In the UK, the information and alert service BlightWatch, supplied by the Met Office and supported by AHDB Potatoes, informs farmers on the current risk of occurrences of blight dur-ing the growdur-ing period. Alerts are generated and sent to users based on the update to the traditional Smith period, the more advanced Hutton Criteria (Criteria met on 2 consecutive days: Minimum air temperatures are at least 10 °C, and relative humidity is 90 % or above for at least 6 hours) or when a confirmed out-break in your area occurs. Optimal control of leaf blight serves to protect plants and neigh-bouring crops that have not yet been infect-ed, with Blightwatch alerts providing an early warning to aid management decisions.
• Containment is most likely to be possible in the early stages. Hence, close monitoring of the crop is important!
• The initial infection of the leaves can be brought on by (latently) infected planting material, volunteer potatoes or tubers on com-post heaps, or it can be brought in by wind from a greater distance. Tubers are infected through seepage of spores from infected leaves, or smear infection during harvest.
How to prevent
• Select varieties that are as resistant as possible and grow tubers early (in the UK, see AHDB National Potato Variety Database). In the long run, there is a risk of breaking the resistance of individual varieties. In order to spread the risk, several varieties should be cultivated.
• The Sarvari Research Trust (SRT) breeds new disease resistant varieties of potato traded by Sarpo Potatoes Ltd. Several have excellent foliar blight resistance, including Sarpo Mira, and Sarpo Axona. Others have highly resistant tubers such as Blue Danube.
• A successful breeding programme in the Nether lands (Agrico Research BV) has also produced a wide range of blight resistant varie ties for organic production in the UK. Two of the highly blight resistant organic varieties on offer are Alouette and Carolus.
• Plant only healthy looking tubers. Discarded tubers should be composted at 60 °C. • Chit the tubers. Infected tubers start to rot
dur-ing the chittdur-ing and can be removed. Plants develop earlier from chitted seed tubers and often form tubers before initial infection. • Plant late and early varieties in separate fields.
If such a spatial separation is not possible, the more susceptible (early) variety should be cul-tivated on the side of the field downwind of
Infection on the leaf surface Stem infection
Phytophthora infestans
Leaf and tuber blight
Other diseases and pests
Besides Leaf and tuber blight, the Potato cyst nematode, and the Colorado beetle (outside the UK) other diseases and pests can attack the potato plants. However, they are often of minor importance and there are no specific control me thods in organic farming.
The publications listed on page 28 offer detailed infor-mation on preventa tive measures.
Infection on the underside of the leaf
Integrated systems approach
As for pest and disease management in organ-ic farming in general, an integrated systems approach should be taken for leaf and tuber blight, too. It should integrate the use of (i) resistant varieties, (ii) available agronomic control stra-tegies, (iii) alternative treatments (e. g. organi-cal ly-based fungicides, plant ‘strengtheners’ and bio-control agents which can replace synthetic and copper-based fungicides) and (iv) optimisation of blight control treatments utilising existing blight forecasting systems with the aim of maxi mising synergistic interactions between (i), (ii), (iii) and (iv).
the prevailing weather conditions. Cultivation in multiple rows and alternating between sus-ceptible and less sussus-ceptible varieties (‘mixed crop’) can delay the spread of the disease. • Cultivate a strip of at least 12 m of a different
species (e. g. wheat or grass/clover) perpen-dicular to the prevailing conditions.
• Avoid overly strong development of leaves (by adapting nitrogen fertilising) and heavy weed infestation. This means that the crops dry faster. • Avoid volunteer potatoes in the succeeding
crops (risk of primary infection). Pigs can be good at removing groundkeepers.
• Either remove potato plants from waste heaps, or flame them or cover them with earth. • Regularly check the plants and rogue by
remo-ving the stems and foliage of plants within a 3 m radius of an infection (flame or mow the leaves to leave the tubers in the soil).
• In the case of a severe infection, chop the leaves off plants with tubers that are ready for harvest and before heavy rains. Put the leaves at the bottom of the ridge.
• After the leaves have died off or have been removed, wait 2–3 weeks before harvesting. This allows the skin to set, reducing the risk of infection from sporulating leaves during harvest.
• Large ridges without dry cracks decrease seepage of spores into the ridge.
How to control
• The only copper-based product licensed for use in the UK, Cuprokylt, was granted emer-gency usage for the 2017 season. Certification bodies in the UK were applying for another emergency extension for the 2018 season. The long term future of copper for use in organics for blight control is uncertain so those growers still relying on it must think about adapting their practices.
• After infection, the fungus cannot be stopped from spreading through the plant.
• The affected plants must be removed and the protection of healthy crops must be increased. • In practice, plant strengtheners/tonics are often used, such as rock dust, horsetail tea, skimmed milk or whey and compost tea. • According to practical experience, rock dust
strengthens the resistance and supports the drying of the leaves. Scientific tests by FiBL could not prove a sufficient efficacy of these agents for control of foliar blight.
Risk of leaf blight
Dose of copper
Level of infection
None Low
0.75 kg/ha 1 kg/haHigh
Infection in neighbouring crops or within the crop, or the Hutton Criteria has been met Infection
within the region No infection
within the region (50 km radius)
Low Medium High
Application strategy for copper
Treatment Weather
When to spray
sion support on assessing the risk to a pota-to crop. The models use local weather data from the Met Office to calculate the current risk of infection for every crop allowing the farmer to take the necessary precautions. If the yield production has progressed rather far (assessed by taking a yield sample) at the time of initial infection (often after mid / end of July), the risk to the tubers is very low. If the crop and wider environment of the site are not yet infected, the likelihood of infection may be very low, especially in dry weather. In the case of wet weather and infection in the surrounding region or within one’s own fields, the likelihood of infection is rather high.
The control strategy for late blight in organic farming was based on the use of copper fungicides but at the time of writing there are currently no copper products licensed for use on crops in the UK following the rejection to relicense Cuprokylt (Certis). An application by AHDB for authorisation for emergency use of Cuprokylt was accepted in time for the 2017 season and was granted for 120 days from 15th May 2017, before final prohibition
of copper based fungicides in organic potato production. Blight management should be based on estimating the current risk of infection in the crop. This depends on the infection in the region, the precipitation, the suscep-tibility of the variety and new growth. Sound knowledge of the current situation in the region (alert systems) and on one’s own farm (frequent field checks) is required for optimal control. The Blight Watch system offers
deci-The treatment should be carried out early enough before heavy precipitation to let it dry, in order to protect the crop.
Copper products only have a fungicidal effect upon contact. An even wetting of the leaf surface and underside in the entire crop is required to ensure a good effect. To control the distribution of the spraying mixture within the crop, there is a
gene-Use enough water for spraying:
• The amount of water should be chosen to properly wet the leaves; however, the spray mixture should not drip off.
• The amount of water should be adapted to the leaf mass: 400–600 l per hectare is common. In lush crops, 600–1000 l per hectare may be needed. • Average driving speed of 4–5 km / h is favourable.
Improve the spraying angle:
• Turn the spray pipe 40° to the front (not possible with all brands). This allows droplets to enter the crop better.
Install double flat fan nozzles:
• The slanted spraying angle allows droplets to enter the crop better.
Use high pressure:
• Choose pressure of 7–10 bar.
• To reduce spray drift, install rebound or injection nozzles that form larger drop-lets than regular nozzles.
Use under-leaf spraying:
• The spray elements specifically wet the underside of the leaves and the lower levels of the foliage (pressure: 4–5 bar).
• Installation is not equally possible on every spraying machine because the spraying elements and the tubes must not interfere with folding-in of the machine.
• The under-leaf spray elements of more recent models rarely become entan-gled in the dense foliage.
• More suitable with a row spacing of 90 cm (due to a later crop covering). • The distance between the elements must coincide with the spacing of the
rows in the crop. For use in other crops, the distance must be adjustable. • Due to strong resistance only a relatively small bar width is possible.
Spraying with compressed air:
• The compressed air moves the leaves and transports the droplets far into the foliage.
• Low drift.
• Less water needed.
• Larger investment and thus only useful for large-scale application. • Especially suitable in combination with tramlines.
Benefit: ++ Cost: +
Benefit: + Cost: +
Benefit: ++ Cost: ++
Benefit: ++ Cost: ++
Benefit: +++ Cost: +++
Benefit: ++ Measures for improved application
Cost: +++
Adult potato beetles Nematode cysts on potato roots.
Larvae Eggs
Leptinotarsa decemlineata
Potato or Colorado beetle
In UK: Globodera rostochiensis (yellow PCN) and Globodera pallida (white PCN) Potato cyst nematode (PCN)
Important to know
• The Colorado potato beetle is a distinctive yellow beetle with ten longitudinal stripes on the wing cases. Adults are up to 11 mm in length.
• This species is not established in the UK and is a notifiable quarantine pest of potato (plus tomato and peppers), with the potential to greatly reduce yields.
• Colorado potato beetle has been eradicated in UK, but is widespread in continental Europe. In GUK it is most com-monly intercepted in spring or early summer from Europe on plant produce (e. g. salad vegetables, potatoes, parsley). • Potato growers in the UK should remain vigilant and contact the local Defra Plant Health and Seeds Inspector, if pres-ence of the beetle is suspected in a crop or import con-signment.
Important to know
• Nematodes damage the roots and affect yield even when no symptoms are evident in the haulm.
• The potato cyst nematode is the most important potato pest in the UK, with the potential to cause major yield losses. • The white PCN is the most common nematode due to its
prolonged hatching period and the selection pressure from the cultivation of several varieties resistant to the yellow PCN. • PCN damages the roots of potatoes, resulting in poor growth, wilting during periods of water stress, early senescence and a reduction in tuber yield by as much as 80 %.
• In the UK, AHDB Potatoes offers a web based calculator tool that acts as a decision justifier, demonstrating the implica-tions of a grower's acimplica-tions on the level of infestation by the white PCN and the effect on predicted yield.
• If the infestation is very low, the yield reduction can be so low as to be unnoticeable when a crop is commercially har-vested. This can lead to a false impression that PCN can be ignored due to no visible drop in the expected yield. The effect on the final population after harvest could become an issue for subsequent potato crops.
• The nematode is mainly spread by the movement of cysts in the soil attached to potato tubers, farm machinery or foot-wear. Cysts can also be spread by wind or floodwater. • Under EU Directive 2007/33/EC, seed potatoes or potatoes for
export must only be planted on land that has been found to be free from PCN infestation following an official soil test, under-taken by a PHSI inspector. The growing of ware potatoes is per-mitted subject to the implementation of a Control Programme.
How to recognise
• In the initial stages plants may appear stunted with wilting, with poor patches of growth. In more severe cases plants may start to show chlorosis.
• If infected plants are lifted, the nematode cysts should be visible on the roots.
• Nematodes have slender, transparent bodies, reaching approximately 1 mm in length.
• As females mature, they swell, forming spherical cysts 1 mm in diameter, which are white / cream coloured. At this stage they can be seen attached to the roots.
• As females mature and die, the cysts develop a reddish-brown hard skin. Mature cysts can be seen attached to roots but usually drop off at harvest, remaining in the soil as a source of infection for future potato crops.
• The infestation level of a soil can be determined by soil extraction. This service is available from a number of accredi-ted laboratories.
How to prevent
• Take marginal land out of production and avoid growing on the worst affected land.
• Soil sampling should be done regularly to identify and moni-tor the threat.
• Biofumigant crops such as mustard can be chopped and incorporated into the soil to help kill PCN eggs.
Irrigation
• Dry soil during early development promotes a wide root system.
• Early irrigation promotes the conversion of organic matter and, thus, the N supply.
• After stem elongation has started, the soil should be kept moist, otherwise tuber forma-tion might start too early and more than one generation of tubers might form.
• Dry periods during tuber formation lead to a growth check, reduced tuber formation and thus to yield and quality losses.
• From tuber formation to flowering, the water content within the ridge should be kept to a minimum of 50 % of the field capacity.
• Depending on the soil and the potatoes’ devel-opment stage, the irrigation rates are 20–35 mm per application, but the soil should not be filled up by the sprinkler application to more than 80–90 % of the usable field capacity.
• During tuber growth, sufficient water content is crucial for yield production, especially from 3 weeks after flowering until maturation. • In case of need, it makes sense to irrigate the
potatoes directly before harvesting to carry more soil onto the filter belt and thus reduce the risk of damage.
Irrigation
Sufficient moisture at the time of tuber formation (initiation) prevents common scab infection (S. scabies).
Sufficient moisture dur-ing tuber development reduces secondary growth and growth tears, and leads to uni-form cooking quality.
Soil that is too wet at tuber initiation can promote powdery scab (S. subterranea) infection through lenticels and occasion-ally through eyes or wounds.
• Drip irrigation is often most effective as it reduc-es the humidity in the canopy (reducing the blight risk) and is more efficient in terms of water application.
Irrigation for frost protection
• Can prevent frost damage in short-term frost periods down to –6 °C.
• Turn on irrigation shortly before the temperature falls below freezing point; in the case of cov-ered potatoes, turn on when the fleece freezes to the moist soil. Irrigation that is performed too late can lead to damage!
• Amount: 3 mm per hour (4 mm nozzles).
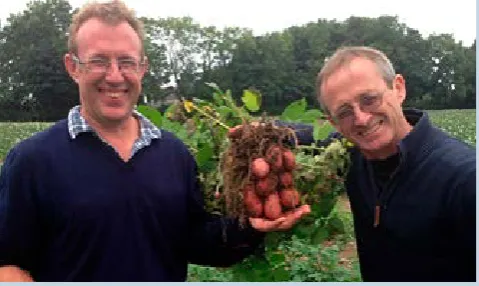
Irrigation contributes to yield and quality security, especially on lighter soils. At the heart of my late blight limitation strategy is the selection
of resistant varieties. I grow 6 main varieties that all offer reliabil-ity and securreliabil-ity. The 4 most blight resistant varieties today are Allouette, Cara, Carolus, and Toluca. I also grow Agria because of its all-round use and great yield even though it’s not very blight resistant but is manageable. I grew Rudolph for the first time this year which looks to be a nice potato, but I will try something different next year. Agrico run field days with trial plots of blight resistant varieties that allow me to select what to grow. Each year I try out new varieties and will give out free samples of these to the box schemes to help introduce them to the consumer.
Measures combined for late blight control:
• Number one is selecting resistant varieties, either from Biose-lect or from the Sarvari Trust.
• I try to sow as early as possible as I can’t extend the growing season at the other end due to the risk from blight. I do chit very early potatoes but as a small grower don’t have the time, facilities or labour to chit the main crop.
• I use wider in the row spacing (approx. 41 cm) to decrease the competition between crop rows and also reduce the leaf wet period as I get more air circulating around the foliage. • I’ve stopped cropping the headlands as this is often
com-pacted and the area where the crops struggle and are least healthy.
• I don’t apply too much farmyard manure as there is usually enough fertility from the ley, but if I do use it, I make sure it’s well composted. I don’t believe in pushing the crop too hard. I’ve found that growth cracks and scab can occur when too much farmyard manure is added, and I prefer a slightly lower yield that stores well and tastes better.
• Once the blight infection has come into the crop, I’ll burn off the foliage of infected plants to prevent the disease spread-ing to the other plants and to the tubers.
Fred Bonestroo’s late blight limitation strategy
Krautentfernung
Haulm removal
Removing haulms early promotes an early har-vest and reduces the risk of wireworm and
Rhizoctonia infestation.
Removing haulms on time can reduce the risk of tuber blight in the case of leaf blight.
Late haulm destruction can lead to higher starch contents, better baking properties and an improved flavour.
The use of mechanical
haulmremovers that areadapted to the ridgeprevents damage onridges and tubers (green tubers).
For the sample dig, the tubers of four different plants are dug out at several locations in the field.
Methods of haulm removal
Mechanicalremoval
• Standard procedure; only applicable in ma tu-red crops (also depending on variety). • Cost-effective and beneficial in terms of
energy use.
• A remover that is specifically adapted to the shape of the ridge and deposits weeds into the furrows is advantageous. Flail mowers are most suitable for haulm removal. • Flame if regrowth occurs.
Flaming
Direct:
• Can be sensible in the case of heavy leaf blight infection, to kill off the spores. • A fast pass at 8–12 km / h can be used at
the initiation of the maturing process. • Fuel consumption (if flaming is the only
measure used): about 110 kg of propane per hectare.
After haulm removal and drying:
• Heat exposure on the remaining stems prevents regrowth over the long term. • Fuel consumption: about 70 kg per hectare. Uneven soil conditions and leaf blight of various degrees within a crop often lead to uneven mat-uration of the tubers. A well-timed haulm removal promotes even maturation as well as early setting of skin and early harvest maturity.
Further benefits of early haulm removal:
• An early harvest reduces the risk of damage by wireworms and Rhizoctonia.
• In the case of leaf blight infection, the haulm removal reduces the risk of tuber blight caused by seepage of spores into the ridges.
• Haulm control can enable the management of the maturation process and thus offer a certain degree of influence on tuber size (preventing oversized tubers) and starch content.
• In the case of a strong late weed infestation, weeds can be destroyed, which will facilitate the harvest.
• In seed potato production, the well-timed removal of haulm prevents viruses from reach-ing the tubers in the case of high aphid pres-sure.
The basic requirement for successful haulm remov-al is visible senescence of the crop (foliage start-ing to turn yellow at the tips) and an appropriate starch content depending on the variety. Measures that are applied too early can lead to unripe and
non-storable products with a starch content that is too low, and regrowth of leaves and net necrosis. If, due to oversized tubers, too high starch contents or the occurrence of secondary growth, green leaves need to be removed, and a multi-stage strategy is required that is adapted to the variety’s properties and the weather conditions and that combines haulm removers and flaming technology.
When to remove the haulms
• When sample digs show that the tubers have reached the required size and desired starch content. The new PotatoSize App from Agro vista and the JHI can be used to accurately deter-mine the size of the crop (www.agrovista.co.uk/ potatosize-app/185/).
• In a healthy crop, when half of the leaves have turned yellow.
• In the case of leaf blight, to prevent the blight from reaching the tubers.
• Industrial potatoes: only when starch content and test baking meet the requirements. • Seed potatoes: the date depends on the size of
the tubers. Starch content and the occurrence of aphids may be important.
• In the case of regrowth: repeat measure, or maybe use flaming.
The more advanced the natural maturation of the crop is …
• The higher the starch content …
• The higher the sporulating leaf blight infection … • The higher the pressure of late weed infestation
dropping seeds …
• The higher the risk of wireworms and Rhizocto-nia …
… the more sensible and unproblematic the remov-al of the haulms is.
Harvest
Before harvesting, the state of maturity, skin sta-bility and tuber quality should be determined. The basic requirement for harvesting (except for early potatoes for certain markets) is the skin stability of the tubers.
What to watch out for
• The tubers reach skin stability at the earliest 2–3 weeks after haulm removal or after the haulms have died off completely. 18 out of 20 (90 %) tubers should withstand rubbing and applying pressure with a thumb at the end of the tuber. • As soon as skin stability has been achieved,
the harvest can begin. Each additional day of unnecessarily delayed harvest significantly increases the risk of impaired quality caused by
Harvest
An early harvest reduc-es the risk of infreduc-esta- infesta-tion with wireworms, slugs, Rhizoctonia and silver scurf.
Well-matured (skin- stable) tubers are less sensitive to damage and storage rot.
Careful harvesting at temperatures that are not too low helps to prevent damage.
Storage
Wound healing
• To allow wound healing, dry off tubers as fast as possible within the first 24 hours (avoid high humidity and condensation and provide posi-tive ventilation).
• Then store the potatoes for 3–4 weeks in a dry and airy environment (several air changes every day) at about 12 °C, or for 2 weeks at 15 °C. This promotes corking and wound healing, and reduces rot.
Cooling
• After drying off, cool the tubers at maximally 0.5–0.7 °C per day /1–2 °C per week. The differ-ence in temperature between the tubers and the outside air at ventilation should be at least 2 °C.
Longterm storage
• Only skin-stable product is suitable.
• Hot summers and high temperatures reduce the dormancy and the storage suitability. • Potatoes intended for consumption can be
cooled to 3 to 6 °C (depending on the variety; e. g. Nicola needs at least 5 °C)
• Low storage temperatures cause the sugar con-tent to increase. This has a negative effect on baking properties, and during frying and baking, high amounts of acrylamide are formed. The amount of reducing sugar after cool storage can be decreased to some extent by warming the tubers to above 10 °C for 2–3 weeks.
• Industrial potatoes: do not store below 8 °C. • Optimal relative humidity: 90–95 %. Check
stor-age temperature and ventilation regularly.
Storage
Dry the potatoes off before storage to prevent rot.
To avoid susceptibility to damage, warm the potatoes up to at least 10 °C before sorting,
washing or packing.
To avoid spreading diseases, only use clean boxes and expose them to the sun or disinfect them.
Clean off fine dust during sorting to reduce the spreading of silver scurf.
wireworms, slugs and Rhizoctonia. On the other hand, incomplete skin stability, a high number of tubers affected by wet rot, or very dry soil are all reasons to delay the harvest for a few days. • If soils are very dry and cloddy, irrigation with
5–15 mm of water per m2 can facilitate the
har-vest.
• In order to ensure a harvest that is as careful and gentle as possible, before harvesting, the potato harvester’s settings should be checked at each strike / batch by additional digging and tuber evaluation.
• Temperatures that are either too low (<10 °C: internal bruising) or too high (>25 °C: sweating and rot) should be avoided because they can decrease tuber quality and storage stability.
• Condensation on the walls indicates insufficient insulation. To avoid weight losses, the warmth can be transferred from the stored tubers to the walls and ceiling by regularly circulating air, which increases the humidity. IT-supported sys-tems allow optimal storage.
Spearmint oil
• Plant tonic based on mint oil and unsaturat-ed fatty acids (commercial name ‘Mitobar’). • Mint oil reduces sprouting of tubers. • Can be applied to seed potatoes and
pota-toes for consumption.
• Mint oil has an intense smell. Take care in case of short-term storage or overdose! Citronella, Clove, Rapeseed oil
• These oils can be used to inhibit sprouting of potatoes.
• Applied by spraying the storage area as soon as the first sprouts become visible in the form of white dots on the skin.
• Intense smell. Ethylene
• According to the EU-Organic Regulation, ethy lene can be used to inhibit sprouting of potatoes. Can be applied to seed potatoes and potatoes for consumption.
• In processing potatoes, it can have a nega-tive impact on the baking colour.
Holes in the tubers
How to recognise
• Round, approx. 1–4 mm sized holes with a black, frayed edge, filled with dry tissue.
• Depth: about 2–8 mm.
• Often together with Rhizoctonia spots.
Important to know
• Planting material with Rhizoctonia
spots and simultaneous occurrence of wireworms bears a high risk of dry core, as damage on the skin serves as entry point for the fungus. If the soil moisture content is high, infection can also occur via lenticels. • The risk of infection is increased in the first few years after perennial grass-clover leys.
How to prevent
• Avoid grass-clover leys as preceding crop.
• Wash the planting material and check for spots / dry core. In the case of a severe infection, replace the planting material. It is best to use uninfected planting material. • Properly chit the planting material
and plant it in warm soils. Dressing with antagonists has a limited pro-tective effect.
• Choose a long crop rotation. • Harvest as soon as skin stability
has been reached to reduce risk of infection.
• If the preceding crop is a grain, encourage the rotting of the straw. • Compost fresh manure; apply it in
the previous year and work it in well. • Expose the planting material to light during preparation to build up sola-nine.
How to recognise
• Round, approx. 2–4 mm sized holes with a sharp outline.
• Depth: a few millimetres up to the entire tuber.
Important to know
• The click beet les lay their eggs in the soil (with a preference for grassland) at a depth of 1–2 cm during May and June. The entire life cycle takes 3–5 years (depending on the spe-cies and the weather conditions). • Larvae in their second and third
year of development cause the greatest damage.
• Increased risk within the first three years after perennial grass-clover ley. • The risk of damage from wireworms is lower after a short term (1 year) grass-clover ley than after a long term grass-clover ley.
How to prevent
• Avoid too many grass-clover leys in potato crop rotation.
• If possible, do not cultivate pota-toes within the first three years after peren nial grass-clover ley.
• Harvest the tubers as early as possi-ble (but skin stability required!). • Specific tillage after the beetles
have laid their eggs between May and June, e. g. after over-winter green manure, or an intense stub-ble cultivation.
• Cultivating legumes (peas, field beans, bush beans) and brassicas (cabbage, fodder radish, mustards) can reduce the damage caused by wireworms.
How to recognise
• Early damage: irregular dents in the tuber.
• Holes of approx. 2–6 mm diame-ter on the surface and significantly wider within the tuber. Sometimes they contain faeces, eggs or slugs.
Important to know
• Caused mostly by smaller slug spe-cies (up to about 2 cm).
• Heavy soils, damp locations or proxi mity to clover leys, grass-land or fallow grass-land are high-risk environments.
• Increased risk in vegetable crop rotation (e. g. with spinach).
How to prevent
• Avoid grass-clover ley, non-perma-nent pasture, green fallow, vegeta-bles and rape as preceding crops. • Harvest the tubers as early as
possi-ble (but skin stability required!). • Slug pellets may be used if justified
but permission from the certifica-tion body will be required.
Tuber damage
The risk of tuber damage depends strongly on the variety, but it can be reduced by appropriate cultivation measures.
Holes in the tubers can be also caused by e. g. couch grass roots. Refer to specialised literature for more detailed information.
Damage on and in the tubers can only be determined on washed and sliced tubers. The tolerance for tuber damage is specified on page 25.
Rhizoctonia solani
Dry core
Larvae of Agriotes spp. Wireworms
Deroceras spp., Arion spp. and others Slugs