Introduction
Welcome to Visual C++. Over the next 21 days, you will learn how to use the features that Microsoft has built into its C++ development environment to enable you to create very advanced applications for the Windows and NT platforms. When Microsoft’s devel-opers first came up with the idea behind Visual C++, they decided to take their world-class C++ compiler and create a development environment and set of tools that would enable developers to create Windows applications with a level of ease and speed that was unheard of among C++ development environments. Since that first version, Microsoft has continued to improve the tools that are a part of Visual C++ to make it even easier to create Windows applications. As Microsoft has introduced new technologies into the Windows platforms, it has also introduced tools into the Visual C++ suite to make it easy to integrate these new technologies into your applications.
If you are new to C++, don’t worry. I’ve tried to make it easy for you to learn the C++ programming language while also learning how to build applications using the Visual C++ tools. Just in case you find yourself having trouble understanding some aspect of C++, I’ve included a brief overview of the programming language in Appendix A, “C++ Review.”
If you’ve looked at previous versions of this book, you might notice that I’ve completely rewritten the entire book. Our goal with this new version is not just to introduce you to and guide you through the various tools and resources that you will use to build applica-tions with Visual C++; I’ve also tried to include a great deal more detail about the vari-ous options that are available to you with each of the features that are covered. This way, you’ll be able to get a lot of use out of this book long after the initial 21 days.
How This Book Is Organized
This book is organized in weeks, with each set of seven days set off into a part unto itself. However, even though the book is organized in weeks, the topics are not neces-sar-ily organized that way.
By the time you begin the second week, you’ll be doing more and more programming, as the topics become more involved. You’ll still be using the Visual C++ tools to construct your applications, but the programming code will be getting a little more involved. You’ll also start learning about more advanced topics, such as displaying graphics and creating SDI and MDI applications. Toward the end of the second week, you’ll begin to work with databases. This topic spills over into the third and final week.
In the third week, you’ll learn how to create your own modules, DLLs, and ActiveX con-trols. You’ll also learn how to build multitasking applications, which perform multiple tasks at a time. Finally, you’ll learn how to integrate Microsoft Internet Explorer, and the ActiveX controls it provides, into your applications so that you can extend your applica-tions over the Internet.
After you finish the third week, you’ll be ready to tackle the world of Windows program-ming with Visual C++. You’ll have the skills and know-how required to build most Windows applications available today.
Conventions Used in This Book
While you are reading this book, you will probably notice a couple conventions that have been used to make it easier for you to learn the topic being discussed.
All the source code in this book is provided in a monospacedfont, as shown in Listing
0.1. This includes all the source code from the applications that you will be building and illustrations of how various functions can be used. Whenever you are adding new code, or changing code in a function with other code already there, the line numbers of the code that you add or change will be pointed out in the text.
LISTING0.1.SOME SAMPLE CODE.
1: void main() 2: {
3: // if you are adding or changing code in an existing
4: // code snippet, I will point out the line numbers in the text. 5: }
If a topic needs special attention, it will be set apart from the rest of the text by one of several special markers:
Notes offer a deeper explanation of a topic or explain interesting or impor-tant points.
Note
Tips are pieces of information that can make things easier.
Tip
Cautions warn you about traps that you will want to avoid.
Caution
At the end of each day, you’ll find a short quiz and one or two exercises to help make sure that you learned the topic you were studying. Don’t worry—just in case you need the answers to the quizzes and some guidance when building the exercises, the solutions are provided in Appendix B, “Answers.”
At a Glance
Welcome to the world of Visual C++. Over the next three weeks, you’ll learn how to build a wide variety of applica-tions using this extremely flexible and complete programming tool. Each day you’ll learn about a different area of function-ality and how you can use it in your applications. What’s more—every one of the areas of functionality will be accom-panied with a hands-on sample application that you will build yourself. There’s not a more effective way of learning new technologies than to work with them yourself. Learning by doing…that’s what you’ll do as you make your way through this book.
Over the course of the first week, you’ll learn about several of the basics that are involved in building applications with Visual C++. This starts on the first day as you learn about and become familiar with the Visual C++ development environ-ment by building a simple application.
On Day 2, you’ll begin learning more about the specifics of building applications in Visual C++. You’ll learn about the standard controls that are used in Windows applications, how you can place and configure these on an application window, and how you can interact with them.
On Day 3, you’ll learn how you can capture mouse and key-board events and react to them in your applications. You’ll see how you can determine where the mouse is in your appli-cation space. You’ll also learn how to determine what keys the user is pressing on the keyboard and how you can react to these user actions.
W
EEK
1
1
2
3
4
5
6
On Day 4, you’ll learn how to work with timers in a Visual C++ application. You’ll learn how to have two or more timers running at the same time and how you can tell them apart.
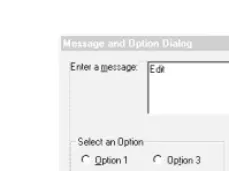
On Day 5, you’ll see how you can add additional windows to your application and how you can use them to get information from the user. You’ll see how you can use built-in dialogs to ask the user simple questions and how you can build your own custom dialogs to get more detailed information.
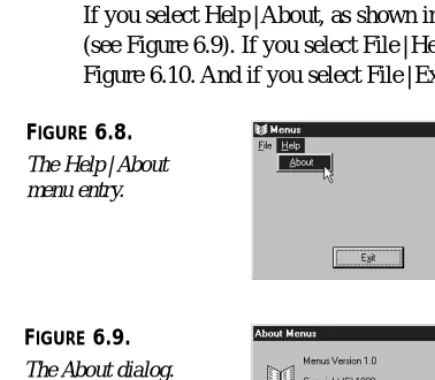
On Day 6, you’ll learn how to create menus to add to your application. You’ll see how you can call functions in your application from menus that you have added to your appli-cation.
On Day 7, you’ll learn about the font infrastructure in Windows and how you can access it in your Visual C++ applications. You’ll see how you can build a list of available fonts and how you can display text in any of these fonts.
D
AY
1
W
EEK
1
The Visual C++
Development
Environment—Building
Your First Visual C++
Application
Welcome to Sams Teach Yourself Visual C++ 6 in 21 Days. Over the next three weeks, you will learn how to build a wide variety of applications with
Microsoft’s Visual C++. What’s even better is that you will learn how to create these types of applications by actually building them yourself. As you read this book, you will be gaining actual programming experience using Visual C++. So let’s get started!
one application development effort—even more than you could possibly learn to use in a single day—I limit the focus to the primary tools that you will use throughout this book, as well as in just about every application you build with Visual C++. Today, you’ll learn about the following:
• The primary areas of the Visual C++ development environment
• The Application Wizard—how you can use it to build the basic infrastructure for your applications
• The Dialog Painter—how you can use it to paint dialog windows, much in the same way that you can build windows with Visual Basic, PowerBuilder, or Delphi
• The Class Wizard—how you can use it to attach functionality to your application windows
The Visual C++ Development Environment
Before you begin your quick tour around the Visual C++ development environment, you should start Visual C++ on your computer so that you can see firsthand how each of the areas are arranged and how you can change and alter that arrangement yourself.
After Developer Studio (the Microsoft Visual development environment) starts, you see a window that looks like Figure 1.1. Each of the areas has a specific purpose in the Developer Studio environment. You can rearrange these areas to customize the Developer Studio environment so that it suits your particular development needs.
The Workspace
When you start Visual C++ for the first time, an area on the left side of Developer Studio looks like it is taking up a lot of real estate and providing little to show for it. This area is known as the workspace, and it is your key to navigating the various pieces and parts of your development projects. The workspace allows you to view the parts of your applica-tion in three different ways:
• Class View allows you to navigate and manipulate your source code on a C++ class level.
• Resource View allows you to find and edit each of the various resources in your application, including dialog window designs, icons, and menus.
1
The Output Pane
The Output pane might not be visible when you start Visual C++ for the first time. After you compile your first application, it appears at the bottom of the Developer Studio envi-ronment and remains open until you choose to close it. The Output pane is where Developer Studio provides any information that it needs to give you; where you see all the compiler progress statements, warnings, and error messages; and where the Visual C++ debugger displays all the variables with their current values as you step through your code. After you close the Output pane, it reopens itself when Visual C++ has any message that it needs to display for you.
The Editor Area
The area on the right side of the Developer Studio environment is the editor area. This is the area where you perform all your editing when using Visual C++, where the code edi-tor windows display when you edit C++ source code, and where the window painter displays when you design a dialog box. The editor area is even where the icon painter displays when you design the icons for use in your applications. The editor area is basi-cally the entire Developer Studio area that is not otherwise occupied by panes, menus,
FIGURE1.1.
The Visual C++ open-ing screen.
Workspace pane
Output pane
Build minibar
Wizard toolbar Standard toolbar
Menu Bars
The first time you run Visual C++, three toolbars display just below the menu bar. Many other toolbars are available in Visual C++, and you can customize and create your own toolbars to accommodate how you best work. The three toolbars that are initially open are the following:
• The Standard toolbar contains most of the standard tools for opening and saving files, cutting, copying, pasting, and a variety of other commands that you are likely to find useful.
• The WizardBar toolbar enables you to perform a number of Class Wizard actions without opening the Class Wizard.
• The Build minibar provides you with the build and run commands that you are most likely to use as you develop and test your applications. The full Build toolbar also lets you switch between multiple build configurations (such as between the Debug and Release build configurations).
Rearranging the Developer Studio Environment
The Developer Studio provides two easy ways to rearrange your development environ-ment. The first is by right-clicking your mouse over the toolbar area. This action opens the pop-up menu shown in Figure 1.2, allowing you to turn on and off various toolbars and panes.
FIGURE1.2.
Toolbar on and off menu.
1
Starting Your First Project
For your first Visual C++ application, you are going to create a simple application that presents the user with two buttons, as in Figure 1.4. The first button will present the user with a simple greeting message, shown in Figure 1.5, and the second button will close the application. In building this application, you will need to do the following things:
1. Create a new project workspace.
2. Use the Application Wizard to create the application framework.
3. Rearrange the dialog that is automatically created by the Application Wizard to resemble how you want the application to look.
4. Add the C++ code to show the greeting to the user.
5. Create a new icon for the application.
FIGURE1.3.
Example of a floating minibar.
On the workspace and Output panes, the double bars that you can use to drag the pane around the Developer Studio environment might appear on the top of the pane or on the left side, depending on how and where the pane is docked.
Note
FIGURE1.4.
Your first Visual C++ application.
Creating the Project Workspace
Every application development project needs its own project workspace in Visual C++. The workspace includes the directories where the application source code is kept, as well
FIGURE1.5.
as the directories where the various build configuration files are located. You can create a new project workspace by following these steps:
1. Select File | New. This opens the New Wizard shown in Figure 1.6.
FIGURE1.6.
The New Wizard.
2. On the Projects tab, select MFC AppWizard (exe).
3. Type a name for your project, such as Hello, in the Project Name field.
4. Click OK. This causes the New Wizard to do two things: create a project directory (specified in the Location field) and then start the AppWizard.
Using the Application Wizard to Create the
Application Shell
The AppWizard asks you a series of questions about what type of application you are building and what features and functionality you need. It uses this information to create a shell of an application that you can immediately compile and run. This shell provides you with the basic infrastructure that you need to build your application around. You will see how this works as you follow these steps:
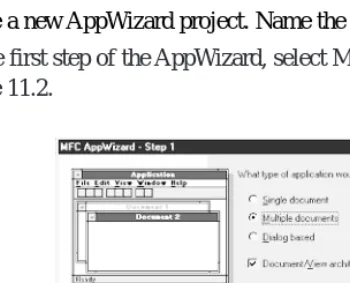
1. In Step 1 of the AppWizard, specify that you want to create a Dialog-based appli-cation. Click Next at the bottom of the wizard.
2. In Step 2 of the AppWizard, the wizard asks you about a number of features that you can include in your application. You can uncheck the option for including sup-port for ActiveX controls if you will not be using any ActiveX controls in your application. Because you won’t be using any ActiveX controls in today’s applica-tion, go ahead and uncheck this box.
1
such as My First Visual C++ Application. Click Next at the bottom of the
wizard.
4. In Step 3 of the AppWizard, leave the defaults for including source file comments and using the MFC library as a DLL. Click Next at the bottom of the wizard to proceed to the final AppWizard step.
5. The final step of the AppWizard shows you the C++ classes that the AppWizard will create for your application. Click Finish to let AppWizard generate your appli-cation shell.
6. Before AppWizard creates your application shell, it presents you with a list of what it is going to put into the application shell, as shown in Figure 1.7, based on the options you selected when going through the AppWizard. Click OK and AppWizard generates your application.
FIGURE1.7.
The New Project Information screen.
7. After the AppWizard generates your application shell, you are returned to the Developer Studio environment. You will notice that the workspace pane now pre-sents you with a tree view of the classes in your application shell, as in Figure 1.8. You might also be presented with the main dialog window in the editor area of the Developer Studio area.
8. Select Build | Build Hello.exe to compile your application.
10. Select Build | Execute Hello.exe to run your application.
11. Your application presents a dialog with a T O D Omessage and OK and Cancel
but-tons, as shown in Figure 1.10. You can click either button to close the application. FIGURE1.8.
Your workspace with a tree view of the pro-ject’s classes.
FIGURE1.9.
1
Designing Your Application Window
Now that you have a running application shell, you need to turn your focus to the win-dow layout of your application. Even though the main dialog winwin-dow may already be available for painting in the editor area, you should still navigate to find the dialog win-dow in the workspace so that you can easily find the winwin-dow in subsequent develop-ment efforts. To redesign the layout of your application dialog, follow these steps:
1. Select the Resource View tab in the workspace pane, as in Figure 1.11.
FIGURE1.10.
The unmodified appli-cation shell.
FIGURE1.11.
The Resource View tab in the workspace pane.
2. Expand the resources tree to display the available dialogs. At this point, you can double-click the IDD_DAY1_DIALOGdialog to open the window in the Developer
Studio editor area.
3. Select the text displayed in the dialog and delete it using the Delete key.
5. Right-click the mouse over the Cancel button, opening the pop-up menu in Figure 1.13. Select Properties from the menu, and the properties dialog in Figure 1.14 opens.
FIGURE1.12.
Positioning the Cancel button.
FIGURE1.13.
Right-clicking the mouse to open a pop-up menu.
6. Change the value in the Caption field to &Close. Close the properties dialog by
clicking the Close icon in the upper-right corner of the dialog.
7. Move and resize the OK button to around the middle of the window, as in Figure 1.15.
FIGURE1.14.
1
8. On the OK button properties dialog, change the ID value to IDHELLOand the
cap-tion to &Hello.
9. Now when you compile and run your application, it will look like what you’ve just designed, as shown in Figure 1.16.
FIGURE1.15.
Positioning the OK button.
Adding Code to Your Application
You can attach code to your dialog through the Visual C++ Class Wizard. You can use the Class Wizard to build the table of Windows messages that the application might receive, including the functions they should be passed to for processing, that the MFC macros use for attaching functionality to window controls. You can attach the functional-ity for this first application by following these steps:
1. To attach some functionality to the Hello button, right-click over the button and select Class Wizard from the pop-up menu.
2. If you had the Hello button selected when you opened the Class Wizard, it is already selected in the list of available Object IDs, as in Figure 1.17.
FIGURE1.16.
Running your redesigned applica-tion.
If you play with your application, you will notice that the Close button still closes the application. However, the Hello button no longer does anything because you changed the ID of the button. MFC applications contain a series of macros in the source code that determine which functions to call based on the ID and event message of each control in the application. Because you changed the ID of the Hello button, these macros no longer know which function to call when the button is clicked.
3. With IDHELLOselected in the Object ID list, select BN_CLICKEDin the list of
mes-sages and click Add Function. This opens the Add Member Function dialog shown in Figure 1.18. This dialog contains a suggestion for the function name. Click OK to create the function and add it to the message map.
FIGURE1.17.
The Class Wizard.
FIGURE1.18.
The Class Wizard Add Member Function dia-log.
4. After the function is added for the click message on the Hello button, select the
OnHellofunction in the list of available functions, as in Figure 1.19. Click the Edit
Code button so that your cursor is positioned in the source code for the function, right at the position where you should add your functionality.
FIGURE1.19.
1
5. Add the code in Listing 1.1 just below the T O D Ocomment line, as shown in Figure
1.20.
FIGURE1.20.
Source code view where you insert Listing 1.1.
LISTING1.1.HELLODLG.CPP—THEOnHelloFUNCTION.
1: Void CHelloDlg::OnHello() 2: {
3: // TODO: Add your control notification handler code here 4:
5: /////////////////////// 6: // MY CODE STARTS HERE 7: /////////////////////// 8:
9: // Say hello to the user
10: MessageBox(“Hello. This is my first Visual C++ Application!”); 11:
12: /////////////////////// 13: // MY CODE ENDS HERE 14: /////////////////////// 15: }
Finishing Touches
Now that your application is functionally complete, you can still add a few details to fin-ish off the project. Those finfin-ishing touches include
• Creating the dialog box icon
• Adding maximize and minimize buttons
Creating the Dialog Box Icon
If you noticed the icon in the top-left corner of your application window, you saw three blocks with the letters M, F, and C. What does MFC have to do with your application? MFC stands for Microsoft Foundation Classes. Technically, it’s the C++ class library that your application is built with, but do you want to broadcast that to every user who sees your application? Most likely not. You need to edit the application icon to display an image that you do want to represent your application. Let’s get busy!
1. In the tree view of your application resources in the workspace pane, expand the icon branch and select the IDR_MAINFRAMEicon, as in Figure 1.22. This brings the
application icon into the editor area of the Developer Studio.
FIGURE1.21.
Now your application will say hello to you.
FIGURE1.22.
1
2. Using the painting tools provided, repaint the icon to display an image that you want to use to represent your application, as in Figure 1.23.
FIGURE1.23.
Your own custom icon for your application.
3. When you compile and run your application, you will notice your custom icon in the top-left corner of your application window. Click the icon and select About Hello from the drop-down menu.
4. On the About dialog that Visual C++ created for you, you can see a large version of your custom icon in all its glory, as shown in Figure 1.24.
FIGURE1.24.
Your application’s About window.
Adding Maximize and Minimize Buttons
In the dialog editor, where you design your application window, you can add the mini-mize and maximini-mize buttons to the title bar of your application window by following these steps:
1. Select the dialog window itself as if you were going to resize the window.
2. Using the pop-up menu (from right-clicking the mouse), select the dialog proper-ties.
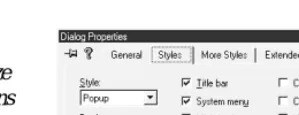
3. Select the Styles tab, as shown in Figure 1.25.
When you open an application icon in the icon designer, the icon is sized by default at 32×32. You can also select a 16×16 size icon from the drop-down list box just above where you are drawing the icon. You should draw both of these icons because there are some instances in which the large icon will be displayed and some instance in which the small icon will be shown. You will want both icons to show the same image to represent your application.
4. After you turn on the minimize and maximize boxes, you can compile and run your application. The minimize and maximize buttons appear on the title bar, as in Figure 1.26.
FIGURE1.25.
Turning the minimize and maximize buttons on and off.
FIGURE1.26.
The application win-dow with the minimize and maximize buttons.
Summary
Today you got your first taste of building applications using Visual C++. You learned about the different areas of the Visual C++ Developer Studio and what function each of these areas serves. You also learned how you can rearrange the Developer Studio envi-ronment to suit the way you work. You also learned how you can use the Visual C++ wizards to create an application shell and then attach functionality to the visual compo-nents that you place on your application windows.
Q&A
Q How can I change the title on the message box, instead of using the applica-tion name?
A By default, the message box window uses the application name as the window
title. You can change this by adding a second text string to the MessageBox
func-tion call. The first string is always the message to be displayed, and the second string is used as the window title. For example, the OnHellofunction would look
like
// Say hello to the user
[image:22.612.184.334.98.156.2]1
Q Can I change the text on the About window to give my company name and more detailed copyright information?
A Yes, the About window is in the Dialogs folder in the Resources View tab of the
workspace pane. If you double-click the IDD_ABOUTBOXdialog, the About box will
be opened in the dialog designer, where you can redesign it however you want.
Workshop
The Workshop provides quiz questions to help solidify your understanding of the material covered and exercises to provide you with experience in using what you’ve learned. The answers to the quiz questions and exercises are provided in Appendix B, “Answers.”
Quiz
1. How do you change the caption on a button?
2. What can you do with the Visual C++ AppWizard?
3. How do you attach functionality to the click of a button?
Exercise
D
AY
2
W
EEK
1
Using Controls in Your
Application
Some of the things that you will find in just about every Windows application are buttons, check boxes, text fields, and drop-down list boxes. These are known as controls, and many of these controls are built into the operating sys-tem itself. With Visual C++, using these common controls is as easy as placing them on a dialog window with a drag-and-drop window design method. Today you are going to learn
• What the basic controls in Visual C++ are • How to declare and attach variables to a controls
• How to synchronize the values between a control and a variable
• How to specify the order users navigate around your application windows • How to trigger actions with controls
The Basic Windows Controls
Several standard controls are built into the Windows operating system, including such things as sliders, tree and list controls, progress bars, and so on. However, today you will work with a half dozen controls that appear in just about every Windows application:
• Static text
• Edit box
• Command button
• Check box
• Radio button
• Drop-down list box (also known as a combo box)
These and other controls are readily available for use in Visual C++ applications. They can be found on the controls palette in the Dialog Painter editor in the Developer Studio, as shown in Figure 2.1.
FIGURE2.1.
The standard controls available on the Control palette.
The Static Text Control
You use the static text control to present text to the user. The user will not be able to change the text or otherwise interact with the control. Static text is intended as a read-only control. However, you can easily change the text displayed by the control as your application is running through the code you create for your application.
The Edit Box Control
An edit box allows the user to enter or change text. The edit box is one of the primary tools for allowing the user to enter specific information that your application needs. It is a control that allows the user to type a specific amount of text, which you can capture
Rich Text Edit Tab Control Custom Control Month Calendar List Control Edit Box Extended Combo Box IP Address Date/Time Picker Animate Tree Control Hot Key
Progress Bar Vertical Scrollbar List Box Radio Button Command Button
Picture
Slider SpinHorizontal Scrollbar Drop-Down
List Box (Combo Box)
Check Box Group Box Static Text
2
and use for any needed purpose. The edit box accepts plain text only; no formatting is available to the user.
The Command Button Control
A command button is a button that the user can press to trigger some action. Command buttons have a textual label that can give users some idea of what will happen when they click that button. Buttons can also have images as part of the button, allowing you to place an image on the button—alone or along with a textual description—to convey what the button does.
The Check Box Control
A check box is a square that the user can click to check (×) or uncheck. The check box control is used to turn a particular value on and off. They are basically on/off switches with an occasional third, in-between state. You normally use check boxes to control dis-crete, on/off-type variables.
The Radio Button Control
A radio button is a circle that the user can click to fill with a black spot. The radio button is similar to the check box control, but it is used in a group of two or more where only one of the values can be in the on state at a time. You normally use radio buttons in groups of at least three, surrounded by a group box. The group box allows each group of radio buttons to be independent so that only one radio button in each group can be in the on state at any time.
The Drop-Down List Box Control
A drop-down list box, or combo control, is an edit box with a list of available values attached. You use the drop-down list box to provide a list of choices, from which the user may select one value from the list. Sometimes, the user is given the option of typing in his own value when a suitable one isn’t provided in the list.
Adding Controls to Your Window
standard Windows applications. When the user selects one of these programs and then clicks the button beside the drop-down list, the selected program will run. Next are two groups of check boxes that affect the controls you add to the top half of the dialog: the controls for displaying a user message and the controls for running another program. The left set of check boxes will enable and disable each group of controls you provide. The right set of check boxes will show and hide each group of controls. At the bottom of the dialog box is a button that can be clicked to close the application.
FIGURE2.2.
Today’s application will use a number of standard controls.
Creating the Application Shell and Dialog Layout
Using what you learned yesterday, create a new application shell and design the applica-tion dialog layout as follows:1. Create a new AppWizard workspace project, calling the project Day2.
2. Use the same settings in the AppWizard as you used yesterday; specify the dialog title Visual C++ Controls.
3. After you create the application shell, lay out the main dialog as shown earlier in Figure 2.2.
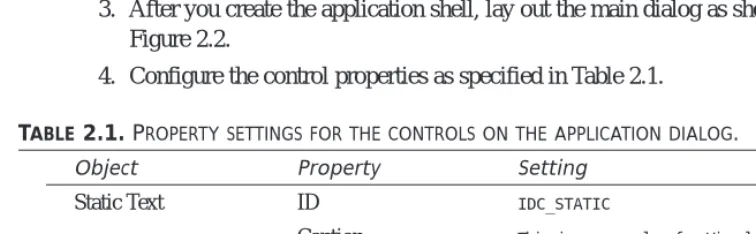
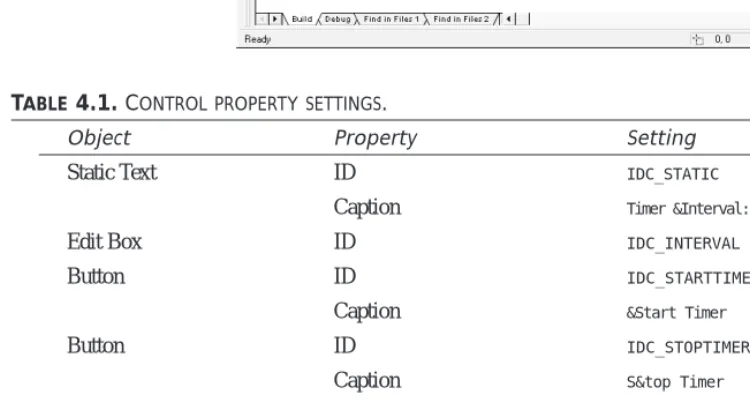
4. Configure the control properties as specified in Table 2.1.
TABLE 2.1.PROPERTY SETTINGS FOR THE CONTROLS ON THE APPLICATION DIALOG.
Object Property Setting
Static Text ID IDC_STATIC
Caption This is an example of a Visual C++ Application using a number of controls.
Static Text ID IDC_STATICMSG
Caption Enter a &Message:
Static Text ID IDC_STATICPGM
[image:28.612.184.321.203.309.2] [image:28.612.91.469.487.604.2]2
Edit Box ID IDC_MSG
Button ID IDC_SHWMSG
Caption &Show Message
Button ID IDC_DFLTMSG
Caption &Default Message
Button ID IDC_CLRMSG
Caption &Clear Message
Button ID IDC_RUNPGM
Caption &Run Program
Button ID IDC_EXIT
Caption E&xit
Combo Box ID IDC_PROGTORUN
Group Box ID IDC_STATIC
Caption Enable Actions
Group Box ID IDC_STATIC
Caption Show Actions
Check Box ID IDC_CKENBLMSG
Caption &Enable Message Action
Check Box ID IDC_CKENBLPGM
Caption E&nable Program Action
Check Box ID IDC_CKSHWMSG
Caption S&how Message Action
Check Box ID IDC_CKSHWPGM
Caption Sh&ow Program Action
Object Property Setting
When adding a combo box control to the window, it is important that you click and drag the area for the control as large as you want the drop-down list to be. After you draw the control on the window, you can resize the width of the control as you would normally expect to do. To resize how far the list drops down, you need to click the arrow, as if you were trying to trigger the drop-down list while the application was running.
5. After you place all these controls on the dialog window and configure all their properties, reopen the properties dialog for the combo box that you placed on the window. On the Data tab of the properties dialog, enter the following values, using a Control+Enter key combination to add the second and third items, as shown in Figure 2.3.
• Notepad
• Paint
• Solitaire
FIGURE2.3.
Use the properties dia-log to add entries in the combo box’s drop-down list.
Specifying the Control Tab Order
Now that you have all the controls laid out on the window, you need to make sure that the user navigates in the order you want if he or she uses the Tab key to move around the window. You can specify the tab order by following these steps:
1. Select either the dialog window or one of the controls on the window in the editing area of the Developer Studio.
2. Choose Layout | Tab Order from the menu. By turning on the Tab Order, you see a number beside each of the controls on the window. The numbers indicate the order in which the dialog will be navigated, as shown in Figure 2.4.
FIGURE2.4.
Turning on Tab Order shows the order in which the dialog will be navigated.
[image:30.612.183.322.445.553.2]2
4. Once you specify the tab order, select Layout | Tab Order once again to return to the layout editor.
Any static text that has a mnemonic should appear just before the control that accompanies the text in the tab order. Because the user cannot interact with the static text, when the user chooses the mnemonic, the focus will go directly to the next control in the tab order.
Note
A mnemonic is the underlined character in the caption on a button, check box, menu, or other control label. The user can press this underlined character and the Alt key at the same time to go directly to that control or to trigger the clicked event on the control. You specify a mnemonic by placing an ampersand (&) in front of the character to be used as
the mnemonic when you type the Caption value. It is important to make certain that you do not use the same mnemonic more than once on the same window, or set of menus, because the user can get confused when choosing a mnemonic doesn’t result in the action that he or she expects.
One last thing that you want to do before getting into the details of the application code is check your mnemonics to make certain that there are no conflicts in your controls. Follow these steps:
1. Select the dialog window or one of the controls in the layout editor. Right-click the mouse and select Check Mnemonics.
2. If there are no conflicts in your mnemonics, Visual C++ returns a message box dialog, letting you know that there are no conflicts (see Figure 2.5).
FIGURE2.5.
The mnemonic checker tells you whether there are conflicts.
3. If any conflicts exist, the dialog indicates the conflicting letter and gives you the option of automatically selecting the controls containing the conflicting mnemon-ics, as in Figure 2.6.
FIGURE2.6.
Attaching Variables to Your Controls
At this point, if you’ve programmed using Visual Basic or PowerBuilder, you probably figure that you’re ready to start slinging some code. Well, with Visual C++, it’s not quite the same process. Before you can begin coding, you have to assign variables to each of the controls that will have a value attached—everything except the static text and the command buttons. You will interact with these variables when you write the code for your application. The values that the user enters into the screen controls are placed into these variables for use in the application code. Likewise, any values that your application code places into these variables are updated in the controls on the window for the user to see.
How do you declare these variables and associate them with the controls that you placed on the window? Follow these steps:
1. Open the Class Wizard, as you learned yesterday.
2. Select the Member Variables tab, as shown in Figure 2.7.
FIGURE2.7.
The Member Variables tab on the Class Wizard is where you add variables to controls.
3. Select the ID of one of the controls that you need to attach a variable to, such as
IDC_MSG.
4. Click the Add Variable button.
5. In the Add Member Variable dialog, enter the variable name, specifying the catego-ry and variable type, as shown in Figure 2.8. Click OK.
2
TABLE2.2.VARIABLES FOR APPLICATION CONTROLS.
Control Variable Name Category Type
IDC_MSG m_strMessage Value CString
IDC_PROGTORUN m_strProgToRun Value CString IDC_CKENBLMSG m_bEnableMsg Value B O O L IDC_CKENBLPGM m_bEnablePgm Value B O O L IDC_CKSHWMSG m_bShowMsg Value B O O L IDC_CKSHWPGM m _ b S h o w P g m Value B O O L
FIGURE2.8.
Adding a variable to a control.
All these variables are prefixed with m _because they are class member vari-ables. This is an MFC naming convention. After the m _, a form of Hungarian
notation is used, in which the next few letters describe the variable type. In this case, bmeans boolean, and strindicates that the variable is a string.
You’ll see this naming convention in use in this book and other books about programming with Visual C++ and MFC. Following this naming convention will make your code more readable for other programmers; knowing the convention will make it easier for you to read other programmer’s code as well.
Tip
7. After you add all the necessary variables, click the OK button to close the Class Wizard.
Attaching Functionality to the Controls
1. Using the Class Wizard, on the Message Maps tab, select the OnInitDialogfunction
in the list of member functions. You can do this by finding the function in the Member Functions list, or by selecting the CDay2Dlgobject in the list of object IDs
and then selecting the WM_INITDIALOGmessage in the messages list, as shown in
Figure 2.9.
FIGURE2.9.
You can use the Class Wizard to locate exist-ing functions.
2. Click Edit Code to be taken to the source code for the OnInitDialogfunction.
3. Find the T O D Omarker, which indicates where to begin adding your code, and add
the code in Listing 2.1.
LISTING2.1.DAY2DLG.CPP—THEOnInitDialogFUNCTION IS WHERE YOU NEED TO ADD INITIALIZATION CODE.
1: BOOL CDay2Dlg::OnInitDialog() 2: {
3: CDialog::OnInitDialog(); 4:
5: . 6: . 7: . 8:
9: // TODO: Add extra initialization here 10:
11: /////////////////////// 12: // MY CODE STARTS HERE 13: /////////////////////// 14:
15: // Put a default message in the message edit 16: m_strMessage = “Place a message here”; 17:
2
19: m_bShowMsg = TRUE; 20: m_bShowPgm = TRUE; 21: m_bEnableMsg = TRUE; 22: m_bEnablePgm = TRUE; 23:
24: // Update the dialog with the values 25: UpdateData(FALSE);
26:
27: /////////////////////// 28: // MY CODE ENDS HERE 29: /////////////////////// 30:
31: return TRUE; // return TRUE unless you set the focus to a
➥control 32: }
There is more code in theOnInitDialogfunction than has been included in
Listing 2.1. I won’t include all the code for every function in the code listings throughout this book as a means of focusing on the code that you need to add or modify (and as a means of keeping this book down to a reasonable size). You are welcome to look at the code that has been left out, to learn what it is and what it does, as you build your understanding of MFC and Visual C++.
Note
This initialization code is simple. You are setting an initial message in the edit box that you will use to display messages for the user. Next, you are setting all the check boxes to the checked state. It’s the last line of the code you added to this function that you really need to notice.
TheUpdateDatafunction is the key to working with control variables in Visual C++. This
function takes the data in the variables and updates the controls on the screen with the variable values. It also takes the data from the controls and populates the attached
vari-If you’ve programmed in C or C++ before, you’ve noticed that you are set-ting the value of the m_strMessagevariable in a very un–C-like manner. It looks more like how you would expect to set a string variable in Visual Basic or PowerBuilder. That’s because this variable is a CStringtype variable. The
CStringclass enables you to work with strings in a Visual C++ application in
much the same way that you would work with strings in one of these other programming languages. However, because this is the C++ programming language, you still need to add a semicolon at the end of each command.
ables with any values changed by the user. This process is controlled by the argument passed into the UpdateDatafunction. If the argument is FALSE, the values in the variables
are passed to the controls on the window. If the argument is TRUE, the variables are
updated with whatever appears in the controls on the window. As a result, which value you pass this function depends on which direction you need to update. After you update one or more variables in your code, then you need to call UpdateData, passing it FALSEas
its argument. If you need to read the variables to get their current value, then you need to call UpdateDatawith a TRUEvalue before you read any of the variables. You’ll get the
hang of this as you add more code to your application.
Closing the Application
The first thing that you want to take care of is making sure that the user can close your application. Because you deleted the OK and Cancel buttons and added a new button for closing the application window, you need to place code into the function called by the Exit button to close the window. To do this, follow these steps:
1. Using the Class Wizard, add a function for the IDC_EXITobject on the BN_CLICKED
message, as you learned to do yesterday.
2. Click the Edit Code button to take you to the new function that you just added.
3. Enter the code in Listing 2.2.
LISTING2.2.DAY2DLG.CPP—THEOnExitFUNCTION.
1: void CDay2Dlg::OnExit() 2: {
3: // TODO: Add your control notification handler code here 4:
5: /////////////////////// 6: // MY CODE STARTS HERE 7: /////////////////////// 8:
9: // Exit the program 10: OnOK();
11:
12: /////////////////////// 13: // MY CODE ENDS HERE 14: /////////////////////// 15: }
A single function call within the OnExitfunction closes the Window and exits the
appli-cation. Where did this O n O Kfunction come from, and why didn’t you have to call it in
2
CDialogclass from which your CDay2Dlgclass is inherited. In the CDialogclass, the
mes-sage map already has the object IDs of the OK and Cancel buttons attached to the O n O K
and OnCancelbuttons so that buttons with these IDs automatically call these
functions. If you had specified the Exit button’s object ID as IDOK, you would not have
needed to add any code to the button unless you wanted to override the base O n O K
functionality.
Showing the User’s Message
Showing the message that the user typed into the edit box should be easy because it’s similar to what you did in yesterday’s application. You can add a function to the Show Message button and call the MessageBoxfunction, as in Listing 2.3.
LISTING2.3.DAY2DLG.CPP—THEOnShwmsgFUNCTION DISPLAYS THE USER MESSAGE.
1: void CDay2Dlg::OnShwmsg() 2: {
3: // TODO: Add your control notification handler code here 4:
5: /////////////////////// 6: // MY CODE STARTS HERE 7: /////////////////////// 8:
9: // Display the message for the user 10: MessageBox(m_strMessage); 11:
12: /////////////////////// 13: // MY CODE ENDS HERE 14: /////////////////////// 15: }
If you compile and run the application at this point, you’ll see one problem with this code. It displays the string that you initialized the m_strMessagevariable within the OnInitDialogfunction. It doesn’t display what you type into the edit box. This happens
because the variable hasn’t been updated with the contents of the control on the window yet. You need to call UpdateData, passing it a TRUEvalue, to take the values of the
con-trols and update the variables before calling the MessageBoxfunction. Alter the OnShwmsgfunction as in Listing 2.4.
LISTING2.4.DAY2DLG.CPP—UPDATEDOnShwmsgFUNCTION.
1: void CDay2Dlg::OnShwmsg() 2: {
3: // TODO: Add your control notification handler code here 4:
5: /////////////////////// 6: // MY CODE STARTS HERE 7: /////////////////////// 8:
9: // Update the message variable with what the user entered 10: UpdateData(TRUE);
11:
12: // Display the message for the user 13: MessageBox(m_strMessage); 14:
15: /////////////////////// 16: // MY CODE ENDS HERE 17: /////////////////////// 18: }
Now if you compile and run your application, you should be able to display the message you type into the edit box, as shown in Figure 2.10.
LISTING2.4. CONTINUED
FIGURE2.10.
The message entered in the edit box is dis-played to the user.
Clearing the User’s Message
If the user prefers the edit box to be cleared before he or she types a message, you can attach a function to the Clear Message button to clear the contents. You can add this function through the Class Wizard in the usual way. The functionality is a simple matter of setting the m_strMessagevariable to an empty string and then updating the controls
on the window to reflect this. The code to do this is in Listing 2.5.
LISTING2.5.DAY2DLG.CPP—THEOnClrmsgFUNCTION.
1: void CDay2Dlg::OnClrmsg() 2: {
3: // TODO: Add your control notification handler code here 4:
5: /////////////////////// 6: // MY CODE STARTS HERE 7: /////////////////////// 8:
2
10: m_strMessage = “”; 11:
12: // Update the screen 13: UpdateData(FALSE); 14:
15: /////////////////////// 16: // MY CODE ENDS HERE 17: /////////////////////// 18: }
Disabling and Hiding the Message Controls
The last thing that you want to do with the message controls is add functionality to the Enable Message Action and Show Message Action check boxes. The first of these check boxes enables or disables the controls dealing with displaying the user message. When the check box is in a checked state, the controls are all enabled. When the check box is in an unchecked state, all those same controls are disabled. In a likewise fashion, the sec-ond check box shows and hides this same set of controls. The code for these two func-tions is in Listing 2.6.
LISTING2.6.DAY2DLG.CPP—THE FUNCTIONS FOR THEENABLE ANDSHOWMESSAGEACTIONS
CHECK BOXES.
1: void CDay2Dlg::OnCkenblmsg() 2: {
3: // TODO: Add your control notification handler code here 4:
5: /////////////////////// 6: // MY CODE STARTS HERE 7: /////////////////////// 8:
9: // Get the current values from the screen 10: UpdateData(TRUE);
11:
12: // Is the Enable Message Action check box checked? 13: if (m_bEnableMsg == TRUE)
14: {
15: // Yes, so enable all controls that have anything 16: // to do with showing the user message 17: GetDlgItem(IDC_MSG)->EnableWindow(TRUE); 18: GetDlgItem(IDC_SHWMSG)->EnableWindow(TRUE); 19: GetDlgItem(IDC_DFLTMSG)->EnableWindow(TRUE); 20: GetDlgItem(IDC_CLRMSG)->EnableWindow(TRUE); 21: GetDlgItem(IDC_STATICMSG)->EnableWindow(TRUE); 22: }
23: else 24: {
25: // No, so disable all controls that have anything 26: // to do with showing the user message 27: GetDlgItem(IDC_MSG)->EnableWindow(FALSE); 28: GetDlgItem(IDC_SHWMSG)->EnableWindow(FALSE); 29: GetDlgItem(IDC_DFLTMSG)->EnableWindow(FALSE); 30: GetDlgItem(IDC_CLRMSG)->EnableWindow(FALSE); 31: GetDlgItem(IDC_STATICMSG)->EnableWindow(FALSE); 32: }
33:
34: /////////////////////// 35: // MY CODE ENDS HERE 36: /////////////////////// 37: }
38:
39: void CDay2Dlg::OnCkshwmsg() 40: {
41: // TODO: Add your control notification handler code here 42:
43: /////////////////////// 44: // MY CODE STARTS HERE 45: /////////////////////// 46:
47: // Get the current values from the screen 48: UpdateData(TRUE);
49:
50: // Is the Show Message Action check box checked? 51: if (m_bShowMsg == TRUE)
52: {
53: // Yes, so show all controls that have anything 54: // to do with showing the user message 55: GetDlgItem(IDC_MSG)->ShowWindow(TRUE); 56: GetDlgItem(IDC_SHWMSG)->ShowWindow(TRUE); 57: GetDlgItem(IDC_DFLTMSG)->ShowWindow(TRUE); 58: GetDlgItem(IDC_CLRMSG)->ShowWindow(TRUE); 59: GetDlgItem(IDC_STATICMSG)->ShowWindow(TRUE); 60: }
61: else 62: {
63: // No, so hide all controls that have anything 64: // to do with showing the user message 65: GetDlgItem(IDC_MSG)->ShowWindow(FALSE); 66: GetDlgItem(IDC_SHWMSG)->ShowWindow(FALSE); 67: GetDlgItem(IDC_DFLTMSG)->ShowWindow(FALSE); 68: GetDlgItem(IDC_CLRMSG)->ShowWindow(FALSE); 69: GetDlgItem(IDC_STATICMSG)->ShowWindow(FALSE); 70: }
2
71:
72: /////////////////////// 73: // MY CODE ENDS HERE 74: /////////////////////// 75: }
By now, you should understand the first part of these functions. First, you update the variables with the current values of the controls on the window. Next, you check the value of the boolean variable attached to the appropriate check box. If the variable is
TRUE, you want to enable or show the control. If the variable if FALSE, you want to
dis-able or hide the control.
At this point, the code begins to be harder to understand. The first function, GetDlgItem, is passed the ID of the control that you want to change. This function returns the object for that control. You can call this function to retrieve the object for any of the controls on the window while your application is running. The next part of each command is where a member function of the control object is called. The second function is a member func-tion of the object returned by the first funcfunc-tion. If you are not clear on how this works, then you might want to check out Appendix A, “C++ Review,” to brush up on your C++.
The second functions in these calls,EnableWindowand ShowWindow, look like they
should be used on windows, not controls. Well, yes, they should be used on windows; they happen to be members of the C W n dclass, which is an ancestor of the CDialogclass
from which your CDay2Dlgclass is inherited. It just so happens that, in Windows, all
con-trols are themselves windows, completely separate from the window on which they are placed. This allows you to treat controls as windows and to call windows functions on them. In fact, all the control classes are inherited from the C W n dclass, revealing their
true nature as windows.
If you compile and run your application now, you can try the Enable and Show Message
FIGURE2.11.
Action check boxes. They should work just fine, as shown in Figure 2.11.
Running Another Application
The last major piece of functionality to be implemented in your application is for the set of controls for running another program. If you remember, you added the names of three Windows applications into the combo box, and when you run your application, you can see these application names in the drop-down list. You can select any one of them, and the value area on the combo box is updated with that application name. With that part working as it should, you only need to add code to the Run Program button to actually get the value for the combo box and run the appropriate program. Once you create the function for the Run Program button using the Class Wizard, add the code in Listing 2.7 to the function.
LISTING2.7.DAY2DLG.CPP—THEOnRunpgmFUNCTION STARTS OTHERWINDOWS APPLICA-TIONS.
1: void CDay2Dlg::OnRunpgm() 2: {
3: // TODO: Add your control notification handler code here 4:
5: /////////////////////// 6: // MY CODE STARTS HERE 7: /////////////////////// 8:
9: // Get the current values from the screen 10: UpdateData(TRUE);
11:
12: // Declare a local variable for holding the program name 13: CString strPgmName;
14:
15: // Copy the program name to the local variable 16: strPgmName = m_strProgToRun;
17:
18: // Make the program name all uppercase 19: strPgmName.MakeUpper();
20:
21: // Did the user select to run the Paint program? 22: if (strPgmName == “PAINT”)
23: // Yes, run the Paint program 24: WinExec(“pbrush.exe”, SW_SHOW); 25:
26: // Did the user select to run the Notepad program? 27: if (strPgmName == “NOTEPAD”)
2
31: // Did the user select to run the Solitaire program? 32: if (strPgmName == “SOLITAIRE”)
33: // Yes, run the Solitaire program 34: WinExec(“sol.exe”, SW_SHOW); 35:
36: /////////////////////// 37: // MY CODE ENDS HERE 38: /////////////////////// 39: }
As you expect, the first thing that you do in this function is call UpdateDatato populate
the variables with the values of the controls on the window. The next thing that you do, however, might seem a little pointless. You declare a new CStringvariable and copy the
value of the combo box to it. Is this really necessary when the value is already in a
CStringvariable? Well, it depends on how you want your application to behave. The next
line in the code is a call to the CStringfunction MakeUpper, which converts the string to
all uppercase. If you use the CStringvariable that is attached to the combo box, the next
time that UpdateDatais called with FALSEas the argument, the value in the combo box is
converted to uppercase. Considering that this is likely to happen at an odd time, this is probably not desirable behavior. That’s why you use an additional CStringin this
func-tion.
Once you convert the string to all uppercase, you have a series of ifstatements that
com-pare the string to the names of the various programs. When a match is found, the
WinExecfunction is called to run the application. Now, if you compile and run your
application, you can select one of the applications in the drop-down list and run it by clicking the Run Program button.
using the function that Windows wants you to use.
Another API function that can be used to run another application is the
ShellExecutefunction. This function was originally intended for opening or printing files, but can also be used to run other programs.
Summary
Today, you learned how you can use standard windows controls in a Visual C++ applica-tion. You learned how to declare and attach variables to each of these controls and how to synchronize the values between the controls and the variables. You also learned how you can manipulate the controls by retrieving the control objects using their object ID and how you can manipulate the control by treating it as a window. You also learned how to specify the tab order of the controls on your application windows, thus enabling you to control how users navigate your application windows. Finally, you learned how to attach application functionality to the controls on your application window, triggering various actions when the user interacts with various controls. As an added bonus, you learned how you can run other Windows applications from your own application.
Q&A
Q When I specified the object IDs of the controls on the window, three controls had the same ID,IDC_STATIC. These controls were the text at the top of the window and the two group boxes. The other two static text controls started out with this same ID until I changed them. How can these controls have the same ID, and why did I have to change the ID on the two static texts where I did change them?
A All controls that don’t normally have any user interaction, such as static text and
group boxes, are by default given the same object ID. This works fine as long as
important to make certain that you use the double equal sign when you want to compare two values because if you use a single equal sign, you alter the value of the variable on the left. This confusion is one of the biggest sources of logic bugs in C/C++ programs.
The WinExecfunction is an obsolete Windows function. You really should use the CreateProcessfunction instead. However, the CreateProcessfunction has a
number of arguments that are difficult to understand this early in program-ming using Visual C++. The WinExecfunction is still available and is
2
your application doesn’t need to perform any actions on any of these controls. If you do need to interact with one of these controls, as you did with the static text prompts for the edit box and combo box, then you need to give that control a unique ID. In this case, you needed the unique ID to be able to retrieve the control object so that you could enable or disable and show or hide the control. You also need to assign it a unique ID if you want to attach a variable to the control so that you could dynamically alter the text on the control.
The application behaves in a somewhat unpredictable way if you try to alter any of the static controls that share the same ID. As a general rule of thumb, you can allow static controls to share the same object ID if you are not going to alter the controls at all. If you might need to perform any interaction with the controls, then you need to assign each one a unique object ID.
Q Is there any other way to manipulate the controls, other than retrieving the control objects using their object IDs?
A You can declare variables in the Control category. This basically gives you an
object that is the control’s MFC class, providing you with a direct way of altering and interacting with the control. You can then call all of the C W n dclass functions
on the control, as you did to enable or disable and show or hide the controls in your application, or you can call the control class methods, enabling you to do things in the code that are specific to that type of control. For instance, if you add another variable to the combo box control and specify that it is a Control category variable, you can use it to add items to the drop-down list on the control.
Workshop
The Workshop provides quiz questions to help you solidify your understanding of the material covered and exercises to provide you with experience in using what you’ve learned. The answers to the quiz questions and exercises appear in Appendix B, “Answers.”
Quiz
1. Why do you need to specify the tab order of the controls on your application win-dows?
2. How can you include a mnemonic in a static text field that will take the user to the edit box or combo box beside the text control?
3. Why do you need to give unique object IDs to the static text fields in front of the edit box and combo boxes?
of the controls?
Exercises
1. Add code to the Default Message button to reset the edit box to say Enter a message here.
2. Add code to enable or disable and show or hide the controls used to select and run another application.
3. Extend the code in the OnRunpgmfunction to allow the user to enter his own
D
AY
3
W
EEK
1
Allowing User
Interaction—Integrating
the Mouse and Keyboard
in Your Application
Depending on the type of application you are creating, you might need to notice what the user is doing with the mouse. You need to know when and where the mouse was clicked, which button was clicked, and when the button was released. You also need to know what the user did while the mouse button was being held down.
Today you are going to learn
• What mouse events are available for use and how to determine which one is appro-priate for your application’s needs.
• How you can listen to mouse events and how to react to them in your Visual C++ application.
• What keyboard events are available for use and what actions will trigger each of these events.
• How to capture keyboard events and take action based on what the user pressed.
Understanding Mouse Events
As you learned yesterday, when you are working with most controls, you are limited to a select number of events that are available in the Class Wizard. When it comes to mouse events, you are limited for the most part to click and double-click events. Just looking at your mouse tells you that there must be more to capturing mouse events than recognizing these two. What about the right mouse button? How can you tell if it has been pressed? And what about drawing programs? How can they follow where you drag the mouse?
If you open the Class Wizard in one of your projects, select the dialog in the list of object IDs, and then scroll through the list of messages that are available, you will find a number of mouse-related events, which are also listed in Table 3.1. These event messages enable you to perform any task that might be required by your application.
TABLE3.1. MOUSE EVENT MESSAGES.
Message Description
W M _ L B U T T O N D O W N The left mouse button has been pressed. W M _ L B U T T O N U P The left mouse button has been released.
W M _ L B U T T O N D B L C L K The left mouse button has been double-clicked. W M _ R B U T T O N D O W N The right mouse button has been pressed.
W M _ R B U T T O N U P The right mouse button has been released. W M _ R B U T T O N D B L C L K The right mouse button has been double-clicked.
3
Drawing with the Mouse
Today you are going to build a simple drawing program that uses some of the available mouse events to let the user draw simple figures on a dialog window. This application depends mostly on the W M _ M O U S E M O V Eevent message, which signals that the mouse is
being moved. You will look at how you can tell within this event function whether the left mouse button is down or up. You will also learn how you can tell where the mouse is on the window. Sound’s fairly straight ahead, so let’s get going by following these steps:
1. Create a new MFC AppWizard workspace project, calling the project Mouse.
2. Specify that this project will be a dialog-based application in the first AppWizard step.
3. Use the default settings in the AppWizard. In the second step, specify a suitable dialog title, such as Mouse and Keyboard.
4. After the application shell is created, remove all controls from the dialog window. This provides the entire dialog window surface for drawing. This step is also nec-essary for your application to capture any keyboard events.
If there are any controls on a dialog, all keyboard events are directed to the control that currently has input focus—the control that is highlighted or has the cursor visible in it. To capture any keyboard events in a dialog, you have to remove all controls from the dialog.
Note
5. Open the Class Wizard. Select W M _ M O U S E M O V Efrom the list of messages, and add
a function by clicking the Add Function button. Click the OK button to accept the suggested function name.
6. Click the Edit Code button to edit the OnMouseMovefunction you just created,
adding the code in Listing 3.1.
LISTING3.1.THEOnM ouseM oveFUNCTION.
1: void CMouseDlg::OnMouseMove(UINT nFlags, CPoint point) 2: {
3: // TODO: Add your message handler code here and/or call default 4:
5: /////////////////////// 6: // MY CODE STARTS HERE 7: /////////////////////// 8:
9: // Check to see if the left mouse button is down 10: if ((nFlags & MK_LBUTTON) == MK_LBUTTON) 11: {
12: // Get the Device Context 13: CClientDC dc(this); 14:
15: // Draw the pixel
16: dc.SetPixel(point.x, point.y, RGB(0, 0, 0)); 17: }
18:
19: /////////////////////// 20: // MY CODE ENDS HERE 21: /////////////////////// 22:
23: CDialog::OnMouseMove(nFlags, point); 24: }
Look at the function definition at the top of the listing. You will notice that two argu-ments are passed into this function. The first of these arguargu-ments is a set of flags that can be used to determine whether a mouse button is depressed (and which one). This deter-mination is made in the first line of your code with the ifstatement:
if ((nFlags & MK_LBUTTON) == MK_LBUTTON)
In the first half of the condition being evaluated, the flags are filtered down to the one that indicates that the left mouse button is down. In the second half, the filtered flags are compared to the flag that indicates that the left mouse button is down. If the two match, then the left mouse button is down.
The second argument to this function is the location of the mouse. This argument gives you the coordinates on the screen where the mouse currently is. You can use this infor-mation to draw a spot on the dialog window.
Before you can draw any spots on the dialog window, you need to get the device context for the dialog window. This is done by declaring a new instance of the CClientDCclass.
This class encapsulates the device context and most of the operations that can be per-formed on it, including all the screen drawing operations. In a sense, the device context is the canvas upon which you can draw with your application. Until you have a canvas, you cannot do any drawing or painting. After the device context object is created, you can call its SetPixelfunction, which colors the pixel at the location specified in the first
two arguments with the color specified in the third argument. If you compile and run your program, you can see how it allows you to draw on the window surface with the mouse, as shown in Figure 3.1.