www.novell.com/documentation
WebAccess User Guide
GroupWise 2014
Legal Notices
Novell, Inc. makes no representations or warranties with respect to the contents or use of this documentation, and specifically disclaims any express or implied warranties of merchantability or fitness for any particular purpose. Further, Novell, Inc. reserves the right to revise this publication and to make changes to its content, at any time, without obligation to notify any person or entity of such revisions or changes.
Further, Novell, Inc. makes no representations or warranties with respect to any software, and specifically disclaims any express or implied warranties of merchantability or fitness for any particular purpose. Further, Novell, Inc. reserves the right to make changes to any and all parts of Novell software, at any time, without any obligation to notify any person or entity of such changes.
Any products or technical information provided under this Agreement may be subject to U.S. export controls and the trade laws of other countries. You agree to comply with all export control regulations and to obtain any required licenses or classification to export, re-export, or import deliverables. You agree not to export or re-export to entities on the current U.S. export exclusion lists or to any embargoed or terrorist countries as specified in the U.S. export laws. You agree to not use deliverables for prohibited nuclear, missile, or chemical biological weaponry end uses. See the Novell International Trade Services web page (http://www.novell.com/company/legal/exports/) for more information on exporting Novell software. Novell assumes no responsibility for your failure to obtain any necessary export approvals.
Copyright © 2003-2014 Novell, Inc. All rights reserved. No part of this publication may be reproduced, photocopied, stored on a retrieval system, or transmitted without the express written consent of the publisher.
Novell, Inc.
1800 South Novell Place Provo, UT 84606 U.S.A.
www.novell.com
Online Documentation: To access the online documentation for this and other Novell products, and to get updates, see the
Novell Documentation website (http://www.novell.com/documentation/).
Novell Trademarks
For Novell trademarks, see the Novell Trademark and Service Mark list (http://www.novell.com/company/legal/trademarks/).
Third-Party Materials
Contents
About This Guide 7
1 Getting Started 9
1.1 Supported Web Browsers . . . 9
1.2 Starting GroupWise WebAccess . . . 9
1.3 Understanding Timing Out from GroupWise WebAccess . . . 10
1.4 Changing Your Password. . . 11
1.5 Getting to Know the GroupWise WebAccess Interface . . . 11
1.5.1 Understanding the Nav Bar . . . 12
1.5.2 Understanding the Toolbar. . . 12
1.6 Exploring the Folder List . . . 13
1.6.1 Home Folder . . . 13
1.6.2 Mailbox Folder . . . 13
1.6.3 Unopened Items . . . 13
1.6.4 Sent Items Folder . . . 14
1.6.5 Calendar Folder . . . 14
1.6.6 Contacts Folder . . . 14
1.6.7 Tasklist Folder . . . 14
1.6.8 Work in Progress Folder . . . 14
1.6.9 Cabinet Folder . . . 14
1.6.10 Junk Mail Folder . . . 14
1.6.11 Trash Folder. . . 15
1.6.12 Shared Folders . . . 15
1.7 Understanding GroupWise Item Types . . . 15
1.7.1 Mail . . . 15
1.7.2 Appointment. . . 15
1.7.3 Task . . . 15
1.7.4 Note . . . 16
1.7.5 Phone Message. . . 16
1.8 Identifying the Icons Appearing Next to Items . . . 16
1.9 Learning More . . . 17
1.9.1 Online Help . . . 18
1.9.2 GroupWise Documentation Web Page . . . 18
1.9.3 GroupWise Cool Solutions Web Community . . . 18
2 Getting Organized 19 2.1 Using Categories to Organize Items . . . 19
2.1.1 Assigning a Category. . . 19
2.1.2 Adding a New Category. . . 19
2.1.3 Removing a Category from an Item. . . 19
2.1.4 Renaming a Category . . . 20
2.1.5 Deleting a Category . . . 20
2.2 Using Folders to Organize Your Mailbox . . . 20
2.2.1 Understanding Folders. . . 20
2.2.2 Modifying the Folder List . . . 21
2.2.3 Deleting Folders. . . 21
2.2.4 Creating a Personal Folder . . . 21
2.2.5 Renaming a Folder . . . 22
2.2.6 Moving an Item to Another Folder . . . 22
2.2.8 Using Shared Folders . . . 22
3 Email 25 3.1 Sending Email . . . 25
3.1.1 Composing Email. . . 25
3.1.2 Formatting Messages . . . 26
3.1.3 Spell-Checking Messages . . . 27
3.1.4 Attaching Files . . . 28
3.1.5 Adding a Signature . . . 28
3.1.6 Saving Unfinished Email . . . 29
3.1.7 Selecting the Default Compose View. . . 31
3.1.8 Addressing Mail Messages . . . 32
3.1.9 Selecting Send Options . . . 33
3.1.10 Posting a Note . . . 35
3.1.11 Sending a Phone Message . . . 35
3.2 Managing Sent Email . . . 36
3.2.1 Retracting Sent Email . . . 36
3.2.2 Resending Email . . . 37
3.2.3 Checking the Status of Sent Email . . . 37
3.2.4 Confirming Delivery of Email You Send . . . 38
3.2.5 Displaying Sent Items . . . 41
3.2.6 Sorting Sent Items . . . 42
3.3 Receiving Email . . . 42
3.3.1 Reading Received Items . . . 42
3.3.2 Reading Attachments. . . 43
3.3.3 Replying to Email. . . 44
3.3.4 Forwarding Email to Other People. . . 45
3.4 Managing Received Email . . . 45
3.4.1 Saving an Item to Disk. . . 46
3.4.2 Saving Status Information . . . 46
3.4.3 Deleting Email . . . 46
3.4.4 Viewing the Source of External Messages . . . 46
3.4.5 Sorting Received Items . . . 47
3.5 Printing Email . . . 47
3.6 Handling Unwanted Email (Spam) . . . 47
3.6.1 Understanding Junk Mail Handling . . . 47
3.6.2 Blocking or Junking Email . . . 47
4 Calendar 49 4.1 Understanding the Calendar . . . 49
4.2 Managing Your Calendar . . . 49
4.2.1 Viewing Your Calendar . . . 50
4.2.2 Reading a Calendar Entry . . . 52
4.2.3 Creating a Personal Calendar . . . 52
4.2.4 Using Shared Calendars . . . 53
4.3 Sending Calendar Items. . . 54
4.3.1 Understanding the Calendar Item Icons . . . 54
4.3.2 Scheduling Appointments . . . 54
4.3.3 Sending Reminder Notes. . . 59
4.4 Receiving Calendar Items . . . 59
4.4.1 Accepting or Declining Calendar Items . . . 60
4.4.2 Delegating Calendar Items . . . 60
4.4.3 Saving Calendar Items . . . 60
4.4.4 Moving an Appointment to a Different Calendar . . . 61
4.5 Publishing Personal Calendars on the Internet . . . 61
4.5.2 Modifying a Published Calendar’s Settings . . . 62
4.5.3 Unpublishing a Calendar . . . 62
4.5.4 Publishing Your Free/Busy Schedule. . . 62
4.6 Printing a Calendar . . . 62
5 Tasks and the Tasklist 65 5.1 Understanding Tasks . . . 65
5.2 Understanding the Tasklist Folder . . . 65
5.3 Using Tasks . . . 66
5.3.1 Assigning a Task . . . 66
5.3.2 Tracking Task Completion . . . 68
5.4 Using the Tasklist Folder . . . 68
5.4.1 Moving an Item from Another Folder to the Tasklist Folder . . . 68
5.4.2 Assigning a Due Date to a Tasklist Item . . . 69
5.4.3 Reordering the Tasklist Folder . . . 69
6 Contacts and Address Books 71 6.1 Understanding Address Books. . . 71
6.1.1 GroupWise Address Book . . . 71
6.1.2 Frequent Contacts Address Book . . . 71
6.1.3 Personal Address Books . . . 72
6.2 Using the Address Selector . . . 72
6.2.1 Understanding the Address Selector . . . 72
6.2.2 Addressing an Item with the Address Selector . . . 73
6.3 Using the Contacts Folder . . . 73
6.3.1 Managing Contacts . . . 74
6.3.2 Managing Groups . . . 76
6.3.3 Managing Resources. . . 78
6.3.4 Managing Organizations . . . 79
6.3.5 Using Frequent Contacts to Address an Item . . . 80
6.3.6 Sending Mail to a Contact from the Contacts Folder . . . 81
6.4 Working with Address Books . . . 81
6.4.1 Opening an Address Book. . . 81
6.4.2 Creating a Personal Address Book . . . 81
6.4.3 Editing a Personal or Frequent Contacts Address Book . . . 81
6.4.4 Deleting a Personal Address Book . . . 82
6.4.5 Accepting a Shared Address Book . . . 83
6.4.6 Viewing People, Groups, Organizations, or Resources in an Address Book. . . 83
6.4.7 Searching for Address Book Entries . . . 83
7 Finding Items 85 7.1 Understanding GroupWise Searches. . . 85
7.2 Searching for a Word or Phrase Using Basic Find. . . 86
7.3 Searching with Criteria . . . 86
7.4 Narrowing a Search . . . 86
7.5 Viewing the Results of a Search . . . 87
7.6 Finding Text in Items . . . 87
8 Rules 89 8.1 Understanding Rules . . . 89
8.2 Actions a Rule Can Perform. . . 89
8.3 Creating a Rule . . . 90
8.3.2 Creating a Vacation Rule or Auto Reply . . . 91
8.3.3 Creating a Rule to Forward All Mail to Another Account . . . 91
8.3.4 Limiting Items Affected by a Rule . . . 91
8.3.5 Using Rule Conditions . . . 92
8.4 Editing a Rule. . . 93
8.5 Deleting a Rule. . . 93
8.6 Enabling or Disabling a Rule . . . 94
9 Mailbox/Calendar Access for Proxies 95 9.1 Receiving Proxy Rights . . . 95
9.1.1 Adding and Removing Proxy Names and Rights in the Mailbox Owner’s Access List . . . . 95
9.1.2 Adding and Removing Users in Your Proxy List . . . 96
9.2 Accessing a Mailbox or Calendar as a Proxy. . . 97
10 Document Management 99 10.1 Searching for Documents. . . 99
10.2 Viewing a Document . . . 99
10.3 Opening a Document . . . 99
10.4 Saving a Document . . . 100
10.5 Viewing the Properties of a Document . . . 100
11 Maintaining GroupWise 101 11.1 Managing Mailbox Passwords . . . 101
11.1.1 Getting Help When You Have Forgotten Your Password. . . 101
11.1.2 Using LDAP Authentication . . . 101
11.1.3 Changing Your LDAP Password . . . 101
11.1.4 Remembering Your GroupWise or LDAP Password . . . 102
11.1.5 Using Mailbox Passwords with Proxies . . . 102
11.2 Managing Your Trash . . . 102
11.2.1 Displaying Items in Your Trash . . . 102
11.2.2 Undeleting an Item in Your Trash. . . 102
11.2.3 Saving an Item In Your Trash. . . 103
11.2.4 Emptying the Trash . . . 103
11.3 Checking Your WebAccess Version . . . 103
A What’s New In GroupWise 2014 WebAccess 105 B GroupWise Frequently Asked Questions 107
About This Guide
This Novell GroupWise 2014 WebAccess User Guide explains how to use GroupWise WebAccess. It
is divided into the following sections:
Chapter 1, “Getting Started,” on page 9
Chapter 2, “Getting Organized,” on page 19
Chapter 3, “Email,” on page 25
Chapter 4, “Calendar,” on page 49
Chapter 5, “Tasks and the Tasklist,” on page 65
Chapter 6, “Contacts and Address Books,” on page 71
Chapter 7, “Finding Items,” on page 85
Chapter 8, “Rules,” on page 89
Chapter 9, “Mailbox/Calendar Access for Proxies,” on page 95
Chapter 10, “Document Management,” on page 99
Chapter 11, “Maintaining GroupWise,” on page 101
Appendix A, “What’s New In GroupWise 2014 WebAccess,” on page 105
Appendix B, “GroupWise Frequently Asked Questions,” on page 107
Appendix C, “Using Shortcut Keys,” on page 109
Audience
This guide is intended for GroupWise WebAccess users.
Feedback
We want to hear your comments and suggestions about this manual and the other documentation included with this product. Please use the User Comments feature at the bottom of each page of the online documentation, or go to Novell Documentation Feedback (http://www.novell.com/
documentation/feedback.html) and enter your comments there.
Additional Documentation
For additional GroupWise documentation, see the following guides at the Novell GroupWise 2014 Documentation Web site (http://www.novell.com/documentation/groupwise2014/)
GroupWise Windows Client User Guide
GroupWise WebAccess User Guide
GroupWise WebAccess Mobile User Guide
1
1Getting Started
GroupWise is a robust, dependable messaging and collaboration system that connects you to your universal mailbox anytime and anywhere. This section gives you an overview of how to start using GroupWise quickly and easily.
Section 1.1, “Supported Web Browsers,” on page 9
Section 1.2, “Starting GroupWise WebAccess,” on page 9
Section 1.3, “Understanding Timing Out from GroupWise WebAccess,” on page 10
Section 1.4, “Changing Your Password,” on page 11
Section 1.5, “Getting to Know the GroupWise WebAccess Interface,” on page 11
Section 1.6, “Exploring the Folder List,” on page 13
Section 1.7, “Understanding GroupWise Item Types,” on page 15
Section 1.8, “Identifying the Icons Appearing Next to Items,” on page 16
Section 1.9, “Learning More,” on page 17
1.1 Supported Web Browsers
Any of the following web browsers:
Linux: Mozilla Firefox; Google Chrome
Windows: Microsoft Internet Explorer 9 or later; Mozilla Firefox; Google Chrome; Windows Spartan
NOTE: On Windows XP, Microsoft Internet Explorer 8.0 is also supported.
Macintosh: The latest version of Safari for your version of Mac OS; Mozilla Firefox; Google Chrome
Microsoft Surface Pro tablet, with Windows 8 or later
Any mobile device that supports Wireless Access Protocol (WAP) and has a microbrowser that supports Hypertext Markup Language (HTML) 4.0 or later
1.2 Starting GroupWise WebAccess
You start GroupWise WebAccess as you would any other home page on the Internet.
1 Use your Web browser to go to the URL your administrator gives you, such as http://server/ gw/webacc, or an IP address such as 155.155.11.22.
If you need to find your GroupWise administrator, ask the person who gave you your GroupWise user name and password.
2 On the GroupWise WebAccess login page, enter your user name and password.
3 Click either This is a public or shared computer or This is a private computer.
The option you choose affects the timeout interval that is used. To help keep your information secure, a shorter timeout interval is used if you are using WebAccess from a public or shared computer. For more information on timeout interval, see Section 1.3, “Understanding Timing Out from GroupWise WebAccess,” on page 10.
4 (Conditional) If you’re using a small mobile device such as a mobile phone, click Options, then
select Use the basic interface.
The basic interface has limited functionality and graphics. It is designed to perform the most basic tasks in GroupWise WebAccess. To close the basic interface, close all Web browsers and launch WebAccess again, then deselect Use the basic interface.
For information on how to use the basic interface, see the GroupWise 2014 WebAccess Basic Quick Start (http://www.novell.com/documentation/groupwise2014/gw2014_qs_webaccbasic/ data/gw2014_qs_webaccbasic.html).
5 Click Login.
Your GroupWise mailbox opens.
If you are unable to log in, click the Can’t log in? link on the login page for more information about
how to get your password reset in your organization.
1.3 Understanding Timing Out from GroupWise
WebAccess
Specific actions, such as opening or sending an item, generate a call to the Web server. Other actions, such as scrolling through items in the Item List, composing a message without sending it, or reading Help topics, do not generate a call to the Web server. If, for a period of time, you leave
GroupWise WebAccess alone or perform actions that do not generate a call, WebAccess logs you out. Doing so provides security for your email and ensures that the Web server and GroupWise WebAccess run efficiently.
The default timeout period is 20 minutes if you are using WebAccess on a public or shared computer. If you are using WebAccess on a private computer the default timeout period is 480 minutes (8 hours). However, your GroupWise administrator can change the timeout period for your
organization’s GroupWise system. You specify whether you are using WebAccess on a public or private computer during login, as described in Section 1.2, “Starting GroupWise WebAccess,” on page 9.
If you try to perform an action after you have been logged out, you are prompted to log in again. To ensure that you have the latest information in your Mailbox and to prevent frequent timeouts, click the Update icon .
NOTE: You must authenticate correctly to be returned to your work after a timeout. If you haven’t logged in correctly, the message you were composing might appear to be lost. Use the keyboard to return to your saved message window (for example, Alt+Left-arrow key in Windows).
1.4 Changing Your Password
In order to access your GroupWise mailbox from WebAccess, your mailbox must have a password. Your GroupWise administrator might have assigned the password when he or she set up your GroupWise account. If you have access to the GroupWise Windows client, you can set your initial mailbox password yourself, as described in “Assigning a Password to Your Mailbox” in “Getting Started” in the GroupWise 2014 Client User Guide.
To change your mailbox password in WebAccess:
1 Click the Options icon , then click Options.
Click the Password tab.
2 Type your old password, then type your new password twice for confirmation.
3 Click Save, then click Close.
Depending on the security level that your GroupWise administrator has established for your post office, you might need to know more about passwords. For more information, see Section 11.1, “Managing Mailbox Passwords,” on page 101.
1.5 Getting to Know the GroupWise WebAccess
Interface
Your main work area in GroupWise is called the Main Window. From the Main Window of GroupWise, you can read your messages, schedule appointments, view your Calendar, manage contacts, open folders, and much more.
Section 1.5.1, “Understanding the Nav Bar,” on page 12
1.5.1
Understanding the Nav Bar
The Nav Bar is located at the top of the WebAccess page. It is designed for quick access to the folders you use the most. By default the Nav Bar contains the Mailbox, Calendar, Contacts, and Documents folders.
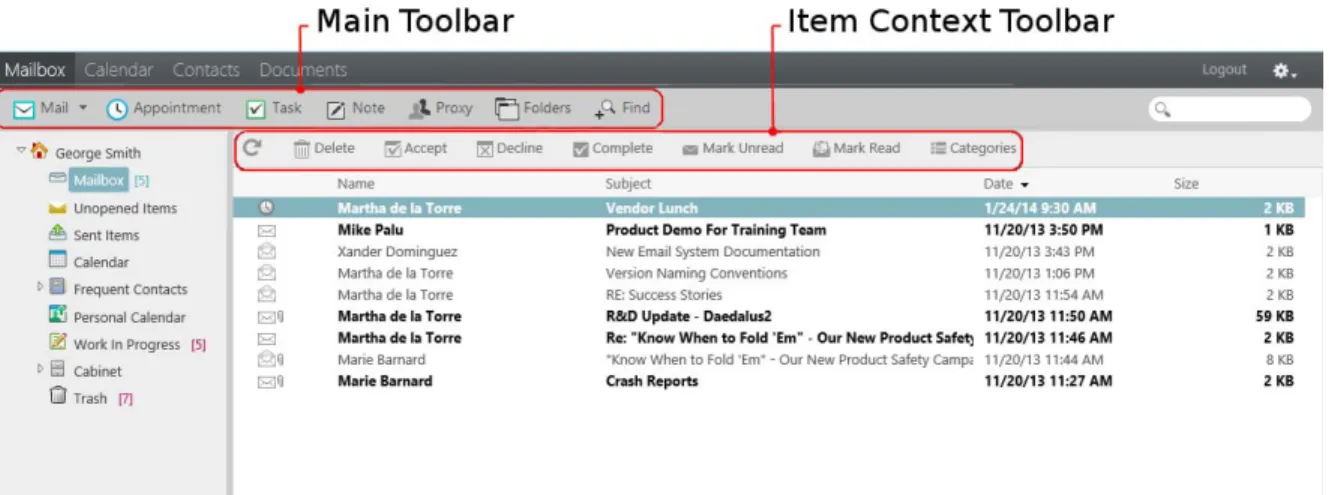
Figure 1-1 The GroupWise WebAccess Nav Bar
1.5.2
Understanding the Toolbar
Use the toolbar to access many of the features and options found in WebAccess. The toolbar at the top of a folder or item is context-sensitive; it changes to provide the options you need most in that location.
There are two different toolbars you can display:
Main: The Main toolbar contains most of your commonly used functions, such as New Appointment and New Mail. The Main toolbar is located at the top of the main page.
Item Context: The Item Context toolbar contains context-sensitive buttons that relate to the item that is displayed. The Item Context toolbar is located at the top of the page.
1.6 Exploring the Folder List
The Folder List at the left of the Main Window lets you organize your GroupWise items by creating folders to store your items in. The Mailbox folder is the default folder that is opened when you first log in. For information about the different GroupWise folders, see Section 2.2, “Using Folders to
Organize Your Mailbox,” on page 20.
The following folders are displayed in the Folder List:
Section 1.6.1, “Home Folder,” on page 13
Section 1.6.2, “Mailbox Folder,” on page 13
Section 1.6.3, “Unopened Items,” on page 13
Section 1.6.4, “Sent Items Folder,” on page 14
Section 1.6.5, “Calendar Folder,” on page 14
Section 1.6.6, “Contacts Folder,” on page 14
Section 1.6.7, “Tasklist Folder,” on page 14
Section 1.6.8, “Work in Progress Folder,” on page 14
Section 1.6.9, “Cabinet Folder,” on page 14
Section 1.6.10, “Junk Mail Folder,” on page 14
Section 1.6.11, “Trash Folder,” on page 15
Section 1.6.12, “Shared Folders,” on page 15
1.6.1
Home Folder
Your Home folder (indicated by your name) represents your GroupWise database. All folders in your Folder List are subfolders of your Home folder.
1.6.2
Mailbox Folder
The Mailbox displays all the items you have received, with the exception of scheduled items (appointments, tasks, and reminder notes) you have accepted or declined. By default, scheduled items and tasks are moved to the Calendar when you accept them.
Your received items are stored in your GroupWise Mailbox, which automatically refreshes as you receive new items. If your computer has audio capabilities, and a GroupWise WebAccess window is open in your Web browser, an audio cue plays when a new item is received.
You can organize your messages by moving them into folders within your Cabinet, and you can create new folders as necessary.
1.6.3
Unopened Items
The Unopened Items folder lists received items you have not yet opened. It is a query folder that cannot be deleted.
1.6.4
Sent Items Folder
The Sent Items folder displays all the items you have sent. By checking the properties of your sent items, you can determine their status (Delivered, Opened, and so on).
1.6.5
Calendar Folder
The Calendar folder is a link that takes you to the Calendar view, where you can choose several Calendar view options. You can use the Folder List to choose which calendars to display. The selected calendars are displayed in the calendar view.
1.6.6
Contacts Folder
The Contacts folder , by default, represents the Frequent Contacts address book. Any modification you make in the Contacts Folder is also made in the Frequent Contacts address book.
From this folder, you can view, create, and modify contacts, resources, organizations, and groups.
1.6.7
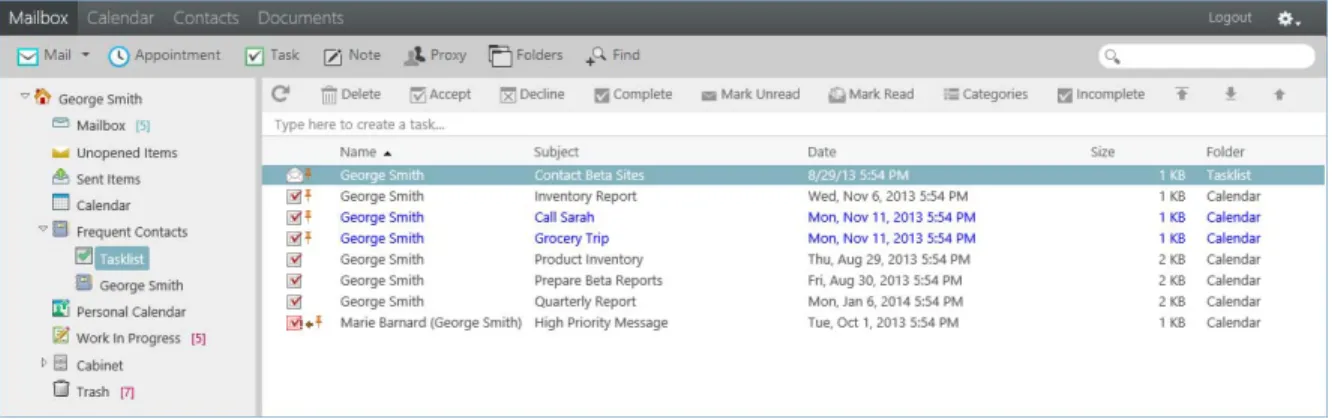
Tasklist Folder
Use the Tasklist folder to create a task list. You can move any items (mail messages, phone messages, reminder notes, tasks, or appointments) to this folder and arrange them in the order you want.
1.6.8
Work in Progress Folder
The Work In Progress folder is a folder where you can save messages you have started but want to finish later. This is also where all Auto Save messages are automatically saved.
1.6.9
Cabinet Folder
The Cabinet contains all of your personal folders. You can rearrange and nest folders by clicking the Folders on the Main Toolbar.
1.6.10
Junk Mail Folder
All email items from addresses and Internet domains that are junked through Junk Mail Handling are placed in the Junk Mail folder . This folder is not created in the folder list unless a Junk Mail option is enabled.
While Junk Mail options are enabled, this folder cannot be deleted. However, the folder can be renamed or moved to a different location in the folder list. If all Junk Mail options are disabled, the folder can be deleted. The folder can also be deleted if the Junk Mail Handling feature is disabled by the GroupWise administrator.
To delete items from the Junk Mail folder, right-click the Junk Mail folder, click Empty Junk Mail Folder, then click Yes.
For more information about Junk Mail Handling, see Section 3.6, “Handling Unwanted Email (Spam),” on page 47.
1.6.11
Trash Folder
All deleted mail and phone messages, appointments, tasks, documents, and reminder notes are stored in the Trash folder . Items in the Trash can be viewed, opened, or returned to your Mailbox before the Trash is emptied. (Emptying the Trash removes items in the Trash from the system.) You can empty your entire Trash, or empty only selected items. The GroupWise administrator can specify that your Trash is emptied automatically on a regular basis.
1.6.12
Shared Folders
A shared folder is like any other folder in your Cabinet, except other people have access to it. You can create shared folders or share existing personal folders in your Cabinet. You choose whom to share the folder with, and what rights to grant each user. Users can post messages to the shared folder, drag existing items into the folder, and create discussion threads. You can’t share system folders, which include the Cabinet, Trash, and Work In Progress folders.
If you place a document in a shared folder, people with rights to the shared folder don’t automatically have rights to edit the document. Before they can edit the document, you must give them Edit rights by clicking Folders, then clicking the Share Folder tab.
1.7 Understanding GroupWise Item Types
Every day you communicate in a variety of ways. To accommodate these needs, GroupWise delivers your items by using a variety of item types. Each item type is explained below.
Section 1.7.1, “Mail,” on page 15
Section 1.7.2, “Appointment,” on page 15
Section 1.7.3, “Task,” on page 15
Section 1.7.4, “Note,” on page 16
Section 1.7.5, “Phone Message,” on page 16
1.7.1
A mail message is for basic correspondence, such as a memorandum or letter. See Section 3.3, “Receiving Email,” on page 42 and Section 3.1, “Sending Email,” on page 25.
1.7.2
Appointment
An appointment lets you invite people to and schedule resources for meetings or events. You can schedule the date, time, and location for the meeting. You can use personal appointments to schedule personal events such as a doctor’s appointment, a reminder to make a phone call at a certain time, and so forth. Appointments display on the Calendar. See Section 4.3.2, “Scheduling Appointments,” on page 54.
1.7.3
Task
A task lets you place a to-do item on your own or on another person’s Calendar after it has been accepted. You can schedule a due date for the task and include a priority (such as A1). Uncompleted tasks are carried forward to the next day. See Section 5.3.1, “Assigning a Task,” on page 66.
TIP: You can also create a Tasklist that is not associated with your Calendar. In this type of Tasklist, any item type (mail, appointment, task, reminder note, phone message) can be used.
1.7.4
Note
A note is posted on a specific date on your own or another person’s Calendar. You can use notes to remind yourself or others of deadlines, holidays, days off, and so forth. Personal notes are useful as reminders for birthdays, vacations, paydays, and so forth. See Section 4.3.3, “Sending Reminder Notes,” on page 59.
1.7.5
Phone Message
A phone message helps you inform someone of a phone call or visitor. You can include such information as caller, phone number, company, urgency of the call, and so forth. You cannot answer your phone from a phone message. See Section 3.1.11, “Sending a Phone Message,” on page 35.
1.8 Identifying the Icons Appearing Next to Items
The icons that appear next to items in your Mailbox, Sent Items folder, and the Calendar show information about the items. The following table explains what each icon means.
Table 1-1 Icon Descriptions
Icon Description
One or more attachments are included with the item. Draft item.
An item you have sent. An item you have replied to. An item you have forwarded. An item you have delegated.
An item you have replied to and forwarded
An item you have replied to and delegated.
An item you have forwarded and delegated.
1.9 Learning More
You can learn more about GroupWise from the following resources:
Section 1.9.1, “Online Help,” on page 18
Section 1.9.2, “GroupWise Documentation Web Page,” on page 18
Section 1.9.3, “GroupWise Cool Solutions Web Community,” on page 18 A personal item.
Unopened mail message with a low, standard, or high priority. Opened mail message with a low, standard, or high priority.
Unopened and opened appointment with a low, standard, or high priority. Unopened and opened task with a low, standard, or high priority. Unopened reminder note with a low, standard, or high priority.
Opened reminder note with a low, standard, or high priority. Unopened phone message with a low, standard, or high priority. Opened phone message with a low, standard, or high priority. A reply is requested for this low, standard, or high priority item.
Unopened document reference.
Opened document reference.
Shared folder notification.
Shared address book notification.
Unopened posted item (shared folder).
Opened posted item (shared folder). Icon Description
1.9.1
Online Help
Complete user documentation is available in Help. In the Main Window, click Help, then use the Contents tab, Index tab, or Search tab to locate the help topics you want.
1.9.2
GroupWise Documentation Web Page
For a complete set of GroupWise user and GroupWise administration documentation, go to the
GroupWise 2014 Documentation Web site (http://www.novell.com/documentation/groupwise2014/).
1.9.3
GroupWise Cool Solutions Web Community
At the Cool Solutions Web site (https://www.novell.com/communities/coolsolutions/gwmag), you find tips, tricks, feature articles, and answers to frequent questions.
2
2Getting Organized
In Getting Started, you learned the basics of the GroupWise Web environment. This section describes how to transform the basic GroupWise Web environment into an efficient, customized collaboration environment that suits your personal work style.
Section 2.1, “Using Categories to Organize Items,” on page 19
Section 2.2, “Using Folders to Organize Your Mailbox,” on page 20
2.1 Using Categories to Organize Items
Categories are used to help define and prioritize items in your mailbox. Categories apply a color pattern of your choice to the specified email messages, so you can classify them at a glance. You can assign more than one category to an item, but one category is always primary and displays the primary color scheme. Categories also apply to calendar items and can be added to calendar items the same way they are added to mail items.
Section 2.1.1, “Assigning a Category,” on page 19
Section 2.1.2, “Adding a New Category,” on page 19
Section 2.1.3, “Removing a Category from an Item,” on page 19
Section 2.1.4, “Renaming a Category,” on page 20
Section 2.1.5, “Deleting a Category,” on page 20
2.1.1
Assigning a Category
1 Select the message you want to add a category to.
2 Right-click, then click Categories.
3 Select the category you want to use.
4 Click OK.
2.1.2
Adding a New Category
1 In your mailbox, click Categories.
2 In the New Category field, specify a name for the new category, then click Add.
3 Select the new category in the Categories section, then specify the text and background colors.
4 Click OK.
2.1.3
Removing a Category from an Item
1 Select the item you want to remove the category from.
3 Deselect the check box in the Categories section.
4 Click OK.
2.1.4
Renaming a Category
1 In your mailbox, click Categories.
2 Select the category you want to rename.
3 Click Rename.
4 Specify the new name, then click OK.
2.1.5
Deleting a Category
1 In your mailbox, click Categories.
2 Select the category you want to remove.
3 Click Delete.
2.2 Using Folders to Organize Your Mailbox
Use folders to store and organize your items. For example, you can group all items related to a particular task or subject together.
Section 2.2.1, “Understanding Folders,” on page 20
Section 2.2.2, “Modifying the Folder List,” on page 21
Section 2.2.3, “Deleting Folders,” on page 21
Section 2.2.4, “Creating a Personal Folder,” on page 21
Section 2.2.5, “Renaming a Folder,” on page 22
Section 2.2.6, “Moving an Item to Another Folder,” on page 22
Section 2.2.7, “Understanding Find Results Folders,” on page 22
Section 2.2.8, “Using Shared Folders,” on page 22
2.2.1
Understanding Folders
The Folder List displays the folders that are relative to the folder you are currently in. The following are context-sensitive Folder Lists:
Calendar: Displays a list of all calendars. From here you can select to display the contents of a calendar in the main calendar. In addition, you can change the color of a calendar.
Contacts: Displays a list of all personal address books. By default, the main Contacts folder is the Frequent Contacts address book.
Documents: Displays a list of your document libraries. By default, the main Documents folder is your default document library.
Click the Expand and Collapse arrows to expand and collapse folders.
For information about the individual folders you might have in your Folder List, see Section 1.6, “Exploring the Folder List,” on page 13.
You can organize items in your folders by moving them. When you move an item into a folder, it is taken from one location and placed in another.
You can store unfinished items in a predefined folder called Work In Progress (see “Saving an Unfinished Email” on page 31). You can also make folders public by sharing them (see “Using Shared Folders” on page 22). You can create rules to automatically sort items to different folders (see
Section 8.3, “Creating a Rule,” on page 90).
2.2.2
Modifying the Folder List
1 On the main WebAccess page, click Folders on the toolbar.
In the Manage Folders window, you can create, delete, and share folders.
2.2.3
Deleting Folders
1 Select the Delete Folder tab at the top of the Folders window.
2 Click the folder you want to delete.
3 Click Yes.
You cannot delete the Calendar, Mailbox, Sent Items, Tasklist, Contacts, Cabinet, Work In Progress, or Trash folders. You can delete the Junk Mail folder only if Junk Mail Handling has been disabled.
2.2.4
Creating a Personal Folder
1 On the main WebAccess page, click Folders on the toolbar.
2 Select the place in the Folder List where you want to add the folder. By default, a new folder is added as the first folder in the Cabinet.
For example, to add a folder at the same level as the Mailbox folder, click the Down button next
to the Mailbox folder. To add a folder to the Mailbox folder, click the Right button next to the
Mailbox folder.
3 Type a name for your new folder in the Folder Name field.
2.2.5
Renaming a Folder
In some cases you might want to rename a folder to more accurately reflect the contents of a folder or to correct a spelling error. In WebAccess new folders can be created but names of existing folders cannot be changed. You can change folder names in the GroupWise Windows client.
For more information on managing folders, see Section 2.2.1, “Understanding Folders,” on page 20.
2.2.6
Moving an Item to Another Folder
1 Locate the item in the Item List.
2 Double-click the item to open it, then click Move.
3 Click the folder where you want to move the item.
If you are moving the item to a folder in the Cabinet, you might need to click the Expand icon
next to the Cabinet to display the Cabinet folders.
2.2.7
Understanding Find Results Folders
A Find Results folder is a folder that displays the results of a query. When the folder is opened, GroupWise examines the search criteria defined for the folder, searches for everything specified, then displays everything it finds in the Item List. You can act on items in a Find Results folder the same way you act on items in any folder, such as opening, forwarding, printing, copying, moving, or deleting them, but the original item remains stored in the folder where the search found it. This means that if you move or delete an item from a Find Results folder, the item is deleted from the Item List, but not from the original location. The next time you open the Find Results folder, the search is performed again and the item is once again displayed.
Although you cannot create new Find Results folders in WebAccess, you can use folders you created in the GroupWise Windows client. However, to ensure that you are viewing the most recent
information in the folder and not a cached copy, you should click Update in the toolbar before opening
a Find Results folder.
2.2.8
Using Shared Folders
A shared folder is like any other folder in your Cabinet, except other people have access to it and it appears in their Cabinets. You can create shared folders or share existing personal folders in your Cabinet. You choose whom to share the folder with, and what rights to grant each user. Then, users can post messages to the shared folder, drag existing items into the folder, and create discussion threads. You cannot share system folders, which include the Mailbox, Unopened Items, Sent Items, Calendar, Task List, Checklist, Cabinet, Work In Progress, Junk Mail, and Trash folders.
If you place a document in a shared folder, people with rights to the shared folder can read the document, but they don’t automatically have rights to edit. Before they can edit the document, you must give them Edit rights on the Share Folder tab.
You can share personal folders with other users. Recipients of the shared folder receive a notification explaining that you have shared the folder with them. They can then accept the folder or decline the folder.
“Sharing an Existing Folder with Other Users” on page 23
“Posting an Item to a Shared Folder” on page 23
“Deleting a Shared Folder” on page 24
Sharing an Existing Folder with Other Users
1 On the main WebAccess page, click Folders on the toolbar, then click the Share Folder tab.
2 Select the folder you want to share. Folders available for sharing are underlined.
3 In the Name field, start typing the name of a user. or
Click Address Selector to search for a user. For more information about the Address Selector,
see Section 6.2, “Using the Address Selector,” on page 72.
4 Select the access options you want for the user.
5 Repeat Step 3 through Step 4 for each user you want to share the folder with.
6 Click Save.
Accepting a Shared Folder
1 Click the Shared Folder notification in your Mailbox.
2 Click Accept Folder.
3 The name of the folder is filled in by default. Make any desired changes to the name of the folder.
4 Select the folder’s location.
5 Click Add Folder.
Posting an Item to a Shared Folder
1 In the Folder List, open the shared folder you want to post the item to.
3 Type a subject and message.
You can include Web site locations or addresses (URLs) in both the Subject field and the
message body.
4 (Optional) Click Check Spelling to spell check the message.
5 (Optional) Click Attach to attach files to the message. For this feature to work, your browser must
support attachments.
6 Click Post to add the message to the shared folder.
Deleting a Shared Folder
To delete a folder that is shared with you:
1 Right-click the folder.
2 Click Delete Folder.
3 Click OK.
Deleting a folder that is shared with you just deletes the folder from your GroupWise Mailbox. All other users are unaffected. However, if you are the one who shared the folder with others, then deleting that folder also removes it from all other users.
3
3An email message is basically a text message sent to a recipient. You can write messages in plain text or HTML, and you can add attachments to them. All incoming messages are delivered to your Mailbox folder.
An email message is basically a text message sent electronically to a recipient. You can write messages in plain text or HTML, and you can add attachments to them. All incoming messages are delivered to your Mailbox folder.
Section 3.1, “Sending Email,” on page 25
Section 3.2, “Managing Sent Email,” on page 36
Section 3.3, “Receiving Email,” on page 42
Section 3.4, “Managing Received Email,” on page 45
Section 3.5, “Printing Email,” on page 47
Section 3.6, “Handling Unwanted Email (Spam),” on page 47
3.1 Sending Email
When you send an email message from GroupWise WebAccess, you can send the message either as text or HTML. Additionally, you can choose to attach a file, add a signature to the message, and spell check the message before it is sent.
The address book and name completion help you to quickly and easily find the contacts you need when sending an email message.
Section 3.1.1, “Composing Email,” on page 25
Section 3.1.2, “Formatting Messages,” on page 26
Section 3.1.3, “Spell-Checking Messages,” on page 27
Section 3.1.4, “Attaching Files,” on page 28
Section 3.1.5, “Adding a Signature,” on page 28
Section 3.1.6, “Saving Unfinished Email,” on page 29
Section 3.1.7, “Selecting the Default Compose View,” on page 31
Section 3.1.8, “Addressing Mail Messages,” on page 32
Section 3.1.9, “Selecting Send Options,” on page 33
Section 3.1.10, “Posting a Note,” on page 35
Section 3.1.11, “Sending a Phone Message,” on page 35
3.1.1
Composing Email
1 Click Mail on the toolbar.
2 In the To box, type a user name, then press Enter. As you begin to type, Name Completion
automatically tries to match the name and complete it for you. Repeat for additional users. If necessary, type user names in the CC and BC boxes.
or
To select user names from a list, click Address on the toolbar, search for and select each user,
click To, CC, or BC for each user, then click OK.
3 Type a subject.
4 Type a message.
You can specify many options, such as making this message a high priority, requesting a reply from the recipients, and more, by clicking the Send Options tab.
5 Include any attachments by clicking the Attach.
6 Click Send on the toolbar.
3.1.2
Formatting Messages
When you send a message, you can select from several format options. You can select to send the message as a text or HTML message, and you can change the fonts, colors, and layout of the message.
“Changing the Font in the HTML View” on page 26
“Formatting Bulleted and Numbered Lists” on page 27
“Undoing the Last Text Action” on page 27
Changing the Font in the HTML View
The recipient of an item sees the changes you make in Plain Text view if he or she views the item in Plain Text view. The recipient of an item sees the changes you make in HTML view if he or she views the item in HTML view. You might want to let the recipient know which view you composed the item in.
1 In an open item you are composing, make sure the HTML toolbar is displayed.
2 Use the HTML toolbar to change the font, add background colors, add images, and more. You might need to resize the item view horizontally to see all the buttons on the HTML toolbar.
Formatting Bulleted and Numbered Lists
You can easily include bulleted and numbered lists in messages.
1 In an open item you are composing in the HTML view, use the HTML toolbar to insert a bulleted or numbered list
2 Type the list item, then press Enter to create the next item in the list.
3 Press Enter twice after the last item to turn off the list formatting.
Undoing the Last Text Action
You can undo the last text action in the Subject or Message field of a message you are composing.
1 Press Ctrl+Z.
For information about other shortcut keys, see Appendix C, “Using Shortcut Keys,” on page 109.
3.1.3
Spell-Checking Messages
Spell Checker lets you check for misspelled words in the messages you create. It checks for misspelled words, duplicate words, and irregular capitalization in items you are creating.
When Spell Checker finds a misspelled word, you can replace it with a word Spell Checker suggests, edit the word manually, or skip the word.
You use the compose options to set up Spell Checker to automatically spell check your messages before you send them.
“Spell-Checking an Item with Spell Checker” on page 27
“Spell-Checking Items Automatically with Spell Checker” on page 27
“Selecting the Spell Checker Language” on page 28
Spell-Checking an Item with Spell Checker
1 Click the Subject or Message field.
2 Click Check Spelling.
WebAccess highlights any misspelled words.
3 Click any highlighted word.
4 Select one of the words Spell Checker suggests to replace the misspelled word. or
Click Edit to make your own corrections.
5 Click Resume Editing when spell-checking is complete.
Spell-Checking Items Automatically with Spell Checker
You can automatically spell-check items every time you click Send.
1 On the main WebAccess page, click the Options icon , then click Options.
3 Select Check spelling before send.
4 Click Save, then click Close.
Selecting the Spell Checker Language
1 In an open item you are composing, click the Subject field or the Message field.
2 Click the drop-down menu next to Check Spelling.
3 Select the language to use.
3.1.4
Attaching Files
You can send files to other users. You can attach files that exist on your hard disk, diskette, or network drive to an item you are sending. The recipients can open an attached file, save it, view it, or print it. If you change an attached file after you have sent it, the recipients do not see the changes. If you attach a file that is password-protected, the recipient cannot open or view the attachment without entering the password.
1 Open a new item.
2 Fill in the To, Subject, and Message fields.
3 Click Attach, then browse to and select the file or files you want to send.
To remove an attached file, click the Remove icon .
4 Click Send on the toolbar.
Moving or deleting a file on a disk or network drive does not affect a file you attached to an item and sent.
If you delete an attached file, it is not erased from disk or network drive; it is simply removed from the attachment list.
3.1.5
Adding a Signature
Use Signatures to insert a signature or tag line at the end of items you send. For example, you can have GroupWise automatically list your name, phone number, and email address at the bottom of every item you send.
In addition to personal signatures, your GroupWise administrator can create a global signature for everyone to use. If the GroupWise administrator requires the global signature, it is automatically appended to all items that are sent. When you resend an item, the global signature is not automatically added to the message.
Signatures that you create or modify in the GroupWise Windows client are automatically displayed in GroupWise WebAccess. Likewise, signatures that you create or modify in GroupWise WebAccess are automatically displayed in the GroupWise Windows client.
1 On the main page, click the Options icon , then click Options.
2 Click Compose.
3 Select Enable signature.
4 Click New, specify a name for the new signature, then click OK.
5 (Optional) Create additional signatures. In the Signature drop-down list, select the signature that
6 Type your signature text in the box.
7 Click Automatically add signature to automatically add your signature when you send the item. or
Click Prompt before adding signature to have WebAccess prompt you to add the signature when
you send the item.
8 Click Save, then click Close.
3.1.6
Saving Unfinished Email
“Understanding Auto-Save” on page 29
“Enabling or Disabling Auto-Save” on page 31
“Saving an Unfinished Email” on page 31
Understanding Auto-Save
When you compose a new message in GroupWise WebAccess, items are automatically saved for you. This prevents the loss of any messages you are authoring if WebAccess unexpectedly shuts down. When you restart WebAccess, you have the option to recover these messages to finish composing them.
If you stop using GroupWise WebAccess for 10 seconds (the default non-use value) and have unsent messages, or if you have been actively composing messages for 60 seconds (the default continuous use value), WebAccess automatically saves your messages to your Work In Progress folder.
WebAccess adds two characters to the title of all auto-saved messages to distinguish them from other items you might have manually saved to your Work In Progress folder.
If there are auto-saved messages when you start WebAccess a message is displayed. The type of message that is displayed differs depending on the number of messages that were auto-saved.
“When One Auto-Saved Message is Recovered” on page 30
“When Two to Five Auto-Saved Messages Are Recovered” on page 30
“When 6 or More Auto-Saved Messages Are Recovered” on page 31
When One Auto-Saved Message is Recovered
When you start WebAccess and only one auto-saved message is recovered, you see the following message:
You have the following options to deal with the auto-saved messages:
Open: Opens the auto-saved messages so that you can finish composing them.
Save: Saves the messages as regular Work In Progress items so that you can finish composing the messages later.
Delete: Deletes the auto-saved messages. The information in them is permanently lost.
Skip: Retains the saved messages on disk but does not recover them in WebAccess. The next time you start WebAccess, the Auto-Save window reappears.
When Two to Five Auto-Saved Messages Are Recovered
When you start WebAccess and two to five auto-saved message are recovered, you see the following message:
You have the following options to deal with the auto-saved messages. Select one of these options for each auto-saved message, then click OK.
Open: Opens the auto-saved messages so that you can finish composing them.
Save: Saves the messages as regular Work In Progress items so that you can finish composing the messages later.
Delete: Deletes the auto-saved messages. The information in them is permanently lost.
Click Skip to retain the saved messages on disk but to not recover them in WebAccess. The next time
you start WebAccess, the Auto-Save window reappears.
When 6 or More Auto-Saved Messages Are Recovered
When you start WebAccess and six or more auto-saved message are recovered, you see the following message:
Click OK to save the messages as regular Work In Progress items so that you can finish composing
the messages later.
Enabling or Disabling Auto-Save
By default, Auto-Save is enabled if you use a high-speed connection to access your GroupWise system. It is disabled by default if you use a low connection speed. For more information on your login options for connecting, see Section 1.2, “Starting GroupWise WebAccess,” on page 9.
1 On the main WebAccess page, click the Options icon , then click Options.
2 Click the Compose tab.
3 Select Enable auto-save to enable Auto-Save.
or
Deselect Enable auto-save to disable Auto-Save.
4 Click Save, then click Close.
Saving an Unfinished Email
1 In an open item, click the Save icon.
2 Click the folder you want to save the item to, then click OK.
The draft message is placed in the folder you chose in Step 2. The default folder for unfinished messages is the Work In Progress folder .
3.1.7
Selecting the Default Compose View
When you are composing a message in GroupWise WebAccess, you can select to have the default compose format in either plain text or HTML.
1 On the main WebAccess page, click the Options icon , then click Options.
2 Click the Compose tab.
3 In the Default Compose View box, select Plain Text or HTML.
To change the view in one item:
1 Open an item.
2 Click the HTML or > Plain Text icon.
3.1.8
Addressing Mail Messages
A mail message has a primary recipient, a subject line, and can be carbon copied and blind copied to other users. You can also attach files, document references, sounds, movies, and OLE objects to your mail messages.
“Using the Address Book” on page 32
“CC (Carbon Copy)” on page 32
“BC (Blind Copy)” on page 32
“Adding Addresses to Mail Messages” on page 32
Using the Address Book
For information on using the Address Book, see Chapter 6, “Contacts and Address Books,” on page 71.
CC (Carbon Copy)
Carbon copy recipients (CC) receive a copy of an item. CC recipients are users who would benefit from the information in an item, but are not affected by or directly responsible for it. All recipients can see that a carbon copy was sent. They can also see the names of the CC recipients.
BC (Blind Copy)
Blind copy recipients (BC) receive a copy of an item. Other recipients receive no information about blind copies. Only the sender and the blind copy recipient know that a blind copy was sent. If a recipient replies and chooses Reply to All, the blind copy recipient does not receive the reply.
Adding Addresses to Mail Messages
1 Click Mail on the toolbar.
2 In the To field, type a user name, then press Enter. Repeat for additional users. If necessary,
type user names in the CC and BC fields.
or
To select user names from a list, click Address on the toolbar. For more information on how to
use the Address Selector, see Section 6.2, “Using the Address Selector,” on page 72.
3 Type a subject.
4 Type a message.
You can specify many options, such as making this message a high priority, requesting a reply from recipients, and more, by clicking the Send Options tab.
If you want, you can change the font of the message text. For information, see “Changing the Font in the HTML View” on page 26.
5 Include any attachments by clicking Attach.
6 Click Send on the toolbar.
3.1.9
Selecting Send Options
“Changing the Priority of Mail You Send” on page 33
“Changing the Security Setting (Classification) of All Items You Send” on page 34
“Changing the MIME Encoding of a Message” on page 35
Changing the Priority of Mail You Send
“Changing the Priority for All Items You Send” on page 33
“Changing the Priority for One Item” on page 34
Changing the Priority for All Items You Send
1 To change the priority of all items you send, click the Options icon , then click Options.
2 Click the Send Options tab.
3 Select High, Standard, or Low.
The small icon next to an item in the Mailbox is red when the priority is high, white when the priority is standard, and gray when the priority is low.
Changing the Priority for One Item
1 To change the priority of one item, open an item, then click the Send Options tab.
2 Select High, Standard, or Low.
The small icon next to an item in the Mailbox is red when the priority is high, white when the priority is standard, and gray when the priority is low.
3 Click Send.
Changing the Security Setting (Classification) of All Items You Send
A classification is a security setting that lets the recipient know if the item is confidential, top secret, and so forth. This information appears at the top of the item. A classification does not provide any encryption or additional security. It is meant to alert the recipient to the relative sensitivity of the item.
1 On the main WebAccess page, click the Options icon , then click Options.
3 Select a security setting from the Classification drop-down list.
4 Click Save, then click Close.
Changing the MIME Encoding of a Message
Many languages require different character encodings to display certain characters properly. In GroupWise WebAccess, you can change the encoding for items that you send and receive.
“Changing the Encoding for All Items You Send” on page 35
“Changing the Encoding for One Item” on page 35
Changing the Encoding for All Items You Send
1 On the main WebAccess page, click the Options icon , then click Options.
2 Click the Send Options tab.
3 Select your MIME encoding from the MIME Encoding drop-down list.
4 Click Save, then click Close.
Changing the Encoding for One Item
1 In the Mail Message window, click the Send Options tab.
2 Select your MIME encoding from the MIME Encoding drop-down list.
3 Click Send on the toolbar to send the message.
3.1.10
Posting a Note
A note is a message that is posted to your mailbox only. Notes are a way of creating personal notes for yourself.
1 In your Mailbox or Calendar, click the drop-down arrow next to Mail, then click Personal Note.
2 Type a subject.
3 Type a message.
4 Include any attachments by clicking Attach.
5 Click Post on the toolbar.
3.1.11
Sending a Phone Message
A phone message is a note you can send to notify other GroupWise users of calls they received while they were out of the office or unavailable. Phone messages are stored in the recipient’s Mailbox. You cannot answer your phone from a phone message.
2 In the To field, type a user name, then press Enter. Repeat for additional users. or
To select user names from a list, click Address on the toolbar. For more information on how to
use the Address Selector, see Section 6.2, “Using the Address Selector,” on page 72.
3 Type the name, company, and phone number of the caller.
4 Type the message in the message body.
If you want, you can change the font of the message text. For information, see “Changing the Font in the HTML View” on page 26.
5 Click Send on the toolbar.
3.2 Managing Sent Email
Section 3.2.1, “Retracting Sent Email,” on page 36
Section 3.2.2, “Resending Email,” on page 37
Section 3.2.3, “Checking the Status of Sent Email,” on page 37
Section 3.2.4, “Confirming Delivery of Email You Send,” on page 38
Section 3.2.5, “Displaying Sent Items,” on page 41
Section 3.2.6, “Sorting Sent Items,” on page 42
3.2.1
Retracting Sent Email
Use Delete from All Mailboxes to retract a sent item from the recipient’s Mailbox. You can retract a
mail or phone message from those recipients who haven’t yet opened the item. You can retract an appointment, reminder note, or task at any time. However, items that have been sent across the Internet to other email systems cannot be retracted.
1 Click the Sent Items folder in the Folder List.
3 (Optional) Add a comment.
4 Click OK.
To see which recipients have opened your message, right-click the item, then click Properties. Email
cannot be retracted if it has already been opened.
3.2.2
Resending Email
Use Resend to send an item a second time, perhaps with corrections.
1 Click the Sent Items folder in the Folder List.
2 Right-click and select Resend.
3 Select Retract Original Item? if you want to retract the original item.
4 Make changes to the item, if necessary, then click Send on the toolbar.
You can check the properties of the original item to see if GroupWise was able to retract it. Right-click the item in the Sent Items folder, then click Properties. Mail and phone messages cannot be retracted if they have already been opened.
3.2.3
Checking the Status of Sent Email
If the receiver’s email system enables status tracking, you can receive status information about the items you send. The Properties window lets you check the status of any item you've sent. For example, you can see when an item was delivered and when the recipient opened or deleted the item. If a recipient accepted or declined an appointment and included a comment, you see the comment in the Properties window. You also see if a recipient marked a task completed. The Properties window also shows information about items you receive. You can see who else received the item (except for blind copy recipients), the size and creation date of attached files, and more.
“Status Overview” on page 37
“Checking the Status of an Item” on page 38
“Saving the Status Information of an Item” on page 38
“Printing the Status Information of an Item” on page 38
Status Overview
There are two views for the properties:
Basic Properties: Displays the Properties header and a list of recipients. The list of recipients displays the recipient’s name, what actions the recipient has taken with the item, the date and time of the last action, and any comments.
Advanced Properties: Displays the Properties header, recipients, post offices, files, and options for the item. The Advanced Properties page is helpful to GroupWise administrators when they need to track the item for troubleshooting purposes.
Checking the Status of an Item
1 Right-click an item in your Mailbox or Calendar, then click Properties.
The icons next to an item can also give you helpful status information. For more information, see
Section 1.8, “Identifying the Icons Appearing Next to Items,” on page 16. To change to the Advanced Properties, click Advanced Properties.
Saving the Status Information of an Item
1 Right-click an item, then click Properties.
2 Click File > Save Page As.
WebAccess gives the item a temporary file name. You can change the file name and default folder.
3 Click Save.
Printing the Status Information of an Item
1 Right-click an item, then click Properties.
2 Click Print View to display a printer-friendly version of the status information, then click Print this page.
3 Select print options and print the status page as you normally would in your Web browser.
3.2.4
Confirming Delivery of Email You Send
GroupWise WebAccess provides several ways to confirm that your item was delivered.
“Tracking Sent Items” on page 38
“Receiving Notifications about Items You Send” on page 38
“Requesting a Reply for Items You Send” on page 39
Tracking Sent Items
You can check the status in the Properties window of any item you send. For information, see
“Checking the Status of Sent Email” on page 37.
Receiving Notifications about Items You Send
If the receiving email system is capable of returning notifications, you can receive notification when the recipient opens or deletes a message, declines an appointment, or completes a task.
“Receiving Notifications about All Items You Send” on page 38
“Receiving a Notification about a Single Item” on page 39
Receiving Notifications about All Items You Send
1 To always receive notification for items you send, click the Options icon , then click Options.
3 In the Return Notification section, specify the type of return receipt you want.
4 Click Save.
Receiving a Notification about a Single Item
1 To get a return receipt for one item, open an item view, then click the Send Options tab.
2 In the Return Notification section, specify the type of return receipt you want.
3 Click Send.
Requesting a Reply for Items You Send
You can inform the recipient of an item that you need a reply. GroupWise WebAccess adds a sentence to the item stating that a reply is requested and changes the icon in the recipient’s Mailbox to a double arrow.
“Requesting a Reply for All Items You Send” on page 39
“Requesting a Reply for a Single Item” on page 40
Requesting a Reply for All Items You Send
1 To request a reply for all items you send, click the Options icon , then click Options.
3 Specify when you want to receive the reply.
The recipient sees next to the message. If you select When Convenient, “Reply Requested:
When convenient” appears at the top of the message. If you select Within x Days, “Reply
Requested: By xx/xx/xx” appears at the top of the message.
4 Click Save > Close.
Requesting a Reply for a Single Item
2 Specify when you want to receive the reply.
The recipient sees next to the message. If you select When Convenient, “Reply Requested: When convenient” appears at the top of the message. If you select Within x Days, “Reply Requested: By xx/xx/xx” appears at the top of the message.
3 Click Send.
3.2.5
Displaying Sent Items
You might want to display items you previously sent. For example, you can read a sent item, resend it with or without corrections, and in some cases, retract it if it has not already been opened by the recipient.
1 Click the Sent Items folder in the folder list.
All sent items reside in this folder unless they are moved to a folder other than the Mailbox or Calendar. If a sent item is moved to another folder, it no longer displays in the Sent Items folder. To display sent items that have been moved to other folders, open those folders.