Appendix A – Attach/Scan Documents
Overview ... A-2
ViewStar Information... A-3
Task 1: Attach a Document ... A-5
Task 2: Scan a Document ... A-8
General Scanning Tips ... A-15
Task 2A: Create a Batch of Documents ... A-16
Task 2B: Delete a Batch of Documents ... A-17
Task 2C: Attach a Scanned Document ... A-18
Helpful Scanning Hints ... A-19
Adjust Brightness and Contrast... A-19
Rotate a Document ... A-20
Overview
The process of attaching documents is performed throughout numerous tasks within NEMIS. It is used to link documents to a NEMIS record.
In the NEMIS−Mitigation functional module, the record is usually a project application. The supporting documentation is linked to the project application record to make the documents available for viewing by NEMIS HMGP users. This includes documents required by NEMIS HMGP (such as the project description and maintenance assurance documents) and any other documents that users elect to add (such as environmental review reports, maps, and photographs). Whether you are attaching a plan, a map, or a Declaration Request Letter, the instructions are the same.
CAUTION: Attachments cannot be deleted once they have been added to NEMIS HMGP. Please make every effort to limit the file attachment size to less than 1 GB.
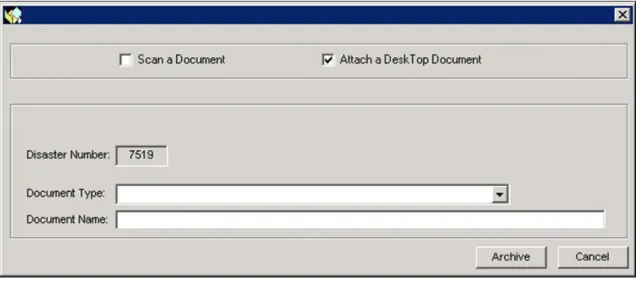
When you select the ATTACH/SCAN DOCUMENTS button from various screens in the NEMIS−Mitigation functional module, the Attach/Scan Document dialog box is displayed (Figure A-1).
If the dialog box is not displayed, it is possible that you need to have ViewStar reinstalled on your machine or you need access to the V drive, where the ViewStar operating system is currently located, or both.
Figure A-1: Attach/Scan Document Dialog Box This appendix describes the following tasks:
• Attach a document
• Scan a document
ViewStar Information
The user must have access to the V Drive where the ViewStar operational files are maintained, and the drive must be active or opened.
A manual install of ViewStar may be necessary. The file is in the ViewStar 5.2 install document. To manually install ViewStar, complete the following steps:
1. Make sure V drive is mapped to the computer (\\MWNE3i1\vs_prod). Check the afile.bat to make sure it pointed to \\mwne3i1\vs_prod . This doesn’t always work on Windows 7 unless the user had admin rights on the workstation. AFILE.BAT is what NEMIS uses to map the V drive so that ViewStar will work. 2. Make sure ViewStar is installed. If it is not, install ViewStar:
a. ViewStar install location: \\MWNE3i1\vs_prod\rr\install\VSSETUP b. Run SETUP.EXE in administrator mode:
i. Select Type Install, check Classic BPI & Enterprise BPI , then click next.
ii. Select Setup Type, Select Custom.
iii. Select Components, scroll to bottom and uncheck Add VS_BIN to the path, MDAC2.6, & ODBC DSN, and continue to click next until uninstall starts and finishes.
iv. Reboot computer.
3. Make sure ViewStar logs on successfully:
a. To test this, go to Start > Run. Inside the run box, type Startup.exe. If ViewStar logs in successfully, skip to section 5; if not, continue to section 4.
4. If ViewStar does NOT log in successfully:
a. Open up Registry Editor (regedit) with administrator credentials. b. Expand HKEY_LOCAL_MACHINE > Expand SOFTWARE > Expand
OBDC and Delete ODBC.INI.
c. Run VSDSNW.EXE /A to remove all the data source names. If there is an error, run regedit and go to HKEY_LOCAL_MACHINE, SOFTWARE, ODBC, ODBC.INI and delete the key.
d. Run VSDSNW.EXE to recreate the data source names. e. Close out regedit.
f. Click Start>Run>VSDNW.EXE, and then close out program after successful run.
g. Click Start>Run>Startup.exe. ViewStar should now log on successfully. 5. Right click on My Computer and go to properties. Open up Advanced System
Settings > Environment Variables.
a. Scroll down bottom variable window list until you see “PATH,” and double-click on Path. Delete \\hyne2i1\vs_mail\rr\vs_bin, and make sure the only pathway showing for NEMIS is \\mwne3i1\vs_prod\rr\vs_bin. Make sure the ViewStar UNC is \\mwne3i1\vs_prod\rr\vs_bin or
V:\RR\VS_BIN (either one will work, but there should only be one). You could also run PATH to get this information.
6. Have user log in to NEMIS MT and use attach function. For support Contact Mr. Robert Cates
Email: [email protected] Desk Phone: 540-678-2220
Task 1: Attach a Document
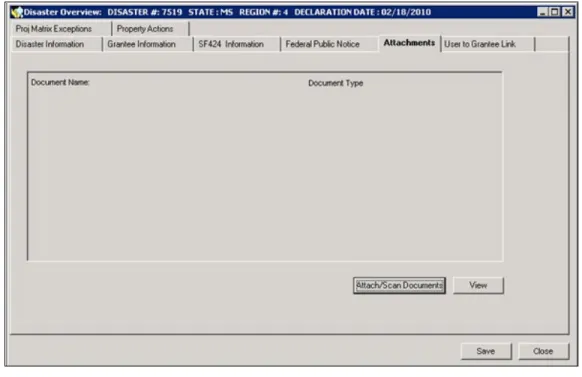
1. Click the Attachments tab (Figure A-2).
NOTE: The Attachments tab displayed here is located in the NEMIS Mitigation Disaster Overview area. All Attach/Scan screens are similar.
Figure A-2: Attachments Tab
2. On the bottom right part of the tab, click the ATTACH/SCAN DOCUMENTS button. The Attach/Scan Document dialog box is displayed (Figure A-3).
Figure A-3: Attach/Scan Document Dialog Box 3. Click inside the Attach a Desk Top Document checkbox.
4. In the Document Type field, select the document category from the drop-down list.
5. In the Document Name field, enter a descriptive name for the document. 6. Click the ARCHIVE button. The Select Attachment dialog box is displayed. 7. Navigate to the file to be attached. Select the file (Figure A-4).
Figure A-4: Select Attachment Dialog Box with Selected File 8. Click the OPEN button. The Successful Archive of Document message is
displayed (Figure A-5).
Figure A-5: Successful Archive Message
9. Click the OK button. The Viewing Information warning is displayed (Figure A-6).
Figure A-6: Viewing Information Message Box 10. Click the OK button.
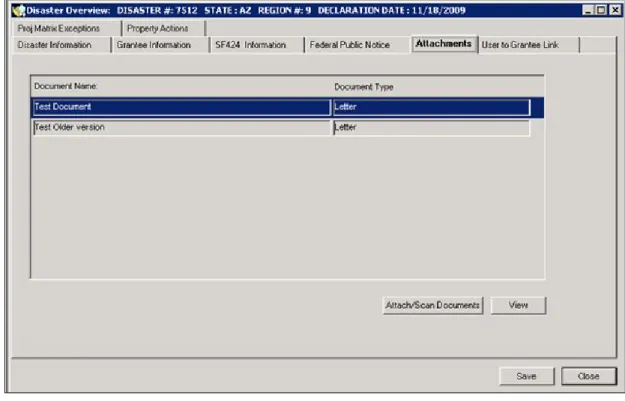
11. The document name is displayed on the Attachments tab (Figure A-7).
Figure A-7: Attachments Tab with Document List
12. To view a document, highlight the document row and click the VIEW button.
Task 2: Scan a Document
NOTE: A computer workstation with a scanner attached is required. Contact your Regional IT Help Desk for assistance.
CAUTION: Switch the scanner on before you switch the computer workstation on.
1. On the NEMIS menu bar, click on Mitigation HMGP Scan (Figure A-8).
Figure A-8: Mitigation HMGP Scan
2. The ViewStar system loads automatically (Figure A-9).
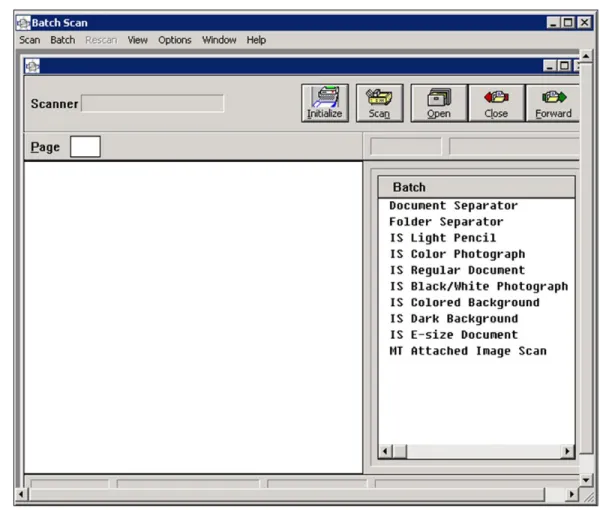
Figure A-9: ViewStar System Loading Message 3. The Batch Scan application window is displayed (Figure A-10).
Figure A-10: Batch Scan Application Window
4. If needed, maximize the window by clicking the square icon in the right top corner.
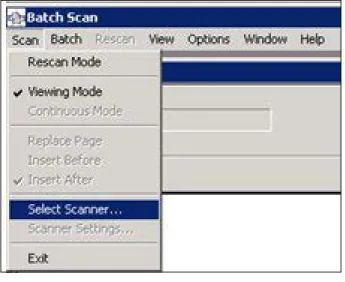
5. On the Batch Scan menu bar, click Scan Select Scanner (Figure A-11).
Figure A-11: Scan Select Scanner
6. The Select a Scanner dialog box is displayed (Figure A-12).
Figure A-12: Select a Scanner Dialog Box
7. Highlight the name of the scanner model. Click the OK button. HINT: The scanner will click quietly as the communication connection
is made. If you do not hear the sound, the scanner may not be linked to the PC. Try again, or first reboot the PC and then try again. When all else fails, contact your Regional IT Help Desk.
8. On the right side of the Batch Scan window, the Batch List is displayed. 9. On the Batch List, double-click on "MT Attached Image Scan" (Figure A-13).
Figure A-13: MT Attached Image Scan Selected 10. Above the Batch List, the Mitigation Batch Number and the words "MT
Attached Image Scan" are displayed (Figure A-14). Write down the Batch Number because you will need it later.
Figure A-14: Batch Scan Window with Mitigation Batch Number
11. If the scanner model has both Automatic Document Feed (ADF) and Flatbed options, select the correct Source in Scanner Properties by completing Steps 11a − 11f.
HINT: Choose "ADF" if the document is printed on regular 8.5" x 11" paper.
Choose "Flatbed" if the document could possibly create a paper jam in the scanner (e.g., Polaroid photos; documents printed on flimsy, thick, wrinkled, torn or dog-eared paper; irregularly-sized documents).
a. On the Batch Scan menu bar, select Scan Scanner Settings (Figure A-15).
Figure A-15: Scan Scanner Settings
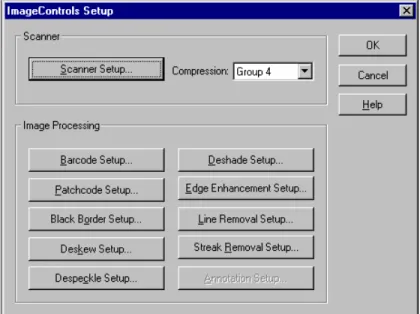
b. The Image Controls Setup dialog box is displayed. Click the SCANNER SETUP button (Figure A-16).
Figure A-16: Image Controls Setup Dialog Box
c. The Scanner Properties dialog box is displayed (Figure A-17).
Figure A-17: Scanner Properties Dialog Box
d. In the Source field, select "ADF" or "Flatbed" depending on your chosen scanning method.
e. Ensure that the Paper Size and Orientation are correct. f. Click the OK button.
12. If you selected "ADF" in the Source field, insert the document face down into the scanner feeder. Gently push the document under the plastic feeder until
the machine displays a green light (if the scanner is equipped with a light) or until the feeder stops the document.
13. If you selected "Flatbed" in the Source field, position the document properly on the glass flatbed. You can only scan one piece of paper at a time.
CAUTION: Remember to remove documents from the glass flatbed before proceeding with documents requiring ADF.
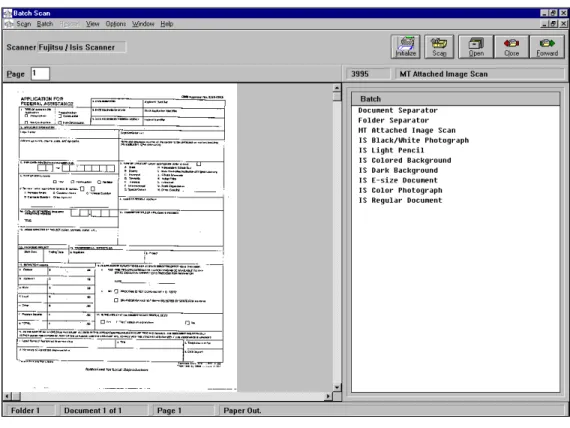
14. On the top right part of the Batch Scan window, click the SCAN button. The scanned image is displayed on the left window (Figure A-18).
Figure A-18: Batch Scan Window with Scanned Document
15. If the scanned image is displaying correctly, click the FORWARD button on the top right part of the Batch Scan window.
16. If the scan is successful, the “Batch has been forwarded” message is displayed at the bottom of the window (Figure A-19).
Figure A-19: Batch Forwarded Message
General Scanning Tips
1. When scanning documents using the ADF, separate and fan the documents so they do not stick together.
2. Do not turn off the scanner during a scanning session. The scanner loses both its initialization information and its scanner settings.
3. During scanning, ensure that the documents are feeding properly or positioned properly on the glass flatbed and the images are acceptable. 4. If the original document is difficult to read or could cause a paper jam, make a
copy of the document and scan the copy.
Task 2A: Create a Batch of Documents
1. You can create a batch of documents by scanning each page or feeding a group of pages. Do not click the FORWARD button until all the pages have been scanned. The pages get added to the Indexed Document until the FORWARD button is clicked.
2. If you want to check your document to make sure all the pages are there, page through the document by changing the page number in the Page box at the top left of the Batch Scan window. The Status Bar at the bottom of the window provides the Document and Page Numbers (Figure A-20).
Figure A-20: Document Batch Information
Task 2B: Delete a Batch of Documents
If the images are not satisfactory or if the scanning job was interrupted, you can delete the entire batch and start over.
1. On the Batch Scan window menu bar, click Batch Cancel Batch. The Delete the Current Batch dialog box is displayed (Figure A-21).
Figure A-21: Delete Current Batch Dialog Box 2. Click the YES or NO button.
Task 2C: Attach a Scanned Document
1. Select the NEMIS process in which you want to attach the scanned document.
2. Click the ATTACH/SCAN DOCUMENTS button. The Attach/Scan Document dialog box is displayed.
3. Select the Document Type from the drop-down list
4. In the Document Name field, enter a descriptive name for the document. 5. Click inside the Scan a Document checkbox. Enter the Batch Number in the
field provided (Figure A-22).
Figure A-22: Attach/Scan a Document Dialog Box
6. Click the ARCHIVE button. The Successful Archive of Document message is displayed.
7. The Viewing Information warning is displayed, indicating that it will take some time before the document can be viewed.
Helpful Scanning Hints
Adjust Brightness and Contrast
1. On the Batch Scan window menu bar, click View Image Quality (Figure A-23).
Figure A-23: View Image Quality
2. The Image Quality dialog box is displayed. The default setting for Contrast and for Brightness is 128 (Figure A-24).
Figure A-24: Image Quality Dialog Box
3. Adjust the settings for the document by clicking on the scroll buttons. 4. Click the OK button.
Rotate a Document
1. On the Batch Scan window menu bar, click View.
2. Select Rotate Right 90, Rotate Left 90, or Rotate 180 (Figure A-25)
Figure A-25: View Rotate