HP D2D NAS
Integration with HP Data Protector 6.11
Abstract
This guide provides step by step instructions on how to configure and optimize HP Data Protector 6.11 in order to back up to HP D2D Backup Systems using a CIFS backup target.
HP Part Number: EH985-90933 Published: February 2011 Edition: 1
© Copyright 2011 Hewlett-Packard Development Company, L.P.
Confidential computer software. Valid license from HP required for possession, use or copying. Consistent with FAR 12.211 and 12.212, Commercial Computer Software, Computer Software Documentation, and Technical Data for Commercial Items are licensed to the U.S. Government under vendor's standard commercial license.
The information contained herein is subject to change without notice. The only warranties for HP products and services are set forth in the express warranty statements accompanying such products and services. Nothing herein should be construed as constituting an additional warranty. HP shall not be liable for technical or editorial errors or omissions contained herein.
WARRANTY STATEMENT: To obtain a copy of the warranty for this product, see the warranty information website:
http://www.hp.com/go/storagewarranty
Linear Tape-Open, LTO, LTO Logo, Ultrium and Ultrium Logo are trademarks of Quantum Corp, HP and IBM in the US, other countries or both. Microsoft, Windows, Windows NT, and Windows XP are U.S. registered trademarks of Microsoft Corporation.
Contents
1 Configure the D2D CIFS server...4
Introduction...4
More about authentication modes...4
Configuring User authentication mode...4
Configuring AD Authentication Mode...7
To join a domain...8
To create shares and grant access permission...10
2 Configure Data Protector to use D2D CIFS Share...14
Creating a new Data Protector File Library...14
Configure drives...18
3 Configure a backup rotation scheme...20
To create a media pool...20
To create a backup job...23
About this guide...32
Intended audience...32
Related documentation...32
Document conventions and symbols...32
HP technical support...33
HP websites...33
Documentation feedback...33
1 Configure the D2D CIFS server
Introduction
The first step in configuring the D2D device as a target for backups from HP Data Protector is to configure the CIFS server on the D2D Backup System.
On the D2D Web Management Interface navigate to theNAS — CIFS Serverpage and clickEdit.
The available Authentication options for the CIFS server are:
• None– All shares created are accessible to any user from any client (this is the least secure option)
• User– Local (D2D) User account authentication • AD– Active Directory User account authentication
More about authentication modes
None:This authentication mode requires no username or password authentication and is the simplest configuration. Data Protector will always be able to use shares configured in this mode with no changes to either server or Data Protector configuration. However, this mode provides no data security because anyone can access the shares and add or delete data.
User:In this mode it is possible to create “local D2D users” from the D2D Web Management Interface. This mode requires the configuration of a respective local user on the Data Protector media server and configuration changes to the Data Protector services. Individual users can then be assigned access to individual shares on the D2D Backup System. This authentication mode is ONLY recommended when the Data Protector media server is not a member of an AD Domain.
AD:In this mode the D2D CIFS server becomes a member of an Active Directory Domain. In order to join an AD domain the user needs to provide credentials of a user who has permission to add computers and users to the AD domain. After joining an AD domain access to each share is controlled by Domain Management tools and domain users or groups can be given access to individual shares on the D2D Backup System. This is the recommended authentication mode, if the Data Protector Media server is a member of an AD domain.
Configuring User authentication mode
These are the steps required in order to configure backups in User authentication mode: • Create a “local user” on the Data Protector Media server.
• Create a matching “local user” on the D2D Backup System. • Configure Data Protector services to use the local user account.
1. Select or create a user on the server that will be used to administer the Data Protector media server and access the D2D Backup System, as follows:
• Using Windows Device Manager selectUsers and Groups. • Create the user.
• Add the user to theAdministrators group for the local server.
2. Set the D2D CIFS Server Authentication mode toUser. Note that any existing backup or restore operations will fail if they are running when the authentication mode is changed.
3. Configure a local user on the D2D Backup System with the same user name and password as the user created on the Windows Server (Backupuser in our example). Do this by selecting
4. In order for Data Protector to be able to authenticate with the D2D shares it must run the “Data Protector Inet” service under the new local user account that has been created on the D2D Backup System and on the Media server.
Change the logon account via theServices menu in Windows Computer Management. After changing the login credentials the service must be restarted for it to take effect.
5. Now that the D2D Backup System is configured in User mode and Data Protector is configured to connect to the D2D shares with the correct credentials, it is possible to create a D2D share and apply access permissions to the Backupuser account.
Navigate to theNAS — Sharespage, click Create Share, provide a shareNameand
6. After creating the share, select thePermissionstab and give Accessrights to the Backupuser account.
Configuring AD Authentication Mode
These are the steps required in order to configure backups in AD authentication mode: • Join the D2D CIFS server to the AD Domain and configure DNS.
• Create or specify a user to be used for backups. • Apply user permissions to D2D shares.
To join a domain
1. Connect to the D2D Web Management Interface, as follows: • Navigate to theNAS — CIFS Server page
• ClickEdit
• ChooseADfrom the drop-down menu
• Provide the name of the domain that you wish to join e.g. “mydomain.local”
2. ClickUpdate. If the domain controller is found, a pop-up box will request credentials of a user with permission to join the domain. (Note that joining or leaving the domain will result in failure of any backup or restore operations that are currently running.)
Provide credentials (username and password) of a domain user that has permission to add computers to the domain and clickRegister.
3. After joining the domain, the DNS server should be automatically updated (if a DHCP server is used) with Forward and Reverse Lookup zone entries, however, some DNS configurations do not allow this. In this case, or if a DHCP is not used on the network, the user must also configure the domain’s DNS server to be able to correctly manage the D2D shares, as follows:
To configure entries manually if the DNS server does not update automatically
From a Windows client server that has domain and DNS management tools installed launch the DNS Management Tool. (From the command line typednsmgmt.mscor launch DNS from the Administrative Tools menu).
Create a new Host(A) record in the forward lookup zone for the domain to which the D2D Backup System belongs with the hostname and IP address of the D2D Backup System.
Also create a Pointer(PTR) in the reverse lookup zone for the domain for the D2D Backup System by providing the hostname and IP address.
To create shares and grant access permission
Now that the D2D Backup System is part of a domain and can be managed, it is possible to create shares and grant access permission to them for domain account users or groups.
1. Create a share on the D2D Backup System that is going to be used as a backup target. • SelectNAS — Sharesfrom the D2D Web Management Interface and clickCreate. • Provide a shareNameandDescription, then select theCIFSprotocol and clickCreate.
2. Now that the D2D Backup System is a member of the domain its shares can be managed from any computer on the domain by configuring a customized Microsoft Management Console (MMC) with the Shared Folders snap-in. To do this first open a new MMC window by typing mmcat the command prompt or from the Start Search box. This will launch a new empty MMC window.
3. To this empty MMC window add the Shared Folders snap-in. SelectFile -> Add/Remove Snap-in ...,then selectShared Foldersfrom the left-hand pane.
4. ClickAdd >and in the dialog box choose the computer to be managed and selectShares
from the View options.
Note that theFolder Pathfield contains an internal path on the D2D Backup System. 6. Save this customized snap-in for future use.
7. Select theShare Permissionstab andAdda user or group of users from the domain. Specify the level of permission that the users will receive and clickApply.
8. Now, from any Windows server on the domain, it is possible to access the newly created share using the credentials of anyone who had been given permission to access the share. If a permitted user is logged into Windows, access to the share will be granted automatically with those permissions.
NOTE: In some cases, when switching the D2D Backup System from No Authentication or User Authentication mode to AD mode, it may be necessary to log out and back into a Windows client before it is possible to access the D2D shares.
9. In order for Data Protector to be able to authenticate with the D2D shares it must run the “Data Protector Inet” service under the new local user account that has been created on the D2D Backup System and on the Media server.
Change the logon account via the Services menu in Windows Computer Management. After changing the login credentials the service must be restarted for it to take effect. In this case a user Backup is created and is a member of the BackupUsers group.
2 Configure Data Protector to use D2D CIFS Share
Before configuring Data Protector it is good practice to check that the user authentication settings to be used by Data Protector are working.
To do this:
• Use Windows Explorer to navigate to the D2D CIFS share that is to be used for backup. • Log in with the previously configured username and password to make sure that the share is
accessible.
• Create an empty file on the share to ensure that it is writable.
NOTE: D2D shares should not be used for Drag-and-Drop storage; this check process is purely intended to prove that authentication configuration is correctly set up.
Creating a new Data Protector File Library
The first step in using Data Protector to back up to a D2D CIFS share is to create a File Library device.
1. Launch the Data Protector Manager and select theDevices & Mediaoption from the context box.
Right click theDevicesfolder and select Add Device …
2. A Wizard will now step through the process of creating a new device.
Provide a newDevice NameandDescription; it is useful if these provide information about the logical location of the CIFS share.
3. The next step of the Wizard provide the path for where the file library is to be stored. This may be the path to the root level of the D2D CIFS share or it could be a directory within that share. TheBrowsebutton only works for storage that is local on the media server so cannot be used to locate the D2D CIFS share.
After adding the directory path, clickPropertiesin order to specify the following parameters: • Maximum size of file depot:This is the size of each individual backup file. The default is 5 GB; this should be set to a value larger than the expected maximum size of the backup jobs that are being sent to this file library. Doing so prevents the creation of lots of small files and the overhead of doing so.
• Minimum free disk space to create new file depot:The default is 2 MB which is OK. • Amount of disk space that should stay free on disk: Leave this at the default of 0 MB as
it makes little sense on a deduplicating file store.
• Even if free disk space drops below %: Leave this set at 10%. Although this has little relevance on a deduplicating filestore it still acts as a useful early warning.
4. In the next step of the Wizard specify theMedia TypetheStandardmedia type should be set toFile, which is the default, and theDistributed Media Formatshould not be selected. Distributed media format allows the creation of virtual full backups, however, this format is very inefficient when used with deduplication devices due to the creation of a large number of small files and the way in which these files are accessed in a random access fashion. If Distributed Media Format is selected, there will be a significant performance impact and possibility of backup failure.
5. The final step of the Wizard provides a summary of the configuration, and also shows information about the disk space available on the D2D Backup System. If these values are 0, this is an indication that the Data Protector Inet service is not properly configured with the correct authentication settings and backups will fail.
6. After completing the Wizard, the Devices and Media Environment folders will show information about the structure of the newly created file library. TheDevicesfolder shows theDirectories
to be used and theDrives used to write to those directories.
7. The final step in configuring the File Library for use is to add more drives and modify their configuration, as described in the next section.
Configure drives
A single drive within the File Library will be automatically created, this allows for a single stream backup to the File Library. If multiple backup streams to the File Library are required, additional drives can be created. See D2D Best Practices for VTL, NAS and Replication implementations for more information on the maximum numbers of concurrent streams and recommendations on how many streams should be used for the different D2D Backup System products.
There are several settings for each drive that must be correctly configured in order to provide good D2D performance. Highlight each drive and select Properties. Go to theSettingsTab and click
Advanced.
Advanced menu — Settings tab
On the Settings Tab of the Advanced menu is an option forConcurrency, this indicates how many parallel streams can write to that drive simultaneously, the default is three. Concurrency is a Data Protector term for Multiplexing, so the backup streams would be interleaved within the backup file, this is bad for deduplication so Concurrency should be set to 1 in order to prevent multiplexing.
Advanced menu — Sizes tab
On the Sizes tab the following settings are defined
• Block Size:this should be set to 512 KB for best performance
• Segment Size:this is how often a catalog section is written; it can be left at the default of 10 GB
• Disk Agent Buffers:this setting can be tuned to improve performance for slow client systems or media servers, the default of 8 is generally acceptable
Advanced menu — Policies tab
Lastly in the Policies tab of the drive properties enable the device for restore and as a source for object copies if required.
3 Configure a backup rotation scheme
When backing up to CIFS shares on the D2D Backup System it is recommended that a retention and rotation scheme similar to that of virtual tape is used. There is some simplification over virtual tape in that no account needs to be taken of the number of cartridges within the virtual library, only the total number of files that can be supported on a D2D CIFS share (25000), which should be more than adequate.
It is, however, important to ensure that the amount of data in the share does not grow in an uncontrolled fashion due to keeping all backups forever. The Backup Schedule created in Data Protector will define how long media will be retained before overwriting and, therefore, how many files will be created.
The following is an example of a best-practice backup rotation and retention scheme configuration with Data Protector. This scheme observes the following best practices:
• File Library files are never appended to. Appended backups reduce replication performance, prevent files from being overwritten until all sessions have expired and have no disk space benefit for NAS targets.
• Only one “type” of data is backed up in this File Library folder, in this case it is “flat file” data, other types would be Exchange, SQL, Oracle etc.
• This backup will create only one concurrent backup stream; more “flat file” backups (of other client servers perhaps) could use the same File Library folder concurrently.
• Software compression is disabled because this will slow the backup job and result in a worse deduplication ratio.
The rotation and retention scheme for this backup rotation scheme employs GFS as follows:
1. Daily (Monday – Friday) Incremental backups, overwritten every week.
2. Weekly (Saturday) Full backups, overwritten every 4 weeks.
3. Monthly (1st Day Month) Full backups, overwritten every 12 months.
4. Yearly (Jan 1st) Full backups, never overwritten.
To create a media pool
The first step in creating the new backup rotation scheme is to create a media pool. It is sensible to ensure that a backup has its own media pool as this prevents expired data from other backups being overwritten which would create a large amount of unrelated housekeeping.
NOTE: Ideally, separate media pools would be created for incremental and full backups from the same backup job, however Data Protector does not allow this configuration.
1. Select theDevices & Mediacontext, and expand theMedia — Poolsbranch. There will be default pool entry for use with the new File Library but we will create a new one.
Right click on thePoolsfolder and select Add Media Pool.
2. On the next step of the wizard set the allocation policy, by changing theUsagetoNon Appendable. This ensures that all backups start a new backup file rather than appending to a backup file from a previous backup. In turn, this prevents a large housekeeping overhead when the appended file is overwritten.
LeaveAllocationset toLoose; this will enable the use of any suitable media rather than requiring a specific media file, which often results in backup failure.
Do not selectAllocate unformatted media firstorUse Free Pool. ClickNext.
3. Lastly you have the option to specify Media Condition Factors. This has little relevance to file media but will result in media files being marked as “Poor” once their “Valid for” and “Maximum Overwrite” thresholds are exceeded. So, these should be set to their maximum values of 828 Months and 9999 Overwrites. ClickFinishand the new media pool will be created.
To create a backup job
Now a backup job can be created. In this example a simple “Filesystem” backup is going to be created to back up the local Cell Manager server.
1. Select theBackupcontext and expand the Backup Specifications folder. Right click
Filesystemand selectAdd Backup …to create a new Filesystem backup.
If other types of backup agents are to be used, e.g. VMWare backups then this Backup Specification should be selected instead.
2. TheCreate New Backup Wizardwill now start, the first step is to choose from a default backup template or create a “Blank” template to configure manually. In this case we will select the “Blank Filesystem Backup” and clickOK.
3. The next step is to select the items to be backed up, in this case just the local cell manager server. Then clickNext.
4. Now select the backup device, this is our newly created file library and writer device within it. If the Backup Specification were backing more than one object (i.e. filesystem or mount point) and had more than one writer device in the file library then it would be necessary to specify each writer to use for the backup and the load balancing configuration.
5. Select theProperties..box in order to specify some additional options. In this case set the
Media poolto the newly created pool to be used for this backup.Concurrencywill already be set to 1 as this was previously configured for the writer device.
7. The last step is to create our backup schedule for Full and Incremental Backups. On the Schedules page clickAdd...to create an item in the schedule.
For the schedule that we are creating there will be some “conflicts” where for example monthly backups occur on the same day and time as some daily backups. In order to ensure that these higher priority backups overrule schedules for those lower down the priority list, configure backups in the following priority order: 1. Yearly, 2. Monthly, 3. Weekly, 4. Daily.
8. Firstly we will create an annual full backup to run on the 1st January at 21:00, the protection period for this backup is set to Permanentto ensure that it is never overwritten.
Configure monthly full backups to be overwritten every 12 months (52 weeks).
9. After creating all of the schedule entries, proceed to the Summary page and selectSave As …from the finishing steps page.
The backups will now run according to the new schedule and, for initial backups, new backup files will be created.
When backup protection expires, e.g. after 1 week of incremental backups, the previous backup files will be overwritten. Overwriting of the backup files will result in housekeeping work being generated; this will run in parallel with the backup process and could cause a slight reduction in performance.
During the backup Data Protector creates two files; one is the backup data file depot which grows throughout the backup, the other is a temporary file of 15 MB which is removed when the backup completes.
About this guide
This guide:
• Provides step by step instructions on configuring a D2D NAS CIFS device on HP Data Protector 6.11
• Describes the HP Data Protector 6.11 Disk Library configuration options and identifies what settings to use with HP D2D NAS CIFS shares.
• Describes how to implement a full end–to–end recovery solution from a target D2D Backup System with D2D NAS CIFS shares using HP Data Protector 6.11.
Intended audience
This guide is intended for users who install, operate and maintain the HP D2D Backup System. This guide assumes a basic working knowledge of HP Data Protector 6.11 and that it has been installed correctly by loading the appropriate Media Agents and licences.
Related documentation
In addition to this guide, the following documents provide related information:
• HP StoreOnce Backup System Concepts Guide: If you are new to the HP StoreOnce Backup
System, it is a good idea to read this guide before you configure your system. It describes the StoreOnce technology.
• HP StoreOnce Backup System User Guide: This guide contains detailed information on using
the Web Management Interface. It also contains troubleshooting information, including details on replacing failed or failing hard disks.
• D2D Best Practices for VTL, NAS and Replication implementations: This white paper advises
how to plan the workload being placed on the HP StoreOnce Backup System in order to optimize performance and minimize the impact of deduplication, replication and housekeeping operations competing for resources. It is regularly updated.
You can find these documents from the Manuals page of the HP Business Support Center website:
http://www.hp.com/support/manuals
In the Storage section, clickStorage Solutionsand then select your product.
Document conventions and symbols
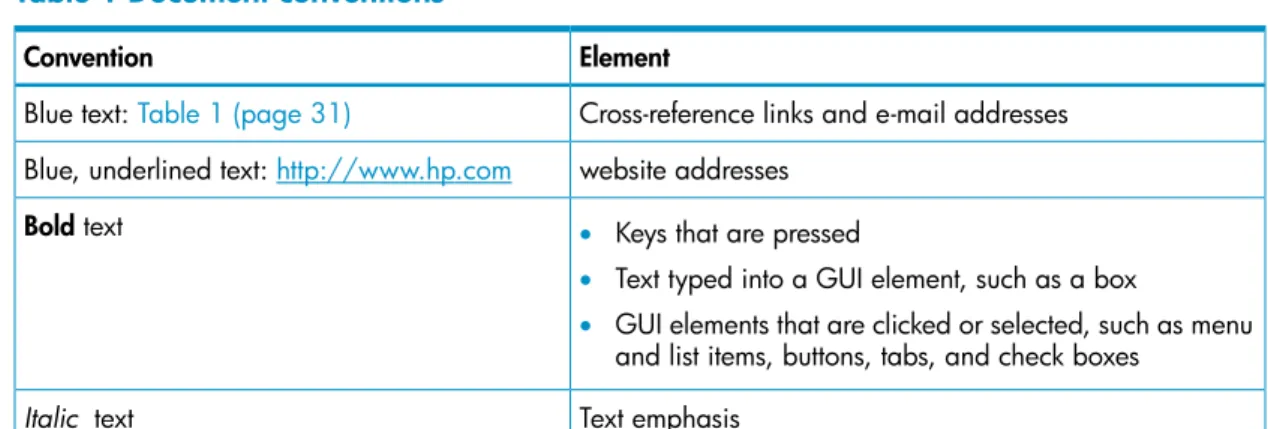
Table 1 Document conventions
Element Convention
Cross-reference links and e-mail addresses Blue text:Table 1 (page 31)
website addresses Blue, underlined text:http://www.hp.com
• Keys that are pressed
• Text typed into a GUI element, such as a box
• GUI elements that are clicked or selected, such as menu and list items, buttons, tabs, and check boxes
Boldtext
Text emphasis
Table 1 Document conventions(continued)
Element Convention
• File and directory names
• System output
• Code
• Commands, their arguments, and argument values Monospace text
• Code variables
• Command variables
Monospace, italic text
Emphasized monospace text Monospace, bold text
WARNING! Indicates that failure to follow directions could result in bodily harm or death.
CAUTION: Indicates that failure to follow directions could result in damage to equipment or data.
IMPORTANT: Provides clarifying information or specific instructions.
NOTE: Provides additional information.
HP technical support
For worldwide technical support information, see the HP support website:
http://www.hp.com/support
Before contacting HP, collect the following information: • Product model names and numbers
• Technical support registration number (if applicable) • Product serial numbers
• Error messages
• Operating system type and revision level • Detailed questions
HP websites
For additional information, see the following HP websites: • http://www.hp.com • http://www.hp.com/go/ebs • http://www.hp.com/go/connect • http://www.hp.com/go/storage • http://www.hp.com/service_locator • http://www.hp.com/support/manuals • http://www.hp.com/support/downloads
Documentation feedback
To make comments and suggestions about product documentation, please send a message to
Index
A
access permissions,10 AD authentication,4
configuring,7 audience,31
authentication modes,4
B
backup job,23
backup rotation scheme best practices,20 backup schedule,27
C
check
share accessible,14 CIFS server,4
concurrency,18 configure
AD authentication,7 backup job,23
backup rotation scheme,20 CIFS server,4
drives,18 media pool,20 user authentication,4 conventions
document,31 text symbols,32 create
file library,14 create shares,10
D
Data Protector Inet service,13 document
conventions,31
related documentation,31 documentation
HP website,31
providing feedback,32 domain,8
drives
configuring,18
F
file library,14
H
help
obtaining,32 host(A) record,9
J
join domain,8
M
media pool,20
P
performance,18 Pointer(PTR) record,9
R
related documentation,31
S
schedule,27 service ,17 share
check accessible,14 symbols in text,32
T
technical support HP,32
service locator website,32 text symbols,32
U
user authentication,4 configuring,4
W
websites HP ,32