Create-Modify-Reuse
Jim Knowlton
Wiley Publishing, Inc.
ffirs.indd iii
Create-Modify-Reuse
Introduction ... xix
Chapter 1: A Python Primer...
1
Part I: The Projects ... 17
Chapter 2: Directory/File Snapshot Program ... 19
Chapter 3: DVD Inventory System ... 43
Chapter 4: Web Performance Tester ... 81
Chapter 5: Customer Follow-Up System ... 103
Chapter 6: Test Management/Reporting System ... 125
Chapter 7: Version Management System ... 157
Chapter 8: Content Management System ... 177
Part II: Advanced Topics ... 197
Chapter 9: Interacting with the Operating System ... 199
Chapter 10: Debugging and Testing ... 221
Appendix A: Where to Go From Here — Resources That Can Help ... 239
Appendix B: Installing Supplemental Programs ... 241
Index ... 253
ffirs.indd i
Create-Modify-Reuse
Jim Knowlton
Wiley Publishing, Inc.
ffirs.indd iii
Published by
Wiley Publishing, Inc. 10475 Crosspoint Boulevard Indianapolis, IN 46256
www.wiley.com
Copyright © 2008 by Wiley Publishing, Inc., Indianapolis, Indiana Published simultaneously in Canada
ISBN: 978-0-470-25932-0
Manufactured in the United States of America 10 9 8 7 6 5 4 3 2 1
Library of Congress Cataloging-in-Publication Data Knowlton, Jim.
Python : create-modify-reuse / Jim Knowlton. p. cm.
Includes index.
ISBN 978-0-470-25932-0 (paper/website)
1. Python (Computer program language) I. Title. QA76.73.P98K56 2008
005.13'3—dc22
2008021374
No part of this publication may be reproduced, stored in a retrieval system or transmitted in any form or by any means, electronic, mechanical, photocopying, recording, scanning or otherwise, except as permitted under Sections 107 or 108 of the 1976 United States Copyright Act, without either the prior written permission of the Publisher, or authorization through payment of the appropriate per-copy fee to the Copyright Clearance Center, 222 Rosewood Drive, Danvers, MA 01923, (978) 750-8400, fax (978) 646-8600. Requests to the Publisher for permission should be addressed to the Legal Department, Wiley Publishing, Inc., 10475 Crosspoint Blvd., Indianapolis, IN 46256, (317) 572-3447, fax (317) 572-4355, or online at http://www.wiley.com/go/permissions.
Limit of Liability/Disclaimer of Warranty: The publisher and the author make no representations or warranties with respect to the accuracy or completeness of the contents of this work and specifically disclaim all warranties, including without limitation warranties of fitness for a particular purpose. No warranty may be created or extended by sales or promotional materials. The advice and strategies contained herein may not be suitable for every situation. This work is sold with the understanding that the publisher is not engaged in rendering legal, accounting, or other professional services. If professional assistance is required, the services of a competent professional person should be sought. Neither the publisher nor the author shall be liable for damages arising herefrom. The fact that an organization or Website is referred to in this work as a citation and/or a potential source of further information does not mean that the author or the publisher endorses the information the organization or Website may provide or recommendations it may make. Further, readers should be aware that Internet Websites listed in this work may have changed or disappeared between when this work was written and when it is read.
For general information on our other products and services please contact our Customer Care Department within the United States at (800) 762-2974, outside the United States at (317) 572-3993 or fax (317) 572-4002. Trademarks: Wiley, the Wiley logo, Wrox, the Wrox logo, Wrox Programmer to Programmer, and related trade dress are trademarks or registered trademarks of John Wiley & Sons, Inc. and/or its affiliates, in the United States and other countries, and may not be used without written permission. Python is a registered trademark of Python Software Foundation. All other trademarks are the property of their respective owners. Wiley Publishing, Inc., is not associated with any product or vendor mentioned in this book.
Wiley also publishes its books in a variety of electronic formats. Some content that appears in print may not be available in electronic books.
ffirs.indd iv
To my children, Karren, Shannon, Kasey, Brian, Courtney, Jaren, Carlen, Kristin, Logan, and Ben — and to little Olivia yet to come (as I write this). For some of you I was there at your birth, some of you I have known
for only a few years, but know that each one of you is a treasure to me.
To Mom and Dad, you are still with me every day. I live to make you proud.
ffirs.indd v
vii
Jim Knowlton is a software quality engineer with Automatic Data Processing (ADP), Inc., where he leads quality assurance efforts on ADP ’ s computer telephony integration and network video projects. He has been instrumental in introducing automated testing methodologies to their QA effort. He has more than fifteen years of experience in the software industry, including clients such as Symantec, Novell, Nike, and Zions Bank. He has extensive experience in open - source technologies, including Python, Ruby, PHP, Apache, and MySQL, and has also worked extensively in the areas of systems management and enterprise security. Jim holds a bachelor of arts degree in management and is currently working on a master of software engineering degree at Portland State University.
ffirs.indd vii
Acquisitions Editor
Jenny Watson
Development Editor
Ed Connor
Technical Editor
Jesse Keating
Production Editor
Daniel Scribner
Copy Editor
Expat Editing
Editorial Manager
Mary Beth Wakefield
Production Manager
Tim Tate
Vice President and Executive Group Publisher
Richard Swadley
Vice President and Executive Publisher
Joseph B. Wikert
Project Coordinator, Cover
Lynsey Stanford
Proofreader
Nancy Carrasco
Indexer
Robert Swanson
ffirs.indd ix
First, I ’ d like to acknowledge Guido Van Rossum for creating such a way cool language as Python. I ’ d like to thank my agent, Neil Salkind, for nursing my insecurities and answering my novice writer questions.
I ’ d like to thank Jenny Watson, my acquisitions editor at Wiley, for being willing to go to bat for an unpublished writer ’ s crazy ideas. Thanks to Ed Connor, my development editor, for his gentle prodding, high standards, and encouragement. Thanks also to Jesse Keating for his help with technical editing, and to Brent Rufener for providing a cover photo.
Finally, but most important, thanks to my family for putting up with my frequent unavailability during the last few months — writing is a solitary art, and it will be nice to reacquaint myself with my loved ones.
ffirs.indd xi
Introduction xix
Chapter 1: A Python Primer
1
Getting Started
1
Obtaining Python and Installing It
1
The Python Interpreter
2
Your Editing /Execution Environment
2
Lexical Structure
3
Keywords
3
Lines and Indentation
4
Data Types and Identifiers
4
Operators
6
Expressions and Statements
7
Expressions
7
Statements
7
Iteration and Decision-Making
8
Iteration
9
Decision-Making
10
Functions
11
Modules
12
Importing Modules
12
How Python Finds Modules to Load
13
Classes
14
Summary
15
Part I: The Projects
17
Chapter 2: Directory/File Snapshot Program
19
Using the Program
20
Creating a Snapshot
20
Listing Snapshot Files
21
Comparing Snapshots
22
ftoc.indd xiii
xiv
Viewing Help
23
Exiting the Program
23
Putting It All Together
24
Design
25
How It All Fits Together
25
Main Program
26
Modules
26
Code and Code Explanation
27
Snapshot.py
27
snapshothelper.py 34
Testing
42
Modifying the Program
42
Summary
42
Chapter 3: DVD Inventory System
43
Using the Program
44
Installing MySQL
44
Adding a DVD to the Database
44
Searching the DVD Inventory
46
Modifying a DVD Record
50
Deleting a DVD Record
53
Exporting the List of DVDs to a CSV File
54
Design
55
How It All Fits Together
56
Modules
56
Code and Code Explanation
58
dvd.py
59
add_dvd.py
61
lookup_dvds.py
63
modify_dvd.py
68
delete_dvd.py
74
csvreport_dvd.py 77
Testing
79
Modifying the Program
79
Summary
80
Chapter 4: Web Performance Tester
81
Using the Program
82
Running the Python Web Server
82
Running the Performance Profiler Client
83
ftoc.indd xiv
xv
Design
88
How It All Fits Together
89
Modules
89
Code and Code Explanation
90
webserver.py
90
webperf.py
92
webclient.py
95
Testing
102
Modifying the Program
102
Summary 102
Chapter 5: Customer Follow-Up System
103
Using the Program
103
Preliminaries
104
Running the Program
112
Design
115
How It All Fits Together
115
Modules
116
Code and Code Explanation
117
form.html
117
form.py
118
Testing
123
Modifying the Program
123
Summary 124
Chapter 6: Test Management/Reporting System
125
Using the Program
126
Running Tests
126
Listing Test Runs
129
Showing Test Results
129
Generating an HTML Test Report
130
Examining the HTML File
131
Displaying Product Help
132
Design
133
Modules
133
Code and Code Explanation
135
test_manager.py 135
test_run.py
140
test_list.py
147
test_results.py
148
test_html.py
151
ftoc.indd xv
xvi
Testing
155
Modifying the Program
155
Summary 155
More About the Minidom Module
156
Chapter 7: Version Management System
157
Using the Program
158
Setting Up Remote Computers
158
Running the Program — Command-Line Syntax
158
Design
162
Modules
162
Code and Code Explanation
163
version_checker.py 164
check_versions.py 168
csv_report.py
173
Testing
174
Modifying the Program
175
Security Considerations
175
Summary 175
Chapter 8: Content Management System
177
Plone Overview
177
What Is Plone?
177
Installing and Configuring Plone
178
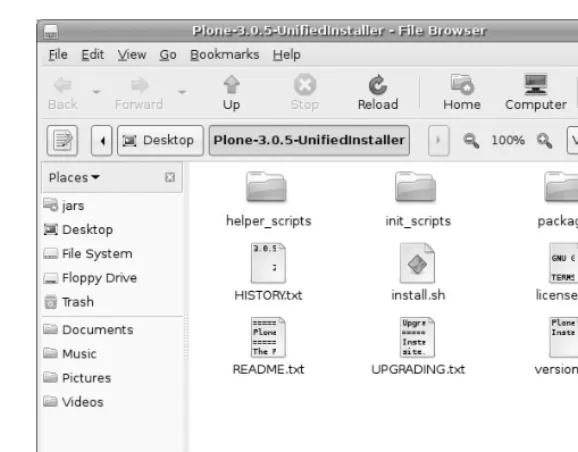
Downloading Plone
179
Extracting the Plone Install
180
Running the Plone Install
181
Starting Plone
182
Discovering the Admin User Password
182
Logging In as the Admin User
182
Setting Up the E-mail Server
184
Setting Up a User
185
Logging In as the Set-Up User
186
Design
187
Navigation 189
Content Management
189
Creating a Page
189
Creating a Collection
191
User Permissions
195
Summary 196
ftoc.indd xvi
xvii
Part II: Advanced Topics
197
Chapter 9: Interacting with the Operating System
199
Generic Operating System Services
200
The os Module — Generic OS Services
200
The time Module — Format and Manipulate System Time
201
The optparse Module — Parse Command-Line Options
203
The platform Module — Get Platform Information
204
The getpass Module — Generate and Check Passwords
204
Some Other Things You Can Do
205
Accessing Windows Services
205
The winreg Module — Manipulate the Windows Registry
205
The winsound Module
206
The win32serviceutil Module — Manage Windows Services
207
The win32net Module — Access Windows Networking Features
209
Some Other Things You Can Do
211
Accessing Unix/Linux Services
212
The termios Module — Access Unix-Style TTY Interface
212
The resource Module — Manage Unix System Resources
212
The syslog Module — Access the Unix syslog
215
The commands Module — Run Commands and Get Output
217
Some Other Things You Can Do
219
Summary 219
Chapter 10: Debugging and Testing
221
The Python Debugger
221
Running the Debugger
222
Python Test Frameworks
226
Why We Test
226
Unit Testing
227
Summary 237
Final Remarks
237
Appendix A: Where to Go From Here — Resources That Can Help
239
Appendix B: Installing Supplemental Programs 241
Index 253
ftoc.indd xvii
Python: Create - Modify - Reuse is designed for all levels of Python developers interested in a practical, hands - on way of learning Python development. This book is designed to show you how to use Python (in combination with the raw processing power of your computer) to accomplish real - world tasks in a more efficient way. Don ’ t look for an exhaustive description of the Python language — you won ’ t find it. The book ’ s main purpose is not to thoroughly cover the Python language, but rather to show how you can use Python to create robust, real - world applications.
In this respect, the goal is similar to foreign - language books that identify themselves as “ conversational, ” focusing on the vocabulary and concepts that people will need the most. Likewise, I focus specifically on the Python knowledge needed to accomplish practical, specific tasks. Along the way, you will learn to create useful, efficient scripts that are easy to maintain and enhance.
The applications, along with source code, are available for download at www.wrox.com .
Who This Book Is For
This book is for developers with some experience with Python who want to explore how to develop full - blown applications. It is also for developers with experience in other languages who want to learn Python by building robust applications. It is well - suited for developers who like to “ learn by doing, ” rather than exploring a language feature by feature. To get the most out of the book, you should understand basic programming principles.
Because this book is project - based, you can approach it in numerous ways. You can, of course, read it from cover to cover. Chapters 2 through 8 each cover a different project, so the chapters are independent of each other. However, because each chapter project is covered individually, there may be some overlap of information. I also sometimes refer to explanations of particular topics covered in previous chapters. This will help to reinforce important concepts.
The end of the book contains two appendixes. The first one is a listing of Python resources you can check out for more information. The second one will help you with installing additional components used in some of the examples.
flast.indd xix
xx
What This Book Covers
I ’ ve always liked the Saturday morning fix - it shows that demonstrate how to build something, such as a cabinet or a deck. The experts on these shows take seemingly large, complex tasks that appear to be beyond the skill level of the average do - it - yourselfer and break them down into smaller, simple tasks, teaching you valuable skills along the way. That ’ s basically the intention and approach taken in this book, applied to the construction of software instead of home improvements.
This book starts with a basic overview of the Python language, designed for those familiar with other languages but new to Python. It is followed by several chapters, each of which describes a complete project that can be used as - is or modified and extended to suit your particular purposes. You ’ ll find applications that access databases, take advantage of web technologies, and facilitate network communications, to name a few. In addition, and more important than the technologies you will be introduced to, you will learn how to use Python to solve real challenges. Following these chapters are two chapters that cover accessing operating system resources and debugging and testing, respectively.
Each project chapter contains complete instructions describing how to install and use the application, so you can actually see the program run as you learn how to construct and use it, including how the project was designed and prototyped. This book is intended to be both a reference guide and a learning aid, teaching you how to build solutions with Python and providing reference information on a wide variety of Python programming concepts.
It is hoped that this book will help you have fun with Python and build useful applications, and — unlike my experience with building a deck — without sore thumbs.
How This Book Is Str uctured
This book is framed around the code itself. This is because developers are typically looking for how to do something; and, as with many activities, you learn how to do something by watching how others do it and trying it yourself. If you want to know how a for loop works, you ’ ll find for loops in my code, but that ’ s not the thrust of the book. Instead, this book shows you how to do things: how to build a content management system, how to build a test management system, how to set up a system for tracking customer follow - up, and so on. Along the way, you ’ ll learn how to communicate with a SQL database, how to act as a web server or communicate with one, how to access operating system services, and more.
There are three basic components to the book:
Chapter 1 is a brief overview of the Python language.
Chapters 2 – 8 cover seven different programming projects, which illustrate various technologies and techniques available to Python developers.
Chapters 9 – 10 cover additional, advanced topics, which will help you as you build Python projects.
❑ ❑ ❑
flast.indd xx
xxi
The project chapters have a consistent structure:
Overview: What does the application do? Using the program
Design
❑ How it all fits together
❑ Modules involved Code and code explanation
❑ Module/class 1 explanation
❑ Module/class 2 explanation
❑ Minor code file explanation Testing, including suggested tests
Modifying the project, including some suggested adaptations Summary
Each project is designed with classes that can be reused and accessed for multiple purposes. This is one of the main benefits of object - oriented programming, so designing for reusability is a main focus of the book. The book contains the following chapters:
1.
A Python PrimerThis chapter is a basic primer on the Python language, and it functions as either a quick tutorial for experienced programmers new to Python or a refresher for programmers with Python experience.
Part I : The Projects
2.
Directory/File Snapshot ProgramThis project demonstrates how to interact with files, create and manipulate data structures, and provide user output. It also touches on code design issues to improve code maintainability. Often when installing or uninstalling software, or verifying changes to a file system, it can be valuable to take a “ snapshot ” of the files and directories, along with their size and last - modified time. The script introduced in this chapter does just that. This chapter also explores how to capture a directory listing into a Python list, and explains how to query this list for particular values.
❑ ❑ ❑
❑
❑ ❑ ❑
flast.indd xxi
xxii
3.
DVD Inventory SystemThis project takes advantage of Python ’ s capability to access and manipulate data in a SQL database. The application enables multiple users to log in to a website that provides access to a DVD inventory database. Permissions are set such that some users can add, modify, or delete entries, whereas other users have read - only access to the data.
4.
Web Performance TesterThis project shows how to communicate with a Python web server and retrieve information regarding how long it takes to receive requested items from the web server. Although writing Python programs to work on a single computer can be useful, the real power of Python can be seen when it is used to script communication between computers on a network. Most networks contain several web servers. A nice feature of Python is that it can act as a lightweight server for various Internet protocols, such as HTTP (web) and ftp. This application enables you to monitor performance of HTTP traffic on your network.
5.
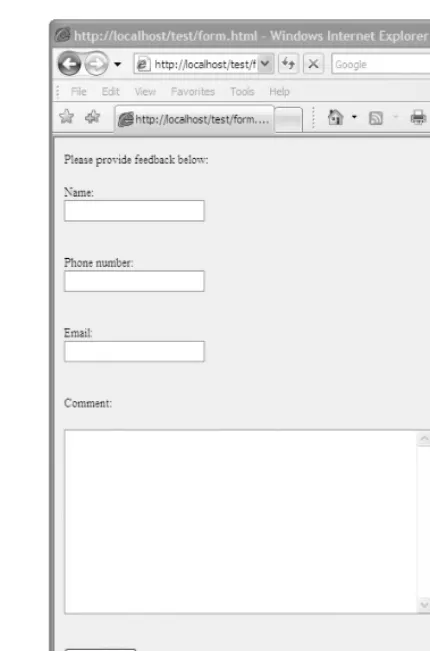
Customer Follow - Up SystemThis project shows how to present a web form to the user and retrieve data from it, how to automatically format and send e mail through an SMTP server, and how to generate an HTML formatted report. The task for the second example is to automatically generate a customer comments e - mail message based on information the customer enters in a form. It uses the
mod_python Apache module to take the information entered in the HTTP form and then utilizes a Python script on the web server to send that information to an SMTP server for mail delivery.
6.
Test Management/Reporting SystemThis project makes use of the unittest module to run tests against an existing application, and creates a framework for reporting test results. Testing is a vital process for developing software. This application enables users to run tests for a given piece of software, to list the previous test runs by date, to show test run results for any previously run tests, and to output the results of any test run as HTML for viewing in a web browser.
7.
Version Management SystemThis project connects to a list of servers via telnet, checks the application version of a pre - set application list, and displays its results both as output and to a log file. Often, a system
administrator needs to patch systems or ensure that systems have the latest application versions installed. This script is an easy way to accomplish that task. It makes use of Python ’ s capability to emulate a telnet client and log in to remote systems and perform functions on that remote system.
8.
Content Management SystemThis project explores Plone, a popular content management system based on Python and Zope (a Python - based application server). Because Python is a very mature language, numerous applications have been built on top of it. A great thing about working with Python - based applications is that you get the benefit of a full - blown application, but you can still use Python to configure and customize it.
flast.indd xxii
xxiii
Part II : Advanced Topics
9.
Interacting with the Operating SystemWhen writing scripts “ in the real world, ” often it is critical to be able to access services available through (and particular to) the operating system you happen to be on. For example, suppose you wanted to read or modify the Window Registry? Or you wanted to get the Linux process ID of a particular process that is running? Is such a thing even possible? Definitely — and this chapter shows you how.
10.
Debugging and TestingBecause I am a software tester myself, testing is a subject that is certainly close to my heart. In this chapter, I discuss why testing is important, how to put the right amount of testing into your code, and how writing automated tests can help you to actually write code more quickly. You ’ ll look at PyUnit, the automated testing framework for Python, and learn how to use it to test the riskiest parts of a script. You ’ ll also explore the Python debugger and some of the nifty features it offers.
Appendix A Where to Go from Here: Resources That Can Help
This appendix provides an annotated list of books, websites, and blogs that can provide useful information, insight, and inspiration for the budding Python script developer.
Appendix B Installing Supplemental Programs
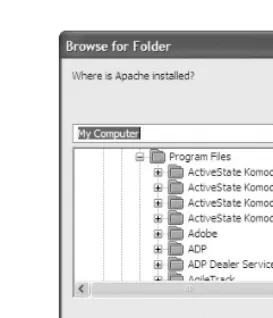
This appendix provides detailed information on how to set up MySQL (used in the project in Chapter 3 ) and PyWin32 (used in Chapter 10 and various other projects in the book).
What You Need to Use This Book
For this book, I used Python 2.51 (the “ CPython ” distribution), run on Windows, as my Python distribution of choice. Most of the examples will work with the latest versions of Python for Windows, Mac, or Unix/Linux, or IronPython. However, to successfully run everything in this book, you ’ ll want the latest version of CPython on Windows, which is currently version 2.51.
Other applications, such as Plone, are available free and can be downloaded as needed. When you get to a chapter for which you need an additional component, I ’ ll indicate that to you, and you can look in Appendix B for information on installing additional components.
Source Code
As you work through the examples in this book, you may choose either to type in all the code manually or to use the source code files that accompany the book. All of the source code used in this book is available for download at www.wrox.com . Once at the site, simply locate the book ’ s title (either by using the Search box or by using one of the title lists) and click the Download Code link on the book ’ s detail page to obtain all the source code for the book.
flast.indd xxiii
xxiv
Because many books have similar titles, you may find it easiest to search by ISBN; this book ’ s ISBN is 978 - 0 - 470 - 25932 - 0.
Once you download the code, just decompress it with your favorite compression tool. Alternately, you can go to the main Wrox code download page at www.wrox.com/dynamic/books/download.aspx to see the code available for this book and all other Wrox books.
Errata
We make every effort to ensure that there are no errors in the text or in the code. However, no one is perfect and mistakes do occur. If you find an error in one of our books, such as a spelling mistake or faulty piece of code, we would be very grateful for your feedback. By sending in errata you may save another reader hours of frustration and at the same time you will be helping us provide even higher quality information.
To find the errata page for this book, go to www.wrox.com and locate the title using the Search box or one of the title lists. Then, on the book details page, click the Book Errata link. On this page you can view all errata that has been submitted for this book and posted by Wrox editors. A complete book list including links to each book ’ s errata is also available at www.wrox.com/misc - pages/booklist.shtml .
If you don ’ t spot “ your ” error on the Book Errata page, go to www.wrox.com/contact/techsupport .shtml and complete the form there to send us the error you have found. I ’ ll check the information and, if appropriate, post a message to the book ’ s errata page and fix the problem in subsequent editions of the book.
p2p.wrox.com
For author and peer discussion, join the P2P forums at p2p.wrox.com . The forums are a Web - based system for you to post messages relating to Wrox books and related technologies and interact with other readers and technology users. The forums offer a subscription feature to e - mail you topics of interest of your choosing when new posts are made to the forums. Wrox authors, editors, other industry experts, and your fellow readers are present on these forums.
At http://p2p.wrox.com you will find a number of different forums that will help you not only as you
read this book, but also as you develop your own applications. To join the forums, just follow these steps:
1.
Go to p2p.wrox.com and click the Register link.2.
Read the terms of use and click Agree.flast.indd xxiv
xxv
3.
Complete the required information to join, as well as any optional information you wish toprovide and click Submit.
4.
You will receive an e - mail with information describing how to verify your account and complete the joining process.You can read messages in the forums without joining P2P but in order to post your own messages, you must join.
Once you join, you can post new messages and respond to messages other users post. You can read messages at any time on the Web. If you would like to have new messages from a particular forum e - mailed to you, click the Subscribe to this Forum icon by the forum name in the forum listing.
For more information about how to use the Wrox P2P, be sure to read the P2P FAQs for answers to questions about how the forum software works, as well as many common questions specific to P2P and Wrox books. To read the FAQs, click the FAQ link on any P2P page.
flast.indd xxv
This chapter provides a quick overview of the Python language. The goal in this chapter is not to teach you the Python language — excellent books have been written on that subject, such as Beginning Python (Wrox, 2005). This chapter describes Python ’ s lexical structure and programming conventions, so if you are familiar with other scripting languages such as Perl or Ruby, or with compiled programming languages such as Java or C#, you should easily be up to speed in no time.
Getting Star ted
Of course, the first thing you need to do is install Python, if you don ’ t already have it. Installers are available for Windows, Macintosh, Linux, Unix, and everything from OpenVMS to the Playstation (no, I ’ m not kidding).
Obtaining Python and Installing It
If you go to www.python.org/download you can find links to download the correct version of Python for your operating system. Follow the install instructions for your particular Python distribution — instructions can vary significantly depending on what operating system you ’ re installing to.
What Version Number to Install
Although the examples in this book should work for any Python version above 2.0, it is best to install the latest stable build for your operating system. For Windows (which is the environment I primarily work in), the latest stable version is 2.51. There is an alpha build of Python 3.0 available as of this writing, but other than just looking at it for fun, I ’ d steer clear of it for the examples in this book — in some cases the syntax is very different, and the examples in this book won ’ t work with Python 3.0.
c01.indd 1
2
The Python Interpreter
One of the most useful tools for writing Python code is the Python interpreter, an interactive editing and execution environment in which commands are run as soon as you enter them and press Enter. On Unix and Macintosh machines, the Python interpreter can usually be found in the /usr/local/bin/python directory, which can be accessed by simply typing the command python .
On Windows machines, the Python interpreter is installed to the c:\python25 directory (for a Python 2.5x installation). To add this directory to your path, type the following at a Windows command prompt: set path=%path%;C:\python25.
On a Windows system, such as with Unix/Linux, you simply type python to bring up the interpreter (either from the c:\python25 directory or from any directory if the Python directory has been added to the path).
When you enter the interpreter, you ’ ll see a screen with information like the following:
Python 2.5.1 (r251:54863, Apr 18 2007, 08:51:08) [MSC v.1310 32 bit (Intel)] on win32 Type “help”, “copyright”, “credits” or “license” for more information.
> > >
Your Editing /Execution Environment
Because the minimum requirements for writing and running Python programs are simply an editor that can save text files and a command prompt where you can run the Python interpreter, you could simply use Notepad on Windows, Vim on Linux/Unix, or TextEdit on Mac, and a command line for running programs.
One nice step up from that is IDLE, Python ’ s integrated development environment (IDE), which is named after Monty Python ’ s Eric Idle and is included with Python. It includes the following useful features:
A full - featured text editor Syntax highlighting Code intelligence A class browser A Python path browser A debugger
A Python interpreter environment
❑ ❑ ❑ ❑ ❑ ❑ ❑
c01.indd 2
3
In addition to IDLE, you do have other options. On Windows, there is a nice IDE called PythonWin, developed by Mark Hammond. It can be installed as a full Python distribution from ActiveState ’ s website ( www.activestate.com ), or you can simply install the win32all package to add PythonWin to a standard Python for Windows install. PythonWin is a great product, very slick and with all the features you ’ d expect from an IDE.
Other options include an Eclipse distribution for Python called EasyEclipse for Python. For my money, I ’ d start out with IDLE, and then as your experience with Python grows, explore other options.
Lexical Str ucture
Following is a simple Python program. It shows the basic structure of many Python scripts, which is as follows:
1.
Initialize variables (lines 1 – 3).2.
Do some processing (lines 4 – 5).3.
Make decisions and perform actions based on those decisions (lines 6 – 10).name = “Jim” age = 42
highschoolGPA = 3.89
enteredName = raw_input(“Enter your name: “)
print “\n\n” if name == “Jim”:
print “Your age is “, age
print “You had a”, highschoolGPA, “GPA in high school” if (highschoolGPA > 3):
print “You had better than a 3.0 GPA...good job!”
Keywords
Keywords are words that are “ reserved ” — they cannot be used as variable names. In the preceding code, the keyword if is used multiple times.
c01.indd 3
4
The keywords are as follows:
and del for is raise assert elif from lambda return break else global not try class except if or while continue exec import pass def finally in print yield
Lines and Indentation
In Python, unlike a compiled language such as C, line breaks are significant, and the end of a program statement is defined by a hard return. Program blocks are defined by a combination of statements (each on a separate line, but with no end - of - statement character visible) and program blocks, delimited visually by the use of indentation.
As shown in the code from the preceding section, lines are indented in Python. This is not simply a stylistic choice — indentation is not just recommended in Python, but enforced by the interpreter. This is probably the most controversial aspect of Python, and it has been the subject of many a flame war online.
Basically, it means that the following code would generate an interpreter error, because the action associated with an if statement must be indented:
if variable1 == “Jim”:
print “variable1 eqiuals Jim”
You ’ ll learn more about the actual if statement itself later.
Data Types and Identifiers
Python provides a rich collection of data types to enable programmers to perform virtually any
programming task they desire in another language. One nice thing about Python is that it provides many useful and unique data types (such as tuples and dictionaries), and stays away from data types such as the pointers used in C, which have their use but can also make programming much more confusing and difficult for the nonprofessional programmer.
c01.indd 4
5
Data Types
Python is known as a dynamically typed language, which means that you don ’ t have to explicitly identify the data type when you initialize a variable. In the code example above, the variable name is assigned to the string value “ Jim ” . However, you don ’ t specifically identify the variable as a string variable. Python knows, based on the value it has been given, that it should allocate memory for a string. Likewise for the
age integer variable and the highschoolGPA float variable.
The following table shows the most commonly used available data types and their attributes:
Data Type Attributes Example
Numeric Types
Float Implemented with C doubles. 5.43 9483.123 Integer Implemented with C longs. 1027
211234 Long Integer Size is limited only by system resources. 567893L Sequence Types
String A list of characters. Is immutable (not changeable in - place). Can be represented by single quotes or double quotes. Can span multiple lines.
“ This is a string ” ” ””
This is an example of a DocString ” ” ”
List A mutable (changeable) sequence of data types. List elements do not have to be “ like. ” In other words, you could have a float element and an integer element in a single list.
[1, 2.3, “ Jim ” ] [1, 2, 3] [1.5, 2.7, 3.0]
[ “ Jim ” , “ Joe ” , “ Bob ” ] Tuple An immutable sequence of data types. Other
than the fact that it can ’ t be changed, it works just like a list.
(1, 2.3, “ Jim ” ) (1, 2, 3) (1.5, 2.7, 3.0) “ Jim ” , “ Joe ” , “ Bob ” Dictionary A list of items indexed by keys . d = { “ first “ : ” Jim ” ,
“ last “ : “ Knowlton “ }
Identifiers
An identifier is a unique name that enables you to identify something. Identifiers are used to label variables, functions, classes, objects, and modules. They begin with either a letter or an underscore, and they can contain letters, underscores, or digits. They cannot contain punctuation marks.
c01.indd 5
6
Operators
If you have programmed in other languages, the operators in Python will be familiar to you. The Python operators are fundamentally similar to those used in other languages. In the code shown earlier, the conditions evaluated in both if statements involve comparison operators. The following table describes the operators most commonly used in Python, and the ones used in this book:
Operator Symbol Example
Numeric Operators
Addition + x + y Subtraction − x – y Multiplication * x * y Division / x / y
Exponent (Power) ** x ** y (x to the y power) Modulo % x % y (the remainder of x/y) Comparison Operators
Greater than > x > y (x is greater than y) Less than < x < y (x is less than y) Equal to == x == y (x equals y)
Greater than or equal to > = x > = y (x is greater than or equal to y) Less than or equal to < = x < = y (x is less than or equal to y) Not equal to != or < > x != y, x < > y (x does not equal y) Boolean Operators
and and x and y (if both are true, then the expression is true) or or x or y (if either is true, then the expression is true) not not not x (if x is false, then the expression is true) Assignment Operator
Assignment = X = 15 name = “ Jim ”
c01.indd 6
7
Expressions and Statements
Expressions and statements are the building blocks of Python programs. They are the equivalent of phrases and sentences in English. To understand Python, it ’ s critical to understand how to put these building blocks together.
Expressions
Expressions consist of combinations of values , which can be either constant values, such as a string ( “ Jim ” ) or a number (12), and operators , which are symbols that act on the values in some way.
The following examples are expressions:
10 - 4 11 * (4 + 5)
x - 5
a / b
Operator Precedence in Expressions
When you have a multiple expression like 5 + 4 * 7 , which operation is done first, the addition or the multiplication? If it isn ’ t too painful to recall your high school algebra class, you might remember learning the rules of operator precedence . These kinds of complex expressions require a set of rules defining which expressions are executed first.
The following list describes the basic rules of operator precedence in Python (don ’ t worry if you don ’ t understand all the terms right now; they ’ ll be explained as you need them):
Expressions are evaluated from left to right.
Exponents, multiplication, and division are performed before addition and subtraction. Expressions in parentheses are performed first.
Mathematical expressions are performed before Boolean expressions ( AND , OR , NOT )
Statements
The statement is the basic unit of programming. In essence, it says “ do this to this. ” Statements in Python are not delimited by a visible character, such as the semicolon in C or C#. Every time you press Enter and start a new line, you are entering a new statement.
❑ ❑ ❑ ❑
c01.indd 7
8
For example, if you type:
Print 12 + 15
into the Python interpreter, you ’ ll get the following output:
> > > print 12 + 15 27
> > >
This is because you told the system to “ print the result of the expression 12 + 15, ” which is a complete statement.
However, if you type:
print 12 +
you ’ ll get a syntax error, as shown here:
> > > print 12 +
SyntaxError: invalid syntax > > >
Clearly, the system cannot read this because it isn ’ t a complete statement, so it results in an error.
Multi - line Statements
It is possible to have a single statement span multiple lines. You could do this for aesthetic reasons or simply because the line is too long to read on one screen. To do this, simply put a space and a backslash at the end of the line. Here are a few examples:
name = “Jim \ Knowlton”
sum = 12 + \ 13
Iteration and Decision - Making
There are two basic ways to control the flow of a program: through iteration (looping) and through decision - making.
c01.indd 8
9
Iteration
Iteration in Python is handled through the “ usual suspects ” : the for loop and the while loop. However, if you ’ ve programmed in other languages, these seemingly familiar friends are a little different.
For Loops
Unlike in Java, the for loop in Python is more than a simple construct based on a counter. Instead, it is a sequence iterator that will step through the items of any sequenced object (such as a list of names, for instance). Here ’ s a simple example of a for loop:
> > > names = [“Jim”, “Joe”] > > > for x in names: print x
Jim Joe > > >
As you can see, the basic syntax is for < variable > in < object > : , followed by the code block to be iterated.
While Loops
A while loop is similar to a for loop but it ’ s more flexible. It enables you to test for a particular condition and then terminate the loop when the condition is true. This is great for situations when you want to terminate a loop when the program is in a state that you can ’ t predict at runtime (such as when you are processing a file, and you want the loop to be done when you reach the end of the file).
Here ’ s an example of a while loop:
> > > counter = 5 > > > x = 0
> > > while x < counter: print “x=”,x
print “counter = “, counter x += 1
x = 0 counter = 5 x = 1 counter = 5 x = 2 counter = 5 x = 3 counter = 5 x = 4 counter = 5 > > >
c01.indd 9
10
Break and Continue
As with C, in Python you can break out of the innermost for or while loop by using the
break statement. Also as with C, you can continue to the next iteration of a loop by using the continue statement.
What about switch or case?
Many of you familiar with other programming languages are no doubt wondering about a decision - tree structure similar to C ’ s switch statement or Pascal ’ s case. Unfortunately, you won ’ t find it in Python. However, the conditional if - elif - else structure, along with other constructs you ’ ll learn about later, make their absence not such a big deal.
Decision - Making
When writing a program, it is of course critical to be able to evaluate conditions and make decisions. Having an if construct is critical for any language, and Python is no exception.
The if Statement
The if statement in Python, as in other languages, evaluates an expression. If the expression is true, then the code block is executed. Conversely, if it isn ’ t true, then program execution jumps to the end. Python also supports use of zero or more elif statements (short for “ else if ” ), and an optional else statement, which appears at the end if you also have elif statements, and would be the “ default ” choice if none of the if statements were true.
Here ’ s an example:
> > > name = “Jim” > > > if name == “Jim”: print “your name is Jim” elif name == “Joe”: print “your name is Joe” else:
print “I have no idea what your name is”
your name is Jim > > >
c01.indd 10
11
Functions
In many ways, the principle behind a function is analogous to turning on a TV. You don ’ t have to understand all the electronics and communications technology behind getting the TV signal to your receiver in order to operate the TV. You do have to know some simple behaviors, however, such as how to turn it on, where the volume switch is, and so on. In a similar fashion, a function gives the program an interface through which it can run program code without knowing the details about the code being run.
Defining a Function
You define a function in Python with the following simple syntax:
def functionName(paramenter1, parameter2=default_value): < code block >
return value (optional)
Note two elements in the preceding example:
Parameters — As you can see, parameters can simply be a variable name (making them required as part of the function call), or they can have a default value, in which case it is optional to pass them in the function call.
The return statement — This enables the function to return a value to the code that called it. The nice thing about this is that you can run a function and assign its output to a variable.
Here ’ s an example of a function definition:
> > > def getname(name):
return name + “ is very hungry”
> > >
Calling a Function
To call a function, simply enter the function name with the function signature:
functionName(paramenter1, parameter2)
If a parameter has a default value in its definition, then you can omit that parameter when you call the function, and the parameter will contain its default value. Alternately, you can override the default value by entering the value yourself when you call the function.
❑
❑
c01.indd 11
12
For example, if a function were defined as follows:
def jimsFunc(age, name = “Jim”):
Then you could call the function in any of the following three ways:
jimsFunc(23)
jimsFunc(42, “James”)
jimsFunc(42, firstName=”Joe”)
In the first example, I simply took the default value for the first parameter; in the second, I replaced it with “ James. ”
Modules
A module is the highest - level programming unit in Python. A module usually corresponds to a program file in Python. Unlike in Ruby, modules are not declared — the name of the *.py file is the name of the module. In other words, basically each file is a module, and modules import other modules to perform various programming tasks.
Importing Modules
Importing modules is done with either the import or reload command.
Import
To use a module, you import it. Usually import statements occur at the beginning of the Python module. Importing modules is a fairly simple operation, but it requires a little explanation. Consider the following examples:
1. import os 2. import os, sys 3. from os import getcwd
4. import os as operatingSystem
These examples highlight some variations in how you can import modules:
1.
This first example is the simplest and easiest to understand. It is merely the keyword import followed by the module name (in this case, os ).2.
Multiple modules can be imported with the same import command, with the modules separated by a comma.c01.indd 12
13
3.
You can import specific names only within a module, without importing the whole module, byusing the from < module > import < name > statement. This can be useful for performance reasons if you only need one function from a large module.
4.
If a module has a name that ’ s difficult to work with or remember, and you want to use a name to represent it that is meaningful to you, simply use the as keyword and import < module > as < identifier > .Reload
Reload is another very useful command, especially when entering code within the Python interactive interpreter. It enables you to reload a particular module without reloading Python. For example, if you wanted to reload the os module, you would simply enter reload os .
If you ’ re wondering why you would ever want to do that, one scenario would be if you have a Python script that runs all the time and it accesses a module on another machine. Assuming you always want to ensure that you ’ re running the most current version of the remote module you ’ re accessing, you ’ d use the reload command.
How Python Finds Modules to Load
When you use an import statement, you don ’ t tell Python where the module that needs to be loaded is located. How, then, does it know where to find the file? The answer to that question is the module
search path .
The Module Search Path
Python has a predefined priority specifying where it should look for modules, known as the module search path. When you enter an import command and the name of the module, Python checks the following locations in the order shown here:
1.
The home directory — This is either the directory from which you launched the Python interactive interpreter or the directory where the main Python program is located.2.
PYTHONPATH — This is an environment variable set in the system. Its value is a list ofdirectories, which Python will search for modules.
3.
Standard library directories — The directory in which the standard libraries are located are searched next.c01.indd 13
14
Exploring sys.path
If you ever want to see your system ’ s Python search path, all you have to do is bring up the interactive interpreter, import the sys module, and type sys.path . The full Python module search path will be returned, as shown in the following example:
> > > import sys > > > sys.path
[‘C:\\Python25’, ‘C:\\Python25\\Lib\\idlelib’, ‘C:\\Program Files\\PythonNet’, ‘c:\\scripts\\python’, ‘c:\\python25’, ‘C:\\Python25\\pyunit-1.4.1’,
‘c:\\python25\\pamie’, ‘C:\\WINDOWS\\system32\\python25.zip’, ‘C:\\Python25\\DLLs’, ‘C:\\Python25\\lib’, ‘C:\\Python25\\lib\\plat-win’, ‘C:\\Python25\\lib\\lib-tk’, ‘C:\\Python25\\lib\\site-packages’, ‘C:\\Python25\\lib\\site-packages\\win32’, packages\\win32\\lib’, ‘C:\\Python25\\lib\\site-packages\\
Pythonwin’, ‘C:\\Python25\\lib\\site-packages\\wx-2.8-msw-ansi’] > > >
Classes
Python is a language that can support both procedural programming and object - oriented programming. Here is an example of a Python class:
> > > class name1():
def setmyname(self, myname): self.name = myname
> > > jimname = name1() > > > jimname.setmyname(“Jim”) > > > print jimname.name Jim
> > >
Note some points about Python ’ s implementation of class programming as demonstrated in the preceding example:
If we were inheriting from other classes, those class names would have been inside the parentheses of the class name1(): definition.
In this case, there is one class method, setmyname . If we wanted to create a constructor for the class, it would be named __init__ .
To create an instance of a class, you simply assign a variable to the class definition, as in
jimname = name1() .
Attributes are accessed with familiar dot notation ( instance variable.attribute ) such as
jimname.name .
❑ ❑ ❑ ❑
c01.indd 14
15
Summar y
This chapter provided a brief tour of the Python language, including the following highlights:
How to get up and running with Python Python ’ s lexical structure
Operators, expressions, and statements Iteration and decision - making
Functions and modules
Classes and object - oriented programming
Of course, there is much more to the Python language than what this short chapter has outlined. Much of it you ’ ll discover as you work through the projects in this book.
Let ’ s get started!
❑ ❑ ❑ ❑ ❑ ❑
c01.indd 15
The Projects
c02.indd 17
Snapshot Program
Have you ever installed a program and wanted to know exactly what was installed? Programs typically include numerous files and directories — in some cases hundreds. It can be difficult to determine what was put on the system. This can especially be important if, for instance, you are verifying an install to ensure that all the directories and files were placed on the system.
Conversely, with an uninstall, you want to verify just the opposite – – that everything that had been put on the system is now gone.
The File/DirectoryComparison program enables you to create a “ snapshot ” of your system based on a directory “ base ” you provide. It will also perform a comparison of two snapshots to show you the differences. This includes items missing from snapshot 1 but in snapshot 2, and items missing in snapshot 2 but present in snapshot 1.
Along the way, you ’ ll learn several valuable things about Python and its features:
How to create and import modules How to create and call functions
Getting user input and passing the value provided by the user to the program How to find information related to the Python Standard Library
❑ ❑ ❑ ❑
c02.indd 19
20
Using the Program
You can find the program located on the www.wrox.com page for this book. To run it, simply go to a command prompt, and from the directory on your system where the Chapter 2 program files are located, type the following: python snapshot.py .
This will bring up a menu like the one shown here:
DIRECTORY/FILE COMPARISON TOOL ==================================== Please type a number and press enter:
1. Create a snapshot 2. List snapshot files 3. Compare snapshots 4. Help
5. Exit
From here, you can create a snapshot, compare two snapshots, view some help text (always a good idea!), or exit the program. The following sections describe each of the program features.
Creating a Snapshot
There are two scenarios for which you would create a snapshot:
You haven ’ t created a snapshot yet and want to create one to have a “ base ” to compare against later.
You have created a snapshot and have run some process (such as an install or uninstall) and want to compare it to the first snapshot you created.
In both cases, the interface is the same. When you type 1 and press Enter to create a snapshot, you are prompted for some information the program needs to create it. First, you ’ ll get the following prompt:
Enter the directory name to create a snapshot of:
This prompt is asking you for the “ root ” on which to base your snapshot. For instance, if I were installing a program into the normal Windows location (which is C:\Program Files ), which creates a directory called jimsprogram , for this prompt I would initially type C:\Program Files because I want to know anything that was put into that directory. That way, when my program installs, I can see what has been put into there.
❑ ❑
c02.indd 20
21
After I tell the directory to “ snap, ” I get the following prompt:
Enter the name of the snapshot file to create:
In other words, it is creating a file on disk, with the snapshot. This is not a human - readable file (it ’ s a “ Pickle ” file — more on that later), but Python will be able to read it and use it to compare snapshots. You can give it any valid filename for your system.
Snapshot Filenames
Because you can look up snapshot filenames by extension, it makes sense to use an extension you can remember, and to be consistent. I suggest naming your snapshots with a .snp extension, as that isn ’ t used for any other type of common file.
Your snapshot is now created. Pressing Enter will take you back to the menu.
Listing Snapshot Files
If you type 2 and press Enter, you ’ ll be presented with an option to list the snapshot files in your current directory. Snapshot files can have any valid filename, so you ’ ll be prompted as follows in order for Python to determine how to list the files:
LIST SNAPSHOT FILES
====================================
Enter the file extension for your snapshot files
(for example, ’ snp ’ if your files end in ‘ .snp’):
After you enter the common extension for your snapshot files, you ’ ll be presented with a list similar to the following (except with your own files listed, of course):
Snapshot list:
========================
ci_directory.snp ci_directory2.snp doctemp1.snp doctemp2.snp
Press [Enter] to continue...
As noted in the preceding sidebar, don ’ t forget to name all your snapshot files with a consistent extension.
Pressing Enter will take you back to the menu.
c02.indd 21
22
Comparing Snapshots
The real purpose of the program is to compare two snapshots to determine what ’ s changed. You ’ ll do this by typing 3 at the menu and pressing Enter. When you do so, you ’ ll get the following prompt:
Enter the filename of snapshot 1:
Enter the name of the “ base ” snapshot file (the program looks in the current directory) and press Enter. After you do that, you ’ ll get the following prompt:
Enter the filename of snapshot 2:
Type the name of the second snapshot file and press Enter. You ’ ll then be presented with results similar to the following:
Added Directories:
new Added Files:
jimsworddoc.doc
Removed Directories:
buildCert Removed Files:
!whatsnew.txt readme.html blueButton.gif framed.html index.html
modalPopupTest.html
Press [Enter] to continue...
c02.indd 22
23
A few notes about the output:
There are four sections to the output:
❑ Added directories
❑ Added files
❑ Removed directories
❑ Removed files
If any of the sections have more than 20 items, then the results are shown in tabular format, in three columns.
Pressing Enter will take you back to the menu.
Viewing Help
If you type 4 and press Enter, you ’ ll get the following help screen:
DIRECTORY/FILE COMPARISON TOOL ====================================
Welcome to the directory/file snapshot tool. This tool allows you to create snapshots of a directory/file tree, list the snapshots you have created in the current directory, and compare two snapshots, listing any directories and files added or deleted between the first snapshot and the second.
To run the program follow the following procedure: 1. Create a snapshot of a file system to monitor. 2. Install (or uninstall) a program under test. 3. Create another snapshot.
4. Compare the snapshots and note the results.
This screen provides a general overview of the program, along with instructions for how to use it. Pressing Enter will take you back to the menu.
Exiting the Program
Well, this one is probably the simplest to understand. Typing 5 and pressing Enter will exit the program and return you to a system prompt.
❑
❑
c02.indd 23
24
Putting It All Together
So far, you ’ ve seen all the options, but how do you really use the program? It involves four basic steps:
1.
Create an initial snapshot.Let ’ s say you have a program called “ Jim ’ s Cool App ” (not the most inventive title, but it ’ s 6:00 A.M. after an all - nighter). Suppose also that the program creates a directory in
C:\Program Files called JimsCoolApp . The first thing you would do is create a snapshot of C:\Program Files (this is before you install your program).
Call the snapshot file something meaningful, and probably date it. This example uses
110607 - ProgFiles - Base.snp (the current date as I write this).
2.
Install your program.This one ’ s pretty self - explanatory. Make sure you install to the default location, in the most standard way possible.
3.
Create a second snapshot.At this point you have created a “ base ” snapshot and installed your program. It ’ s time to create a snapshot post - install. Run the program again, type 1 , and press Enter to create a snapshot, again naming it something meaningful, in this case 110607 - ProgFiles - JCAInstalled.snp. At this point, if you want to make sure you named your snapshot files correctly, you can choose option 2 from the menu and list snapshot files.
4.
Compare snapshots.Finally, you ’ re ready to compare snapshots. Type 3 and press Enter from the menu. First enter the name of the initial snapshot file, 110607 - ProgFiles - Base.snp in this case. Then, enter the name of the second snapshot file, which was 110607 - ProgFiles - JCAInstalled.snp in the example above.
You ’ ll now be presented with a list of all the files and directories added with “ Jim ’ s Cool App. ”
Other Applications of the Program
Two other possible uses for this program, other than documenting an install, are as follow:
Document an uninstall. In this case, you would just use the “ installed ” snapshot as your base, and then take another snapshot after uninstalling and compare them to see what was removed. Typically, you would compare the “ before install ” snapshot to the “ after uninstall ” snapshot to determine whether the uninstall neglected to delete program artifacts.
If you have a “ standard configuration ” for a system, you could create a base snapshot with your standard configuration and run the compare after building other systems, to ensure that the list of files and directories is consistent.
❑
❑
c02.indd 24
25
Design
The design of the Directory/File Snapshot program is a simple one: It includes two modules, snapshot and snapshothelper , and no classes. Snapshot is the main program, and snapshothelper contains helper functions to perform various tasks, as shown in Figure 2 - 1 .
Snapshot module
Snapshothelper module
Figure 2 - 1
No Classes?
This program could have been developed with classes, but recall that in this book I want to show you how to create both procedural and object - oriented code. Therefore, the classes come later.
How It All Fits Together
As mentioned earlier, the snapshot module is the main program, and the one that users will actually run from the command line. It displays the menu, accepts input from the user based on the menu options, and performs actions based on that selection. Generally, the main “ actions ” that happen as a result of the user ’ s menu selection happen in the snapshothelper module.
The first place that Python looks for a module when it is imported is in the same directory as the main calling program. If a module has been created that is a “ helper ” module, then that ’ s the logical place to put it. That ’ s why snapshot and snapshothelper are in the same directory.
If a module is not specific to a particular program, but contains functions and classes you would want to use in many different programs, the best place to put it would be in your Python library directory.
You ’ ll find that this design is quite common — a single “ main ” program supported by one (or several) “ helper ” programs that contain classes, functions, or data that provides some kind of service to the calling program. The advantage of this is that it provides abstraction . In other words, you can simply call a function from the main program and as long as it provides what you are asking for, it doesn ’ t matter how it was accomplished. This makes modifying programs much easier. You ’ ll learn more about that later.
c02.indd 25
26
Main Program
Although the main program for this application is in the snapshot module, which displays the menu, accepts the user input, and then calls the appropriate function based on the choice the user made, the functions to actually “ do stuff ” are not in the snapshot module, but rather in snapshothelper .
Table 2 - 1
Function Return Type Description
menu() stri