HPE Smart Storage Administrator
User Guide
Abstract
This document identifies, and provides instructions for, the tools available for configuration, management, monitoring, and diagnosing of HP Enterprise ProLiant controller and server products. This document is for the person who installs, administers, and troubleshoots servers and storage systems. HP Enterprise assumes you are qualified in the servicing of computer equipment and trained in recognizing hazards in products with hazardous energy levels.
Part Number: 742648-007a March 2016
© Copyright 2013, 2016 Hewlett Packard Enterprise Development LP
The information contained herein is subject to change without notice. The only warranties for Hewlett Packard Enterprise products and services are set forth in the express warranty statements accompanying such products and services. Nothing herein should be construed as constituting an additional warranty. Hewlett Packard Enterprise shall not be liable for technical or editorial errors or omissions contained herein.
Links to third-party websites take you outside the Hewlett Packard Enterprise website. Hewlett Packard Enterprise has no control over and is not responsible for information outside the Hewlett Packard Enterprise website.
Confidential computer software. Valid license from Hewlett Packard Enterprise required for possession, use or copying. Consistent with FAR 12.211 and 12.212, Commercial Computer Software, Computer Software Documentation, and Technical Data for Commercial Items are licensed to the U.S. Government under vendor’s standard commercial license.
Microsoft® and Windows® are either registered trademarks or trademarks of Microsoft Corporation in the United States and/or other countries. Linux® is the registered trademark of Linus Torvalds in the U.S. and other countries.
Contents
Overview ... 5
About HPE SSA ... 5
Benefits of using HPE SSA ... 5
Support for configuration tasks ... 6
Array configuration ... 8
Array configuration guidelines ... 8
Minimum requirements ... 8
Native support for 64-bit and 32-bit operating systems ... 9
Operations ... 10
Accessing HPE SSA in the offline environment ... 10
Launching HPE SSA with Intelligent Provisioning (Gen8 or later)... 10
Launching HPE SSA during POST (Gen8 or later) ... 10
Launching HPE SSA from an ISO image (all generations) ... 10
Accessing HPE SSA in the online environment ... 14
Launching HPE SSA on a local server ... 14
Launching HPE SSA on a local server to configure a remote server ... 15
Launching HPE SSA on a remote server to configure a local server ... 16
Using the HPE SSA GUI ... 16
Icon and key stroke legend... 17
Navigating the GUI ... 18
Configuration tasks ... 23
Diagnostic tasks ... 58
Using the HPE SSA CLI ... 60
Opening the CLI in Console mode ... 60
Opening the CLI in Command mode ... 60
CLI syntax... 61
Typical procedures ... 65
Encryption commands ... 84
Using HPE SSA scripting ... 89
Capturing a configuration ... 90
Using an Input script ... 90
Creating an HPE SSA script file ... 90
Script file options ... 95
XML support ... 111
HPE SSA scripting warning messages ... 115
HPE SSA scripting error messages ... 115
Troubleshooting ... 121
HPE Smart Storage Administrator Diagnostics Utility CLI ... 121
About the utility ... 121
Reported information ... 121
Installing the utility ... 123
Launching the utility in CLI mode ... 123
Diagnostic report procedures ... 123
SmartSSD Wear Gauge report procedures ... 124
512e Physical drive support ... 124
Drive arrays and fault-tolerance methods ... 125
Drive arrays ... 125
Effects of a hard drive failure on logical drives ... 127
Fault-tolerance methods ... 128
Diagnosing array problems ... 136
Optional components ... 138
HPE Secure Encryption ... 138
HPE Smart Array Advanced Pack ... 139
About SAAP ... 139
Acronyms and abbreviations... 140
Documentation feedback ... 142
Overview
About HPE SSA
HPE SSA is the main tool for configuring arrays on Smart Array controllers. It exists in three interface formats: the HPE SSA GUI, the HPE SSA CLI, and HPE SSA Scripting. All formats provide support for configuration tasks (on page 6). Some of the advanced tasks are available in only one format.
The diagnostic features in HPE SSA are also available in the standalone software HPE Smart Storage Administrator Diagnostics Utility CLI (on page 121).
Starting with HPE SSA and ProLiant Gen8 servers and server blades, HPE SSA is accessible both offline and online:
•
Accessing HPE SSA in the offline environment (on page 10)Using one of multiple methods, you can run HPE SSA before launching the host operating system. In offline mode, users can configure or maintain detected and supported ProLiant devices, such as optional Smart Array controllers and integrated Smart Array controllers. Some HPE SSA features are only available in the offline environment, such as setting the boot controller and boot volume.
•
Accessing HPE SSA in the online environmentThis method requires an administrator to download the HPE SSA executables and install them. You can run HPE SSA online after launching the host operating system.
Benefits of using HPE SSA
HPE Smart Storage Administrator is an advanced utility that enables you to perform many complex configuration tasks. Previously, other HPE configuration utilities, including Array Configuration Utility and Option ROM Configuration for Arrays, were recommended for storage configuration.
Although ACU is still supported, HPE SSA replaces it starting with ProLiant Gen8 servers.
There are many GUI differences between ACU and HPE SSA. Some of the main differences include the following:
•
The tabs in ACU are integrated into the new HPE SSA Configure menu.•
The 2-panel format in ACU is replaced with a 3-panel format in HPE SSA.•
HPE SSA includes a quick navigation menu, to access configuration or diagnostics options for a specific controller.•
With a Smart Array Gen8 or later controller, most options do not require an SAAP license.•
HPE SSA does not include a Wizards feature.HPE SSA includes a stand-alone CLI diagnostics utility ("HPE Smart Storage Administrator Diagnostics Utility CLI" on page 121).
HPE SSA provides full-range support for standard and advanced configuration tasks ("Support for configuration tasks" on page 6). Some of these advanced tasks are not available in all HPE SSA interface formats (GUI, CLI, and Scripting).
Using HPE SSA over other configuration utilities provides the following benefits:
•
English, French, German, Italian, Japanese, Simplified Chinese, and Spanish languages are supported.•
Applications can be executed using the following tools:o Any bootable media, such as a software CD
o Any supported Host operating system with a web browser (Microsoft Windows 2003 is not supported. For a list of supported operating systems, see the Hewlett Packard Enterprise website (http://www.hpe.com/info/ossupport).)
o Intelligent Provisioning, which is embedded in ProLiant Gen8 and later servers
•
All formats can run in both online and offline environments.•
The utility can run on any machine that uses a supported browser.Support for configuration tasks
The following table uses these symbols:
+ —The controller supports this task through HPE SSA.
– —The controller supports this task through HPE SSA only with a registered SAAP license key.
# —The controller supports this task through HPE SSA only with a registered SmartCache license key. To identify controller-specific feature support and SAAP requirements, see the controller user guide or the Hewlett Packard Enterprise website (http://www.hpe.com/info/enterprise/docs).
For more information, see "About SAAP."
Procedure Smart Array G6 and G7
controllers
Smart Array
Gen8 controllers Smart Array Gen9 controllers (RAID mode)
Smart HBA Gen9 controllers1
(RAID mode) Activate or delete
license keys + + + +
Assign a RAID level to a logical drive
+ + + +
Assign spare drives to an array + + + + Configure multiple systems identically + 2 +2 +2 +2 Configure a RAID 6 logical drive – + + Configure a RAID 60 logical drive – + + Configure RAID 1 (ADM) and RAID 10 (ADM) – + + Copy the configuration of one system to multiple systems –2 +2 + + Create multiple logical drives per array
+ + + +
Create or delete arrays and logical drives
+ + + +
Enable or disable a physical drive write
Procedure Smart Array G6 and G7
controllers
Smart Array
Gen8 controllers Smart Array Gen9 controllers (RAID mode)
Smart HBA Gen9 controllers1
(RAID mode) cache
Enable solid state drives to be used as caching devices, using SmartCache
n/a # #
Enable optimized data path to solid state drives using SSA Smart Path
+ + + + Expand an array + + + + Extend a logical drive + + + + Heal an array – + + + Drive Erase (replace the content of a physical drive with zeros or random 0 and 1)
– + + +
Drive Erase (with
sanitize options) + Identify devices by
causing their LEDs to flash
+ + + +
Migrate the RAID
level or stripe size + + + +
Move an array (copy all array data to a new array and then delete the old array)
–3 + + +
Move and delete individual LUNs – + + + Optimize the controller performance for video –3 + + + Re-enable a failed logical drive + + + +
Set the boot controller
+ + + +
Set the expand priority, migrate priority, and accelerator ratio
+ + + +
Set the spare
activation mode + + + +
Set the stripe size + + + +
Set the surface
scan delay + + + +
Share a spare drive among several arrays
Procedure Smart Array G6 and G7
controllers
Smart Array
Gen8 controllers Smart Array Gen9 controllers (RAID mode)
Smart HBA Gen9 controllers1
(RAID mode) Removing a drive
from an array (restripe the data on an array to occupy fewer physical drives, then remove the excess drives from the array)
+/–3 + + +
Specify the size of the logical drive
+ + + +
Split a RAID 1 array or recombine a split array (offline only)
+/– + + +
Split mirror backup and rollback of RAID 1, 1+0, 1 (ADM) and 10 (ADM) mirrors – + + + no ADM support
1Scripting is the most efficient method for this task.
2Having the latest firmware installed allows access all of the supported features. 3The task is supported only from the Configuration screen.
Array configuration
Array configuration guidelines
Remember the following factors when you build an array:
•
All drives grouped in a logical drive must be of the same type (for example, either all SAS or all SATA and either all hard drives or all solid state drives).•
For the most efficient use of drive space, all drives within an array should have approximately the same capacity. Each configuration utility treats every physical drive in an array as if it has the same capacity as the smallest drive in the array. Any excess capacity of a particular drive cannot be used in the array and is unavailable for data storage.•
The more physical drives configured in an array, the greater the probability that the array will experience a drive failure during any given period.•
To guard against the data loss that occurs when a drive fails, configure all logical drives in an array with a suitable fault-tolerance (RAID) method. For more information, see "Drive arrays andfault-tolerance methods (on page 125)."
Minimum requirements
For minimum operating system requirements to run any HPE SSA format, see the Hewlett Packard Enterprise website (http://www.hpe.com/info/ossupport).
Minimum video requirements to run the HPE SSA GUI include a minimum monitor resolution of 1024x768 and 16-bit color. The GUI supports the following browsers:
•
Mozilla Firefox 9.0 or later•
Microsoft Internet Explorer 8.0 or laterFor a list of supported controllers, see Smart Array RAID Controllers on the Hewlett Packard Enterprise website (http://www.hpe.com/servers/smartarray).
Native support for 64-bit and 32-bit operating
systems
HPE SSA now offers a native 64-bit HPE SSA application for supported 64-bit operating systems, eliminating the need for compatibility libraries. A 32-bit HPE SSA application is also available. Users can choose to install the application that matches the OS installed on the server product.
The 64-bit HPE SSA application is not a direct upgrade from 32-bit HPE SSA. On 64-bit systems running 32-bit HPE SSA, you must uninstall the 32-bit application, and then install the 64-bit application.
Future versions of HPE SSA will be available as native 32-bit or native 64-bit applications, as long as 32-bit operating systems are supported.
Operations
Accessing HPE SSA in the offline environment
To access and launch the HPE SSA GUI in an offline environment, use one of the following methods:
•
Launching HPE SSA with Intelligent Provisioning (Gen8 or later) (on page 10)•
Launching HPE SSA during POST (Gen8 or later) (on page 10)•
Launching HPE SSA from an ISO image (all generations) (on page 10)To access the HPE SSA CLI or HPE SSA Scripting in an offline environment ("Accessing HPE SSA in the offline environment" on page 10), you must launch HPE SSA from an ISO image.
When offline HPE SSA launches, an Execution Mode screen does not appear because HPE SSA does not support Remote Service Mode in an offline environment. For this functionality, use HPE SSA in an online environment.
Launching HPE SSA with Intelligent Provisioning (Gen8 or later)
1. Boot the server.
2. Press F10 to launch Intelligent Provisioning. 3. At the main screen, select Perform Maintenance.
4. At the Maintenance screen, select HPE Smart Storage Administrator (HPE SSA). The system launches the HPE SSA GUI.
Launching HPE SSA during POST (Gen8 or later)
For Gen8 servers: 1. Boot the server.
During POST, the system recognizes devices.
2. When the system recognizes a Smart Array controller, press F5.
The system launches the HPE SSA GUI, or if you are using Serial Console, the system launches the HPE SSA CLI.
For Gen9 and later servers: 1. Boot the server.
During POST, the system recognizes devices. 2. Press F10 to start Intelligent Provisioning.
A menu appears, listing the options for launching HPE SSA. 3. Select a method to launch HPE SSA.
The system launches the HPE SSA GUI, or if you are using Serial Console, the system launches the HPE SSA CLI.
Launching HPE SSA from an ISO image (all generations)
To launch HPE SSA, you can also boot from an ISO image. To prepare the image, use one of the following methods:
•
Mounting the image through iLO (on page 11)•
Burning the image to a CD or DVD (on page 11)•
Flashing the image to a USB memory key or SD card on a HPE UEFI bootable server ("Flashing the image to a USB memory key or SD card on a UEFI bootable server" on page 11)•
Installing the image on a PXE server (on page 12)Booting from the ISO image on a drive, on a key, or through iLO provides the same GUI interface. The user can select to run Offline HPE SSA GUI, HPE SSA CLI, or HPE SSA Scripting.
Mounting the image through iLO
This iLO functionality requires an iLO Advanced license. To mount the image:
1. Download the ProLiant Offline HPE Smart Storage Administrator ISO image from the Hewlett Packard Enterprise website (http://www.hpe.com/info/enterprise/docs).
2. Browse to the server iLO page.
3. Start the remote console for the server.
4. On the remote console, use the iLO mount feature to browse to the location of the ISO image. 5. Select the ISO image to be mounted.
6. Reboot the server.
Burning the image to a CD or DVD
1. Download the ProLiant Offline HPE Smart Storage Administrator ISO image from the Hewlett Packard Enterprise website (http://www.hpe.com/info/enterprise/docs).
2. Use third-party software to burn the ISO image to a CD or DVD. 3. Set the server to boot from the optical drive.
4. Insert the CD or DVD. 5. Reboot the server.
Flashing the image to a USB memory key or SD card on a UEFI bootable server
Booting from a USB key is supported only for UEFI mode.1. Download the ProLiant Offline HPE Smart Storage Administrator ISO image from the Hewlett Packard Enterprise website (http://www.hpe.com/servers/ssa).
CAUTION: Before creating a bootable USB key from the Offline HPE SSA ISO image, back up any critical data stored on the key to a different location. The utility overwrites all data on the key.
2. Using ISO mounting software, mount the Offline HPE SSA ISO image to a Windows drive. For this example, use "E:."
3. Insert a USB key into a USB connector on the Windows system. For this example, use "F:."
4. Format the USB key, and copy the contents of the mounted ISO to the USB key. 5. Insert the USB key into the server.
The USB key can now be used to boot to the Offline HPE Smart Storage Administrator environment. When booting from the USB key, a menu is presented. Select "USB BOOT: Smart Storage
Installing the image on a PXE server
To install the Offline HPE SSA ISO image on a PXE server and boot from the image over a network, use the following procedures:
1. Review the prerequisites (on page 12). 2. Set up PXELinux.
3. Configure PXELinux (on page 12). 4. Specify the ISO image path.
Depending on the network configuration, boot times might vary.
Prerequisites
Before proceeding with the configuration, you must have all the prerequisites:
•
A good, working knowledge of PXE and TFTP•
A network with a DHCP server on it•
A TFTP server configured on the same network as the DHCP server•
A network file server that hosts the ISO images and is accessible by a PXE booted system•
PXELinux (http://syslinux.zytor.com/wiki/index.php/PXELINUX)These instructions presume that you are using a Linux TFTP server and the TFTP package (http://www.kernel.org/pub/software/network/tftp). Other TFTP servers should work similarly.
Set up PXELinux
Before proceeding with the configuration, ensure that your TFTP server and PXELinux configuration is set up and configured properly.
To set up PXELinux:
1. Download the ProLiant Offline HPE Smart Storage Administrator ISO image from the Hewlett Packard Enterprise website (http://www.hpe.com/servers/ssa).
2. Copy the ISO image to the network file system, and note the location. NFS and Windows file shares are supported.
For this example, use the following NFS and path to the ISO image:
192.168.0.99:/path/to/ahpssacd/image/hpssaoffline-2.40.iso
3. Before proceeding, test your network file system to ensure that it is accessible. 4. Access the /system directory of the CD in one of the following ways:
o Burn and mount the ISO image.
o Extract the ISO image using a third-party tool.
5. Copy all the files from the /system directory of the CD to your TFTP server so that it is accessible by the TFTP software.
Configure PXELinux
1. Using the isolinux.cfg file from the /system/ directory of the CD as a guide, copy the labeled targets to your PXELinux configuration file. You do not need to include the entire file:
label sos
MENU LABEL HP ProLiant Offline HP SSA Image kernel hpboot_v.c32
append vmlinuz initrd=initrd.img media=net rw root=/dev/ram0
ramdisk_size=257144 init=/init loglevel=3 ide=nodma ide=noraid pnpbios=off vga=791 splash=silent showopts TYPE=AUTOMATIC
label vsos
MENU LABEL HP ProLiant Offline HP SSA Image kernel hpboot_v.c32
append vmlinuz initrd=initrd.img media=net rw root=/dev/ram0
ramdisk_size=257144 init=/init loglevel=3 ide=nodma ide=noraid pnpbios=off vga=791 splash=silent showopts TYPE=MANUAL
2. Replace the lines kernel hpboot_v.c32 with kernel vmlinuz.
3. Remove vmlinuz from the append line.
The paths to the files on the TFTP server are vmlinuz and initrd.img. You must modify them to include any directories or naming conventions you may have on your TFTP server.
Specify the ISO image path
For the PXE-booted server to find the ISO image, you must add the ISO image path to the append line in the PXELinux configuration file.
Add the following arguments:
iso1=nfs://192.168.0.99/path/to/hpssacd/image/hpssaoffline-2.40.iso iso1mnt=/mnt/bootdevice
The iso1 parameter helps the PXE-booted HPE SSA Offline CD locate the ISO image. The iso1mnt parameter tells the PXE-booted HPE SSA CD where the iso1 image must be mounted.
Your final configuration must be similar to the following example:
label sos
MENU LABEL HP ProLiant Offline HPS SA Image kernel vmlinuz
append initrd=initrd.img media=net rw root=/dev/ram0 ramdisk_size=257144 init=/init loglevel=3 ide=nodma ide=noraid pnpbios=off vga=791
splash=silent showopts TYPE=AUTOMATIC
iso1=nfs://192.168.0.99/path/to/hpssacd/image/hpssaoffline-2.40.iso iso1mnt=/mnt/bootdevice
label vsos
MENU LABEL HP ProLiant Offline HP SSA Image kernel vmlinuz
append initrd=initrd.img media=net rw root=/dev/ram0 ramdisk_size=257144 init=/init loglevel=3 ide=nodma ide=noraid pnpbios=off vga=791
splash=silent showopts TYPE=MANUAL
iso1=nfs://192.168.0.99/path/to/hpssacd/image/hpssaoffline-2.40.iso iso1mnt=/mnt/bootdevice
You can add additional ISO images by specifying the additional iso# and iso#mnt arguments, for example,
iso2=/path/to/iso2.iso iso2mnt=/mnt/iso2.
Supported network file systems
The following network file systems are supported for use with PXE booting:
•
NFS:iso1=nfs://192.168.0.99/path/to/hpssacd/image/hpssaoffline-1.60-16.0.iso iso1mnt=/mnt/bootdevice
NFS volumes are mounted with the following options:
o -o ro
o nolock
•
Windows operating systems:iso1=smbfs://192.168.0.99/share/path/to/hpssacd/image/hpssaoffline-1.60-16.0.iso iso1mnt=/mnt/bootdevice
•
Windows operating systems with logon credentials:iso1=smbfs://user:[email protected]/share/path/to/hpssacd/image/hpss aoffline-1.60-16.0.iso iso1mnt=/mnt/bootdevice
Accessing HPE SSA in the online environment
To access, install, and launch HPE SSA in the online environment, you must download the HPE SSA executables. All three formats have separate executables.
HPE SSA Scripting is a standalone application that is distributed with the HPE SSA CLI application. Users familiar with ACU Scripting must now install the HPE SSA CLI application to obtain the scripting executable. The new HPE SSA scripting executable (hpssascripting) replaces the former executable (hpacuscripting) in all scripts.
For information about the minimum monitor settings and the version numbers of supported operating systems and browsers, see the README.txt file provided with the executable.
Both HPE SSA and the HPE SSA CLI need sg driver(scsi generic) to access Smart Array controller in Linux. Red Hat Enterprise Linux 7.1 and later does not load sg driver automatically. You should load the driver and type 'modprobe sg' before running HPE SSA or HPE SSA-CLI.
To use HPE SSA in the online environment:
1. Obtain the executable files from one of the following locations:
o The Hewlett Packard Enterprise website (http://www.hpe.com/support/hpesc), under Drivers & Downloads.
When prompted for product information, enter the appropriate server or server blade model name.
o The software CD that is provided with the controller
2. Follow the installation instructions provided with the executable.
3. After the executables are installed, launch each executable in the following manner:
o GUI—Click Start, and then select Programs>HPE System Tools>HPE Smart Storage Administrator>Setup HPE Smart Storage Administrator.
Depending on your configuration scenario, choose one of the following options:
— Launching HPE SSA on a local server (on page 14)
— Launching HPE SSA on a local server to configure a remote server (on page 15)
— Launching HPE SSA on a remote server to configure a local server (on page 16)
o CLI—Click Start, and then select Programs>HPE System Tools>HPE Smart Storage Administrator CLI
o Scripting—Run hpssascripting.exe (Windows) or hpssascripting (Linux).
Launching HPE SSA on a local server
1. Click Start, and then select Programs>HPE System Tools>HPE Smart Storage Administrator>HPE Smart Storage Administrator.
HPE SSA launches in either a browser or application window (v1.50 and later). HPE SSA then scans the system and detects controllers. When controller detection is complete, the controllers are available on the Controller/Device menu.
2. Configure a controller ("Configuring a controller" on page 24). When configuration is complete, continue with the next step.
3. (Optional) To make newly created logical drives available for data storage, use the operating system disk management tools to create partitions and format the drives.
Linux OS
1. From any command prompt, enter one of the following:
o For local mode, enter: hpssa– local
o For remote mode, enter: hpssa– start
HPE SSA launches in a browser window. 2. For a list of options, enter the following:
hpssa- h
Launching HPE SSA on a local server to configure a remote
server
1. On the local server (host), click Start, and then select Programs>HPE System Tools>HPE Smart Storage Administrator>HPE Smart Storage Administrator Preferences.
The HPE Smart Storage Administrator Preferences screen appears.
o Optional: Under System Management Homepage Integration, click Enable, or leave Disabled
(default).
o Optional: Under Preferred Language, select a language or leave as System Default.
o Click Exit.
2. On the remote server, open the browser.
3. Enter the following text into the address field of the remote browser (where servername is the name or IP address of the host):
http://servername:2301
The login screen for the System Management Homepage opens. 4. Enter your login credentials:
o If you are using version 7.0.0 or later of the System Management Homepage, use your operating system user name and password.
o If you are using an earlier version of the System Management Homepage, use your WBEM user name and password.
The System Management Homepage opens.
For more information about the System Management Homepage, see the following:
o The Hewlett Packard Enterprise System Management Homepage webpage (http://www.hpe.com/info/smh)
o The HP System Management Homepage Installation Guide on the Hewlett Packard Enterprise
website (http://www.hpe.com/info/enterprise/docs)
5. Click HPE Smart Storage Administrator on the left side of the screen.
HPE SSA opens, scans the remote server, and detects controllers. When controller detection is complete, the controllers are available on the Controller/Device menu.
6. Configure a controller ("Configuring a controller" on page 24).
7. (Optional) To make newly created logical drives available for data storage, use the operating system disk management tools to create partitions and format the drives.
Launching HPE SSA on a remote server to configure a local
server
1. On the local server (host), click Start, and then select Programs>HPE System Tools>HPE Smart Storage Administrator>HPE Smart Storage Administrator Preferences.
The HPE Smart Storage Administrator Preferences screen appears.
o Optional: Under HP System Management Homepage Integration, click Enable, or leave
Disabled (default).
o Optional: Under Preferred Language, select a language or leave as System Default.
o Click Exit.
2. On the server that you want to configure, connect to the Systems Insight Manager server (port: 280), and then log in.
3. Select Device Queries.
4. Under Device by Type, select All Servers. 5. Connect to the server that is running HPE SSA.
6. Under Device Links, select System Management Homepage. The login screen for the System Management Homepage opens. 7. Log in using your credentials:
o If you are using version 7.0.0 or later of the System Management Homepage, use your operating system user name and password.
o If you are using an earlier version of the System Management Homepage in Windows, use your WBEM user name and password.
The System Management Homepage opens.
For more information about the System Management Homepage, see the following:
— The Hewlett Packard Enterprise System Management Homepage (http://www.hpe.com/info/enterprise/docs)
— The HP System Management Homepage Installation Guide on the Hewlett Packard
Enterprise website (http://www.hpe.com/info/enterprise/docs) 8. Click HPE Smart Storage Administrator on the left side of the screen.
HPE SSA opens, scans the remote server, and detects controllers. When controller detection is complete, the controllers are available on the Controller/Device menu.
9. Configure a controller ("Configuring a controller" on page 24). When configuration is complete, continue with the next step.
10. (Optional) To make newly created logical drives available for data storage, in a Windows OS, use the operating system disk management tools to create partitions and format the drives.
Using the HPE SSA GUI
Access HPE SSA with one of the many methods available:
•
Accessing HPE SSA in the offline environment (on page 10)When you launch the HPE SSA GUI, the application opens and HPE SSA scans the system and detects controllers. This process can last up to 2 minutes. When controller detection is complete, the controllers are available on the Devices/Tools menu.
After the GUI is open, tasks are distributed among categories. For more information, see "Navigating the GUI (on page 18)."
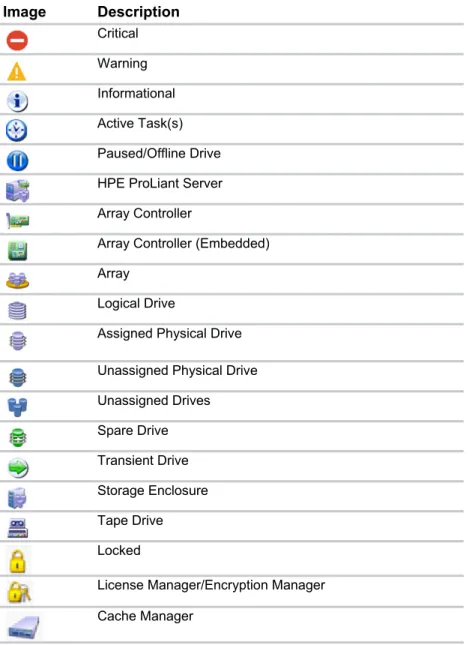
Icon and key stroke legend
The HPE SSA GUI includes many icons (also defined in the Help file) to help with identification and troubleshooting. Image Description Critical Warning Informational Active Task(s) Paused/Offline Drive HPE ProLiant Server Array Controller
Array Controller (Embedded) Array
Logical Drive
Assigned Physical Drive Unassigned Physical Drive Unassigned Drives Spare Drive Transient Drive Storage Enclosure Tape Drive Locked
License Manager/Encryption Manager Cache Manager
Keyboard functions and shortcuts can be used for navigating or performing actions in the GUI.
Key Description
Tab Cycle through selectable items on a page
Shift + Tab Cycle backwards through selectable items on a page F5 Rescan system (equivalent to clicking the Rescan
Key Description B Browse main menu H Open HPE SSA Help X Exit HPE SSA
Enter Perform the action of the currently selected link or button*
Escape Close non-action popups* R Refresh selected controller*
* Local keyboard shortcuts are available only when the action that the key activates is accessible.
Navigating the GUI
When you open HPE SSA, the Welcome screen appears.
•
The HPE Smart Storage Administrator quick navigation menu is in the top, left-hand corner of the screen. Clicking the down arrow displays the available devices, and clicking one of the available devices displays additional information and options for the device. You can also return to a serverHome screen, or you can choose Configuration or Diagnostics for a device listed. For more information, see "Configure screen (on page 19)" or "Diagnostics screen (on page 21)."
•
Available device(s) are listed on the left-hand side of the screen. Clicking on a server or array controller displays the available actions, alerts, and summary for that device. You can point to the status alerts to see details on an alert.•
What's New? summarizes the changes since Array Configuration Utility became HPE Smart Storage Administrator, and since the previous versions of HPE SSA.•
The Rescan System button is near the top right of the screen.After adding or removing devices, click Rescan System to update the list of available devices.
•
The Help button is near the top right of the screen.To access help topics, press the H key or click Help. For more information, see "HPE SSA Help. ("HPE SSA help" on page 22)"
•
The Exit HPE SSA button is near the top right of the screen.Configure screen
To access this screen, click either a device under Configuration in the quick navigation menu, or select an available device from the Home screen, and then click Configure under the available options.
The Configure screen displays the GUI elements from the Welcome screen and lists available actions, status messages, more detailed information, and a controller configuration summary for a selected controller.
•
Devices and Tools—This panel, at left, displays systems, controllers, arrays, physical devices, unassigned drives, and cache, license and encryption managers.•
Actions—This panel, in the middle, provides the following information and functionality:o Tasks that are available for the selected device based on its current status and configuration
o Options and information pertinent to the task, after a task is selected
•
Status Messages—This panel provides the following information and functionality:o Status icons (critical, warning, and informational) with the number of individual alerts for each category
o A view all status messages link that displays device-specific alerts in a pop-up window
•
Controller Configuration Summary—This panel provides a summary of the following elements:o Data arrays
o Data logical drives
o Data drives
o Unassigned drives
o Spare drives
For a list of possible tasks that are available on the Configure screen, see "Configuration tasks (on page 23)."
Diagnostics screen
To access this screen, either click a device under Diagnostics in the quick navigation menu, or select an available device from the Home screen, and then click Diagnose under the available options.
•
SmartSSD Wear Gauge ReportWhen selecting either report, the available actions on the Actions panel include viewing the report or saving the report.
For a list of possible tasks that are available on the Diagnostics screen, see "Diagnostic tasks (on page 58)."
SmartSSD Wear Gauge Report
The SmartSSD Wear Gauge Summary provides a brief overview of the following:
•
Total Solid State Drives with Wearout Status•
Total Smart Array Solid State Drives•
Total Non Smart Array Solid State Drives•
Total Solid State SAS Drives•
Total Solid State NVMe Drives•
Total Solid State DrivesWhen running a report, you can either view a graphic representation of the report with SSD usage and estimated lifetime information, or generate a report without a graphical display, with the option of saving the report.
HPE SSA help
The Help button, at upper right, opens the embedded HPE SSA help file. In addition to providing information about the main screens and tabs, Help also provides several useful topics for new users, including the following:
•
Keyboard Controls—An explanation and list of keyboard functions for navigating the GUI•
Keyboard Shortcuts—A list of keys and operations they perform within the GUITo view these help topics and others, press the H key or click Help. When the Help window opens, expand the topic "Getting Started with HPE SSA."
The glossary in HPE SSA help defines industry standard and Hewlett Packard Enterprise terms as they relate to the HPE SSA application.
Configuration tasks
From the Configure screen, you can perform tasks related to controllers, arrays, physical drives, and logical drives.
For certain tasks, the controller must have SAAP activated by a registered license key. For more information, see "About SAAP."
When a controller or device is selected, the tasks that appear are a subset of the total number of possible tasks for the selected item. HPE SSA lists or omits tasks based on the controller model and configuration. For example, if the selected controller has no unassigned physical drives, Create Array is not an available task.
The following table lists all the possible tasks for every type of item.
Item Tasks
Controller Accelerated I/O Path
Advanced Controller Settings* ** Array Accelerator Settings Clear Configuration Controller Settings Create Array
Disable Standby Controller
Enable HBA/RAID/Smart Array Mode operations* Enable SmartCache†
Manage Encryption Manage License Keys* Modify Power Modes* More Information Parallel Surface Scan
Physical Drive Write Cache Settings Redundancy Settings*
View Status Alerts
Array Bypass RAID components using HPE SSA Smart Path Change Array Drive Type**
Create Array Create Logical Drive Create Split Mirror Backup
Convert Plaintext Data to Encrypted Data Delete
Expand Array Heal Array**
Manage Split Mirror Backup More Information
Move Drives** Re-Mirror Array** Shrink Array** Spare Management Split Mirrored Array** View Status Alerts Volume Key Rekey
Item Tasks
Logical drive Create Logical Drive
Create SmartCache for Logical Drive Convert Plaintext Data to Encrypted Data Delete
Extend Logical Drive Instant Secure Erase Migrate RAID/Stripe Size Modifying Cache Write Policy Move Logical Drive* ** More Information
Re-enable Failed Logical Drive View Status Alerts
Volume Key Rekey Unused space Create Logical Drive
More Information Physical drive Erase Drive**
View Status Alerts Unassigned
drives Create Array Erase Drive** More Information
*This task is not available on all controller models.
**If performed with an Smart Array G6 or G7 controller, this task requires a registered SAAP license key or a controller where SAAP functionality is standard. See "About SAAP."
†Only available on a Gen8 or Gen9 controller with a registered SmartCache license key.
Configuring a controller
1. Open HPE SSA.For more information, see "Using the HPE SSA GUI (on page 16)." 2. Open the Configure panel by doing one of the following:
o Choose a device and click Configure in the quick navigation menu.
o Select an available device from the Home screen, and then click Configure under the available options.
The Configure panel appears.
IMPORTANT: Screens may have different options available, depending on the server configuration.
3. Configure the controller. See "Performing a Configuration task (on page 25)." 4. When prompted, save the configuration.
5. Do one of the following:
o Configure an additional controller. Repeat steps 3 through 5.
o Click Exit HPE SSA.
Performing a Configuration task
1. Open HPE SSA.
For more information, see "Using the HPE SSA GUI (on page 16)." 2. Open the Configure panel by doing one of the following:
o Choose a device and click Configure in the quick navigation menu.
o Select an available device from the Home screen, and then click Configure under the available options.
The Actions, Status Messages, and Controller Configuration Summary panels appear. The listed tasks are available for this device in its current configuration. For more information, see
"Configuration tasks (on page 23)."
4. Click a task button.
A list of all possible options for that task appears on the right side of the screen, replacing the task list.
5. Select the settings or configuration options for the device.
6. Use the Next and Back buttons to navigate multiple screens of options. 7. Click Save or OK.
HPE SSD Smart Path
Hewlett Packard Enterprise SSD Smart Path enables I/O requests to bypass Smart Array firmware and access SSDs directly. This process accelerates reads for all RAID levels and writes for RAID 0. The controller device driver analyzes each I/O request for the following Smart Path eligibility requirements:
•
Read requests for all supported RAID levels•
Write requests for all RAID 0 volumes•
Size and location parameters, resulting in an operation that can be satisfied by a single physical disk I/OThe command values are Enable or Disable.
Example:
•
SSDSmartPath= Enable | DisableTo enable or disable HPE SSD Smart Path: 1. Open HPE SSA.
For more information, see "Using the HPE SSA GUI (on page 16)." 2. Open the Configure panel by doing one of the following:
o Choose a device and click Configure in the quick navigation menu.
o Select an available device from the Home screen, and then click Configure under the available options.
3. Select a controller from the Devices menu. The Actions panel appears.
Create a logical drive: 1. Click Create Array.
2. Select the physical drives for the new array. 3. Click Create Array.
4. Make selections for RAID Level, Strip Size/Full Stripe Size, Sectors/Track, and Size.
5. Click Create Logical Drive. 6. Click Finish.
By default, HPE SSD Smart Path is enabled on SSD drives.
8. If you want to disable HPE SSA Smart Path, click Disable HPE SSD Smart Path.
9. Click Save.
Rapid Parity Initialization
When you create a logical drive, you must initialize the parity using Rapid Parity Initialization.
RAID levels that use parity (RAID 5, RAID 6 (ADG), RAID 50, and RAID 60) require that the parity blocks be initialized to valid values. Valid parity data is required to enable enhanced data protection through background surface scan analysis and higher performance write operations. Two initialization methods are available:
•
Default – Initializes parity blocks in the background while the logical drive is available for access by the operating system. A lower RAID level results in faster parity initialization.•
Rapid – Overwrites both the data and parity blocks in the foreground. The logical drive remains invisible and unavailable to the operating system until the parity initialization process completes. All parity groups are initialized in parallel, but initialization is faster for single parity groups (RAID 5 and RAID 6). RAID level does not affect system performance during rapid initialization.Rapid Parity Initialization is available only for supported controllers and in arrays composed of supported physical drives.
To select the method for parity initialization: 1. Open HPE SSA.
For more information, see "Using the HPE SSA GUI (on page 16)." 2. Open the Configure panel by doing one of the following:
o Select an available device from the Home screen, and then click Configure under the available options.
3. Select Logical Devices from the Devices menu. A list of arrays appears.
4. Select an array, and select Create Logical Drive from the Actions menu.
5. Make selections for RAID Level, Number of Parity Groups, Strip Size/Full Strip Size,
Sectors/Track, Size, Parity Initialization Method,and Caching. Depending on the controller used and drives selected, your options may appear different from the image below.
6. Click Create Logical Drive to continue. A summary page appears.
SSD Over Provisioning Optimization
Solid state devices can be optimized by deallocating all used blocks before any data is written to the drive. The optimization process is performed when the first logical drive in an array is created and when a physical drive is used to replace a failed drive. Not all controllers support this option.
The SSD Over Provisioning Optimization feature allows the user to disable Over Provisioning Optimization in the GUI.
To disable Over Provisioning Optimization: 1. Open HPE SSA.
For more information, see "Using the HPE SSA GUI (on page 16)." 2. Select Unassigned Drives located under Controller Devices.
4. The Create Logical Drive window appears. Under the option SSD Over Provisioning Optimization, select Do not perform SSD Over Provisioning Optimization on the Array.
5. Click Create Logical Drive.
Changing the Spare Activation Mode
The spare activation mode feature enables the controller firmware to activate a spare drive under the following conditions:
•
When a data drive reports a predictive failure (SMART) status•
When a data drive fails; this mode is the default.In normal operations, and for older controllers, the firmware starts rebuilding a spare drive only when a data drive fails. With the predictive failure activation mode, rebuilding can begin before the drive fails, reducing the likelihood of data loss that could occur if an additional drive fails.
To change the Spare Activation Mode: 1. Open HPE SSA.
For more information, see "Using the HPE SSA GUI (on page 16)." 2. Open the Configure panel by doing one of the following:
o Choose a device and click Configure in the quick navigation menu.
o Select an available device from the Home screen, and then click Configure under the available options.
3. Select a controller from the Devices menu. The Actions panel appears.
4. In the Actions panel, click Modify Spare Activation Mode. 5. From the menu, select one of the following modes:
o Failure Spare Activation
o Predictive Spare Activation 6. Click Save.
Changing the Spare Management mode
The Spare Management feature provides multiple methods for handling spare behavior. You can choose from the following options:
•
Dedicated—When the failed data drive is replaced, it must be rebuilt from the data on the spare drive. In Dedicated mode, one spare can be dedicated to multiple arrays.•
Auto-Replace Drives—The spare for the failed data drive automatically becomes the replacement data drive. When the spare is replaced, the data drive does not need to be rebuilt. In Auto-replace mode, spare drives cannot be shared between arrays.If assigning Auto-Replace Drives mode to an array with a RAID 0 drive, Spare Activation Mode must be set to Predictive Spare Activation mode.
To change the Spare Management mode: 1. Open HPE SSA.
For more information, see "Using the HPE SSA GUI (on page 16)." 2. Open the Configure panel by doing one of the following:
o Choose a device and click Configure in the quick navigation menu.
o Select an available device from the Home screen, and then click Configure under the available options.
3. Select a controller from the Devices menu. 4. Select Create Array from the Actions panel.
The Array details screen appears.
5. Select a controller, drive type, and physical drives, and click Create Array.
6. Select settings for Create Plaintext Volume, RAID Level, Strip Size/Full Strip Size,
7. Click Manage Spare Drives.
8. From the menu, select one of the following spare drive types:
o Dedicated Spare Drives
o Auto-Replace Drives
10. Click Save.
11. A confirmation screen appears. Click Yes to continue.
12. Click Manage Spare Drives to make additional selections, or click Finish.
Setting Auto RAID 0
CAUTION: If you select this option for any logical drives, you will experience data loss for that logical drive if one physical drive fails. Assign RAID 0 to drives that require large capacity and high speed, but pose no data safety risk.
Auto Array RAID 0 creates a single RAID 0 volume on each physical drive specified, enabling the user to select multiple drives and configure as RAID 0 simultaneously. Each array contains one physical drive and one RAID 0 logical drive.
For more information about RAID 0, see "RAID 0—No fault tolerance (on page 128)." To create an array with RAID 0:
1. Open HPE SSA.
For more information, see "Using the HPE SSA GUI (on page 16)." 2. Select the controller.
4. A new window appears, confirming each array will contain a single RAID 0 logical drive. Click Yes to continue.
5. A new window appears, confirming RAID 0 configuration. Click Finish to complete.
Parallel Surface Scan
1. Open HPE SSA. For more information, see "Using the HPE SSA GUI (on page 16)." 2. Select a controller.
4. Under Current Parallel Surface Scan Count, use the slider to select the parallel surface scan count.
5. Click Save Settings.
6. A summary page appears. Click Finish to exit.
Cache Manager
Caching increases database performance by writing data to the cache memory, instead of directly to the logical drives. Caching can be disabled to reserve the cache module for other logical drives on the array. To configure the controller cache:
1. Open HPE SSA.
For more information, see "Using the HPE SSA GUI (on page 16)." 2. Open the Configure panel by doing one of the following:
o Select an available device from the Home screen, and then click Configure under the available options.
3. Select Cache Manager from the Tools menu.
4. Click Controller Cache in the Cache Manager menu.
5. Click Modify Caching Settings.
6. Select one or more logical drives to be cached. 7. Verify caching settings.
About HPE SmartCache
SmartCache enables solid state drives to be used as caching devices for hard drive media. SmartCache provides the following features:
•
Accelerates application performance•
Provides lower latency for transactions in applications•
Supports all operating systems where Smart Array Gen9 controllers are supported, without the need for changes to OS, driver, or applications•
Choice of write-through or write-back cache (Gen9 servers only)SmartCache will be fully enabled after the first SmartCache is created on the controller. The following features are not available unless SmartCache is disabled:
•
Expand Array•
Advanced Capacity Expansion•
Move Logical Drive•
Change Array Drive Type•
Mirror Splitting and Recombining (offline only)•
Split Mirror Backup and Rollback (online and offline)•
Heal Array•
Extend Logical Drive•
Migrate RAID/Strip Size•
Change Cache Ratio•
Align Logical DrivesTo support SmartCache, the Smart Array Controller firmware must meet the following version minimums:
•
6G controller: version 3.42 or later•
12G controller: all releasesSmartCache requires a SmartCache license. For more information, see the Hewlett Packard Enterprise website (http://www.hpe.com/servers/smartcache).
Enable HPE SmartCache
Enabling HPE SmartCache with an array will accelerate data input/output for the assigned logical drives. At least one logical drive must be created on the controller prior to enabling SmartCache. To enable SmartCache:
1. Open HPE SSA.
For more information, see "Using the HPE SSA GUI (on page 16)." 2. Open the Configure panel by doing one of the following:
o Choose a device and click Configure in the quick navigation menu.
o Select an available device from the Home screen, and then click Configure under the available options.
4. Click Enable HPE SmartCache in the Actions menu.
5. Select one or more physical drives from the list of available drives. 6. Click OK.
7. A pop-up window appears, indicating certain features will not be available with SmartCache enabled. If you want to continue, click Yes.
8. Create SmartCache for Logical Drive appears.
9. Select the following:
o Logical drive to cache
o Cache write policy and RAID type
o Size of the cache. Hewlett Packard Enterprise recommends 10% of the drive size, and it must be a minimum of 16 GiB.
11. SmartCache Details, SmartCache Statistics,and Device Path appear. Click Finish to proceed.
The SmartCache is created for the Logical Drive. Installing a license key with HPE SmartCache
You can use HPE SSA to install the license key and activate SmartCache functionality. To install a license key:
1. Open HPE SSA.
For more information, see "Using the HPE SSA GUI (on page 16)." 2. Open the Configure panel by doing one of the following:
o Choose a device and click Configure in the quick navigation menu.
o Select an available device from the Home screen, and then click Configure under the available options.
4. Under actions, click Add License Key.
5. Enter the license key number. 6. Click Save.
Enabling SmartCache Write-back
HPE SSA contains two different policies for data writes when caching: write-back and write-through. Write-back is a caching method where data is not copied to the data volume until absolutely necessary. Write-back might accelerate performance in comparison to the write-through policy by reducing the number of write operations to data volumes. The performance improvement can involve the risk of lost data if the cache volume fails.
Write-through is a caching method where data is written to the cache and the data volumes
simultaneously. Write-through is the preferred write policy in applications where data loss cannot be tolerated, but has lower performance compared to the write-back policy.
A write-back SmartCache cannot be deleted until it is converted to a write-through SmartCache using the
Modify Caching Write Policy button. This conversion forces user data to be flushed from the SmartCache volume to the primary hard drive volume, to avoid data loss when the SmartCache is deleted. The time to flush data from write-back SmartCache to hard drive volume varies, depending on several variables including how much dirty data is held in the write-back SmartCache, host workload, and number of hard drives in the primary volume.
SmartCache volumes must be deleted from newest to oldest, in reverse order from how they were created.
Some controllers might not support this option or might require a license key to enable this feature. The target can be any valid SSD drive and existing non-cached logical drive for the data.
CAUTION: Specifying the write-back cache write policy could result in data loss in the event of failure of the cache volume. When using a RAID 0 cache volume, a single SSD failure might result in data loss.
IMPORTANT: If a demo license key expires, all SmartCache volumes configured with write-back cache write policy are converted to write -through. When this happens, the logical drive details show different values for Cache Write Policy and Cache Write Policy Requested. If the license is reinstalled, the SmartCache volumes are restored to their original write-back cache write policy.
To modify the logical drive cache policy settings: 1. Open HPE SSA.
For more information, see "Using the HPE SSA GUI (on page 16)." 2. Select the controller.
3. Click Modify Controller Settings.
4. Under Physical Drive Write Cache State, select one of the following:
o Enabled
o Disabled
5. Click Save Settings.
6. A summary page appears. Click Finish to exit.
Working with mirrored arrays
Among the advanced tasks possible with the HPE SSA GUI, you can split a mirrored array and then recombine it. This process entails splitting a RAID 1 or RAID 1+0 mirror into two identical new arrays consisting of RAID 0 logical drives.
Support for these procedures requires the following:
•
The HPE SSA GUI must be run in offline mode ("Accessing HPE SSA in the offline environment" on page 10).•
Smart Array G6 and G7 controller models must have a valid SAAP license.•
Mirrored arrays being split can have RAID 1, RAID 1+0, RAID 1 (ADM), or RAID 10 (ADM) configurations. Arrays with other RAID configurations cannot be split.Several reasons exist for splitting and recombining a mirrored array. For more information, see the "RAID
1(+0): breaking mirrors and rebuilding drives" how-to white paper on the Hewlett Packard Enterprise
website (http://www.hpe.com/info/enterprise/docs).
Splitting a mirrored array
1. Run the HPE SSA GUI in offline mode. See "Accessing HPE SSA in the offline environment (on page 10)."
2. Open the Configure panel by doing one of the following:
o Choose a device and click Configure in the quick navigation menu.
o Select an available device from the Home screen, and then click Configure under the available options.
3. Select Arrays from the Devices menu.
4. From the Arrays menu, select the appropriate array. 5. Select Manage Data Drives from the Actions panel. 6. Under Available Array Action(s), select Mirror Array. 7. Select a physical drive.
8. Click OK.
The mirrored array details are displayed. 9. Click Finish.
10. When HPE SSA finishes splitting the array, two logical drives appear in the Arrays menu:
o When a RAID 1 or RAID 1+0 array splits, two RAID 0 logical drives are created.
o When an array that contains a RAID 1 (ADM) logical drive splits, a RAID 1 logical drive and a RAID 0 logical drive are created.
o When an array that contains a RAID 10 (ADM) logical drive splits, a RAID 1+0 logical drive and a RAID 0 logical drive are created.
11. Shut down the OS. 12. Power down the server.
13. With power off, remove the physical drives that constitute one of the new arrays.
If you do not remove the physical drives for one of the arrays, the OS will be unable to distinguish between the two arrays when the server is restarted because the arrays are identical.
14. Power up the server. 15. Restart the OS.
Recombining a split mirrored array
1. Run the HPE SSA GUI in offline mode. See "Accessing HPE SSA in the offline environment (on page 10)."
2. Open the Configure panel by doing one of the following:
o Choose a device and click Configure in the quick navigation menu.
o Select an available device from the Home screen, and then click Configure under the available options.
3. Select Arrays from the Devices menu.
4. Select the appropriate array from the Arrays menu. 5. Select Manage Data Drives from the Actions panel.
6. In the Available Tasks panel, click Manage Split Mirror Backup. 7. Select the array to be mirrored to the source array.
This array is usually the array that was split from the original mirrored array. However, it can be any other array of the correct size.
8. Click OK.
9. When HPE SSA finishes re-mirroring the array, restart the OS.
The controller uses the rebuild process to synchronize the mirrored drives. The drive online LED flashes during the rebuild process. Depending on the hard drive size and the server load, this process can take up to 2 hours. You can boot the OS during this time, but the logical drive is not fault-tolerant until the rebuild is complete.
Creating a split mirror backup
This task splits an array that consists of one or more RAID 1, RAID 1+0, RAID 1 (ADM), or RAID 10 (ADM) logical drives, and then creates two arrays: a primary array and a backup array.
To create a split mirror backup:
1. Run the HPE SSA GUI in offline mode. See "Accessing HPE SSA in the offline environment (on page 10)."
2. Open the Configure panel by doing one of the following:
o Choose a device and click Configure in the quick navigation menu.
o Select an available device from the Home screen, and then click Configure under the available options.
3. Select Arrays from the Devices menu.
4. Select the appropriate array from the Arrays menu. 5. In the Actions panel, click Create Split Mirror Backup.
A verification and message dialog box appears. 6. Click OK.
7. A details window appears. Click Finish.
HPE SSA creates the array according to the following rules:
o If the original array contained RAID 1 or RAID 1+0 drives, then the primary array will contain RAID 0 drives.
o If the original array contained RAID 1 (ADM) drives, the primary array will contain RAID 1 drives.
o If the original array contained RAID 10 (ADM) drives, the primary array will contain RAID 1+0 drives.
o The backup array always contains RAID 0 logical drives.
o The primary array continues to be fully accessible to the operating system while the backup array is hidden from the operating system.
8. When HPE SSA finishes creating the split mirror backup, the new backup array appears in the
Devices menu:
The array includes the designation "Backup" at the beginning of the array name.
Re-mirroring, rolling back, or re-activating a split mirror backup
1. Run the HPE SSA GUI in offline mode. See "Accessing HPE SSA in the offline environment (on page 10)."
2. Open the Configure panel by doing one of the following:
o Choose a device and click Configure in the quick navigation menu.
o Select an available device from the Home screen, and then click Configure under the available options.
3. Select Arrays from the Devices menu.
5. In the Available Tasks panel, click Manage Split Mirror Backup. 6. Select one of the following actions:
o Re-mirror the array and preserve the existing data. Discard the backup array.
This option re-creates the original mirrored array with the current contents of the primary array.
o Re-mirror the array and roll back to the contents of the backup array. Discard existing data. This option re-creates the mirrored array but restores its original contents, which are in the backup array. Hewlett Packard Enterprise recommends that you do not perform this option under the following circumstances:
— In an online environment
— If the logical drive to be rolled back is mounted
— If the logical drive to be rolled back is in use by the operating system
o Activate the backup array.
This option makes the backup array fully accessible to the operating system. HPE SSA removes the designation "backup" from the name of the array.
Healing an array
The Heal Array operation enables you to enter a command to replace failed physical drives in the array with healthy physical drives. After replacement, the original array and logical drive numbering is
unaffected.
To use Heal Array, you must meet the following conditions:
•
The array has at least one failed drive.•
The array is not transforming (for example, rebuilding to a spare).•
The array has a working cache, making it capable of transformation.•
The replacement physical drives and the original drives must be of the same interface type, such as SAS, SATA, and so on.•
A sufficient number of unassigned physical drives of the correct size are available to replace each failed physical drive in the array.The correct size is defined as a drive as large as the smallest drive on the array, but no larger than the smallest spare.
•
If using an ProLiant Smart Array G6 or G7 controller, an SAAP 1.0 license is activated.When you select Heal Array, and all conditions are met, one of the following actions occurs to the volume in the array:
•
If a volume has failed, HPE SSA recreates the volume. This action occurs with a RAID 0 volume.•
If a volume is degraded, HPE SSA rebuilds the volume.Change array drive type
Some controllers may not support this option or might require a license key to enable the feature. HPE SSA enables you to transfer the contents of an array to an existing empty array or a new array. During this operation, all logical drives transfer from the original array to the destination array. The original array is deleted, and the drives that were being used are freed and listed as unassigned drives.
Changing an array drive type is a time-consuming process for two reasons: all data in each logical drive is copied to the destination array, and the controller performs all data transformations while servicing IO requests to other logical drives.