Wireless USB Adapter Set
User guide
v2.2
Wireless USB Adapter Kit - User Guide
1
Table of contents
1
Introduction
... 2
1.1 Package contents ... 2
1.2 System requirements ... 3
1.3 Installation steps in short ... 3
2
Software installation
... 7
2.1 Installation on Windows Vista ... 7
3
First use
... 11
3.1 Suggestions for a better use ... 11
3.2 How to connect the PC Adapter ... 11
3.3 Device Adapter pairing ... 11
3.4 Device Adapter installation ... 12
3.5 USB device connection ... 13
4
Manager software
... 14
4.1 Icon meanings ... 14
4.2 User interface ... 14
4.3 Device Adapters management ... 16
5
Troubleshooting
... 18
5.1 Installation does not automatically start from CD ... 18
5.2 PC Adapter not found or not ready ... 18
5.3 Troubles with pairing procedure ... 18
5.3.1 No PC Adapter found ... 19
5.4 My USB device is not found ... 19
5.5 My USB device frequently disconnects ... 20
5.6 Other diagnosis tools ... 20
5.6.1 LED indications ... 20
5.6.2 Drivers installation check ... 21
6
Technical specifications
... 22
Wireless USB Adapter Kit - User Guide
2
1
Introduction
The Wireless USB Adapter Set solution offers instant Wireless USB connectivity between a PC and a USB device using a simple kit consisting of a PC Adapter (Host side dongle) and a Device Adapter (Device side dongle).
The Adapters kit implements Wireless USB specifications (http://www.usb.org) and it can interoperate with any other Wireless USB certified solution.
1.1
Package contents
The package includes:
1 USB dongle, marked as PC Adapter; 1 USB dongle, marked as Device Adapter; 1 USB cradle;
1 power supply;
1 software and documentation CD; 1 printed Quick Start Guide.
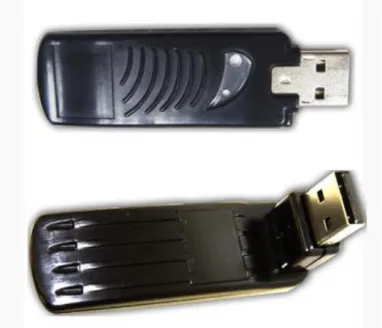
Note: To correctly use this product, the user must be able to properly distinguish between PC Adapter and Device Adapter, because they play different roles within the set.
In order to correctly identify the two Adapters, please refer to labels on back sides, as shown in the following figure:
Wireless USB Adapter Kit - User Guide
3
Figure 1: PC Adapter and Device Adapter
1.2
System requirements
Operating System: Microsoft Windows™ XP w/ Service Pack 3, Microsoft Windows™
Vista w/ Service Pack 1.
Hardware: Personal Computer (notebook or desktop) equipped with at least two
USB ports (best performances with USB 2.0) or with one USB port connected to a USB hub (an external device that multiplies the number of USB ports connected to a computer).
1.3
Installation steps in short
Wireless USB Adapter Kit - User Guide
4
Note: For an easier installation of this product, it is important to install software and drivers before plugging any of the two Adapters to your PC.
Plug the PC Adapter into a USB port of your PC(best performances with USB 2.0) and wait for drivers’ activation.
Plug the Device Adapter into another USB port of your PC , keeping the PC Adapter connected and wait for drivers’ activation.
Wait for Adapters association procedure to complete, until “Device Adapter has been paired” message is shown.
Wireless USB Adapter Kit - User Guide
5
Unplug the Device Adapter from PC and plug it into USB cradle.
Complete the installation procedure by plugging USB device and power supply into the USB cradle.
Wireless USB Adapter Kit - User Guide
6
Wireless USB Adapter Kit - User Guide
7
2
Software installation
This paragraph describes in details software and drivers installation procedure.
Note: If a previous version of Wireless USB Adapter Set software has been previously installed on your system, please remove it before continuing with newer version.
Make sure that none of the two Adapters is plugged into your PC;
Insert the CD and wait for installation to auto-start. If it does not occur in a few seconds, proceed with manual start from Windows “Computer resources”.
2.1
Installation on Windows Vista
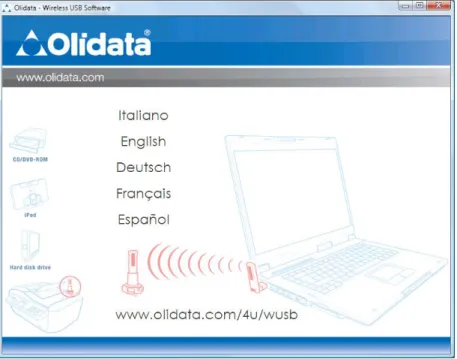
First, the installer asks to choose the language:
Wireless USB Adapter Kit - User Guide
8
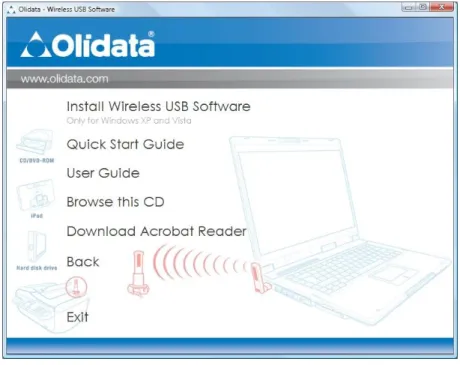
Then a welcome screen presents a menu with the following options:
Install Wireless USB Software: to start software and driver installation;
Quick Start Guide: to open the Quick Start Guide from CD;
User Guide: to open this User Guide from CD;
Browse this CD: to open explorer window to browse the CD content;
Download Acrobat Reader: to download Adobe Acrobat Reader ®,
needed to read documents from CD (internet connection needed);
Back: to go back to language selection window;
Exit: to exit application.
Figure 3: Main menu windows
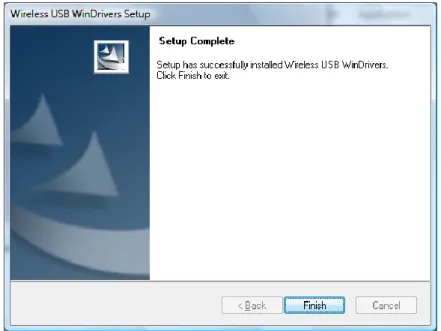
The first choice runs final software and driver’s installation.
Wireless USB Adapter Kit - User Guide
9
Figure 5: Installation wizard
A different destination folder can be chosen.
Figure 6: Destination folder selection
Wireless USB Adapter Kit - User Guide
10
Wireless USB Adapter Kit - User Guide
11
3
First use
This chapter describes the correct use of the Wireless USB Adapter Set.
3.1
Suggestions for a better use
Taking care of this product helps keep it in good operational conditions, and it may also extend its life time.
It is also recommended to avoid, as much as possible, any sudden change of temperature, humid and dust environments as well as mechanical shocks and stress. Finally, in order to maximize performances try, to keep dongles in vertical position, as they use radio antennas for transmission.
3.2
How to connect the PC Adapter
Plug the PC Adapter into one of the USB ports available on your PC (choose an USB 2.0 port when possible).
The system will detect it and start a standard driver activation wizard. Follow its instructions to get drivers activated.
Figure 8: Drivers activation under Windows Vista
Then the icon shown in the Windows bar notification area should change color, from grey into red . Red color means that the PC Adapter is ready, waiting for Device Adapter to get ready as well.
Note: If the icon does not turn into red color, see chapter 5 of the user guide: Troubleshooting.
Note: For further information on icon meaning, see paragraph 4.1 of the user guide.
3.3
Device Adapter pairing
The system keeps some permanent memory of all pairings so that in normal conditions, the pairing procedure does not need to be repeated.
During the pairing, keep the PC Adapter plugged into an USB port of your PC and plug the Device Adapter into another USB port, too.
Wireless USB Adapter Kit - User Guide
12
The system will detect it and start a standard driver activation wizard. Follow its instructions to get drivers activated.
Figure 9: Drivers successfully loaded
Then wait for the pairing procedure to successfully complete, until the message “Device Adapter has been paired” is shown.
Figure 10: Pairing successfully completed
Unplug the Device Adapter from PC.
Note: If pairing procedure fails, see chapter 5 of the user guide: Troubleshooting.
3.4
Device Adapter installation
Insert the Device Adapter on top of USB cradle and plug in the power supply jack, too.
After some while, the icon shown in the Windows bar notification area must turn from red into green , as shown in the following figure:
Figure 11: The icon
Wireless USB Adapter Kit - User Guide
13
Note: If the icon does not turn into green color, see chapter 5 of the user guide: Troubleshooting.
3.5
USB device connection
It is now possible to plug the USB device into the bottom of USB cradle as well, close to the power supply jack.
Windows should detect the USB device and should send common USB notifications until the USB device is connected and ready to be used. It is also possible that Windows tries to load USB device drivers, so let it complete the procedure.
Wireless USB Adapter Kit - User Guide
14
4
Manager software
The Wireless USB Adapter Set includes a Wireless USB management software which allows the user to verify and manage Wireless USB connections and devices.
4.1
Icon meanings
When manager software is running, a status icon is shown in the Windows bar notification area. It indicates the status of PC Adapter, as described in the following chart:
Icon
Meaning
Connected: a wireless connection is established with a Wireless
USB device.
PC Adapter Enabled: wireless USB PC Adapter is connected to
the PC (PC Adapter is connected and on, but no Device Adapter is detected).
PC Adapter not connected or disabled: wireless USB PC
Adapter is disabled or not connected.
Wireless USB channel is busy: low channel quality detected, but
at least one Device Adapter is still connected; to improve connection quality.
Wireless USB channel is not available: no available channel detected; to improve connection quality.
4.2
User interface
To open the manager software, right-click on the icon shown in the Windows bar notification area for contextual menu to be displayed as follow:
The following chart explains menu options:
Menu option
Description
Wireless USB Adapter Kit - User Guide
15
Help Opens a quick help page.
About Shows product information and driver versions.
Exit Closes the application.
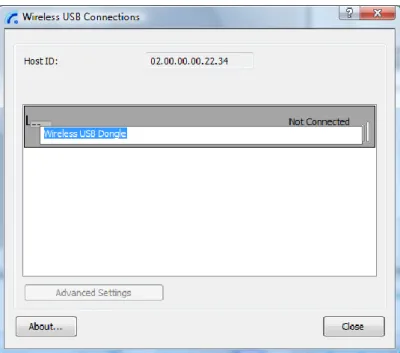
The second option opens the manager software main window, showing the list of known connections as well as their status.
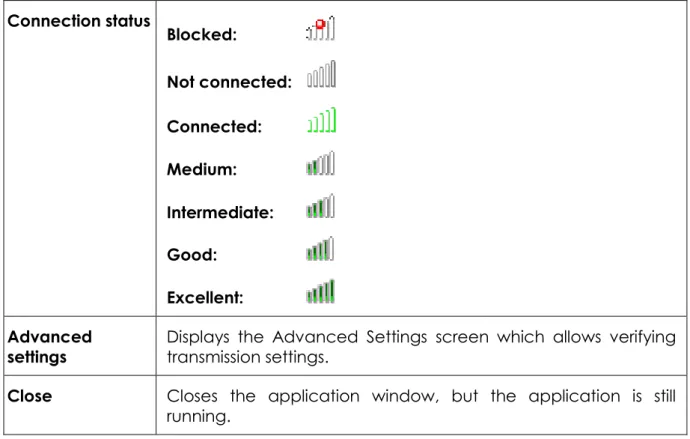
Figure 12: Manager software main window The following chart explains the main window contents.
Item
Description
Wireless USB Adapter Kit - User Guide 16 Connection status Blocked: Not connected: Connected: Medium: Intermediate: Good: Excellent: Advanced
settings Displays the Advanced Settings screen which allows verifying transmission settings.
Close Closes the application window, but the application is still
running.
4.3
Device Adapters management
The manager software allows the user to remove or temporarily disable known devices.
To temporarily disable a device, open the contextual menu by right-clicking on the chosen connection and select option “Block device”.
Device pairing is still available for future use.
To remove a device, select option “Disassociate device”. Device pairing is discarded.
A new pairing procedure is needed to work with the same Device Adapter again.
Figure 13: Device contextual menu
It is also possible to modify connection names on the list, by simply double-clicking the name of the chosen connection.
Wireless USB Adapter Kit - User Guide
17
Wireless USB Adapter Kit - User Guide
18
5
Troubleshooting
This chapter offers a quick support for common problem analysis.
Olidata Customer Care is available to help users during troubleshooting or to provide up-to-date software, drivers and documentation. Access Olidata website (www.olidata.com) to find all details.
5.1
Installation does not automatically start from CD
If driver installation does not start automatically, it is possible that this feature has been disabled in Windows. Access Windows Resource Manager to start it manually.
5.2
PC Adapter not found or not ready
If the system cannot detect the PC Adapter (grey icon), try the following steps: Unplug the PC Adapter, wait a few seconds for Windows to upload drivers, then
plug it in again;
If the previous step fails, close manager software by selecting “Exit” option from icon contextual menu (right-click), and then restart it.
Last of all, restart the system.
5.3
Troubles with pairing procedure
If pairing procedure fails, (the following message is shown):
Figure 15: Pairing failed message
Wireless USB Adapter Kit - User Guide
19
Unplug the Device Adapter, wait a few seconds for Windows to upload drivers, then plug it in again;
If previous step fails, follow the same procedure with the PC Adapter; If previous step fails, follow the same procedure with both Adapters; Last of all, unplug all Adapters and restart the system.
5.3.1
No PC Adapter found
If the following message is shown during pairing procedure,
Figure 16: No PC Adapter found
make sure that at least one PC Adapter is plugged (see also paragraph 5.2 of the user guide), and try again.
5.4
My USB device is not found
If the USB device is connected to USB cradle and it is not detected by Windows, first check that PC Adapter is working well (see paragraph 5.2 of the user guide.). If the problem does persist, check the possible causes within the following:
Device Adapter is not powered: make sure that USB cradle is connected to fully
functional power supply;
Device Adapter is not within operational range: try to shorten distance between
PC Adapter and Device Adapter. The maximum range is 30 feet, but it can be affected by environment conditions;
Obstacles between PC Adapter and Device Adapter: it is recommended to keep
space clear between PC Adapter and Device Adapter (pay special attention to metallic objects);
Pairing failed: try pairing procedure again (see paragraph 0 of user guide);
PC Adapter not detected: carry out checks described on paragraph 5.2 of the
user guide;
This USB device is not supported yet: this is a really recent technology still under development. It can occur that some USB devices are not fully supported yet, especially the older ones. Several device categories are still under development and will be fully supported in the future (eg.: several webcams, microphones,
Wireless USB Adapter Kit - User Guide
20
audio USB cards and almost all audio-enabled devices). Please contact Olidata Customer Care to obtain more info.
5.5
My USB device frequently disconnects
If the USB device frequently looses connection, it may be due to the distance between PC and Device Adapters or by interfering obstacles. Please, try to shorten distance or keep space clear.
5.6
Other diagnosis tools
5.6.1
LED indications
It is possible to verify Adapters statuses by interpreting LED behaviors:
Off: the Adapter is not powered; On: the Adapter is powered; Blinking: traffic.
Figure 17: LED position on PC Adapter
Wireless USB Adapter Kit - User Guide
21
5.6.2 Drivers installation check
Expert users can verify driver’s installation by opening Windows “Device Manager” window and by browsing the USB device tree. When the PC Adapter is connected, it should be shown in the tree, as in the following example:
Wireless USB Adapter Kit - User Guide
22
6
Technical specifications
Operational range Up to 30 feet line of sight.
Frequencies range U.S.A.: 3.1GHz to 4.8GHz.
Europe/Japan/Korea: 4.2GHz to 4.8GHz.
Dimensions PC Adapter: 107 mm x 20 mm x 9 mm.
Device Adapter: 96 mm x 20 mm x 9 mm.
Power supply PC Adapter: directly powered by USB port.
Device Adapter: powered by USB cradle, 5VDC+/-10% @. 1A (positive polarity) 2.5W.
Operating temperature 0°C a +70°C.
USB pairing type Cable pairing through PC USB ports.
Security Standard WUSB 128-bit AES.
Regulations compliance USB 2.0/1.1.
Wireless USB v. 1.0.
WiMedia PHY rev. 1.1, MAC rev 1.0. FCC CFR 47 Part 15.
Europe EN 302 065, Japan Radio Law, Korea MIC.
Operating systems Microsoft Windows™ XP w/ Service Pack 3, Microsoft.
Wireless USB Adapter Kit - User Guide
23
7
Environment preservation
Particular attention must be paid to environment preservation. Specific disposal regulations of different countries must be observed.
Please refer to law regulations in force at the moment of disposal. Pay attention to correctly identify and classify all involved materials.