DESIGN GUIDES FOR
GUIDELINES AND STANDARDS
CHAPTER4
G U I D E T I T L E P A G E
Introduction to the Design Guide 4.2
1 Protection of existing riparian vegetation (G&S I.B) 4.3 2 Use of local native species (G&S I.B AND I.C) 4.5 3 Use of Ornamental or non-native species (G&S I.C.2) 4.7 4 Riparian revegetation or mitigation projects (G&S I.C) 4.9 5 Temporary erosion control options (G&S I.C.3 & IV.B.7) 4.11 6 Placement of fill and planting of trees by levees (G&S I.C.4) 4.13 7 Slope stability protection area (G&S II.A) 4.14 8 SCVWD freeboard requirements (G&S III.B.4) 4.15 9 Grading adjacent to creeks and SCVWD right of way (G&S V.A) 4.16 10 Plant species for vegetated buffers and swales (G&S IV) 4.20 11 Specifications for placement of fill on SCVWD levees (G&S V.B.2) 4.21 12 Outfall standards (G&S VI.B.3) 4.22 13 Flap gate structure (G&S VI.B.5) 4.43 14 SCVWD water pipeline crossing (G&S VIII.B.6) 4.45 15 Utility crossing under creeks (G&S VIII.B.1) 4.49 16 Guidance for Trail Design (G&S IX) 4.51 17 Groundwater resource assessment criteria (G&S XIII.A) 4.60 18 Detention basin design (G&S XIV.A.3) 4.61 19 Bank protection repair guide (G&S IV) 4.65
INTRODUCTION TO THE DESIGN GUIDE
I. PURPOSEThe Guidelines and Standards (G&S’s) were developed by the Santa Clara Valley Water Resources Protection Collaborative (Collaborative) to address land use near streams and protect surface and groundwater quality and quantity in Santa Clara County. The goal was to develop and implement a consistent set of G&S’s to enhance water and watershed resource protection through local agency land use planning and permitting. The Proposed G&S’s provide guidance for addressing a wide range of activities (including riparian habitat protection, slope stability, erosion control, trail construction, grading). The purpose of the Design Guides is to provide further detail and clarification on specific application of the G&S’s.
II. AUDIENCE
The audience for this Design Guides is city/County/SCVWD staff responsible for reviewing and permitting project applications. The G&S’s and these related Design Guides are to be used as appropriate by permitting agency staff in reviewing all of the various permits required for development on affected streamside parcels (unless an exempt single family use on an already developed lot). This would include permits for grading, drainage, structures, landscaping, planning, zoning and any other related activities and improvements.
III. INTEGRATION INTO EXISTING PROCESSES
The Design Guides included are models to be incorporated as appropriate by local agencies into their existing practices. In general, the content of the Design Guides is fairly consistent with existing practices of the SCVWD and local jurisdictions. It is anticipated that these Design Guides will be used unless determined otherwise by agreement between the local agency and SCVWD. Where there is a variety of options, the preferred option is indicated.
It is acknowledged, however, that the preferred option may not always be feasible or preferred depending on the circumstances, so other options, which are allowable but not typically recommended have been included as well.
IV. PROTECTION OF STREAM RESOURCES
A major purpose of providing the Design Guides is to protect and enhance streams and streamside natural resources. When deciding on what type of improvements to be made to a streamside parcel, please keep in mind what is best for the ecological health of the stream. If there is a conflict between a Design Guides and a specific G&S, staff should defer to the G&S. Some judgment will need to be made based on site-specific conditions and the dynamic nature of stream systems.
PROTECTION OF EXISTING RIPARIAN VEGETATION
INTRODUCTIONThis Design Guide is designed to provide more detail to G&S I.B on protection of native riparian plants. The G&S’s include several requirements related to the
protection, removal and planting of riparian vegetation for new and major development. The sections that follow provide more detail on how to best implement these requirements. They also serve as helpful guidelines for single family home owners involved in landscaping and revegetation projects.
THE IMPORTANCE OF RIPARIAN VEGETATION
Riparian vegetation plays a vital role in maintaining stream stability, providing valuable wildlife habitat, and moderating downstream flooding. In addition, the presence and/or absence of riparian areas is directly correlated to water quality as the riparian vegetation serves to filter pollutants from stormwater, such as oil and grease from roadways, fertilizer runoff from lawns, and excess sediments from upstream. Due to the importance and relative lack of riparian vegetation in Santa Clara County, particularly in urban areas, one goal of any planning project is to avoid removal of any native riparian vegetation and to prevent the types of conditions that would threaten or degrade existing riparian habitat and/or contribute to soil loss critical to the continued health and regeneration of riparian trees. To this end, all development activities need to be
VALUE OF ESTABLISHING RIPARIAN BUFFERS
The amount and condition of the riparian habitat has been significantly reduced in Santa Clara County over time, primarily due to channel encroachment and modification. This has led to incised channels, as well as a lowering of the water table, loss of riparian vegetation, decline in water quality and most beneficial uses, as well as increased risk of erosion, bank failure and flooding. To stop and reverse this trend, an additional buffer area should be established between the edge of the existing riparian zone and any development, where feasible. This buffer should be planted with native vegetation in order to better protect the riparian corridor and the watercourse. The goal is to eventually establish and increase the riparian buffer area all along the riparian corridor. The value of riparian buffers areas has been well documented, in addition to reducing flash runoff and improving water quality, they provide supplemental foraging resources and corridors for wildlife to access the streams and even increase streamside property values.
This Design Guide describes standard criteria for determining how far from existing riparian habitat to locate construction and development activities in order to help ensure its protection. The Design Guides that follow provide more detail on the types of plants to use in landscaping and revegetation of areas, in or adjacent, to riparian areas. For more information on design of trails in specific, see Design Guide number 15.
CALCULATING RECOMMENDED TREE PROTECTION ZONES
Calculation of the recommended distance between an existing riparian tree and closest construction, staff need to consider at least three variables:
1. The maturity of the tree 2. The trunk diameter
3. The sensitivity (or tolerance) of that particular species to nearby activities To calculate recommended minimum distance for each species, please use the species-specific formula shown on page 74 of ‘Trees and Development, A Technical Guide to Preservation of Trees During Land Development’ by Matheny and Clark. This book published in 1998 by the International Society of Arboriculture (http://www.isa-arbor.com/publications/publications.aspx) integrates the three criteria into an optimal offset distance for development or trail construction, or the “Tree Protection Zone”, (Chart to be inserted pending copyright permission.)
If excavation occurs inside the identified “Tree Protection Zone”, roots will be severed, the tree’s health will decline, the incidence of insect and diseases will increase and people may be endangered by eventual failure of the destabilized tree. Where there are other site constraints, anticipated encroachment within the recommended tree protection zone, an arborist should be consulted to determine the appropriate protection measures or alternative setbacks.
EXAMPLE TREE PROTECTION ZONES
Western Cottonwood (Populus fremontii): Poor Tolerance
The Western Cottonwood has a poor tolerance to root disturbance. The tree protection zone for an overmature tree is 1.5’ per inch of tree diameter or a 45 foot radius for a 30 inch diameter tree. Other trees with a poor tolerance include the black cottonwood and bigleaf maple.
Western Sycamore (Platanus racemosa): Moderate Tolerance
A Western Sycamore has a moderate sensitivity to impacts around its roots. The tree protection zone for an overmature tree measured from its trunk is 1.25 feet per inch of trunk diameter. A 30” diameter mature Western Sycamore needs a tree protection zone with a 37.5’ radius. Other species with a moderate tolerance include the valley oak, California bay and willows.
Coast Live Oak (Quercus agrifolia): Good Tolerance
The Coast Live Oak has a good tolerance to disturbance. The species is sensitive to the addition of fill around its trunk and does not tolerate frequent summer watering. The tree protection zone for a mature tree is one foot per inch of trunk diameter. A 30 inch diameter tree needs a protection zone with a 30 foot radius. Other trees with a good tolerance include alders, box elders, and California buckeye.
USE OF LOCAL NATIVE SPECIES
INTRODUCTIONThe use of locally native plants for all landscaping and revegetation projects adjacent to streams and riparian areas is required for new and major redevelopment. It should also be the preferred choice for homeowners involved in any landscaping and revegetation projects within the riparian corridor since native plants are ecologically best suited to a particular creek environment and will provide the most habitat and slope protection with the least amount of maintenance over time.
HOW TO FIND AND SELECT NATIVES IN THE WATERSHED
When vegetating the creek, choose species growing nearby and make sure the plants used were propagated from seeds, cuttings or divisions collected from the same local creek or watershed. Try local home-grown native plants via direct installation of seeds, divisions and cuttings on the creek bank. Oaks, buckeye and bay trees are easy to grow from seed planted directly into moist creek bank soil. Cottonwood and willow are easy to grow from cuttings stuck directly into moist sandbars. California rose, California blackberry, snowberry, mugwort, beardless wildrye and others can be propagated readily from vegetative offsets and division.
GUIDELINES FOR PLANTING NATIVE SPECIES
• Geared toward establishing or enhancing the native habitat. • Ensure that the initial planting
density is high, averaging 6 to 12 feet on center, to create canopy coverage and closure quickly. Include a range of species in the plant palette to fill in the understory, mid-story and overstory. • Avoid hardscape such as patios,
walkways and decks within these areas to minimize human impacts and maximize habitat value.
• Maintain and monitor plantings
for a 3 to 5 year period to ensure healthy establishment. Performance and success criteria include percentage of allowable mortality and goals for an annual percentage of vegetative cover. • Slowly eliminate the need for human
intervention, including irrigation, weed control, replanting, pruning, etc. The final goal is to discontinue maintenance activities when habitat is self sustainable.
TREES:
Big Leaf Maple Acer macrophyllum California Box Elder Acer negundo var.californicum California Buckeye Aesculus californica White Alder Alnus rhombifolia Western Sycamore Platanus racemosa Fremont Cottonwood Populus fremontii ssp. fremontii Black Cottonwood Poplus trichocarpa Coast Live Oak Quercus agrifolia Valley Oak Quercus lobata Narrow-leaved Willow Salix exigua Red Willow Salix laevigata Yellow Willow
Salix lucida ssp. lasiandra Arroyo Willow
Salix lasiolepis Blue Elderberry Sambucus mexicana California Bay Laurel Umbellularia californica SHRUBS AND VINES: California Sagebrush Artemisia californica Mule Fat Baccharis salicifolia Virgin’s Bower Clematis ligusticifolia Toyon Heteromeles arbutifolia Coffeeberry Rhamnus californica California Wild Grape Vitus californica Brown Dogwood Cornus glabrata California Rose Rosa californica California Blackberry Rubus ursinus Snowberry
Symphoricarpos albus var. laevigatus GROUND COVERS AND HERBACEOUS PERENNIALS: Mugwort Artemisia douglasiana Western Aster Aster chilensis Douglas’ Baccharis Baccharis douglasii Western Goldenrod Euthamia occidentalis Beardless Wildrye Leymus triticoides Sticky Monkey Flower Mimulus aurantiacus California Figwort Scrophularia californica
LIST OF NATIVE PLANT SPECIES
The following list is a conglomerate of riparian plant species that exist within the boundaries of Santa Clara County. The distribution of one plant may or may not overlap with the next one on the list. Some of them would never be seen together in the wild due to preferences for different
microclimates, soil substrates and hydrologic regimes. If you are unfamiliar with local native plant ecology, consult local experts for help selecting the best plant palette for your particular creek or follow Nature’s example and copy what you see in a wild area located close to your project site.
GUIDELINES AND STANDARDS 1.B & I.C
C a l i f o r n i a N a t i v e P l a n t S o c i e t y ’ s W e b s i t e :
USE OF ORNAMENTAL
OR NON-NATIVE LANDSCAPING
INTRODUCTIONIf the use of local native plants propagated from local stock does not fit your
landscaping goals, choose:
• Non invasive drought-tolerant, non native ornamental plantshaving no potential to cross pollinate native riparian species. For example, if native valley and coast live oaks, willows, sycamores or cottonwoods exist in the riparian corridor, don’t plant ornamental oaks, willows, sycamores or poplars. • Non invasive, drought tolerant,
non-local California natives(aka ornamental natives), with no potential to cross-pollinate local native species; for example- Fremontodendron or Romneya.
When selecting plants and choosing their location in an ornamental landscape, the project design goals are generally geared to human aesthetics. In choosing ornamental landscaping, hardscape features, such as patios, decks, and walkways, are design components. These features should be avoided within the riparian habitat area at all locations.
PLANT SELECTION GUIDE
The choices of plants that meet the criteria described above for ornamental landscaping is vast. Selection of a plant species for a particular site will depend on goals of the landscape plan, site constraints, the owner’s desires and budget. There are a variety of resources available from which selections can be made. Cities generally have plant lists available that were assembled for water conservation purposes. The East Bay Municipal Utility District has prepared a book, entitled “Plants and Landscapes for Summer Dry Climates” and the Sunset Western Garden Book, commonly available at most nurseries, has plant selections identified that are suitable for dry places. Select plants from these sources as long as you avoid invasive plants and take the caution provided above for selecting native species that have not been propagated from your local watershed.
REFERENCES
The California Native Plant Society’s ‘Guidelines for Protecting Native Plants from Genetic Degradation’ is a helpful reference on the subject.
GUIDELINES AND STANDARDS 1.C.2
NON – LOCAL CALIFORNIA NATIVE PLANTS
The following California native plants have a very low potential of hybridizing with our Santa Clara County natives since they do not naturally occur in northern California
TREES
Chilopsis linearis, (Desert Willow), Lyonothamnus floribundus, (Catalina Ironwood), Prosopis glandulosa var. torreyana, (Mesquite) SHRUBS Fremontodendron californicum or Fremontodendron mexicanum, (Flannel Bush), Galvesia speciosa, (Island Bush Snapdragon) Rhus integrifolia, (Lemonade Berry), Rhus ovata, (Sugar Bush), Romneya coulteri, (Matilija Poppy), Simmondsia chinensis, (Jojoba)
Acacia Acacia spp. Almond Prunus dulcis Ash, evergreen Fraxinus uhdei
Bamboo, running types Arundinaria, chimonobambusa, phyllostachys, etc. Black locust Robinia pseudoacacia Broom, french Genista monspessulana, previously cytisus monspessulanus Broom, scotch Cytisus scoparius Broom, spanish Spartium junceum Cape weed Arctotheca calendula Cotoneaster Cotoneaster spp. Elm Ulmus spp. Eucalyptus Eucalyptus spp. Fig Ficus carica
Flowering plum, fruitful varieties Prunus spp.
Fountain grass
Pennisetum setaceum); purple variety “cupreum” is sterile and acceptable Foxglove Digitalis purpurea Giant reed Arundo donax Glossy privet Ligustrum lucidum Gorse Ulex europaea Himalayan blackberry Rubus discolor Holly oak Quercus ilex Iceplants
Carpobrotus edulis, c. Chilensis, mesembryanthemum spp. Ivy, algerian
Hedera canariensis Ivy, cape Delairea odorata,
previously senecio mikanioides Ivy, english Hedera helix Kikuyu grass Pennisetum clandestinum Lemon balm Melissa officinalis Lombardy poplar Populus nigra ‘italica’ London plane tree Platanus acerifolia
Mint, any kind including pennyroyal, peppermint, spearmint Mentha spp. Monterey pine Pinus radiata Myoporum Myoporum laetum Olive Olea europaea Pampas grass, jubata grass
Cortaderia selloana, C. Jubata Pepper trees Schinus spp. Periwinkle Vinca major Pyracantha Pyracantha spp. Tamarisk, salt cedar Tamarix spp.
Tree of heaven Ailanthus altissima
Walnut, english or black Juglans regia, juglans californica var. Hindsii
C O M M O N L Y F O U N D I N V A S I V E S P E C I E S T O B E A V O I D E D
GUIDELINES AND STANDARDS 1.C.2
C a l i f o r n i a I n v a s i v e P l a n t C o u n c i l W e b s i t e :
w w w . c a l - i p c . o r g
Find it at: http://www.cnps.org/archives/archives.htm
Scroll down to:
1) Policies and Guidelines 2) Conservation Policies
3) Guidelines for Landscaping to Protect Native Vegetation from Genetic Degradation.
RIPARIAN REVEGETATION
OR MITIGATION PROJECTS
INTRODUCTION
This Design Guide is most applicable for larger scale revegetation or mitigation projects but also provides helpful information for anyone planning a revegetation project. Because of the complexity of revegetation design and the variety of ecosystems that exist within the county, it is nearly impossible to create succinct detailed Design Guidelines. Instead, a list of general, broad brush design planning guidelines is included below for riparian revegetation projects in Santa Clara County. Each individual project should be mentored through all stages of project planning and design by experienced biological staff on a case by case basis.
WATERSHED FIDELITY
• To preserve genetic integrity in county watersheds, propagation material (seeds, cuttings, divisions) must originate from local native stock, i.e. individuals found as close as possible to the project site and within the same watershed.
• If propagation material cannot be obtained from within the watershed, material may be collected from an immediately adjacent watershed that shares common ecological characteristics (climate, elevation, soil type, headwaters in the same mountain range, etc.). • An ecological justification is required
before any species may be planted using container stock grown from propagules that originate outside Santa Clara County.
SEED AND CONTAINER PLANTS
• Direct seeding should be used when possible. Quercus sp. and Aesculus californica have high success rates when installed in this manner.
• Direct stuck cuttings of willows,
cottonwoods and mule fat is encouraged. • Containerized native plants for
revegetation or landscape plantings should be grown and installed in the smaller, deeper container sizes typically offered by revegetation nurseries rather than commercial nurseries to ensure they are healthy. For that reason, quality native plants will normally be smaller and younger than conventional nursery container stock, usually 1-gallon equivalent or smaller size. Contract nursery production takes one-year minimum lead time before installation. Designers should take these factors into account when commitments are made to project stakeholders.
DESIGN GUIDE 4
SPECIES SELECTION
• Select plant species that are historically and ecologically appropriate to the project area unless site conditions have been radically modified. The plant palette should be well-suited to these conditions and blend with the existing native vegetation types.
• Non-local, showy, native “landscape” species should not be intermingled with native revegetation species on projects where habitat restoration is the goal.
• Do not plant invasive, non-native species near streams.
DESIGN CRITERIA
• Revegetation design should be predicated upon thorough analysis of groundwater and surface water hydrology, soil profiles, and other physical information obtained from direct site investigations. Existing site conditions should be preserved and modification into an artificially sustained condition should be discouraged.
• Revegetation projects should be designed to quickly attain sustainability rather than to require long-term human intervention. • Irrigation, weed and pest control, soil
manipulation, etc., should become unnecessary within one to three years. • Land use on adjacent sites that could
disrupt or damage the project goals should be factored into design decisions for revegetation projects.
• Experienced biological staff should be active participants during the entire design process for revegetation, native landscape, mixed (native & non-native) landscape, erosion control, etc. plans and specifications.
GUIDELINES AND STANDARDS 1.C
C a l i f o r n i a N a t i v e P l a n t S o c i e t y W e b s i t e :
TEMPORARY EROSION CONTROL OPTIONS
INTRODUCTIONThis design guide provides more detail on G&S I.C.3 and GS IV.B.7 by explaining what steps can be taken during post construction to provide erosion control in short order on stream banks through temporary vegetative measures. These measures are typically employed:
• when the grading and/or construction is being done in phases,
• when it does not make sense to plant more permanent vegetation or
• if grading and/or construction has not been completed by the rainy season. These temporary techniques are also sometimes used in conjunction with final more permanent revegetation. The following guidelines can be used to determine if and how erosion control seed mixes should be used.
S E E D M I X E S TO B E AVO I D E D
Some commercially available seed mixes contain species, which are invasive weeds, aggressive competitors with native plants and/or future fire hazards. These seed mixes should be excluded from streamside areas.Examples are Blando brome, rose or red clover and annual rye.
EROSION CONTROL OPTIONS FOR WORK SITES WITH
EXISTING NATIVE PLANTS
These erosion control options should be followed in most areas along natural creeks, where native trees, shrubs and herbs
reside on or near the work site. A site visit or referral of a good series of photos to a landscape professional familiar with native plants or a revegetation specialist may be needed to determine the best approach.
If no irrigation is available, if the slope is very steep, or if it’s late in the season
• Use a non-biological method, such as straw, straw with tackifier, erosion control blankets (jute netting with straw or coir filling), etc. instead of seeding.
Benefits:
• The blankets are functional immediately after installation.
• The adjacent native plants will fill in at their own pace.
Use if there is absolutely no time to investigate site conditions.
• Use a Failsafe mix with 50 lb/ac ‘Regreen’ sterile wheat (Triticum X Elymus ‘Regreen’), with 95% minimum purity, and minimum germination of 85%.
Benefits:
• This plant mix makes few if any seeds, so it cannot become a weed, and it usually lives only one year.
EROSION CONTROL OPTIONS FOR WORK SITES WITHOUT EXISTING NATIVE PLANTS
These erosion control options should be followed in areas where there is no remaining native vegetation for miles around. An example of such a site is the back slope of a levee in an urbanized area.
For Sunny Slopes 3:1 or Flatter
• California Native Grass
Use a mix of:
Prostrate Hordeum californicum (Prostrate California Barley) @ 16 lb/ ac, minimum purity 90%, minimum germination 80%.
Elymus glaucus ‘Berkeley’ (‘Berkeley’ Blue Wildrye) @12 lb/ac, minimum purity 95%, minimum germination 85% Bromus carinatus ‘S.F. Bay Area’(‘S. F. Bay Area’California Brome) @ 10 lb/ac, minimum purity 95%, minimum germination 85%
• Failsafe mix
50 lb/ac ‘Regreen’ sterile wheat (Triticum X Elymus ‘Regreen’), minimum purity 95%, minimum germination 85%
• Non-biological method as outlined above
For Slopes 2:1 or Steeper
• California Native Grasses PLUS Mix
Use the mix for Slopes 3:1 or Flatter PLUS Vulpia microstachys (Three Weeks Fescue) @ 5 lb/ac, minimum purity 95%, minimum germination 70%
• Failsafe mix
50 lb/ac ‘Regreen’ sterile wheat (Triticum X Elymus ‘Regreen’), minimum purity 95%, minimum germination 85%. • Non-biological methodas outlined
above
PLACEMENT OF FILL AND
PLANTING OF TREES BY LEVEES
Plants with large root systems (trees and large shrubs) should not be placed on existing levees.
Trees may planted on a levee if additional fill is placed on the levee.
Depth Toe of Bank 2 1 15 Feet 30 Feet (2xDepth)
2:1 Slope Stability Protection Area Top of Bank
2 1
2:1 Slope Stability Protection Area
2 1
2:1 Slope Stability Protection Area Pool
SLOPE STABILITY PROTECTION AREA
Note: While accessory structures are typically exempt, it is still recommended to locate them outside the 2:1 Slope Stability Protection Area in order to protect the structures, creek bank, and habitat.
BACKGROUND
Freeboard is the additional capacity in a stream above the calculated capacity required for the 1 percent flow. Freeboard provides a safety factor for such things as normal wave action, inaccuracies in determination of friction factors, and minor silt and debris deposits. The freeboard guidelines should also be followed when streams are modified as part of major land development proposals. The Federal Emergency
Management Agency (FEMA) has set guidelines for the determination of freeboard. In order for an area to be removed from a flood zone designated by FEMA following completion of a flood control project, the project must meet the FEMA guidelines. These freeboard guidelines are followed by the SCVWD in the design of flood protection projects and should be followed for the design of bridges and other street crossings.
A. Where the design water surface1 is above natural ground, the following criteria shall be considered a minimum:
1. Federal Emergency Management Agency (FEMA) guidelines. FEMA currently specifies that levees shall have a minimum of 3 feet of freeboard with an additional foot of freeboard required 100 feet on either side of structures that are within the leveed section of creek or where the flow is constricted such as at bridges. FEMA also requires an additional ½ foot above the minimum at the upstream end of the levee, tapering to not less than the minimum
GUIDELINES FOR ESTABLISHING FREEBOARD
FOR BRIDGE CROSSINGS AND FLOOD
PROTECTION PROJECTS
2. For floodwalls, use the same freeboard criteria as for levees. (Basis—SCVWD guideline)
3. If two-tenths of the total energy (depth of flow + [v2/2g]) is greater than the freeboard requirement of A-1 or A-2 above, then the computed value shall be used for freeboard. (Basis—Natural Resource Conservation Service [NRCS] guideline)
B. Where the design water surface is below natural ground, the following criteria shall be considered a minimum:
1. One foot of freeboard shall be used for constructed, nonnatural channels where large amounts of vegetation are not anticipated in the channel. (Basis— Corps of Engineers guideline)
2. For all channels, if two-tenths of the total energy is greater than the freeboard requirement of B-1 above, then the computed value shall be used for freeboard. (Basis—NRCS guideline)
C. For bridges, the following criteria shall be considered minimum:
1. At new bridges, freeboard shall be the same as in the existing or proposed channel either upstream or downstream, whichever is greater. When the bridge structure encroaches into the freeboard area, there shall not be an increase in water surface for bank full flow. The intent is to define
a system (bridge and channel) with a uniform level of protection. (Basis—
INTRODUCTION
The details in this Design Guide are intended to provide clarification to G&S V.A, which calls for all grading next to streams to address drainage and avoid the concentration of flow over the stream bank. For all major redevelopment and new development, grading should be addressed in stormwater permit provisions. The applicants will have to observe urban runoff pollution prevention regulations during grading operations. In addition, the following grading guidelines would also be useful to single family homeowners interested in minimizing erosion and saturation of the streambank and maintaining slope stability and riparian habitat.
ADDITIONAL INFORMATION REQUIRED
In addition to the urban runoff pollution prevention regulations, permit applicants should also be asked to provide the following information:
• Existing trees that are to remain and those proposed to be removed • The species of tree and its diameter
at 4 feet from the ground
• Source of fill and hazmat certification
This will help in assess if the proposed grading method is the most appropriate for the site so as to avoid other impacts.
OPTIONS FOR GRADING
This Design Guide provides 5 options of how to design grading. Any other proposal which satisfactorily meets the goals of preventing over-bank drainage and the placement of fill along the riparian protection area by future lot owners may be considered. The selection of a particular option will be influenced by a site’s finished grades needed to provide for streets, building pads and positive drainage to the storm sewer system.
Option #1 is the preferred option because it avoids disturbance to the riparian corridor and does not direct drainage over bank.
In other cases, applicants might need to use one of the Options 2- 5, because of the need to raise the site elevation. Option 2 avoids disturbance to the riparian corridor and minimizes the drainage directed over bank. Options 3 and 4 are similar but more costly. Option 5 would only be suitable if there is no riparian vegetation and it conforms to adjacent property upstream and downstream. Fill placed within the riparian area should be suitable for planting.
GRADING OPTIONS NEXT TO STREAMS
DESIGN GUIDE 9
GUIDELINES AND STANDARDS V.A GUIDELINES AND STANDARDS
2. Where an existing bridge or culvert can convey the design flow under pressure, it must be structurally sound and must be able to resist the resultant lateral and uplift forces.
(Basis—SCVWD guideline)
D. Other Considerations:
1. Evaluate all bridges with debris loads on the piers. (suggest Corps practice of three times pier diameter as blockage) 2. Freeboard should also contain the flow
defined by the 80 percent confidence
limit statistical parameter where practical to do so.
3. All channels with super-critical flow will use sequent depth plus freeboard. 4. All channels will include freeboard
for super-elevation of water surface at curves in addition to requirements specified in Sections A, B, and C above. 5. In areas of the County where there is
the possibility of continued land surface subsidence, additional freeboard allowances should be considered.
G R A D I N G O P T I O N S N E X T T O S T R E A M S
G R A D I N G O P T I O N S N E X T T O S T R E A M S
Option 5 is not the preferred option because placement of fill in riparian areas can damage stream side resources. If fill must be used in riparian areas, the type of fill used must support riparian vegetation and the area should be revegetated.
GRADING AND DRAINAGE
Use of Vegetated Swales or Buffer Strips
INTRODUCTION
The Guidelines and Standards Section V on Grading and Section VI on Outfalls and Site Drainage refer to the use of vegetated swales or buffer strips. A vegetated swale (a.k.a. grassed channel, dry swale, wet swale or biofilter) is a broad, shallow channel with a dense stand of vegetation designed to trap particulate pollutants (suspended solids and trace metals). Vegetated swales are fairly straight forward to design and can be easily incorporated into a project’s site drainage plan. For all major redevelopment and new development, vegetated swales may be included in the stormwater permit; however, they are also a good practice for single family homeowners to consider incorporating in landscaping and design plans.
The benefits of using vegetated swales or buffer strips next to streams are that they: 1. Improve the quality of stormwater runoff
and reduce or slow the velocity of runoff from hardened or paved areas
2. Allow for infiltration
3. Provide an opportunity for sediment and pollutants to be filtered and removed from the runoff.
The swales can be located within landscaped or turf areas and can collect runoff from patios, driveways, roof drains, parking lots. Discharge from the swale should be to a storm drain system, which will ultimately discharge to a stream.
DESIGN ELEMENTS
• Gentle side slopes: 3 horizontal to 1 vertical slope maximum
• Minimal longitudinal slope: 1% to 2% recommended. If greater, install check dams to reduce velocity. Do not use swales on slopes greater than 6% • Flowpath length: Minimum of 10 feet • Bottom width: 2 to 8 feet. Consider
access with mowing equipment if turf grasses are used.
RECOMMENDED TYPES OF VEGETATION TO USE
There is a variety of vegetation, including trees, shrubs, groundcover and grasses that are suitable for periodic inundation. One goal is to select plants that will thrive at the site. Near streams, native plants and wetland vegetation are preferred to turf grasses as swale liners because they offer higher resistance to flow and provide a better environment for filtering and trapping pollutants from stormwater. However, turf grass, allowed to remain slightly high, can provide some benefits as well.
MAINTENANCE
Turf maintenance consists of mowing and removal of grass clippings. Swales should be cleaned of any sediment accumulation and monitored for erosion with subsequent reseeding or replanting as necessary.
Fertilizers should be applied before the rainy season to minimize conveyance of pollutants to the stream.
PLANT SPECIES FOR VEGETATED BUFFERS AND SWALES
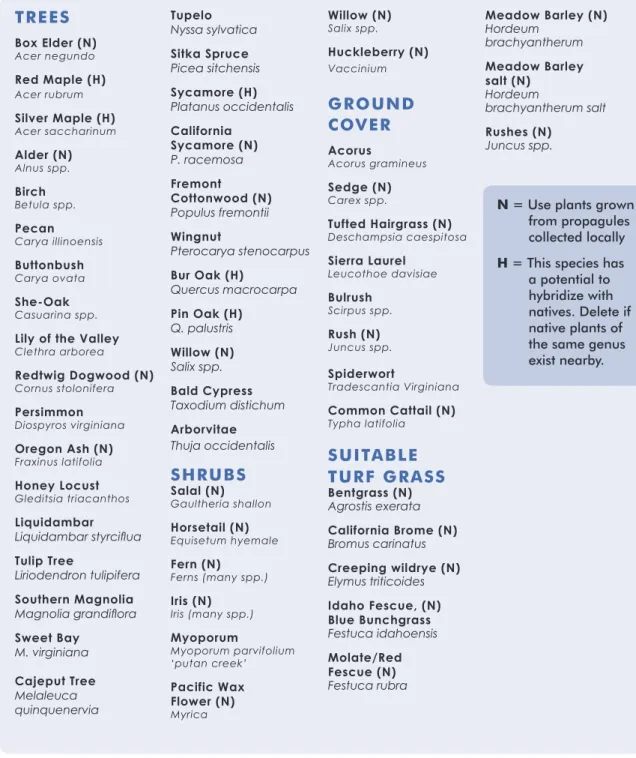
The following trees and shrubs tolerate wet soil and periodic inundation, and may be suitable for planting in basins and biofilters depending on regional hardiness and other factors. This list is not all-inclusive, and draws from both native and exotic species.
TREES Box Elder (N) Acer negundo Red Maple (H) Acer rubrum Silver Maple (H) Acer saccharinum Alder (N) Alnus spp. Birch Betula spp. Pecan Carya illinoensis Buttonbush Carya ovata She-Oak Casuarina spp. Lily of the Valley Clethra arborea Redtwig Dogwood (N) Cornus stolonifera Persimmon Diospyros virginiana Oregon Ash (N) Fraxinus latifolia Honey Locust Gleditsia triacanthos Liquidambar Liquidambar styrciflua Tulip Tree Liriodendron tulipifera Southern Magnolia Magnolia grandiflora Sweet Bay M. virginiana Cajeput Tree Melaleuca quinquenervia Tupelo Nyssa sylvatica Sitka Spruce Picea sitchensis Sycamore (H) Platanus occidentalis California Sycamore (N) P. racemosa Fremont Cottonwood (N) Populus fremontii Wingnut Pterocarya stenocarpus Bur Oak (H) Quercus macrocarpa Pin Oak (H) Q. palustris Willow (N) Salix spp. Bald Cypress Taxodium distichum Arborvitae Thuja occidentalis SHRUBS Salal (N) Gaultheria shallon Horsetail (N) Equisetum hyemale Fern (N) Ferns (many spp.) Iris (N) Iris (many spp.) Myoporum Myoporum parvifolium ‘putan creek’ Pacific Wax Flower (N) Myrica Willow (N) Salix spp. Huckleberry (N) Vaccinium GROUND COVER Acorus Acorus gramineus Sedge (N) Carex spp. Tufted Hairgrass (N) Deschampsia caespitosa Sierra Laurel Leucothoe davisiae Bulrush Scirpus spp. Rush (N) Juncus spp. Spiderwort Tradescantia Virginiana Common Cattail (N) Typha latifolia SUITABLE TURF GRASS Bentgrass (N) Agrostis exerata California Brome (N) Bromus carinatus Creeping wildrye (N) Elymus triticoides Idaho Fescue, (N) Blue Bunchgrass Festuca idahoensis Molate/Red Fescue (N) Festuca rubra Meadow Barley (N) Hordeum brachyantherum Meadow Barley salt (N) Hordeum brachyantherum salt Rushes (N) Juncus spp.
GUIDELINES AND STANDARDS V.B.2
Table excerpted from BASMAA’s Start at the Source Guide (2003) and adapted from Harris (1992), Sunset Western Garden Book (1998) and ABAG (1995b).
“Start at the Source” is available at http://www.scvurppp-w2k.com/basmaa_satsm.htm. Other design guidance for pollution prevention is available at www.scvurppp.org
N = Use plants grown from propagules collected locally
H = This species has a potential to hybridize with natives. Delete if native plants of the same genus exist nearby.
INTRODUCTION
This specification for structural fill is to be used where fill is placed on a levee in conjunction with projects that construct levees, raise levee heights or include cuts into levees for placement of outfalls or utilities.
FILL MATERIAL
Fill material for trench backfill of levees and for levee embankment may be either imported backfill material or suitable material from trench excavation blended with imported earthfill material. The fill material is to be free of debris, organic or deleterious material and not contain rocks or lumps over 4 inches in greatest dimension; no more than 15% of the rocks or lumps should be larger than 2 ½ “. The fill material shall contain at least 75% finer than the #4 U.S. Standard Sieve and 50% finer than the #200 Sieve. The liquid limit shall be less than 40 and the plasticity index shall be between 10 and 20. Levee fill material should be relatively impervious (permeability less than 10 to the minus 6cm/ sec).
SPECIFICATIONS FOR PLACEMENT OF
STRUCTURAL FILL ON SCVWD LEVEES
ADDITIONAL GUIDELINES
Surfaces exposed by stripping or excavation shall be scarified to a minimum depth of 6 inches and compacted to a relative compaction of not less than 95% based on (American Society of Testing Materials) ASTM D 1557 standard. The loose thickness of each layer of embankment material before compaction shall not exceed 8 inches, and each lift shall be compacted to at least 90% relative compaction based on ASTM D1557 standard. The field density and moisture content of compacted fill will be determined according to ASTM D 1556, D2922
and D3017 standard procedures. Any backfilled area not meeting the minimum test requirements shall be removed and recompacted until tests meet the minimum requirements. Jetting or ponding is not permitted
No thin, sliver fills will be accepted. Where compacted channel embankment is required or where replacement in over excavated areas must be accomplished, the new embankment must be placed in thin, maximum 8 inch thick horizontal layers with a minimum width of 6 feet. This specified width may be any combination of new fill plus cut into existing slope, except that a minimum cut of 2 feet into existing slope per layer of fill must be made. Slopes shall be trimmed to conform to existing section after placement of fill has been completed.
OUTFALL STANDARDS
I N T R O D U C T I O N
The details in this Design Guide are intended to provide clarification to G&S IV.B.1-3, which calls for slope protection for outfalls to be designed to meet SCVWD minimum engineering standards using softer slope protection methods wherever possible. This Design Guide also includes a plan view to show how the outfall would intersect with a natural channel so as to not impede surface flows or create a barrier to fish passage. The diagrams depicted are models and should be used by the local permitting agency staff unless otherwise determined by agreement between the agency and SCVWD or unless stream conditions dictate otherwise. For placement of outfalls into streams with levees, floodwalls or structural linings, however, SCVWD will need to be consulted as they typically have ownership or easements on these areas of the stream.
G E N E R A L G U I D E L I N E S
1. Outfalls should not overhang the streambank or streambed as this can lead to excessive channel erosion. 2. Outfalls, bridge abutments and other
structures should be placed within the first half of the straight section after the bend (page 4.24) in order to minimize erosion, prevent turbulence and prevent redirection of flow.
3. Outfalls should be aligned downstream in the direction of the flow, at an angle no greater than 30 degrees. In natural streams where possible, a narrow channel should be created for the outfall so that the discharge merges into the streams in order to minimize erosion, prevent turbulence and prevent redirection of flow.
4. Any outfall pipe should be cut off flush with the face of slope protection.
5. Outfalls with flap gates require dormers or similar designs to isolate the flap gate and keep them out of flow area. (See Detail #18/1 and 28/1).
TYPICAL MATERIALS TO USE
Where the pipe must be cut flush with the side slope (typically in engineering channels and on steep slopes where hard slope protection measures are needed, use corrugated metal or appropriate plastic pipes for outfalls. For outfalls, with rock slope protection, or where pipe is constructed into a concrete headwall, reinforced concrete pipe may be used.
TYPES OF OUTFALLS AND WHEN TO USE THEM
The selection of an outfall is dependent on the condition of the stream bank into which the outfall is directed. Below is a table that
Type of Outfall Detail Number When to Use Benefits/Limitations
Outfalls with rock
slope protection 6-1, 6-2, 6-3
For unlined streams where slopes are flatter than 1.5:1 and where an incision into the bank is not possible.
Preferred option because vegetation can be re-established and rocks are more resilient to movement and stream degradation.
Outfall with a
drainage swale 27-1
For natural streams where a bank incision can be made
Reduced potential for erosion from outfall but an incorrect placement in channel can increase turbulence and erosion
Outfall into RCB Wall with one or two steel curtains
1-1,1-2,1-3 2-1, 2-2
If the stream is contained in a Reinforced Concrete Box. The detail used will depend on the steel rebar configuration in the box
Reduced need for
additional bank protection. Size of pipe is limited: larger pipes can impact hydraulics.
Pipe to Pipe
Outfall 3-1
If the stream is contained in a reinforced Concrete or corrugated metal pipe
Outfall pipe is limited to ¼ the size of the stream pipe
Pipe Outfall into
Channel Lining 4-1, 4-2
If the stream is contained in a concrete lined channel
describes when certain outfalls would be most appropriate.
In addition to these measures, SCVWD has also developed model details for outfalls into mattress and stepped gabions, an emergency overflow into a stream, and an outfall into a deep ravine. These will be available on the District’s web site. Other soft methods of slope protection that incorporate vegetation are shown in the Bank Protection section. An outfall may also be incorporated into a vegetated bank design provided there is sufficient slope protection to prevent bank erosion.
Straight
Section
Be
nd
Flow
Be
nd
Straight
Section
Outfall at 30 angle to
direction of flo
w
Outfall
O U T F A L L S T A N D A R D S
Outfalls, bridge abutments and other structures should be placed within the first half of the straight section after the bend.
Outfalls should be aligned downstream in the direction of the flow, at an angleof less than 30 degrees.
D E S I G N G U I D E 1 2
GUIDELINES AND STANDARDS VI.B.3 GUIDELINES AND STANDARDS VI.B.3
O U T F A L L W I T H R O C K S L O P E P R O T E C T I O N
Straight
Section
Be
nd
Flow
Be
nd
Straight
Section
Outfall at 30 angle to
direction of flo
w
Outfall
D E S I G N G U I D E 1 2
GUIDELINES AND STANDARDS VI.B.3 GUIDELINES AND STANDARDS VI.B.3
O U T F A L L W I T H R O C K S L O P E P R O T E C T I O N
D E S I G N G U I D E 1 2
GUIDELINES AND STANDARDS VI.B.3 GUIDELINES AND STANDARDS VI.B.3
O U T F A L L W I T H R O C K S L O P E P R O T E C T I O N
D E S I G N G U I D E 1 2
GUIDELINES AND STANDARDS VI.B.3 GUIDELINES AND STANDARDS VI.B.3
N O T E S F O R C O N S T R U C T I O N O F O U T F A L L
C R I T E R I A T O B E U S E D F O R D E S I G N O F O U T F A L L
D E S I G N G U I D E 1 2
GUIDELINES AND STANDARDS VI.B.3 GUIDELINES AND STANDARDS VI.B.3
O U T F A L L W I T H D R A I N A G E S WA L E
D E S I G N G U I D E 1 2
GUIDELINES AND STANDARDS VI.B.3 GUIDELINES AND STANDARDS VI.B.3
T Y P I C A L O U T F A L L I N T O R E I N F O R C E D
C O N C R E T E B O X WA L L
with two steel curtains
D E S I G N G U I D E 1 2
GUIDELINES AND STANDARDS VI.B.3 GUIDELINES AND STANDARDS VI.B.3
T Y P I C A L O U T F A L L I N T O R E I N F O R C E D
C O N C R E T E B O X WA L L
with two steel curtains
D E S I G N G U I D E 1 2
GUIDELINES AND STANDARDS VI.B.3 GUIDELINES AND STANDARDS VI.B.3
T Y P I C A L O U T F A L L I N T O R E I N F O R C E D
C O N C R E T E B O X WA L L
with two steel curtains
D E S I G N G U I D E 1 2
GUIDELINES AND STANDARDS VI.B.3 GUIDELINES AND STANDARDS VI.B.3
T Y P I C A L O U T F A L L I N T O R E I N F O R C E D
C O N C R E T E B O X WA L L
with one steel curtains
D E S I G N G U I D E 1 2
GUIDELINES AND STANDARDS VI.B.3 GUIDELINES AND STANDARDS VI.B.3
T Y P I C A L O U T F A L L I N T O R E I N F O R C E D
C O N C R E T E B O X WA L L
with one steel curtain
D E S I G N G U I D E 1 2
GUIDELINES AND STANDARDS VI.B.3 GUIDELINES AND STANDARDS VI.B.3
P I P E T O P I P E O U T F A L L S
The size of the pipe is limited to 1/4 the diameter of the receiving pipe.
D E S I G N G U I D E 1 2
GUIDELINES AND STANDARDS VI.B.3 GUIDELINES AND STANDARDS VI.B.3
P I P E O U T F A L L I N T O C H A N N E L L I N I N G
D E S I G N G U I D E 1 2
GUIDELINES AND STANDARDS VI.B.3 GUIDELINES AND STANDARDS VI.B.3
P I P E O U T F A L L W I T H S A C K E D
C O N C R E T E R I P R A P
D E S I G N G U I D E 1 2
GUIDELINES AND STANDARDS VI.B.3 GUIDELINES AND STANDARDS VI.B.3
P I P E O U T F A L L W I T H S A C K E D
C O N C R E T E R I P R A P
D E S I G N G U I D E 1 2
GUIDELINES AND STANDARDS VI.B.3 GUIDELINES AND STANDARDS VI.B.3
P I P E O U T F A L L W I T H S A C K E D
C O N C R E T E R I P R A P
D E S I G N G U I D E 1 2
GUIDELINES AND STANDARDS VI.B.3 GUIDELINES AND STANDARDS VI.B.3
P I P E O U T F A L L W I T H S A C K E D
C O N C R E T E R I P R A P
D E S I G N G U I D E 1 2
GUIDELINES AND STANDARDS VI.B.3 GUIDELINES AND STANDARDS VI.B.3
P I P E O U T F A L L W I T H S A C K E D
C O N C R E T E R I P R A P
D E S I G N G U I D E 1 2
GUIDELINES AND STANDARDS VI.B.3 GUIDELINES AND STANDARDS VI.B.3
P I P E O U T F A L L W I T H
S A C K E D C O N C R E T E R I P R A P
D E S I G N G U I D E 1 2
GUIDELINES AND STANDARDS VI.B.3 GUIDELINES AND STANDARDS VI.B.3
F L A P G A T E S T R U C T U R E
Flap gates are needed on outfalls where the adjacent ground is below the high water level (usually 100 year water surface elevation). The flap gates will prevent the back flow of water from the stream on to the adjacent land. Where adjacent land at the stormdrain pipe inlet is higher in elevation than the high water level, a flap gate is not needed. Two options for the placement of a flap gate are shown.
D E S I G N G U I D E 1 2
GUIDELINES AND STANDARDS VI.B.3 GUIDELINES AND STANDARDS VI.B.3
GUIDELINES AND STANDARDS VI.B.5
S C V W D WA T E R P I P E L I N E C R O S S I N G
GUIDELINES AND STANDARDS VIII.B.6
The following pipeline crossing design guides are for water, sewer and other utilities that may cross SCVWD raw (untreated) or treated water pipelines. These are generally large diameter high pressure water mains that supply drinking water to Santa Clara County residents. There may be variations to this guideline if pipeline is located under city/county streets.
S C V W D WA T E R P I P E L I N E C R O S S I N G
S C V W D WA T E R P I P E L I N E C R O S S I N G
P I P E L I N E PA R A L L E L T O S C V W D WA T E R P I P E L I N E
Place utilities on the downstream face of bridge and culvert crossings. Downstream face is preferred so as to not be damaged during debris removal activities. Exposed sanitary sewer, gas lines and treated water lines should be sleeved or otherwise protected to prevent breakage. Utilities may not be placed within the waterway, opening of the bridge or culvert. Utility crossings using direction bore or jack and bore methods are the preferred methods for under stream crossing.
U T I L I T Y C R O S S I N G U N D E R C R E E K S
U T I L I T Y C R O S S I N G U N D E R C R E E K S
This type of utility crossing under a creek is not preferred because of the damage it can cause to riparian areas, bank soil structure and impacts to water quality. Permits are needed from resource agencies. This option may be permissible only in rare cases for small, rural streams.
INTRODUCTION
The guidelines and details in this Design Guide are intended to provide clarification to G&S IX.A and IX.A.2, which discuss design and construction of trails next to streams and riparian areas. Most of the guidelines and details, which are specifically related to streams, grading and riparian resources, have been excerpted from the document, Uniform Interjurisdictional Trail Design, Use and Management Guidelines (UD) (April 15, 1999), which was prepared by the Santa Clara County Parks and Recreation Department.
GENERAL GUIDELINES FOR PROTECTION OF RIPARIAN HABITAT
While trails are often located near natural and streamside areas for recreation and enjoyment purposes, it is important that the construction, design and use of the trail not negatively impact the nearby stream and stream resources that users of the trail want to enjoy. A biological resource assessment will be required for trail routes along streams or creeks. While there is no standard setback, the general guideline is to locate the trail adjacent to - not within - the riparian corridor.
In designing the trail, the goal is to remove the minimum amount of
vegetation as necessary to accommodate the trail clearing width and to mitigat and restore riparian habitat. Consideration should be given to acquiring additional land rights, where feasible, to place the trail outside of the riparian corridor. In addition,
GUIDANCE FOR TRAIL DESIGN
For Trails next to Streams and Streamside Resources
known special status plants and animal habitats. In special status species areas, trail use may be limited as appropriate to ensure protection of these resources. (UD – 1.3.2.1)
• Revegetation or enhancement will be undertaken where any sensitive habitat or special status species habitat will be disturbed by construction. The design of an appropriate revegetation program shall fully compensate for the lost habitat and shall be designed by a qualified biologist. Riparian and wetland habitat will typically be mitigated at a 3:1 ratio for high quality habitat areas and at a lower ratio where lower habitat quality justifies a lower ratio. Locally native plants will be utilized in all mitigation work. (UD – 1.3.3.6)
• Any cut or fill slopes adjacent to the trail shall be immediately reseeded or replanted. Vegetation will vary by location and surrounding landscape context.
FOR MORE INFORMATION
Refer to sections in this Design Guide for protection riparian vegetation and planting guidelines.
GENERAL GUIDELINES FOR SITING OF TRAILS NEXT TO STREAMS/STREAM CROSSINGS
The objective is to set trails back from the top of bank to avoid erosion over time and protect the existing riparian area.
• Use existing maintenance trails, access route and levees wherever possible to minimize impacts of new construction in
• Trails in areas of moderate or difficult terrain and adjacent to a riparian zone shall be composed of natural materials or shall be designed to minimize disturbance, and the need for drainage structures. (UD – 1.3.3.2) • Trail crossings of streams and drainages shall
be designed to minimize disturbance through the use of bridges or culverts, whichever is least environmentally damaging. Bridges and culverts should be designed so that they visually and functionally blend with the environment. (UD – 1.3.3.3)
• New native riparian vegetation should be planted in the setback zone, where practical, to complement existing vegetation
(UD – 1.3.3.4)
• Trails will avoid wetlands, including seasonal wetlands, wherever possible. Trails adjacent to wetlands will be constructed so that trail fills avoid wetland impacts. (UD – 1.3.3.5) • Locate trail alignment and crossings under
bridges above the 100 year or 1% flood water surface elevation.
• Trail alignment will be limited to one side of the stream to minimize impacts to habitat. • Trail use will generally be limited to the
hours between dawn and dusk to minimize impacts to wildlife.
• Lighting of trails should be avoided. Exceptions include security lighting in downtown commercial and entertainment areas where lighting should be minimized.
GENERAL GUIDELINES FOR GRADING AND DRAINAGE
• No significant grading as defined by local ordinances will be used for trail construction unless in conjunction with an approved development project. (UD – 3.5.1) • The degree of cut allowed on a slope
depends on the soil type, hardness and surrounding natural resources. Cuts should be contoured to blend with the natural slopes. Berms of earth, rocks or wood may be necessary. (UD – 3.5.2)
• Use limited terracing or building steps to avoid large-scale grading. Reinforce steps with stone or wood. (UD – 3.5.3)
• Surface water shall be diverted from trails by cross sloping the trail tread between 2 and 3%.
(UD – 3.5.4)
• Where there is potential for significant soil erosion, require a specific erosion control plan. (UD – 3.5.5)
• Do not locate irrigation systems within 2 feet of the edge of the trail. Irrigation for turf areas around a trail should use only a pop-up variety of irrigation head. To avoid erosion and undercutting of the trail, the irrigation system should be
controlled so that only incidental spray might reach the trail surface and edge. (UD – 3.5.6) • Select plants for streamside areas that do not
require irrigation beyond an establishment period. • Use permeable pavements where possible.
• Where overland direction of drainage away from the creek is constrained, provide positive drainage.
GENERAL DESIGN AND
AESTHETIC PLANS AND SECTIONS
In addition to the excerpted guidelines above, this section also includes 7 plans and/or sections to help guide the design and placement of trails taken from the Santa Clara County Parks Departments Uniform Interjurisdictional Trail Design manual.
• Design of Urban Shared-Use Trails (T-1) • Section: Trail Adjacent to Creek, Park,
or Open Space (T-5A)
• Plan: Trail Adjacent to Creek, Park or Open Space (T-5B)
• Plan: Design of a Trail on a Levee (T-15)
• Plan and Section: Levee Trail Undercrossing (T-16) • Creek Crossings and Water Quality (T-17)
• Trail Placement Adjacent to Streams (T-18)
w w w . p a r k h e r e . o r g
GUIDELINES AND STANDARDS IXS E C T I O N : T R A I L A D J A C E N T T O C R E E K ,
PA R K O R O P E N S PA C E
P L A N : T R A I L A J A C E N T T O C R E E K ,
PA R K O R O P E N S PA C E
GROUNDWATER RESOURCE ASSESSMENT CRITERIA
INTRODUCTIONAny proposed project subject to CEQA where the permitting agency finds that there is potential for groundwater quantity or quality impacts should provide a groundwater assessment that will need to be reviewed. Examples of land use decisions that could impact groundwater and may require a groundwater assessment include:
• Increases in water demand (whether that demand will be served by on-site wells or potentially change the quantity of water pumped by retail water suppliers) • Land use changes that could impact the
quantity or quality of water percolating into the groundwater resource on site such as changes in impervious surface area or the use of dry wells or other stormwater infiltration facilities
• Use of on-site wastewater treatment • Use of underground chemical
storage facilities.
SUBMISSION OF
GROUNDWATER ASSESSMENT
The groundwater assessment should be submitted to the appropriate permitting agency for review. Groundwater assessment before a project starts will help the
appropriate permitting agency anticipate groundwater management impacts and ensure that groundwater resources, both quantity and quality, are sustained and protected. The required groundwater assessment should include:
General:
• A description of the groundwater basin or basins over which the project lies; • Identify whether the site is located in a
recharge area of the groundwater basin; • Identify any existing active or abandoned
wells on site.
Water Supply:
• Is groundwater expected to be a source of supply to meet the water demand for the project? If so, provide pumping locations and quantities for the proposed project;
- Describe potential impacts to groundwater recharge on site (due to changes in pervious and impervious surfaces for example);
• Is there currently or will the proposed project be using recycled water? For what uses?
Water Quality:
• Are there any existing contamination sites or plumes?
• Information on the geo-hydrology of the site, including historical depth to water at the site (in different years, seasons, or different hydrologic conditions if known); is the shallowest groundwater part of the drinking water aquifer or perched water above a confining lens or confining layer? • Identify active drinking water sources
and protection zones within the proposed project limit;
- If known, the vulnerability of the local groundwater to any possible contamination that might occur at the site (the physical barrier effectiveness to use the DWSAP terminology): what the groundwater gradient is on site, the ability of the soil materials to transmit or delay the movement of contamination to the water table;
• Identify locations and risk rankings of possible contaminating activities within the limit of the proposed project area. These include storm runoff devices, other infiltration devices (such as septic or leach fields), chemical storage tanks (for example, dry cleaners and gas stations); • Provide the information on Best
management practices (BMPs) applied within the proposed project area for protecting groundwater and surface water that are used or potentially used as sources of drinking water.
GUIDELINES AND STANDARDS XIV.A.3
SCVWD FLOOD PROTECTION DETENTION BASIN DESIGN CRITERIA
This guidance is intended to provide an overview and is to be supplemented with engineering analysis and design. Engineering professionals should refer to the SCVWD Hydrology Manual, the Santa Clara County Drainage Manual, and any design requirements made by permitting agencies. These design criteria are recommended to be used when detention basins are required to mitigate for impacts to flood conveyance capacity. Separate criteria have been developed for implementing NPDES permit requirements for hydro-modification. There may be some instances where stormwater runoff rates need to be regulated for both flood protection and hydro-modification (HMP) purposes. In those cases, the recommended method of design needs to be as follows: (a) design the basin for the HMP requirements, (b) test the HMP basin design against the flood protection requirements outlined in this section. If the HMP design meets the flood protection requirements, the HMP design achieves both functions. If not, the HMP design would need to be modified by the engineer to accomplish both functions. This may require modifying the storage volume and the orifices/weirs of the HMP basin.
GENERAL DESIGN CRITERIA
The frequency, lateral extent and elevation of flooding should not substantially increase under post development conditions.
SCVWD FLOOD PROTECTION DETENTION BASIN
DESIGN CRITERIA
In general the design of detention facilities should be based on the differential storage between the inflow and the outflow
hydrographs. The peak of the outflow hydrograph for the post-design condition shall not exceed that of the pre-design condition.
DEFINITIONS AND DESIGN IMPLICATIONS OF SOME TERMINOLOGIES
Pre-development condition: This is the existing land uses within the tributary watershed, which may be completely rural, and it includes pervious and impervious areas. Using appropriate procedures, the total flow peak and volume may be determined by calculating the flood hydrographs from the pervious and impervious areas and then subsequently combining these two hydrographs.
Post-development condition: With an increase in imperviousness, urbanization within the watershed will result in a higher runoff volume and a different peak flow rate which, again, are obtained by combining the pervious area and impervious area hydrographs from the post-development land use conditions.
Differential peak flow rate and volume:
The differential flow values, between the pre- and post-development conditions, represent the effect of urbanization. In order to minimize impacts from flooding, no increase in flow rate or volume is allowed. Thus, mitigation measures are needed. One of the mitigation measures is to achieve