ITApps 2010/11 Page 1 of 6
Shopcreator – HO-Exercises: What to do
Work thorough the hands-on exercises in the order they are presented:
9 Any point marked like this indicates outcomes (what you should be able to do by the end of the exercise).
9 By the end of that exercise you should have achieved all the outcomes listed. Use the list to track progress.
The diamond bullet indicates ‘this is an instruction’.
Follow the instructions in the order specified. The instruction is explained is the surrounding text.
If you are the kind of person who learns by doing, follow the instructions and jump to the next set of instructions. When you to want to know ‘why’ or ‘what else’, go back and read the explanation
The tasks in the hand-on exercises are organised as follows:
1. On going reflection: while building the e-shop think about the context of the e-shop in the overall business and especially the risks and integration issues.
2. Set-up build process: logging on to the administration back office and the e-shop front end.
3. Build the site structure: start up configuration, change password and email. 4. Build the catalogue: set up an index and add product(s).
5. Build the checkout: set up the order processing, pricing and shipping options. 6. Brand the site: customise the look and feel of the e-shop.
HO-6: Shopcreator – Set-up the build process
(Logging On: Administration/Store)
By the end of this exercise you will have:
9 Logged on to the Shopcreator administration site, 9 Logged on to the your e-shop website,
9 Switched between the back end and front end of your e-shop, 9 Explored the screen layout in the Shopcreator administration site. Notes:
1. Before you can do this exercise with Shopcreator you will need: (i) a user name (also the website name), (ii) password, and (iii) address of the Shopcreator’s Administration page. You should receive this in a thank you email message from Shopcreator or in an email from your lecturer. If you do not have this, ask your tutor for it in class.
2. You can also access the shopcreator login page from your office or home.
3. Please do not contact Shopcreator directly with any problems as our terms of use do not include user support.
1.
Getting into the back office
Open browser and enter the URL : http://www.shopcreator.com
Book mark this page. It is your access point into the administration system.
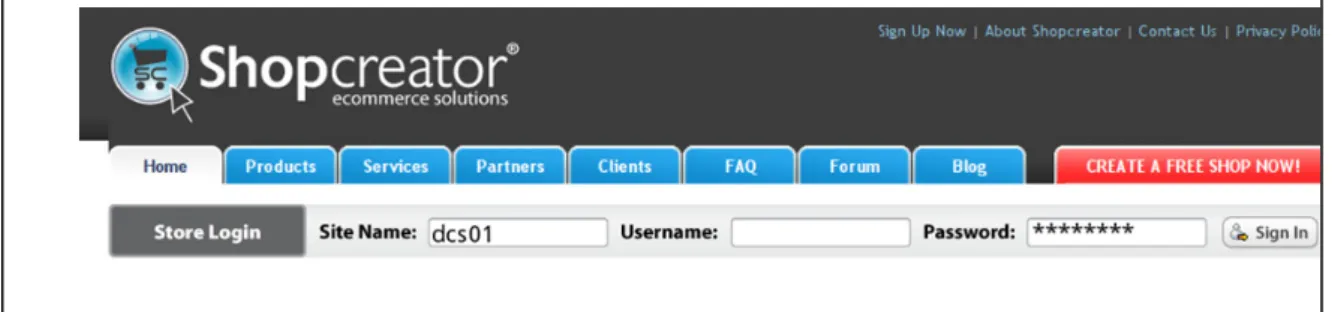
Fill in the details of your user name and password, and press ‘Sign In’ (Fig 1). Note: You ‘Site Login Name’ is the user name you have been given. You need to
leave the box named ‘User Name’ blank and then fill in your password in the box called password (as the example below).
ITApps 2010/11 Page 2 of 6 Figure 1: The Shopcreator Log-in Page
The name of your site is displayed in the on the top left of the administration window, as an indication that the control menu is available to your site alone.
2.
Step by step creation of a shop
The following steps are for the site structure: 2.1
Change company details
Select the menu item named “Site Configuration”
Select “Amend Company Details“ from the submenu
Change the email addresses for Info, Administration and Orders.
Enter a lot of keywords that correspond to the e-shop, so that search engines can rate the site well.
Summary will appear under the link in the search engines
Details like names, telephone number and address are compiled in a footer at the bottom of your website.
ITApps 2010/11 Page 3 of 6 2.2
Change the information pages
Select the menu item named “Information Pages”
Select “Amend Info Page Content”
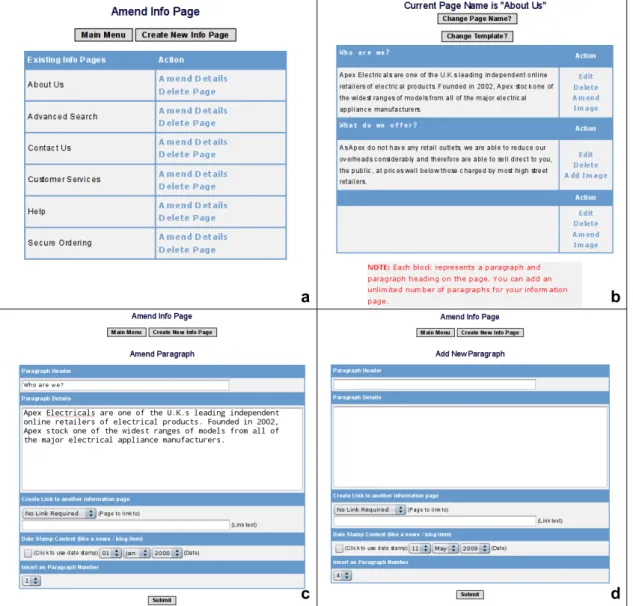
Change About us, Contact us, Customer Services, Help and Secure Ordering pages to fit your company profile.
Upload images relevant to your company (don’t forget to add references in the assignments for images that you get from other sites).
Fig 2: (a) Information pages; (b) Changing “About us” information page; (c) Editing an information page; (d) Adding a new paragraph for an information page.
2.3
Familiarise yourself with the menu functions.
The general layout of the shopcreator back-office system is that you have a navigation menu on the left hand side (as shown on picture below) and the main page content on the central frame.
We will briefly describe what each item on the menu does.
a b
d c
ITApps 2010/11 Page 4 of 6 Key buttons
• Channels. A facility that allows you to connect to a Facebook Marketplace currently. A Facebook marketplace gives you the opportunity to buy, sell, give things away, or ask for anything you want – from people you know or know something about it.
• Departments. These are the categories of your site. Every product must belong to a category (from now on get used to the term Department as a synonym of Category). • Products. As the name suggests from this option you can add and edit product details on
your website.
• Imports. This option allows you to create your entries for products, departments, etc in a predefined format and easily import the file. For instance you could use a product back-end database, save the contents of a table in the predefined format and then use the file to run the import into shopcreator.
• Information Pages. This option allows you to create the generic information pages of your website, such as ‘About Us’, ‘Contact Us’, ‘Help’, etc. These pages tend to be important as they inspire confidence on your potential customers and make your site look professional. • Discounts. You can use this option to generate discounts on your store; there are two
main options: per-category and per-supplier.
• Site Configuration. This is perhaps the most important set of options; from here you can amend your company details, change the index name (we will discuss this in more detail very soon), change the site currency, change various site and checkout labels, change passwords and access options, enable content type, enable stock-control, etc.
• Site Design. This is the option from where you can design the general look & feel of your website by adding header images and changing various layout options.
• Payment Set-up. This is if you intend to make your website live and start accepting payments. If you intend to do this, you need to contact shopcreator to discuss various options (please note that they will charge you, this part is not free!).
• Shipping. This option allows you to set your product delivery and charging options; your shipping system can range from very simple (one charge for all items or very complicated). Also this largely depends on the type of product you intend to sell e.g. e-books are
delivered digitally.
• Orders. This allows you to view and process your orders. Again this is beyond the scope of the module, and you only need to worry about it if you intend to make your website live.
ITApps 2010/11 Page 5 of 6 • Reports. This is the shopcreator reporting subsystem that lets you see what your
customers get up to whilst on your site. This is an essential tool for constantly improving your site and product offering.
• Admin User Access. As the name suggests, this option provides you with utilities to add other user, allocate privileges, etc.
• Publish. This option allows you to make your site live or disable access to your site. • Multi-Currency. If you sell in more than one geographic regions or countries then you
need this option to manage exchange rates.
• Google Tools. Using this tool you can generate a search engine sitemap to upload it to Google, so that it can be used when your shop appears in the results of a search.
• Refresh Menus. Use this to refresh the navigation menu hierarchy, in the case it becomes corrupt.
---
Note the Top Control Panel
The most important button on the top control panel is ‘Publish’ (a globe icon). Press this button to save the changes you make as you work on your site. (Also note that
sometimes shopcreator auto-saves your changes, but better safe than sorry!).
The magnifying glass allows you to view your website the way your customers would view it.
The ‘Help’ option will open a new window with online help. You can also download the shopcreator manual (it is 5MB).
--- 3.
Opening the store
From the top-right panel, click the button ‘View’. This will open a new window or browser tab showing your website.
4.
Back Office and the Store Front
Summary:To build the store and manage the online business, enter the back office by opening a browser and entering the URL: http://www.shopcreator.com
The admin area is secure so you will need a username and password to enter.
Your customer will come to your online store by opening a browser and entering the URL: http://www.shotpcreator.net/mall/yourstore
Your customer can browse and add items to a shopping basket but once they enter the checkout /order area they will enter a secure transaction. The order details are transmitted in an encrypted format and stored in the admin area ready for you to collect via the admin entrance.
5.
Explanation of the build and test process
In general when you make any changes, additions or deletions in the back office (administration window) you need to test how this will appear to your customers in the store window.
Remember that your back-office login is https://www.shopcreator.com while your front-office (e-shop) URL is http://www.shopcreator.com/mall/your_site_name/