SQL Server 2012 with PowerShell
V3 Cookbook
Donabel Santos
Chapter No. 6
In this package, you will find:
A Biography of the author of the bookA preview chapter from the book, Chapter NO.6 "Backup and Restore" A synopsis of the book’s content
Information on where to buy this book
About the Author
Donabel Santos is a SQL Server MVP and is the senior SQL Server Developer/DBA/ Trainer at QueryWorks Solutions, a consulting and training company in Vancouver, BC. She has worked with SQL Server since version 2000 in numerous development, tuning, reporting, and integration projects with ERPs, CRMs, SharePoint, and other custom applications. She holds MCITP certifications for SQL Server 2005/2008, and an MCTS for SharePoint. She is a Microsoft Certified Trainer (MCT), and is also the lead instructor for SQL Server Administration, Development, and SSIS courses at British Columbia Institute of Technology (BCIT).
Donabel is a proud member of PASS (Professional Association of SQL Server), and a proud BCIT alumna (CST diploma and degree). She blogs (www.sqlmusings.com), tweets (@sqlbelle), speaks and presents (SQLSaturday, VANPASS, Vancouver TechFest, and so on), trains (BCIT, QueryWorks Solutions), and writes (Packt, Idera, SSWUG, and so on).
SQL Server 2012 with PowerShell
V3 Cookbook
PowerShell is Microsoft's new command-line shell and scripting language that promises to simplify automation and integration across different Microsoft applications and components. Database professionals can leverage PowerShell by utilizing its numerous built-in cmdlets, or using any of the readily available .NET classes, to automate database tasks, simplify integration, or just discover new ways to accomplish the job at hand.
SQL Server 2012 with PowerShell V3 Cookbook provides easy-to-follow, practical examples for the busy database professional. Whether you're auditing your servers, or exporting data, or deploying reports, there is a recipe that you can use right away! You start off with basic topics to get you going with SQL Server and PowerShell scripts and progress into more advanced topics to help you manage and administer your SQL Server databases.
The first few chapters demonstrate how to work with SQL Server settings and objects, including exploring objects, creating databases, configuring server settings, and
performing inventories. The book then dives deeply into more administration topics such as backup and restore, credentials, policies, and jobs.
Additional development and BI-specific topics are also explored, including deploying and downloading assemblies, BLOB data, SSIS packages, and SSRS reports.
A short PowerShell primer is also provided as a supplement in the Appendix, which the database professional can use as a refresher or occasional reference material. Packed with more than 100 practical, ready-to-use scripts, SQL Server 2012 with PowerShell V3 Cookbook will be your go-to reference in automating and managing SQL Server.
What This Book Covers
Chapter 1, Getting Started with SQL Server and PowerShell explains what PowerShell is, and why you should consider learning PowerShell. It also introduces PowerShell V3 new features, and explains what needs to be in place when working with SQL Server 2012 and PowerShell.
Chapter 2, SQL Server and PowerShell Basic Tasks demonstrates scripts and snippets of code that accomplish some basic SQL Server tasks using PowerShell. We start with simple tasks such as listing SQL Server instances, and creating objects such as tables, indexes, stored procedures, and functions to get you comfortable while working with SQL Server programmatically.
Chapter 3, Basic Administration tackles more administrative tasks that can be accomplished using PowerShell, and provides recipes that can help automate a lot of repetitive tasks. Some recipes deal with instance and database properties; others provide ways of checking disk space, creating WMI alerts, setting up Database Mail, and creating and maintaining SQL Server Jobs.
Chapter 4, Security provides snippets that simplify security monitoring, including how to check failed login attempts by parsing out event logs, or how to administer roles and permissions.
Chapter 5, Advanced Administration shows how PowerShell can help you leverage features such as Policy Based Management (PBM) and encryption using PowerShell. This chapter also explores working with SQL Server Profiler trace files and
events programmatically.
Chapter 6, Backup and Restore looks into different ways of backing up and restoring SQL Server databases programmatically using PowerShell.
Chapter 7, SQL Server Development provides snippets and guidance on how you can work with XML, XSL, binary data, and CLR assemblies with SQL Server and PowerShell.
Chapter 8, Business Intelligence covers how PowerShell can help automate and manage any BI-related tasks—from rendering SQL Server Reporting Services (SSRS) reports, to deploying the new SQL Server Integration Services (SSIS) 2012 ISPAC files, to backing up and restoring SQL Server Analysis Services (SSAS) cubes.
Chapter 9, Helpful PowerShell Snippets tackles a variety of recipes that are not SQL Server specific, but you may find them useful as you work with PowerShell. Recipes include snippets for creating files that use timestamps, analyzing event logs for recent system errors, and exporting a list of processes to CSV or XML.
Appendix A, SQL Server and PowerShell CheatSheet provides a concise cheatsheet of commonly used terms and snippets when working with SQL Server and PowerShell.
Appendix B, PowerShell Primer offers a brief primer on PowerShell fundamentals.
Appendix C, Resources lists additional PowerShell and SQL Server books, blogs and links.
Appendix D, Creating a SQL Server VM provides a step-by-step tutorial on how to create and configure the virtual machine that was used for this book.
6
Backup and Restore
In this chapter, we will cover: Changing database recovery model Listing backup history
Creating a backup device
Listing backup header and fi le list information Creating a full backup
Creating a backup on mirrored media sets Creating a differential backup
Creating a transaction log backup Creating a fi legroup backup
Restoring a database to a point in time Performing an online piecemeal restore
Introduction
Knowing how to back up and restore a database is one of the most fundamental skills you need to have when managing your database environment.
There are different ways to do backup and restore. It can be done through SQL Server Management Studio, by using stored procedures, or through SSIS. And now, these tasks can be done with PowerShell. The key is to determine which tool is best suited for the particular task.
Doing the backups and restores using PowerShell has its own advantages, including being able to automate backups across multiple servers, being able to retrieve, consolidate, and fi lter all backup histories if needed. It is even easier to do these tasks in SQL Server 2012 because of additional cmdlets for backup and restore. It also gives you access to the full power of SMO should you need to add additional parameters.
Changing database recovery model
In this recipe, we will explore how to change SQL Server recovery model using PowerShell.
Getting ready
We will use AdventureWorks2008R2 in this exercise, and change the recovery model from
Full to Simple. Feel free to substitute this with a database of your choice.
Check what SQL Server recovery model your instance is set to, using SSMS. Open your Object Explorer and right-click on the database you chose and click on Properties | Options:
If your database is set to either Simple or Bulk-logged, change this to Full and click on OK. Since we will be using AdventureWorks2008R2 in later exercises, we need to change this
How to do it...
1. Open the PowerShell console by going to Start | Accessories | Windows PowerShell | Windows PowerShell ISE.
2. Import the SQLPS module as follows:
#import SQL Server module
Import-Module SQLPS -DisableNameChecking
3. Add the following script and run:
$instanceName = "KERRIGAN"
$server = New-Object -TypeName Microsoft.SqlServer.Management.Smo. Server -ArgumentList $instanceName
$databasename = "AdventureWorks2008R2" $database = $server.Databases[$databasename] #possible values for RecoveryModel are #Full, Simple and BulkLogged
$database.DatabaseOptions.RecoveryModel = [Microsoft.SqlServer. Management.Smo.RecoveryModel]::Simple
$database.Alter() $database.Refresh()
#list Recovery Model again
$database.DatabaseOptions.RecoveryModel #remember to change the recovery model back #to full for the next recipes
How it works...
To change a database's RecoveryModel property, get a handle to that database fi rst:
$databasename = "AdventureWorks2008R2" $database = $server.Databases[$databasename]
Once you have the handle, use the DatabaseOptions property of the database object to
set the RecoveryModel property to Simple:
#possible values for RecoveryModel are #Full, Simple and BulkLogged
$database.DatabaseOptions.RecoveryModel = [Microsoft.SqlServer. Management.Smo.RecoveryModel]::Simple
There's more...
RecoveryModel is a database property that specifi es what backup and restore operations
are permitted. There are three possible values for RecoveryModel: Full, BulkLogged,
and Simple.
Full and BulkLogged recovery models allow the use of logfi les for backup and restore
purposes. The Full recovery model heavily uses the transaction logfi les, and allows for
point-in-time recovery.
The BulkLogged recovery model minimally logs the bulk events. If there are no bulk events
in the system, then in-time recovery is possible. If there are bulk events, however, point-in-time recoverability will be affected, and it is possible not to be able to recover from your logfi les at all. See Paul Randal's blog post on A SQL Server DBA myth a day: (28/30) BULK_ LOGGED recovery model:
http://www.sqlskills.com/BLOGS/PAUL/post/A-SQL-Server-DBA-myth-a-day-(2830)-BULK_LOGGED-recovery-model.aspx
The Simple recovery model does not support transaction log backups and restores at
all. This means that there is no point-in-time recovery possible, and the window for data loss could be large. Simple recovery model, therefore, is not a recommended setting for
production servers; it can be a setting used for development and sandbox servers, or any instance where data loss would not be critical.
The RecoveryModel you choose in your environment will typically be determined by the
company's Recovery Point Objective (RPO) and Recovery Time Objective (RTO), although in most cases the recommended setting would be Full recovery model.
Read more about RecoveryModel from MSDN:
http://msdn.microsoft.com/en-us/library/ms189275(v=sql.110).aspx
See also
The Altering database properties recipe in Chapter 2, SQL Server and PowerShell
Listing backup history
In this recipe, we will list the backup history for a SQL Server instance.
How to do it...
1. Open the PowerShell console by going to Start | Accessories | Windows PowerShell | Windows PowerShell ISE.
2. Import the SQLPS module as follows:
#import SQL Server module
Import-Module SQLPS -DisableNameChecking
3. Add the following script and run:
$instanceName = "KERRIGAN"
$server = New-Object -TypeName Microsoft.SqlServer.Management. Smo.Server -ArgumentList $instanceName
#display date of last backup $server.Databases |
Select Name, RecoveryModel, LastBackupDate, LastDifferentialBackupDate, LastLogBackupDate | Format-Table -AutoSize
Your result should look similar to the following screenshot:
Note that when you see a date of 1/1/0001 12:00:00 AM, then it means no backup has ever been taken for that database.
How it works...
Listing the backup history is a simple task, using a little bit of PowerShell and SMO. After you get a database handle, you can display the last backup dates onto the screen.
#display days ago since last backup $server.Databases |
Select Name, RecoveryModel, LastBackupDate, LastDifferentialBackupDate, LastLogBackupDate | Format-Table -AutoSize
Alternatively, you can capture this in a fi le, or a table, whichever your requirements specify.
See also
The Listing SQL Server jobs recipe in Chapter 3, Basic Administration
Creating a backup device
This recipe shows how you can create a backup device using PowerShell.
Getting ready
We are going to create a backup device in this recipe. The equivalent T-SQL of what we are trying to accomplish is:
EXEC master.dbo.sp_addumpdevice @devtype = N'disk', @logicalname = N'Full Backups',
@physicalname = N'C:\Backup\backupfile.bak'
How to do it...
1. Open the PowerShell console by going to Start | Accessories | Windows PowerShell | Windows PowerShell ISE.
2. Import the SQLPS module as follows:
#import SQL Server module
Import-Module SQLPS -DisableNameChecking
3. Add the following script and run:
$instanceName = "KERRIGAN"
$server = New-Object -TypeName Microsoft.SqlServer.Management. Smo.Server -ArgumentList $instanceName
#this file will be created by PowerShell/SMO $backupfilename = "Full Backups"
$backupfile = "C:\Backup\backupfile.bak"
$backupdevice = New-Object Microsoft.SqlServer.Management.Smo. BackupDevice($server,$backupfilename)
#BackupDeviceType values are:
#CDRom, Disk, FloppyA, FloppyB, Tape, Pipe, Unknown
$backupdevice.BackupDeviceType = [Microsoft.SqlServer.Management. Smo.BackupDeviceType]::Disk
$backupdevice.PhysicalLocation = $backupfile $backupdevice.Create()
#list backup devices $server.BackupDevices
4. Confi rm by using SQL Server Management Studio. Log in to your instance and expand
BackupDevices. You should see the new backup device you created in PowerShell.
How it works...
A backup device is a layer of abstraction that allows you to reference a backup medium—be it a fi le, a network share, or a tape—using a logical name instead of specifying the full physical path. To create a backup device using PowerShell and SMO, you will need to fi rst create a handle to an SMO BackupDevice object:
$backupdevice = New-Object Microsoft.SqlServer.Management.Smo. BackupDevice($server,$backupfilename)
You will also need to specify BackupDeviceType, and the physical location of the media.
BackupDeviceType can be one of CDRom, Disk, FloppyA, FloppyB, Tape, Pipe, and
Unknown. This is illustrated in the following code:
$instanceName = "KERRIGAN"
$server = New-Object -TypeName Microsoft.SqlServer.Management.Smo. Server -ArgumentList $instanceName
$backupdevice.BackupDeviceType = [Microsoft.SqlServer.Management.Smo. BackupDeviceType]::Disk
$backupdevice.PhysicalLocation = $backupfile $backupdevice.Create()
See also
The Listing backup header information and fi le list information recipe Read up on backup devices:
http://msdn.microsoft.com/en-us/library/ms179313(v=sql.110). aspx
Listing backup header and
fi
le list
information
In this recipe, we will look at listing backup header information from a backup fi le.
Getting ready
For this task, we will look at listing an existing backup's header information.
If you do not have any backups in your system yet, you can do any of this chapter's backup recipes prior to performing this recipe.
How to do it...
To list the header information, follow these steps:
1. Open the PowerShell console by going to Start | Accessories | Windows PowerShell | Windows PowerShell ISE.
2. Import the SQLPS module as follows:
#import SQL Server module
Import-Module SQLPS -DisableNameChecking
3. Add the following script and run:
$instanceName = "KERRIGAN"
$server = New-Object -TypeName Microsoft.SqlServer.Management. Smo.Server -ArgumentList $instanceName
$smoRestore = New-Object Microsoft.SqlServer.Management.Smo. Restore
#replace this with your backup file
#change this to where your backup directory is #in our case we're using default backup directory
$backupfilepath = Join-Path $server.Settings.BackupDirectory $backupfile
$smoRestore.Devices.AddDevice($backupfilepath, [Microsoft. SqlServer.Management.Smo.DeviceType]::File)
$smoRestore.ReadBackupHeader($server) $smoRestore.ReadFileList($server)
The result you are going to get will be similar to the following screenshot:
Notice that you can see the BackupName, BackupType, ServerName, BackupSize,
4. To display the fi le list information, add the following script and run:
$smoRestore.ReadFileList($server)
The result you are going to get will be similar to the following screenshot:
Notice that you can see properties such as LogicalName, PhysicalName,
FileGroupName, and Size of both the data and logfi les associated with this backup fi le.
How it works...
You will often want to fi nd out more information about the contents of your backup fi les. The backup header and the fi le list of the backup fi les allow you to retrieve additional information about the contents of a backup fi le or backup device. Starting with SQL Server 2008, one must have the CREATE DATABASE permission before the header information can be listed.
To start, we must fi rst create a reference to an SMO Restore object:
$smoRestore = New-Object Microsoft.SqlServer.Management.Smo.Restore;
The ReadBackupHeader method of the Microsoft.SqlServer.Management.Smo.
Restore class lists all the backup headers for all backup sets contained in a backup device
or fi le. The information it returns includes:
BackupName and Description
BackupType
Compressed
ServerName
DatabaseName
DatabaseVersion and DatabaseCreationDate
BackupSize
CheckpointLSN
DatabaseBackupLSN
Backup start and fi nish date
We will also need to create a reference to the backup fi le or backup device from which we wish to read the information. We do this by adding the backup fi le using the AddDevice
method of the Restore object.
$backupfile = "AdventureWorks2008R2_Full_20120205231407.bak" #change this to where your backup directory is
#in our case we're using default backup directory
$backupfilepath = Join-Path $server.Settings.BackupDirectory $backupfile
$smoRestore.Devices.AddDevice($backupfilepath, [Microsoft.SqlServer. Management.Smo.DeviceType]::File)
To retrieve the backup header, just invoke the ReadBackupHeader method of the Restore
object and pass in the server object as an argument.
$smoRestore.ReadBackupHeader($server)
The fi le list contains the actual database and logfi les associated in a particular backup set. Listing the fi le list requires a very similar syntax to reading the backup header. We need to invoke the method ReadFileList, passing the server object as an argument again.
See also...
Read more about the Restore class methods:
http://msdn.microsoft.com/en-us/library/microsoft.sqlserver. management.smo.restore_methods(v=sql.110).aspx
Creating a full backup
In this recipe, we will look at how we can do a full database backup using PowerShell.
Getting ready
We will use the AdventureWorks2008R2 database for this recipe. We will create a full
compressed backup of the database to a timestamped .bakfi le in the C:\Backup folder.
Feel free to use a database of your choice for this task.
The T-SQL syntax that will be generated by this PowerShell recipe will look similar to:
BACKUP DATABASE [AdventureWorks2008R2]
TO DISK = N'C:\Backup\AdventureWorks2008R2_Full_20120227092409.bak' WITH NOFORMAT, INIT,
NAME = N'AdventureWorks2008R2 Full Backup', NOSKIP, REWIND, NOUNLOAD, COMPRESSION, STATS = 10, CHECKSUM
How to do it...
1. Open the PowerShell console by going to Start | Accessories | Windows PowerShell | Windows PowerShell ISE.
2. Import the SQLPS module as follows:
#import SQL Server module
Import-Module SQLPS -DisableNameChecking
3. Add the following script and run:
$instanceName = "KERRIGAN"
$server = New-Object -TypeName Microsoft.SqlServer.Management. Smo.Server -ArgumentList $instanceName
$databasename = "AdventureWorks2008R2" $timestamp = Get-Date -Format yyyyMMddHHmmss
$backupfolder = "C:\Backup\"
$backupfile = "$($databasename)_Full_$($timestamp).bak" $fullBackupFile = Join-Path $backupfolder $backupfile Backup-SqlDatabase ` -ServerInstance $instanceName ` -Database $databasename ` -BackupFile $fullBackupFile ` -Checksum ` -Initialize `
-BackupSetName "$databasename Full Backup" ` -CompressionOption On
Check your C:\Backup directory and confi rm that the timestamped backup fi le has
been created.
4. Confi rm by reading the backup header. Add the following script and run:
#confirm by reading the header #backup type for full is 1
#this is a block of code you would want to put #in a function so you can use anytime
$smoRestore = New-Object Microsoft.SqlServer.Management.Smo. Restore $smoRestore.Devices.AddDevice($fullBackupFile, [Microsoft. SqlServer.Management.Smo.DeviceType]::File) $smoRestore.ReadBackupHeader($server) $smoRestore.ReadFileList($server)
How it works...
In this recipe, we fi rst create a timestamped fi lename:
$databasename = "AdventureWorks2008R2" $timestamp = Get-Date -Format yyyyMMddHHmmss $backupfolder = "C:\Backup\"
$backupfile = "$($databasename)_Full_$($timestamp).bak" $fullBackupFile = Join-Path $backupfolder $backupfile
This will give you a fi lename similar to this:
C:\Backup\AdventureWorks2008R2_Full_20120227092409.bak
Next, you need to invoke the Backup-SqlDatabase cmdlet. The Backup-SqlDatabase
cmdlet has been introduced for SQL Server 2012, and this cmdlet encapsulates a lot of the options that used to be available only via SMO.
It is imperative, for this recipe, that we use the Get-Help cmdlet for the
Backup-SqlDatabase cmdlet fi rst, to know which parameters are available.
Here is one part of the help content:
SYNTAX
Backup-SqlDatabase [-Database] <string> [[-BackupFile] <string[]>] [-BackupAction <BackupActionType>] [-BackupDevice <BackupDeviceItem[]>]
[-BackupSetDescription <string>] [-BackupSetName
<string>] [-BlockSize <int>] [-BufferCount <int>] [-Checksum] [-CompressionOption
<BackupCompressionOptions>] [-ContinueAfterError] [-CopyOnly] [-DatabaseFile <string[]>] [-DatabaseFileGroup <string[]>]
[-ExpirationDate
<DateTime>] [-Format] [-Incremental] [-Initialize]
[-LogTruncationType <BackupTruncateLogType>] [-MaxTransferSize <int>] [-MediaDescription
<string>] [-MediaName <string>] [-MirrorDevices
<BackupDeviceList[]>] [-NoRecovery] [-NoRewind] [-Passthru] [-Path <string[]>] [-Restart]
[-RetainDays <int>] [-SkipTapeHeader] [-UndoFileName <string>] [-UnloadTapeAfter] [-Confirm] [-WhatIf] [<CommonParameters>]
At the time of writing this book, there are still some corrections that need to be made to the help contents for Backup-SqlDatabase. This is documented in this MS Connect
item http://connect.microsoft.com/SQLServer/feedback/details/683594/
backup-sqldatabase-cmdlet-help. The content of the help, nevertheless, is still useful
in getting you up and running with the cmdlet. In our recipe, this is the command we executed:
Backup-SqlDatabase ` -ServerInstance $instanceName ` -Database $databasename ` -BackupFile $fullBackupFile ` -Checksum ` -Initialize `
-BackupSetName "$databasename Full Backup" ` -CompressionOption On
Note that we used the line continuation character back tick (`) for readability purposes, so we can align each parameter at the same position on each line.
Let's explain in more detail these options that we have chosen: Parameter Explanation -ServerInstance $instanceName Instance to backup -Database $databasename Database to backup -BackupFile $fullBackupFile
Backup file name
-Checksum Enable backup checksum, which can be used
in restore operation to determine if backup file is corrupt
-Initialize Specifies backup set contained in the file or
backup device will be overwritten
-BackupSetName "$databasename Full Backup"
Backup set name
-CompressionOption On Specifies whether compression should be
applied to the backup file
You can also provide the complete enum reference for the CompressionOption value:
-CompressionOption ([Microsoft. SqlServer.Management.Smo. BackupCompressionOptions]::On)
Once you get more familiar with the Backup-SqlDatabase cmdlet, you will soon realize that
all other backup types will be just a matter of adding or changing some of these parameters.
There's more...
Although there is already a cmdlet available for backing up databases, it will also be useful to look at how you can do the backups via SMO. Using SMO may be the more code-heavy way of tackling a database backup in PowerShell, but it is nonetheless still very powerful and fl exible. The cmdlet can be viewed as simply a wrapper to the SMO backup methods. Taking a peek at how this is done can be a benefi cial exercise.
The fi rst few steps for this approach are similar to the steps we have for this recipe: import SQLPS, and create the SMO server object. After that, we will need to create
an SMO Backup object.
$databasename = "AdventureWorks2008R2" $timestamp = Get-Date -Format yyyyMMddHHmmss
$backupfile = "$($databasename)_Full_$($timestamp).bak" $fullBackupFile = Join-Path $backupfolder $backupfile #This belongs in Microsoft.SqlServer.SmoExtended assembly
$smoBackup = New-Object Microsoft.SqlServer.Management.Smo.Backup
With a handle to the SMO backup object, you will have more granular control over what values are set to which properties. Action can be any of Database, File, or Log.
$smoBackup.Action = [Microsoft.SqlServer.Management.Smo. BackupActionType]::Database
$smoBackup.BackupSetName = "$databasename Full Backup" $smoBackup.Database = $databasename $smoBackup.MediaDescription = "Disk" $smoBackup.Devices.AddDevice($fullBackupFile, "File") $smoBackup.Checksum = $true $smoBackup.Initialize = $true $smoBackup.CompressionOption = [Microsoft.SqlServer.Management.Smo. BackupCompressionOptions]::On
You can also optionally set up your own event notifi cation on the backup progress using the
Microsoft.SqlServer.Management.Smo.PercentCompleteEventHandler and
Microsoft.SqlServer.Management.Common.ServerMessageEventHandler classes.
#the notification part below is optional #it just creates an
#event handler that indicates progress every 20% $smoBackup.PercentCompleteNotification = 20
$percentEventHandler = [Microsoft.SqlServer.Management.Smo. PercentCompleteEventHandler] {
Write-Host "Backing up $($databasename)...$($_.Percent)%" } $completedEventHandler = [Microsoft.SqlServer.Management.Common. ServerMessageEventHandler] { Write-Host $_.Error.Message } $smoBackup.add_PercentComplete($percentEventHandler) $smoBackup.add_Complete($completedEventHandler)
When done setting the properties, you can just invoke the SqlBackup method of the SMO
Backup class and pass the server object:
#backup
$smoBackup.SqlBackup($server)
Conversely, when you do a restore with SMO, the steps are going to be pretty similar. You will need to create the SMO Restore object, set the properties, and call the SqlRestore
More about Backup and PercentCompleteEventHandler Learn more about these SMO classes:
BackupRestoreBase: http://msdn.microsoft.com/en-us/library/ microsoft.sqlserver.management.smo.backuprestorebase. percentcomplete.aspx PercentCompleteEventHandler: http://msdn.microsoft.com/ en-us/library/microsoft.sqlserver.management.smo. percentcompleteeventhandler.aspx
See also
The Creating a backup on mirrored media sets recipe The Creating a differential backup recipe
The Creating a transaction log backup recipe The Creating a fi legroup backup recipe
Creating a backup on mirrored media sets
In this recipe, we will create a full database backup on mirrored backup fi les.Getting ready
We will use the AdventureWorks2008R2 database for this recipe. We will create a mirrored
backup of the database, and both timestamped backup fi les will be stored in C:\Backup.
Feel free to substitute this with the database you want to use with mirrored backups. The T-SQL syntax that will be generated by this PowerShell recipe will look similar to:
BACKUP DATABASE [AdventureWorks2008R2] TO DISK = N'AdventureWorks2008R2.bak' MIRROR
TO DISK = N'C:\Backup\AdventureWorks2008R2_Full_20120227092409_Copy1. bak'
MIRROR TO DISK = N'C:\Backup\AdventureWorks2008R2_ Full_20120227092409_Copy2.bak'
WITH FORMAT, INIT,
NAME = N'AdventureWorks2008R2 Full Backup', SKIP, REWIND, NOUNLOAD, COMPRESSION, STATS = 10, CHECKSUM
How to do it...
1. Open the PowerShell console by going to Start | Accessories | Windows PowerShell | Windows PowerShell ISE.
2. Import the SQLPS module as follows:
#import SQL Server module
Import-Module SQLPS -DisableNameChecking
3. Add the following script and run:
$instanceName = "KERRIGAN"
$server = New-Object -TypeName Microsoft.SqlServer.Management.Smo. Server -ArgumentList $instanceName
$databasename = "AdventureWorks2008R2"
#create filenames, which we will use as Device $databasename = "AdventureWorks2008R2"
$timestamp = Get-Date -Format yyyyMMddHHmmss $backupfolder = "C:\Backup\"
$backupfile1 = Join-Path $backupfolder "$($databasename)_ Full_$($timestamp)_Copy1.bak"
$backupfile2 = Join-Path $backupfolder "$($databasename)_ Full_$($timestamp)_Copy2.bak"
#create a backup device list
#in this example, we will only use two (2) #mirrored media sets
#note a maximum of four (4) is allowed
$backupDevices = New-Object Microsoft.SqlServer.Management.Smo. BackupDeviceList(2) $backupDevices.AddDevice($backupfile1, [Microsoft.SqlServer. Management.Smo.DeviceType]::File) $backupDevices.AddDevice($backupfile2, [Microsoft.SqlServer. Management.Smo.DeviceType]::File) #backup database Backup-SqlDatabase ` -ServerInstance $instanceName ` -Database $databasename `
-BackupSetName "$databasename Full Backup" ` -Checksum `
-SkipTapeHeader `
-MirrorDevices $backupDevices ` -CompressionOption On
4. Open your C:\Backup folder and confi rm that the two timestamped backup fi les
have been created.
How it works...
With SQL Server, it is possible to create a backup with up to four mirrors per media set. Mirrored media sets allow you to have multiple copies of that backup, which are stored in different backup devices.
For our recipe, we must fi rst create a set of fi les that we will use to save our backup to.
#create backup devices
#in this example, we will only use two (2) mirrored media sets #note a maximum of four (4) is allowed
$databasename = "AdventureWorks2008R2" $timestamp = Get-Date -Format yyyyMMddHHmmss $backupfolder = "C:\Backup\"
$backupfile1 = Join-Path $backupfolder "$($databasename)_ Full_$($timestamp)_Copy1.bak"
$backupfile2 = Join-Path $backupfolder "$($databasename)_ Full_$($timestamp)_Copy2.bak"
We then need to add these fi les' backup devices to our BackupDeviceList object. The value
that we pass to our BackupDeviceList constructor, represents the number of backup devices
we are adding. A maximum of four is allowed for mirrored media.
$backupDevices = New-Object Microsoft.SqlServer.Management.Smo. BackupDeviceList(2)
$backupDevices.AddDevice($backupfile1, [Microsoft.SqlServer. Management.Smo.DeviceType]::File)
$backupDevices.AddDevice($backupfile2, [Microsoft.SqlServer. Management.Smo.DeviceType]::File)
In the Backup-SqlDatabase cmdlet, the highlighted code in the following snippet shows
the options that enable mirrored backups. Note that we used the line continuation character backtick (`) for readability purposes, so we can align each parameter at the same position on each line.
#backup database Backup-SqlDatabase `
-ServerInstance $instanceName ` -Database $databasename `
-BackupSetName "$databasename Full Backup" ` -Checksum ` -Initialize ` -FormatMedia ` -SkipTapeHeader ` -MirrorDevices $backupDevices ` -CompressionOption On
Let's explain a bit more about some of these highlighted options:
Parameter Explanation
-Initialize Specifies backup set contained in the file or backup
device will be overwritten
-FormatMedia Overwrites existing media header information, and
creates a new media set
-SkipTapeHeader Skip checking backup tape expiration
-MirrorDevices Allows backup on mirrored media sets; accepts a
BackupDeviceList array
See also
The Creating a full backup recipe The Creating a differential backup recipe The Creating a transaction log backup recipe The Creating a fi legroup backup recipe
Learn more about mirrored backup media sets:
http://msdn.microsoft.com/en-us/library/ms175053(v=sql.110). aspx
Creating a differential backup
This recipe shows how you can create a differential backup on your database.
Getting ready
We will use the AdventureWorks2008R2 database for this recipe. We will create
a differential compressed backup of the database to a timestamped .bakfi le in the
The T-SQL syntax that will be generated by this PowerShell recipe will look similar to:
BACKUP DATABASE [AdventureWorks2008R2]
TO DISK = N'C:\Backup\AdventureWorks2008R2_Diff_20120227092409.bak' WITH DIFFERENTIAL , NOFORMAT, INIT,
NAME = N'AdventureWorks2008R2 Diff Backup', NOSKIP, REWIND, NOUNLOAD, COMPRESSION, STATS = 10, CHECKSUM
How to do it...
1. Open the PowerShell console by going to Start | Accessories | Windows PowerShell | Windows PowerShell ISE.
2. Import the SQLPS module as follows:
#import SQL Server module
Import-Module SQLPS -DisableNameChecking
3. Add the following script and run:
$instanceName = "KERRIGAN"
$server = New-Object -TypeName Microsoft.SqlServer.Management.Smo. Server -ArgumentList $instanceName
$databasename = "AdventureWorks2008R2" $timestamp = Get-Date -Format yyyyMMddHHmmss $backupfolder = "C:\Backup\"
$backupfile = "$($databasename)_Diff_$($timestamp).bak" $diffBackupFile = Join-Path $backupfolder $backupfile Backup-SqlDatabase ` -ServerInstance $instanceName ` -Database $databasename ` -BackupFile $diffBackupFile ` -Checksum ` -Initialize ` -Incremental `
-BackupSetName "$databasename Diff Backup" ` -CompressionOption On
4. Confi rm by reading the backup header. Add the following script and run:
#confirm by reading the header #backup type for differential is 5
#this is a block of code you would want to put #in a function so you can use anytime
$smoRestore = New-Object Microsoft.SqlServer.Management.Smo. Restore $smoRestore.Devices.AddDevice($diffBackupFile, [Microsoft. SqlServer.Management.Smo.DeviceType]::File) $smoRestore.ReadBackupHeader($server) $smoRestore.ReadFileList($server)
How it works...
A differential backup captures all changes to a database since the last full backup. Creating a differential backup in PowerShell is very similar to creating a full backup when using the Backup-SqlDatabase cmdlet, with a slight change in the set of
options that need to be specifi ed.
Backup-SqlDatabase ` -ServerInstance $instanceName ` -Database $databasename ` -BackupFile $diffBackupFile ` -Checksum ` -Initialize ` -Incremental `
-BackupSetName "$databasename Diff Backup" ` -CompressionOption On
The one option that differentiates a full and differential backup is the option -Incremental.
More information about these options used with the
Backup-SqlDatabase cmdlet is explained in more details in the
Creating a full backup recipe.
There's more...
To do a differential backup using SMO, the code will be similar to the SMO code you would use with a full backup. The one line that you will need to add is:
$smoBackup.Incremental = $true
Check out a more detailed example and explanation of how to use SMO for backups, instead of the Backup-SqlDatabase cmdlet,
See also
The Creating a full backup recipe
The Creating a backup on mirrored media sets recipe The Creating a transaction log backup recipe
The Creating a fi legroup backup recipe
Creating a transaction log backup
In this recipe, we will create a transaction log backup.Getting ready
We will use the AdventureWorks2008R2 database for this recipe. We will create a
timestamped transaction log backup fi le in the C:\Backup folder. Feel free to use a
database of your choice for this task.
Ensure the recovery model of the database you are backing up is either Full or BulkLogged.
You can use the Changing database recovery model recipe as a reference. The main code you can execute to query the current recovery model setting of your database is:
$database.DatabaseOptions.RecoveryModel
You can also check this using SQL Server Management Studio.
Log in to SSMS
Expand Databases, and right-click on AdventureWorks2008R2 Go to Properties | Options and check the Recovery Model value
The T-SQL syntax that will be generated by this PowerShell recipe will look similar to:
BACKUP LOG [AdventureWorks2008R2]
TO DISK = N'C:\Backup\AdventureWorks2008R2_Txn_20120815235319.bak' WITH NOFORMAT, NOINIT, NOSKIP, REWIND, NOUNLOAD, STATS = 10
How to do it...
1. Open the PowerShell console by going to Start | Accessories | Windows PowerShell | Windows PowerShell ISE.
2. Import the SQLPS module as follows:
#import SQL Server module
3. Add the following script and run:
$instanceName = "KERRIGAN"
$server = New-Object -TypeName Microsoft.SqlServer.Management.Smo. Server -ArgumentList $instanceName
#create a transaction log backup $databasename = "AdventureWorks2008R2" $timestamp = Get-Date -Format yyyyMMddHHmmss $backupfolder = "C:\Backup\"
$backupfile = "$($databasename)_Txn_$($timestamp).bak" $txnBackupFile = Join-Path $backupfolder $backupfile Backup-SqlDatabase ` -BackupAction Log ` -ServerInstance $instanceName ` -Database $databasename ` -BackupFile $txnBackupFile
How it works...
Transaction log backups are only permitted if the database you are backing up is in either the
Full or BulkLogged Recovery Model. To create a transaction log backup using the
Backup-SqlDatabase cmdlet, there is one option that must be specifi ed:
Backup-SqlDatabase `
-BackupAction Log `
-ServerInstance $instanceName ` -Database $databasename ` -BackupFile $txnBackupFile
When backing up databases, one of the most important parameters is BackupAction, which
accepts three valid values: Database, Files, and Log.
You can also optionally use the fully qualifi ed name of the BackupActionType enumeration:
-BackupAction ([Microsoft.SqlServer.Management.Smo. BackupActionType]::Log
Additional options you can specify when doing transaction log backups are:
Parameter Explanation
-NoRecovery Required when you are taking tail log backups; this
puts the database in the Restoring state, and the log is not truncated
-LogTruncationType Accepts an SMO BackupTruncateLogType
enumeration value, which is one of: NoTruncate,
Truncate, and TruncateOnly
There's more...
Tail log backups will contain anything that hasn't been backed up yet. These backups are usually taken in the event of a disaster, or just before a restore operation. Taking a tail log backup leaves the database in a Restoring state, that is, in an inaccessible state to
prevent further changes.
See also
The Creating a backup on mirrored media sets recipe The Creating a full backup recipe
The Creating a differential backup recipe The Creating a fi legroup backup recipe Learn more about tail log backups here:
http://msdn.microsoft.com/en-us/library/ms179314(v=sql.110). aspx
Creating a
fi
legroup backup
In this recipe, we will create a fi legroup backup using the Backup-SqlDatabase
PowerShell cmdlet.
Getting ready
For testing purposes, let's create a small sample database called StudentDB that contains
a couple of fi legroups called FG1 and FG2. Each fi legroup will have two datafi les.
Open up SQL Server Management Studio and run the following script:
CREATE DATABASE [StudentDB] ON PRIMARY
( NAME = N'StudentDB', FILENAME = N'C:\Temp\StudentDB.mdf'), FILEGROUP [FG1]
( NAME = N'StudentData1', FILENAME = N'C:\Temp\StudentData1.ndf'), ( NAME = N'StudentData2', FILENAME = N'C:\Temp\StudentData2.ndf'), FILEGROUP [FG2]
( NAME = N'StudentData3', FILENAME = N'C:\Temp\StudentData3.ndf') LOG ON
( NAME = N'StudentDB_log', FILENAME = N'C:\Temp\StudentDB.ldf') GO
We will use this database to do our fi legroup backup.
How to do it...
1. Open the PowerShell console by going to Start | Accessories | Windows PowerShell | Windows PowerShell ISE.
2. Import the SQLPS module as follows:
#import SQL Server module
Import-Module SQLPS -DisableNameChecking
3. Add the following script and run:
$instanceName = "KERRIGAN"
$server = New-Object -TypeName Microsoft.SqlServer.Management.Smo. Server -ArgumentList $instanceName
$databasename = "StudentDB"
$timestamp = Get-Date -Format yyyyMMddHHmmss #create a file to backup FG1 filegroup $backupfolder = "C:\Backup\"
$backupfile = "$($databasename)_FG1_$($timestamp).bak" $fgBackupFile = Join-Path $backupfolder $backupfile Backup-SqlDatabase ` -BackupAction Files ` -DatabaseFileGroup "FG1" ` -ServerInstance $instanceName ` -Database $databasename ` -BackupFile $fgBackupFile ` -Checksum ` -Initialize `
-BackupSetName "$databasename FG1 Backup" ` -CompressionOption On
#confirm by reading the header #backup type for files is 4
#this is a block of code you would want to put #in a function so you can use anytime
$smoRestore = New-Object Microsoft.SqlServer.Management.Smo. Restore
$smoRestore.Devices.AddDevice($fgBackupFile, [Microsoft.SqlServer. Management.Smo.DeviceType]::File)
$smoRestore.ReadBackupHeader($server)
How it works...
Backing up fi legroups can be considered a practical alternative for VLDBs, or very large databases, where a full backup can take up impractical amounts of space and time. With fi legroup backups, you can strategize which fi legroups to back up more frequently and which ones less frequently. Filegroup backups also enable you to take advantage of online piecemeal restores for Enterprise Edition of SQL Server, starting with SQL Server 2005.
See the Performing an online piecemeal restore recipe for more details.
In our recipe, we chose to backup FG1. Our main backup command looks like this:
Backup-SqlDatabase ` -BackupAction Files ` -DatabaseFileGroup "FG1" ` -ServerInstance $instanceName ` -Database $databasename ` -BackupFile $fgBackupFile ` -Checksum ` -Initialize `
-BackupSetName "$databasename FG1 Backup" ` -CompressionOption On;
Notice the highlighted lines of code. These lines enable the fi legroup backups. For the
BackupAction parameter, we have to specify Files. The other options for BackupAction
are Database and Log.
Once we have specifi ed that we want the Files value for the BackupAction
parameter, we should also pass the name of the fi legroup we want to back up using
See also
The Creating a backup on mirrored media sets recipe The Creating a full backup recipe
The Creating a differential backup recipe The Creating a transaction log backup recipe The Performing an online piecemeal restore recipe Learn more about backing up fi les and fi legroups:
http://msdn.microsoft.com/en-us/library/ms179401(v=sql.110). aspx
Restoring a database to a point in time
In this recipe, we will use the different backup fi les we have to restore to a point in time.Getting ready
In this recipe, we will use the AdventureWorks2008R2 database. You can also substitute
this with your preferred database on your development environment.
The AdventureWorks2008R2 database has a single fi legroup that contains a single datafi le.
We will restore this database to another SQL Server instance at a different point in time using three different backup fi les from three different backup types:
Full backup Differential backup Transaction log backup
We can create these three types of backups on the AdventureWorks2008R2 database
using PowerShell as illustrated in previous recipes. If you are fairly comfortable with T-SQL, this can also be done with T-SQL backup commands.
To help us verify if our point-in-time restore worked as expected, create a timestamped table before taking any type of backup. Alternatively, create a table and insert a timestamped record in the table before taking a backup.
You can use the following script to create your fi les 6464 - Ch05 - 10 - Restore a database to a point in time - Prep.ps1, which is included in the downloadable fi les for this book. When the script has fi nished executing, you should have timestamped Student tables in the
AdventureWorks2008R2 database, created within one minute intervals, similar to the
following screenshot:
For our recipe, we will restore the AdventureWorks2008R2 database to a second instance,
KERRIGAN\SQL01, up to 2012-04-07 08:21:59. This means that after the point-in-time
restore, we should have only four timestamped Student tables in KERRIGAN\SQL01
restored database:
StudentFull_201204070818
StudentDiff_201204070819
How to do it...
To restore to a point in time using a full, differential, and several transaction logfi les, follow these steps:
1. Open the PowerShell console by going to Start | Accessories | Windows PowerShell | Windows PowerShell ISE.
2. Import the SQLPS module as follows:
#import SQL Server module
Import-Module SQLPS -DisableNameChecking
3. Add the following script and run:
$instanceName = "KERRIGAN\SQL01"
$server = New-Object -TypeName Microsoft.SqlServer.Management. Smo.Server -ArgumentList $instanceName
#backupfilefolder
$backupfilefolder = "C:\Backup\" #look for the last full backupfile
#you can be more specific and specify filename $fullBackupFile =
Get-ChildItem $backupfilefolder -Filter "*Full*" | Sort -Property LastWriteTime -Descending |
Select -Last 1
#read the filelist info within the backup file
#so that we know which other files we need to restore
$smoRestore = New-Object Microsoft.SqlServer.Management.Smo. Restore
$smoRestore.Devices.AddDevice($fullBackupFile.FullName, [Microsoft.SqlServer.Management.Smo.DeviceType]::File) $filelist = $smoRestore.ReadFileList($server)
#read headers of the full backup file,
#because we are restoring to a default instance, we will #need to specify we want to move the files
#to the default data directory of our KERRIGAN\SQL01 instance $relocateFileList = @()
$relocatePath = "C:\Program Files\Microsoft SQL Server\MSSQL11. SQL01\MSSQL\DATA"
#we are putting this in an array in case we have
#multiple data and logfiles associated with the database foreach($file in $fileList)
{
#restore to different instance
#replace default directory path for both
$relocateFile = Join-Path $relocatePath (Split-Path $file. PhysicalName -Leaf)
$relocateFileList += New-Object Microsoft.SqlServer. Management.Smo.RelocateFile($file.LogicalName, $relocateFile) }
#let's timestamp our restored databasename #this is strictly for testing our recipe $timestamp = Get-Date -Format yyyyMMddHHmmss $restoredDBName = "AWRestored_$($ timestamp)"
#==================================================== #restore the full backup to the new instance name #==================================================== #note we have a NoRecovery option, because we have #additional files to restore
Restore-SqlDatabase ` -ReplaceDatabase ` -ServerInstance $instanceName ` -Database $restoredDBName ` -BackupFile $fullBackupFile.FullName ` -RelocateFile $relocateFileList ` -NoRecovery #==================================================== #restore last differential
#note the database is still in Restoring State
#==================================================== #using PowerShell V2 Where syntax
$diffBackupFile =
Get-ChildItem $backupfilefolder -Filter "*Diff*" |
Where {$_.LastWriteTime -ge $fullBackupFile.LastWriteTime} | Sort -Property LastWriteTime -Descending |
Select -Last 1
Restore-SqlDatabase ` -ReplaceDatabase `
-ServerInstance $instanceName ` -Database $restoreddbname `
-BackupFile $diffBackupFile.FullName ` -NoRecovery
#==================================================== #restore all transaction log backups from last
#differential up to 2012-04-07 08:21:59
#==================================================== #identify the last txn log backup file we need to restore #we need this so we can specify point in time
$lastTxnFileName = "AdventureWorks2008R2_Txn_201204070821" $lastTxnBackupFile =
Get-ChildItem $backupfilefolder -Filter "*$lastTxnFileName*" #restore all transaction log backups after the
#last differential, except the last transaction #backup that requires the point-in-time restore
foreach ($txnBackup in Get-ChildItem $backupfilefolder -Filter "*Txn*" |
Where {$_.LastWriteTime -ge $diffBackupFile.LastWriteTime -and $_.LastWriteTime -lt $lastTxnBackupFile.LastWriteTime} |
Sort -Property LastWriteTime) { Restore-SqlDatabase ` -ReplaceDatabase ` -ServerInstance $instanceName ` -Database $restoreddbname ` -BackupFile $txnBackup.FullName ` -NoRecovery }
#restore last txn backup file to point in time #restore only up to 2012-04-07 08:21:59
#this time we are going to restore using with recovery Restore-SqlDatabase ` -ReplaceDatabase ` -ServerInstance $instanceName ` -Database $restoreddbname ` -BackupFile $lastTxnBackupFile.FullName ` -ToPointInTime "2012-04-07 08:21:59"
How it works...
In this recipe, we are using the Restore-SqlDatabase cmdlet, the counterpart of the
Backup-SqlDatabase cmdlet that was introduced in SQL Server 2012.
Let's get a high-level overview of how to perform a point-in-time restore, and then we can break it down and explain the pieces involved in this recipe:
1. Gather your backup fi les.
Identify the last transaction log backup file that contains the point you want
to restore to.
2. Restore the last good full backup with NORECOVERY.
3. Restore the last good differential backup taken after the full backup you just restored with NORECOVERY.
4. Restore the transaction logs taken after your differential backup:
You can restore up to and including the log backup that contains the data to
the point in time you want to restore with NORECOVERY. You need to restore
the last log backup to a point in time, that is, you need to specify up to when to restore. Lastly, restore the database using WITH RECOVERY to make the
database accessible and ready to use.
Or, you can restore all transaction log backup files before the log backup that
contains the data to the point in time you want to restore with NORECOVERY.
Next, restore the last log backup using WITH RECOVERY to a point in time,
that is, you need to specify up to when to restore. Step 1 – Gather your backup fi les
You will need to collect your backup fi les. They don't necessarily have to reside in the same folder or drive, but it will be ideal, as it can simplify your restore script because you will have a uniform folder/drive to refer to. You will also need read permissions for these fi les.
In our recipe, we have simplifi ed this step. We have collected our full, differential, and transaction log backup fi les and stored them in the C:\Backup\ folder for ease of access.
If your backup fi les reside in different locations, you will just need to adjust the directory references in your script appropriately.
Once you have the backup fi les, assuming you follow a fi le naming convention, you can fi lter out all the full backups in your directory. In our sample, we are using the convention
databasename_type_timestamp.bak. For this scenario, we can extract that one full
backup fi le by specifying the keyword or pattern in our fi lename. We use the Get-ChildItem
cmdlet to fi lter for the latest full backup fi le:
#look for the last full backupfile
$fullBackupFile =
Get-ChildItem $backupfilefolder -Filter "*Full*" | Sort -Property LastWriteTime -Descending |
Select -Last 1
Once you have the full backup handle, you can read the fi lelist that is stored in that backup fi le. You can use the ReadFileList method that is available with an SMO Restore object.
Reading the fi lelist can help you automate by extracting the fi lenames of the data and logfi les you will need to restore.
#read the filelist info within the backup file
#so that we know which other files we need to restore
$smoRestore = New-Object Microsoft.SqlServer.Management.Smo.Restore $smoRestore.Devices.AddDevice($fullBackupFile.FullName, [Microsoft. SqlServer.Management.Smo.DeviceType]::File)
$filelist = $smoRestore.ReadFileList($server)
When reading the fi lelist, one property you can extract is the type of fi le that is stored:
The different types are:
L = Logfi le D = Database fi le F = FullText catalog
Step 2 – Restore the last good full backup, with NORECOVERY The fi rst step in restore operations is to restore the last known good full backup. This provides you a baseline to which you can restore additional fi les. The NORECOVERY option
is very important, as it preserves (or does not roll back) uncommitted transactions and allows additional fi les to be restored. We will be using the NORECOVERY option throughout
our restore process.
Because the full backup is always the fi rst fi le that needs to be restored, all the prep work required when moving fi les also happens at this stage.
For our recipe, we want to restore the database, originally from the default instance KERRIGAN,
to another instance, KERRIGAN\SQL01. For this reason, we will need to move our fi les from the
path stored with our backup fi le, to the new path we want to use. In this example we only want to move from the default data directory of our default instance to the data directory of our named instance KERRIGAN\SQL01. We do this by retrieving the full paths of the original data and
logfi les from the fi lelist, and replacing the full path with the new location we want to restore to. The highlighted code in the following snippet shows how we change this location:
$relocateFileList = @()
$relocatePath = "C:\Program Files\Microsoft SQL Server\MSSQL11.SQL01\ MSSQL\DATA"
#we are putting this in an array in case we have
#multiple data and logfiles associated with the database foreach($file in $fileList)
{
#restore to different instance
#replace default directory path for both
$relocateFile = Join-Path $relocatePath (Split-Path $file. PhysicalName -Leaf)
$relocateFileList += New-Object Microsoft.SqlServer.Management. Smo.RelocateFile($file.LogicalName, $relocateFile)
}
Note that our array contains the Microsoft.SqlServer.Management.Smo.RelocateFile
object, which will contain the logical and (relocated) physical names of our database fi les.
$relocateFileList += New-Object Microsoft.SqlServer.Management.Smo. RelocateFile($file.LogicalName, $relocateFile)
To restore our database, we are simply going to use the Backup-SqlDatabase cmdlet. There
are a couple of really important options here such as RelocateFile and NoRecovery.
#restore the full backup to the new instance name #note we have a NoRecovery option, because we have
Restore-SqlDatabase ` -ReplaceDatabase ` -ServerInstance $instanceName ` -Database $restoredDBName ` -BackupFile $fullBackupFile.FullName ` -RelocateFile $relocateFileList ` -NoRecovery
Step 3 – Restore the last good differential backup taken after the full backup you just restored, with NORECOVERY
Once the full backup is restored, we can add the last good differential backup following our full backup. This is going to be a less involved process, because at this point we've already restored our base database and relocated our fi les. We need to restore the differential backup with
NORECOVERY to prevent uncommitted transactions from being rolled back:
#using PowerShell V2 Where syntax $diffBackupFile =
Get-ChildItem $backupfilefolder -Filter "*Diff*" |
Where {$_.LastWriteTime -ge $fullBackupFile.LastWriteTime} | Sort -Property LastWriteTime -Descending |
Select -Last 1 Restore-SqlDatabase ` -ReplaceDatabase ` -ServerInstance $instanceName ` -Database $restoreddbname ` -BackupFile $diffBackupFile.FullName ` -NoRecovery
Note that you may, or may not, have a differential backup fi le in your environment. If you don't, don't worry, it does not affect your recoverability as long as you have all the transaction log backup fi les intact and available for restore.
Step 4 – Restore the transaction logs taken after your differential backup
After we restore our differential backup fi le, we can start restoring our transaction log backup fi les. These transaction log backup fi les should be the ones following your differential backup. You may, or may not, need the complete set of logfi les following your differential backup. If you need to restore up to the point of a database crash, you will need to restore all transaction log backups including the tail log backup. If not, you will only need the backup fi les up to the time to which you want to restore.
For our recipe, we identify fi rst the last transaction log backup fi le we want to restore. This is important because we need to know how to use a PointInTime parameter when we use this
#identify the last txn log backup file we need to restore #we need this so we can specify point in time
$lastTxnFileName = "AdventureWorks2008R2_Txn_201204070821" $lastTxnBackupFile =
Get-ChildItem $backupfilefolder -Filter "*$lastTxnFileName*"
For all other transaction log backup fi les, we loop through our backup folder and restore all .txnfi les that were taken after the last differential backup, and before the last transaction log
backup fi le we want to restore. We also need to sort the fi les by the WriteTime parameter so
that we can restore them sequentially to our database. Note that we need to restore all these fi les with NORECOVERY.
foreach ($txnBackup in Get-ChildItem $backupfilefolder -Filter "*Txn*" |
Where {$_.LastWriteTime -ge $diffBackupFile.LastWriteTime -and $_.LastWriteTime -lt $lastTxnBackupFile.LastWriteTime} |
Sort -Property LastWriteTime) { Restore-SqlDatabase ` -ReplaceDatabase ` -ServerInstance $instanceName ` -Database $restoreddbname ` -BackupFile $txnBackup.FullName ` -NoRecovery }
Once all these fi les are restored, then we are ready to restore the last transaction logfi le. Once this fi le is restored, the database needs to be accessible, and all uncommitted transactions need to be rolled back.
There are two methods to do this. The fi rst method, which we used in the recipe, is to restore the last fi le with the ToPointInTime parameter, and without the NoRecovery parameter.
Restore-SqlDatabase ` -ReplaceDatabase ` -ServerInstance $instanceName ` -Database $restoreddbname ` -BackupFile $lastTxnBackupFile.FullName ` -ToPointInTime "2012-04-07 08:21:59"
An alternative is to restore this last transaction log backup fi le with NoRecovery as well, but
add another command in the end to restore the database using WITH RECOVERY. In reality,
it is safer to restore all the required transaction log backup fi les with NORECOVERY all the way
through. This is safer because if we accidentally restore a fi le using WITH RECOVERY, the only
Once we have confi rmed that all the required fi les have been restored, we can restore the database using WITH RECOVERY. One way to achieve this in our recipe, is by using a T-SQL
statement, and passing this statement to our Invoke-Sqlcmd cmdlet:
#get the database out of Restoring state #make the database accessible
$sql = "RESTORE DATABASE $restoreddbname WITH RECOVERY" Invoke-Sqlcmd -ServerInstance $instanceName -Query $sql
The RESTORE DATABASE command takes our database from a restoring state, to an
accessible and ready-to-use state. The RESTORE command rolls back all unfi nished
transactions and readies the database for use.
See also
The Creating a backup on mirrored media sets recipe The Creating a full backup recipe
The Creating a differential backup recipe The Creating a transaction log backup recipe The Performing an online piecemeal restore recipe
You can check out how to do point-in-time restore using T-SQL:
http://msdn.microsoft.com/en-us/library/ms179451(v=sql.110). aspx
Performing an online piecemeal restore
In this recipe, we will perform an online piecemeal restore.Getting ready
We will use a test database called StudentDB database, which has three fi legroups—one
primary, two custom fi legroups FG1 and FG2—in this recipe. Each of FG1 and FG2 will have
one secondary datafi le stored in the C:\Temp folder.
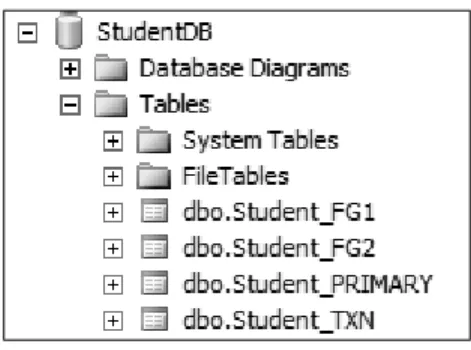
You can use the script 6464 - Ch05 - 11 - Perform an Online PieceMeal Restore - Prep.ps1 to create your fi les, which is included in the downloadable fi les for this book. When the script has fi nished executing, you should see the following database:
This is how the tables will be structured:
Table Filegroup Datafile name Datafile location
Student_PRIMARY PRIMARY StudentDB.mdf Default data
directory Student_FG1 FG1 Student_FG1_ data C:\Temp Student_FG2 FG2 Student_FG2_ data C:\Temp
Student_TXN PRIMARY StudentDB.mdf Default data
directory
For our recipe, we will restore only the PRIMARYfi legroup, and fi legroup FG2 to our second
SQL Server instance KERRIGAN\SQL01. At the end of our task, only Student_PRIMARY
and Student_FG2 tables will be accessible.
Feel free to substitute this with a database available in your development environment that already has separate fi legroups and fi legroup backups.
How to do it...
1. Open the PowerShell console by going to Start | Accessories | Windows PowerShell | Windows PowerShell ISE.
2. Import the SQLPS module as follows:
#import SQL Server module
Import-Module SQLPS -DisableNameChecking
3. Add the following script and run:
$instanceName = "KERRIGAN\SQL01"
$server = New-Object -TypeName Microsoft.SqlServer.Management. Smo.Server -ArgumentList $instanceName
#let's timestamp our databasename
#this is strictly for testing and checking purposes $timestamp = Get-Date -Format yyyyMMddHHmmss
$restoreddbname = "StudentDBRestored_$($timestamp)"
$relocatePath = "C:\Program Files\Microsoft SQL Server\MSSQL11. SQL01\MSSQL\DATA"
#for this piecemeal restore, we need to specify #files to restore
#primary filegroup
$primaryfgbackup = "C:\Backup\StudentDB_PRIMARY.bak" #additional filegroup(s) to restore, and filegroup name $fg2backup = "C:\Backup\StudentDB_FG2.bak"
$fg2name = "Student_FG2_data" #transaction log backup
$txnbackup = "C:\Backup\StudentDB_TXN.bak" #========================================= #primary fg
#=========================================
#because we want to restore to a different instance, #we need to create an array of files which will #contain the new file locations of data and log #files in the primary filegroup
$relocateFileList = @()
$smoRestore = New-Object Microsoft.SqlServer.Management.Smo. Restore
$smoRestore.Devices.AddDevice($primaryfgbackup , [Microsoft. SqlServer.Management.Smo.DeviceType]::File)
$smoRestore.ReadFileList($server) | ForEach-Object {
$relocateFile = Join-Path $relocatePath (Split-Path $_.PhysicalName -Leaf)
$relocateFileList += New-Object Microsoft.SqlServer. Management.Smo.RelocateFile($_.LogicalName, $relocateFile) }
#========================================= #restore primary fg
#needs to be only mdf and ldf #========================================= Restore-SqlDatabase ` -Partial ` -ReplaceDatabase ` -ServerInstance $instanceName ` -Database $restoreddbname ` -BackupFile $primaryfgbackup ` -RelocateFile $relocateFileList ` -NoRecovery #========================================= #fg2 #========================================= $relocateFileList = @()
#for the custom filegroup we want to restore, we want to #relocate only that filegroup's datafiles
$smoRestore = New-Object Microsoft.SqlServer.Management.Smo. Restore
$smoRestore.Devices.AddDevice($fg2backup , [Microsoft.SqlServer. Management.Smo.DeviceType]::File)
$smoRestore.ReadFileList($server) | ForEach-Object {
if($_.LogicalName -eq $fg2name) {
$relocateFile = Join-Path $relocatePath (Split-Path $_.PhysicalName -Leaf)
$relocateFileList += New-Object Microsoft.SqlServer. Management.Smo.RelocateFile($_.LogicalName, $relocateFile) }
}
#========================================= #restore fg2
#dont need partial anymore
#========================================= Restore-SqlDatabase ` -ReplaceDatabase ` -ServerInstance $instanceName ` -Database $restoreddbname ` -BackupFile $fg2backup ` -RelocateFile $relocateFileList ` -NoRecovery
#========================================= #restore transaction log backup
#this will restore using with recovery #========================================= Restore-SqlDatabase ` -ReplaceDatabase ` -ServerInstance $instanceName ` -Database $restoreddbname ` -BackupFile $txnbackup
How it works...
Online piecemeal restore is an Enterprise feature available starting from SQL Server 2005. This type of restore, also referred to as partial restore, allows you to stage your restores. With each restore sequence, one or more fi legroups are available online, leaving the rest offl ine. The power of this feature is that as soon as your fi rst fi legroup is restored, the objects you have in this fi legroup already become accessible to your end users or applications. The fi rst thing you will need to do is line up your fi les. You will need to specify where the
PRIMARYfi legroup backup, any user fi legroups you want to restore, and the transaction log
backup fi les are. In our recipe, we are also restoring the database to a different instance, so we will need to relocate our database fi les. For this reason, we must also specify what the fi legroup names are for the fi legroups we are restoring.
#primary filegroup
$primaryfgbackup = "C:\Backup\StudentDB_PRIMARY.bak" #additional filegroup(s) to restore, and filegroup name $fg2backup = "C:\Backup\StudentDB_FG2.bak"
$fg2name = "Student_FG2_data" #transaction log backup
$txnbackup = "C:\Backup\StudentDB_TXN.bak"
Once we have the files lined up, we need to create an array that contains the files we are relocating:
$relocateFileList = @()
$smoRestore = New-Object Microsoft.SqlServer.Management.Smo.Restore $smoRestore.Devices.AddDevice($primaryfgbackup , [Microsoft.SqlServer. Management.Smo.DeviceType]::File)
$smoRestore.ReadFileList($server) | ForEach-Object {