Team LiB
Team LiB
by Greg Harvey
6 PDF
FOR
909 Third Avenue New York, NY 10022
www.wiley.com
Copyright 2003 by Wiley Publishing, Inc., Indianapolis, Indiana Published by Wiley Publishing, Inc., Indianapolis, Indiana Published simultaneously in Canada
No part of this publication may be reproduced, stored in a retrieval system or transmitted in any form or by any means, electronic, mechanical, photocopying, recording, scanning or otherwise, except as permitted under Sections 107 or 108 of the 1976 United States Copyright Act, without either the prior written permission of the Publisher, or authorization through payment of the appropriate per-copy fee to the Copyright Clearance Center, 222 Rosewood Drive, Danvers, MA 01923, (978) 750-8400, fax (978) 646-8700. Requests to the Publisher for permission should be addressed to the Legal Department, Wiley Publishing, Inc., 10475 Crosspoint Blvd., Indianapolis, IN 46256, (317) 572-3447, fax (317) 572-4447, e-mail:
Trademarks:Wiley, the Wiley Publishing logo, For Dummies, the Dummies Man logo, A Reference for the Rest of Us!, The Dummies Way, Dummies Daily, The Fun and Easy Way, Dummies.com and related trade dress are trademarks or registered trademarks of Wiley Publishing, Inc., in the United States and other countries, and may not be used without written permission. Adobe and Acrobat are trademarks or regis-tered trademarks of Adobe Systems Incorporated. All other trademarks are the property of their respective owners. Wiley Publishing, Inc., is not associated with any product or vendor mentioned in this book.
LIMIT OF LIABILITY/DISCLAIMER OF WARRANTY: WHILE THE PUBLISHER AND AUTHOR HAVE USED THEIR BEST EFFORTS IN PREPARING THIS BOOK, THEY MAKE NO REPRESENTATIONS OR WARRANTIES WITH RESPECT TO THE ACCURACY OR COMPLETENESS OF THE CONTENTS OF THIS BOOK AND SPECIF-ICALLY DISCLAIM ANY IMPLIED WARRANTIES OF MERCHANTABILITY OR FITNESS FOR A PARTICULAR PURPOSE. NO WARRANTY MAY BE CREATED OR EXTENDED BY SALES REPRESENTATIVES OR WRITTEN SALES MATERIALS. THE ADVICE AND STRATEGIES CONTAINED HEREIN MAY NOT BE SUITABLE FOR YOUR SITUATION. YOU SHOULD CONSULT WITH A PROFESSIONAL WHERE APPROPRIATE. NEITHER THE PUBLISHER NOR AUTHOR SHALL BE LIABLE FOR ANY LOSS OF PROFIT OR ANY OTHER COM-MERCIAL DAMAGES, INCLUDING BUT NOT LIMITED TO SPECIAL, INCIDENTAL, CONSEQUENTIAL, OR OTHER DAMAGES.
For general information on our other products and services or to obtain technical support, please contact our Customer Care Department within the U.S. at 800-762-2974, outside the U.S. at 317-572-3993, or fax 317-572-4002.
Wiley also publishes its books in a variety of electronic formats. Some content that appears in print may not be available in electronic books.
Library of Congress Control Number: 2003105653 ISBN: 0-7645-3760-1
Manufactured in the United States of America 10 9 8 7 6 5 4 3 2 1
1O/SR/QX/QT/IN
Greg Harvey, the author of more than 50 computer books, has had a long career of teaching business people in the use of IBM PC, Windows, and Macintosh software application programs. From 1983 to 1988, he conducted hands-on computer software training for corporate business users with a variety of training companies (including his own, PC Teach). From 1988 to 1992, he taught university classes in Lotus 1-2-3 and Introduction to Database Management Technology (using dBASE) in the Department of Information Systems at Golden State University in San Francisco.
In mid-1993, Greg started a new multimedia publishing venture called mind over media. As a multimedia developer, he hopes to enliven his future com-puter books by making them into true interactive learning experiences that will vastly enrich and improve the training of users of all skill levels. You can send him e-mail at [email protected] visit his Web site at
www.mindovermedia.com.
In 1999, Greg began graduate school at the California Institute of Integral Studies (CIIS) in San Francisco. In the summer of 2000, he received his master’s degree in philosophy and religion in the area of Asian and Comparative Studies. Currently, he has finished all his coursework in the Ph.D. program at CIIS and is getting ready to begin work on his dissertation in the area of Chinese and Tibetan end-of-life religious beliefs.
Dedication
To Chris for his unflagging support and encouragement
Author’s Acknowledgments
Let me take this opportunity to thank all the people, both at Wiley Publishing, Inc., and at Mind over Media, Inc., whose dedication and talent combined to get this book out and into your hands in such great shape.
At Wiley Publishing, Inc., I want to thank Steve Hayes and Tiffany Franklin for their considerable help in getting this project underway, Christine Berman for her tremendous expertise as project editor, and Jean Rogers for her great skill as the copy editor, for making sure that the project stayed on course and made it into production so that all the talented folks on the Production team could create this great final product.
Some of the people who helped bring this book to market include the following:
Acquisitions, Editorial, and Media Development
Project Editor: Christine Berman Acquisitions Editor: Tiffany Franklin Copy Editor: Jean Rogers
Technical Editor: Gordon Kent Editorial Manager: Leah Cameron
Media Development Manager:Laura VanWinkle Media Development Supervisor:Richard Graves Editorial Assistant: Amanda Foxworth
Cartoons:Rich Tennant, www.the5thwave.com
Production
Project Coordinators: Nancee Reeves, Regina Snyder
Layout and Graphics:Seth Conley, Carrie Foster, LeAndra Hosier, Michael Kruzil, Janet Seib
Proofreaders: Laura Albert, Angel Perez, Carl Pierce, Kathy Simpson,
Techbooks Production Services Indexer: Techbooks Production Services
Publishing and Editorial for Technology Dummies
Richard Swadley,Vice President and Executive Group Publisher Andy Cummings,Vice President and Publisher
Mary C. Corder,Editorial Director Publishing for Consumer Dummies
Diane Graves Steele,Vice President and Publisher Joyce Pepple,Acquisitions Director
Composition Services
Introduction ...1
Part I: Presenting Acrobat and PDF Files ...7
Chapter 1: The Ins and Outs of PDF Files ...9
Chapter 2: Accessing PDF Files ...21
Chapter 3: Getting Acquainted with Acrobat 6 ...53
Part II: The Wealth of Ways for Creating PDF Files ...79
Chapter 4: Distilling PDF Files ...81
Chapter 5: Converting Microsoft Office Documents ...107
Chapter 6: Capturing Paper Documents ...121
Chapter 7: Capturing Web Pages ...133
Chapter 8: Printing PDF Files ...147
Part III: Reviewing, Editing, and Securing PDFs ...159
Chapter 9: Annotating PDF Files for Review ...161
Chapter 10: Editing PDF Files ...203
Chapter 11: Securing PDF Files ...239
Chapter 12: Extracting Text and Graphics from PDF Files ...263
Chapter 13: Cataloging and Distributing PDF Files ...275
Part IV: PDFs as Electronic Documents ...291
Chapter 14: Creating Interactive Forms ...293
Chapter 15: Building and Publishing eBooks ...327
Chapter 16: Making PDFs into Multimedia Presentations ...355
Part V: The Part of Tens ...377
Chapter 17: Top Ten Third-Party Acrobat Plug-Ins ...379
Chapter 18: Top Ten Online Resources ...383
Introduction...1
About This Book ...1
How to Use This Book ...2
What You Can Safely Ignore ...2
Foolish Assumptions ...3
How This Book Is Organized ...3
Part I: Presenting Acrobat and PDF Files ...3
Part II: The Wealth of Ways for Creating PDF Files ...4
Part III: Reviewing, Editing, and Securing PDFs ...4
Part IV: PDFs as Electronic Documents ...4
Part V: The Part of Tens ...5
Conventions Used in This Book ...5
Keyboard and mouse ...5
Special icons ...6
Where to Go from Here ...6
Part I: Presenting Acrobat and PDF Files ...7
Chapter 1: The Ins and Outs of PDF Files . . . .9
The Purpose of PDF Files ...9
Benefits of Using PDF Files ...11
What you designed is what they see ...12
PDF files in the review cycle ...12
Providing forms, both paper and electronic ...12
Document archiving ...15
PDF in the prepress workflow ...16
Quick and easy Web site retrieval ...16
PDF files as slide shows and multimedia presentations ...17
The Different Types of PDF Files ...18
Chapter 2: Accessing PDF Files . . . .21
Perusing PDF Files in Adobe Reader ...21
Downloading and launching Adobe Reader 6 ...23
The Adobe Reader window ...26
Navigating PDF documents ...37
Perusing PDF Files in Acrobat 6 ...42
Reading eBooks with Adobe Reader and Acrobat 6 ...43
I want my DRM ...43
Using the Adobe DRM Activator ...44
Dusting Off My Bookshelf ...45
Chapter 3: Getting Acquainted with Acrobat 6 . . . .53
Launching Acrobat 6 ...53
Opening PDF files for viewing or editing ...54
Arranging open PDF files in the Acrobat window ...55
Closing open PDF files ...56
Getting Comfy with the Acrobat 6 Interface ...57
What’s good on the Acrobat 6 menus today? ...57
Tons o’ toolbars! ...68
Getting all the help you need ...73
Viewing the How To window ...74
Making quick use of keyboard shortcuts ...75
Part II: The Wealth of Ways for Creating PDF Files ...79
Chapter 4: Distilling PDF Files . . . .81
Common Ways to Create PDF Files ...81
Put away that PDFWriter! ...82
Using Create PDF in Acrobat 6 ...82
Using the Acrobat 6 Distiller ...84
To every PDF there is a purpose . . . ...86
Automatically displaying your distilled file in Acrobat ...88
Making Adobe PDF settings of your very own ...89
Selecting security settings for the new PDF file ...101
Automated PDF files — would you watch this folder for me? ...102
Making Acrobat Distiller your printer ...104
PDF Files Courtesy of Adobe PDF Online ...105
Chapter 5: Converting Microsoft Office Documents . . . .107
Using PDFMaker in Microsoft Office for Windows ...108
Automatically viewing the converted PDF in Acrobat ...109
Converting and e-mailing PDF files ...110
Customizing the PDF conversion settings ...111
Converting Office documents to PDF and sending them for review ...117
Converting Office X files on the Mac ...118
Chapter 6: Capturing Paper Documents . . . .121
Scanning Paper Documents in Acrobat 6 ...121
Making scanned documents searchable and editable ...125
Correcting Paper Capture boo-boos ...127
Importing Previously Scanned Documents into Acrobat ...129
Chapter 7: Capturing Web Pages . . . .133
Opening Web Pages as PDF Files ...134
Browsing captured Web pages in Acrobat or Adobe Reader ...136
Modifying the Web capture preferences ...140
Modifying the Web capture conversion settings ...141
Adding Web Pages to a PDF File ...143
Adding linked pages to a PDF file ...143
Refreshing updated content ...144
Chapter 8: Printing PDF Files . . . .147
Printing PDF Files ...147
Printing document layers ...150
Printing selected pages ...152
Printing oversized documents ...154
Using the prepress printing settings ...155
Troubleshooting Printing Problems ...155
Using PrintMe Internet Printing ...156
Part III: Reviewing, Editing, and Securing PDFs ...159
Chapter 9: Annotating PDF Files for Review . . . .161
Sending Out PDF Files for Review in Windows ...161
Initiating an e-mail-based review ...162
Participating in an e-mail-based review ...164
Setting up a browser-based review ...164
Managing reviews with the Review Tracker ...169
The Ins and Outs of Bookmarks ...171
Generating automated bookmarks ...171
Creating manual bookmarks ...173
Editing bookmarks ...174
Inserting Document Comments with the Commenting Toolbar ...176
Using the Note tool ...177
Using the Stamp tool ...180
Hitting the highlights ...184
Inserting Document Comments with the Advanced Commenting Toolbar ...186
Using the Text Box tool ...186
Using the Attach Sound tool ...188
Using the File Attachment tool ...190
Mark it well ...191
Viewing Comments in a PDF Document ...195
Summing up ...195
Showing and hiding comments ...196
Finding comments ...198
Removing all comments ...201
Chapter 10: Editing PDF Files . . . .203
Touching Up the Text and Graphics ...204
Using the TouchUp Text tool to edit text ...204
Editing text from the context menu ...206
Modifying text attributes ...207
Touching up your graphic images ...208
Page-Editing Practices ...212
Rotating pages ...212
Cropping pages ...213
Replacing pages from other PDF files ...215
Inserting and deleting pages ...217
Reordering the pages ...219
Renumbering the thumbnail pages ...219
Adding Headers and Footers to a PDF Document ...221
Adding Watermarks and Backgrounds to PDF Documents ...223
Adding Articles to a PDF Document ...225
Defining articles ...226
Checking the flow of a new article ...228
Editing Document Layers in a PDF File ...229
Flattening PDF layers ...230
Merging PDF layers ...231
Batch Processing to the Rescue ...232
Editing batch sequences ...233
Creating new batch sequences ...233
Chapter 11: Securing PDF Files . . . .239
Protecting PDF Files ...239
Checking a document’s security settings ...240
Securing files with low or high encryption ...241
Signing Off Digital Style ...244
Setting up your profile ...245
Modifying the user settings in a profile ...246
Signing a PDF document ...250
Validating digital signatures ...255
Comparing signed documents ...259
Chapter 12: Extracting Text and Graphics from PDF Files . . . .263
Extracting Blocks of Text ...264
Using drag-and-drop to copy text ...265
Selecting columns of text ...266
Selecting tables and formatted text ...268
Selecting and Copying Graphic Images ...270
Exporting Images in Various Graphics Formats ...271
Saving Entire PDF Files in a New File Format ...272
Saving PDF files as text files ...272
Saving PDF files as HTML files ...273
Chapter 13: Cataloging and Distributing PDF Files . . . .275
Cataloging 101 ...275
Creating the PDF document collection ...276
Building an index for your collection ...278
Rebuilding an index ...281
Searching a Collection ...283
Viewing the search results ...286
Refining your search ...287
Adding document information (metadata) and date filtering to your searches ...288
Distributing PDF Document Collections ...289
Part IV: PDFs as Electronic Documents ...291
Chapter 14: Creating Interactive Forms . . . .293
Introducing Form Fields ...293
Adding Fields to Forms ...294
Move those fields! ...297
Duplicating form fields ...298
Getting Acquainted with Form Field Tools ...299
Selecting Form Field Options ...300
Jawing about General tab options ...300
Applying Appearance tab options ...301
Understanding the Options tab ...303
Interacting with the Actions tab ...306
Getting familiar with the Format tab ...314
Viewing the Validate tab ...315
Cruising the Calculate tab ...316
Sizing up the Selection Change tab ...317
Singling out the Signed tab ...318
Looking at the Layout Grid ...319
Chapter 15: Building and Publishing eBooks . . . .327
But First, a Little eBook History . . . ...327
Designing eBooks for Different Devices ...329
Turning Out Tagged PDF Files ...331
Perfecting your eBook in PageMaker ...331
What about other layout programs? ...340
Designing Library and Cover Graphics ...343
Adding a cover graphic to your PDF eBook ...344
Adding a library thumbnail graphic to your PDF eBook ...346
Links ...348
Adding an internal link ...348
Using Link Properties options ...350
Adding an external link ...350
Controlling the Way Text Flows ...351
Distributing Your eBooks ...353
Chapter 16: Making PDFs into Multimedia Presentations . . . .355
Converting a Presentation to PDF ...356
Building Your Own PDF Presentation ...357
Having Fun with Photoshop ...358
Using Multimedia Objects in a Presentation ...361
Inserting a movie in a presentation ...362
Inserting a sound in a presentation ...366
Making Your Presentation Interactive ...366
Viewing a Presentation Full Screen ...368
Selecting Full Screen Mode Preferences ...368
Using the Image Viewer and Picture Tasks Plug-ins ...371
Viewing slideshows with the Image Viewer plug-in ...371
Exporting images with the Picture Tasks plug-in ...372
Part V: The Part of Tens ...377
Chapter 17: Top Ten Third-Party Acrobat Plug-Ins . . . .379
Chapter 18: Top Ten Online Resources . . . .383
A
dobe PDF (Portable Document Format) is just now starting to fulfill its promise as a truly transportable file format that enables people to share sophisticated electronic documents across a wide array of otherwise incom-patible computer platforms without requiring access to either the software that generated the documents or the fonts used in the documents. Part of the proof of this statement is evidenced in the ever-growing presence of PDF documents, especially on the World Wide Web.Nowadays, you can hardly browse the Web without encountering sites that present some of their online information as PDF files. In fact, so many sites offer their standard reports, registration and feedback forms, and industry white papers as downloadable PDF files that few seasoned business users remain unfamiliar with the PDF format (even if they’re not exactly sure what it is) or the free Adobe Reader software used to open, read, and print docu-ments saved in it.
Beyond the popularity of PDF for information-sharing on the Internet, PDF is also becoming increasingly popular as the format to use for prepress docu-ments, eBook publishing, document review, and document archiving. To ready PDF files for these additional roles, you naturally graduate from the world of the free Adobe Reader and Acrobat eBook Reader to that of Acrobat 6.
Acrobat 6 (which, unlike the free Adobe Reader, you must purchase) is Adobe’s latest version of its all-in-one utility for editing, annotating, and managing docu-ments saved in PDF.
As the name Acrobat implies, this utility enables you to juggle the many roles it can assign PDF files with relative ease. All that’s required of you is a keen sense of the role or roles you want your PDF document to fulfill along with a careful reading of the pertinent sections of this book.
About This Book
this book’s information emphasizes more the purpose you ultimately have in mind for the PDF file than the features used to accomplish this purpose in the various programs such as Acrobat, Adobe Reader, and the Acrobat eBook Reader.
As a result, this book is not meant to be read from cover to cover. Each discus-sion of a topic briefly addresses the question of how a particular feature enables you to accomplish your purpose before launching into how to use it. In Acrobat, as with most other sophisticated programs, there is usually more than one way to do a task. For the sake of your sanity, I have purposely limited the choices, usually by giving you only the most efficient ways to do a particular task. Later on, if you’re so tempted, you can experiment with alternative ways of doing a task. For now, just concentrate on performing the task as described.
As much as possible, I’ve tried to make it unnecessary for you to remember anything covered in another section of the book. From time to time, however, you come across a cross-reference to another section or chapter in the book. For the most part, such cross-references are meant to help you get more com-plete information on a subject, should you have the time and interest. If you have neither, no problem; just ignore the cross-references as if they never existed.
How to Use This Book
As a reference to all things PDF, you should start out by looking up the topic you need information on (either in the Table of Contents or the Index) and then refer directly to the section of interest. Most topics are explained con-versationally. Many times, however, my regiment-commander mentality takes over, and I list the steps you need to take to accomplish a particular task in a particular section.
What You Can Safely Ignore
When you come across a section that contains the steps you take to get some-thing done, you can safely ignore all text accompanying the steps (the text that isn’t in bold) if you have neither the time nor the inclination to wade through more material.
Foolish Assumptions
I’m going to make only two assumptions about you (let’s see how close I get): You have a need to create and use PDF files in your work, and you have access to Acrobat 6. Some of you are working on PCs running some version of Windows or Windows NT. Others of you are working on Macintosh computers running one of the later versions of the Mac operating system. Note that there are rather specific system requirements for Acrobat 6 whether you use a Windows or Macintosh computer. These requirements are covered in Chapter 1.
Beyond that, it’s anyone’s guess what brings you to Acrobat and PDF. Some of you need to know how to convert all your paper documents into PDF files. Some of you need to know how to save your graphics files as PDFs. Others of you need to know how to create PDF form files in which users can submit important data. Still others of you need to know how to create and publish PDF files as eBooks for sale and distribution on the World Wide Web.
Regardless of your needs, you will be able to find the information you require somewhere in the pages of this book.
How This Book Is Organized
This book is organized into five parts, the first four of which cover all the basics of reading, making, and managing PDF files. The fifth part, the indispens-able Part of Tens, recaps important Acrobat and PDF enhancements and resources. You should not, however, get too hung up about following along with the structure of the book; ultimately, it doesn’t matter at all if you find out how to use Paper Capture to convert printed documents to PDF before you find out how to use PDFMaker 6.0 to convert your Word documents, or if you figure out how to archive your PDF documents in a searchable collection before you discover how to create interactive forms for collecting data online. The impor-tant thing is that you find the information — and understand it when you find it — when you need to do what needs getting done.
In case you’re interested, here’s a synopsis of what you find in each part of this book.
print PDF documents. Chapter 3 acquaints you with the interface of Acrobat 6, Adobe’s utility for preparing and editing PDF documents.
Part II: The Wealth of Ways
for Creating PDF Files
Part II looks at the many ways of making PDF files. Chapter 4 gives you vital information on how to use and customize the Acrobat Distiller to create the PDF document suited to just the purpose you have in mind. Chapter 5 covers the ins and outs of converting Microsoft Office documents (specifically those created with Word, Excel, and PowerPoint) to PDF. Chapter 6 covers captur-ing paper documents as PDF files primarily by scanncaptur-ing them directly into Acrobat 6. Chapter 7 tells you how to capture Web pages as PDF files. Chapter 8 covers the printing of all or part of your PDF files on printers you have in-house.
Part III: Reviewing, Editing,
and Securing PDFs
Part III covers a mixture of techniques for reviewing, editing, and protecting your PDF files. Chapter 9 introduces you to the many ways for annotating the PDF documents that you send out for online review and introduces the new e-mail-based and browser-based review features in Acrobat 6. Chapter 10 covers editing PDF files in Acrobat 6. Chapter 11 tells you how to secure your PDF documents and protect them from further changes. Chapter 12 acquaints you with the different ways you can extract contents in your PDF files for repurposing with the other software programs you use. Chapter 13 gives you the ins and outs of cataloging your PDF files by creating searchable collec-tions that you can distribute across networks or on CD-ROM.
Part V: The Part of Tens
As is the tradition in these For Dummiesbooks, the last part contains lists of the top ten most useful facts, tips, and suggestions. Chapter 17 gives you a list of my top ten third-party (that is, not developed by Adobe Systems) add-in programs for augmenting and enhancing the program’s already considerable features. Chapter 18 gives you a list of my top ten online resources for discov-ering even more about Acrobat and PDF files!
Conventions Used in This Book
The following information gives you the lowdown on how things look in this book — publishers call these the book’s conventions(no campaigning, flag-waving, name-calling, or finger-pointing is involved, however).
Keyboard and mouse
Although most of the keyboard and mouse instructions given in the text are self-explanatory, there are a few important differences between the typical Windows and Macintosh keyboards and mice that are worth noting here. For example, keystroke shortcuts in Acrobat 6 and Adobe Reader 6 in Windows often use the Ctrl key in combination with one or more letter keys. The Macintosh, however, substitutes its Ôkey (called the Command key, the one with the apple and the cloverleaf icon) for the Windows Ctrl key (rather than using its Control key). Also, because the Macintosh keyboard has no Alt key, its Option key is routinely substituted in all shortcuts using the Alt key.
Regarding the mouse, Windows favors a two-button (left- and right-button) mouse, whereas Macintosh favors a single-button mouse. As a result, while you access shortcut (or context) menus in Acrobat in Windows by clicking the right mouse button (a technique commonly known as right-clicking), you hold down the Control (not the Ô) key as you click the mouse on the Macintosh (a tech-nique commonly known as Control+clicking). Note that if you do have a two button mouse on the Macintosh, the right-clicking technique applies.
Special icons
The following icons are strategically placed in the margins to point out stuff you may or may not want to read.
This icon alerts you to nerdy discussions that you may well want to skip (or read when no one else is around).
This icon alerts you to shortcuts or other valuable hints related to the topic at hand.
This icon alerts you to information to keep in mind if you want to meet with a modicum of success.
This icon alerts you to information to keep in mind if you want to avert com-plete disaster.
Where to Go from Here
Presenting
A
dobe’s PDF (Portable Document Format) is charac-terized as a truly universal file format that preserves all the original document’s formatting — including its fonts, graphics, and layout — across a wide array of different computer platforms. This part of the book is where you find out how PDF came to warrant this lofty characterization.The Ins and Outs of PDF Files
In This Chapter
What is a PDF file?
The benefits of using PDF files
Where PDF files come from
The different flavors of PDF files
I
’m so enthusiastic about Adobe PDF files that I think the abbreviation PDF should stand for Pretty Darn Fantastic instead of the more mundane Portable Document Format. In PDF files, you not only see the first inklings of a truly paperless office (or as close as we’re likely to get), but also the deliv-ery of a truly universal file format; that is, one truly capable of being opened and used on any of the many computer operating systems currently in use.In this chapter, you get introduced to what makes PDF files so special and how they can be used to your advantage, especially in office environments that mix and match different computer platforms. As part of this process, you also get acquainted with the different versions of PDF files and how they can be tailored to fit the particular needs of those who use the documents.
The Purpose of PDF Files
The key to this digital file interchange is the nifty little software program known as Acrobat (although Adobe originally named it Carousel when it first appeared in 1993). A free form of this software, known as the Adobe Reader,is available from Adobe Systems for all the major personal computing devices and most versions of all the operating systems known to humankind. As of this writing, these forms include:
Microsoft Windows machines with the following versions: Windows 3.1, Windows 95 (OSR 2.0), Windows 98 SE, Windows Millennium Edition, Windows NT 4.0 (with Service Pack 5), Windows 2000, or Windows XP
Macintosh computers with version 7.5.3, 8.1–8.6, 9.1–9.2, or OS X of the Macintosh operating system
Palm handhelds with OS 3.0 or later
Pocket PC computers with Windows CE or Windows 2002
IBM AIX workstations with IBM AIX 4.2.1
HP 9000 Series workstations (model 700 or higher) with HP-UX 9.0.3
SGI workstations with Silicon Graphics IRIX 5.3
DEC workstations with DEC OSF/1, version 4
Sun Solaris SPARCStations with Sun OpenWindows 3.0 or later, Motif 1.2.3 or later, OpenLook 3.0, or CDE 1.0 or later
Computers running versions of Linux including Red Hat Linux 5.1 or Slackware Linux 2.0
Acrobat 6 and Adobe Reader are both major upgrades to the Acrobat software family. Consequently, backward-compatibility with older operating systems is limited. In order to run Acrobat 6 on Windows you must use one of the follow-ing operatfollow-ing systems: Microsoft Windows 98 Second Edition, Windows NT Workstation 4.0 with Service Pack 6, Windows 2000 Professional with Service Pack 2, Windows XP Professional or Home Edition, or Windows XP Tablet PC Edition. Macintosh users must use OS X versions 10.2.2–10.2.6.
All you have to do to get the appropriate version of Adobe Reader for your current operating system is point your Web browser to the following page on the Adobe Systems Web site at
www.adobe.com/products/acrobat/readstep2.html
Adobe Reader best suited for your computer system. If your current system is compatible with Adobe Reader, you are offered two choices: either the Basic or Full versions if you chose dial-up as your connection speed, or Full if you chose broadband. The Basic version is 8.7MB and can typically take up to 30 minutes or more to download with a 56K modem. The Full version of Adobe Reader has enhanced features that are described in the Step 2 of 2 dialog box and weighs in at a hefty 15.3MB — not a big deal if you have broadband Internet access but worth the consideration if you use a modem to connect to the Web. After choosing your desired version of Adobe Reader, click the Download button. After downloading the Adobe Reader to the desk-top of your computer platform, double-click the icon representing the com-pressed version of the program to unpack and install it on your computer.
After you install the Adobe Reader on your computer, you can then open, review, and print any PDF file that you get, regardless of what application pro-grams were used in generating its text and graphics, and regardless of the computer platform on which these programs ran. (See Chapter 2 for details on how to access and review PDF files with the Adobe Reader.)
Adobe Reader comes in two versions with very different feature sets that you can compare during the process of downloading the program. Adobe also cre-ated not two, but three different versions of Acrobat 6: Professional, Standard, and Elements. In order to compare the different features of these products, Adobe provides an Acrobat family features matrix page on their Web site. Go to the following page on Adobe’s Web site to view this important information:
www.adobe.com/products/acrobat/matrix.html
Benefits of Using PDF Files
What you designed is what they see
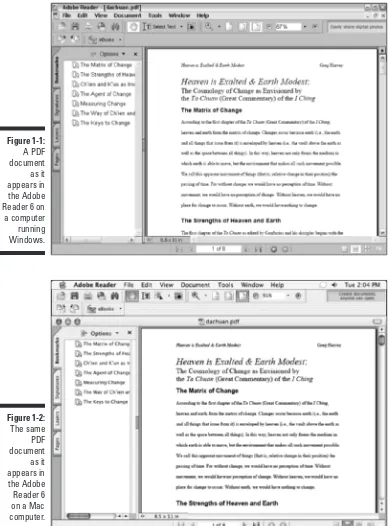
Because you are assured that your PDF files will essentially appear on-screen and print as you originally designed them, no matter the computer on which they’re opened or the printing device to which they’re output, you don’t have to hold back on your design, avoiding the use of certain more decorative fonts and/or complex layouts. Figures 1-1 and 1-2 illustrate this situation. In Figure 1-1, you see a PDF file as it appears when opened with Adobe Reader on a computer running Windows. Figure 1-2 shows the same PDF file as it appears when opened on a Macintosh computer. As you can see, they are both comparable in terms of the appearance of their fonts and their layout.
PDF files in the review cycle
While PDF debuted as a universal file format for viewing and printing docu-ments on various types of computers and printers, thanks to advances to the Acrobat software (and here I’m referring to the full-fledged Acrobat program that you must pay for rather than the freebie Adobe Reader available for download), you can now make PDF files an integral part of your design review process. After converting a document to PDF, you can disseminate copies of it to each of the people from whom you need feedback or approval before you put it into use. Each of these people can then add their feedback by adding comments or actually marking up the PDF document in Acrobat 6.
You can then collect their feedback and make the necessary changes either to the PDF version of the file in Acrobat 6 or to the original document (prior to PDF conversion) in the program used in its creation. If managers, cowork-ers, or clients are required to sign off on the document (either in its original or revised form), they can indicate their approval by stamping the document with their approval or by digitally signing off on it, as shown in Figure 1-3. (See Chapter 9 for details on how to use PDF files in a review cycle and Chapter 11 for details on how to use digital signatures.)
Figure 1-2:
The same PDF document as it appears in the Adobe Reader 6 on a Mac computer.
Figure 1-1:
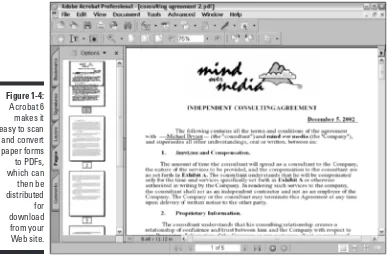
If you need to make certain paper forms available on your company’s intranet or your public Web site so that users can download, print, and then fill them in by hand, you can use Acrobat 6 to scan the paper forms and immediately convert their digital images into PDF files (see Figure 1-4). If you need to be able to search and edit the text in the electronic versions of these forms, you can use the Paper Capture feature — Acrobat’s version of OCR (Optical Character Recognition) software — to convert the text image into searchable and editable fonts. (See Chapter 6 for details on scanning paper forms and converting them into PDF files with Acrobat 6.)
If you need to get feedback or process informational or order forms directly from your company’s intranet or its public Web site, you can use Acrobat 6 to design the electronic forms. Acrobat 6 makes it possible to add all types of interactive fields, including text boxes, combo boxes (also known as drop-down list boxes), check boxes, radio buttons, and command buttons (that users can select to do things such as submit their information or clear the form). With the addition of a simple CGI (Common Gateway Interface) script (courtesy of your friendly IT personnel or Internet service provider), you can store the data submitted by way of your PDF forms in text files that your favorite database or spreadsheet program can read and store. (See Chapter 14 for details on creating interactive PDF forms for use online.)
Figure 1-3:
You don’t have to use the World Wide Web or a company intranet to be able to fill in electronic PDF forms that you create with Acrobat 6. Users who have Acrobat 4 or later installed on their computers can open and fill in these elec-tronic forms using this version or later of Acrobat.
Document archiving
Let’s face it: Paper archives are not just bulky and heavy, but they also degrade quickly and are a veritable nightmare to search. For this reason alone, out of all the possible uses for Adobe’s Portable Document Format, archiving your documents as PDF files may prove to be the most important to you. Imagine all your paper contracts, correspondence, company reports, and the like stored as collections on CD-ROMs, from which you can retrieve individual files through searches for keywords or for vital statistics such as author name, client name, or job number.
You can use the Paper Capture feature in Acrobat 6 on the Windows or Macintosh platform to scan and convert such paper documents into search-able PDF files. After you do that, Acrobat makes it easy for you to organize
Figure 1-4:
these files into collections (known officially as catalogs), which you can index for truly speedy retrieval using the Acrobat 6 search feature. (See Chapter 6 for details on converting paper documents to PDF and Chapter 13 for details on cataloging and indexing your files prior to storing them on various media.)
The Paper Capture feature in Acrobat 6 for Windows restricts you to scanning and converting paper documents of no more than 50 pages in length. If you know that you must scan and convert documents longer than 50 pages on the Windows platform, you need to purchase the standalone module, Acrobat Capture 3 for Windows NT, 2000, or XP or Acrobat Capture 2.0 for Windows 95/98.
PDF in the prepress workflow
One of the most obvious uses for PDF files is in the prepress workflow, during which documents that require professional printing are checked for potential printing errors and readied for conversion from electronic images to the film or plates used in the final printing of the document using high-end imageset-ters (a process known in the industry as preflight). Acrobat 6 (Professional version only) contains a number of prepress-related printing options, along with an overprinting preview and an on-screen color correction feature.
These specialized print options and error-checking features in Acrobat 6 are designed to help professional graphic artists and service bureau personnel in finding and eliminating potentially costly printing problems. Most users not directly involved in this end of the business will have no reason to fool with these printing options or use these specialized preview features. (If, for some unknown reason, you are interested in knowing more about these prepress features, refer to Chapter 8.)
Always check with your service bureau personnel to find out what, if any, prepress options they want you to use prior to sending them your PDF files for preflight. Some houses definitely prefer that you not use anyof these pre-press options, so it’s always good to check it out ahead of time.
Quick and easy Web site retrieval
As both a road warrior and Web enthusiast, you can use this feature to keep up on the latest online information right from the comfort of your portable computer at those times when you’re traveling or just waiting to travel.
If you work as a Web designer, the Web Capture feature provides a perfect means for distributing your Web pages for approval to your client or cowork-ers. If they have Adobe Reader or Acrobat 6 on their computers, they can even annotate the pages with their suggestions in the form of notes and markups or even give you that final nod of approval using the stamp feature. (See Chapter 7 for details on retrieving and converting Web pages to PDF.)
PDF files as slide shows and
multimedia presentations
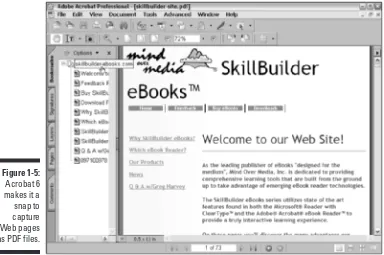
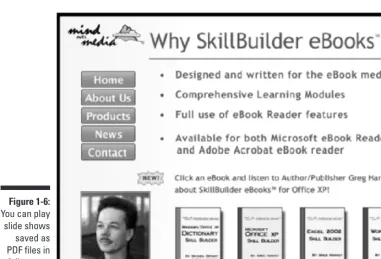
Another application for PDF files is to use them to create and distribute slide shows and multimedia presentations (see Figure 1-6). Acrobat 6 enables you to add interactivity to your slides in the form of hyperlinks, buttons, and slide transitions. You can also use the program to add sound and/or digital movie files to the slides that your users can play back for a true multimedia experience. Note that Acrobat 6 now supports slide shows and greeting eCards created in Adobe Photoshop Elements 2.0 and Photoshop Album 1.0.
Figure 1-5:
To enhance the online slide show or multimedia presentation, Acrobat 6 sup-ports a full-screen mode that the user can invoke with none of the screen clutter normally associated with using Acrobat and Adobe Reader (full-screen mode hides the menus, toolbars, scroll bars, status bar, and in Windows, even the omnipresent Task bar). When a user views your slide show or pre-sentation in full-screen mode, you can set it up so that Acrobat automatically advances through each page after a set time interval, using a slide transition of your choice.
If you normally use Microsoft PowerPoint to create your slide shows, you can convert them into PDF files at the touch of a button. You can then use
Acrobat 6 to add any extra interactivity and then distribute them for play-back on any computer on which the free Adobe Reader 6 is installed.
The Different Types of PDF Files
In addition to the many different uses for the Adobe Portable Document Format described in this chapter, PDF files also give you a great deal of flexi-bility when you want to reuse their content for other purposes. For example,
Figure 1-6:
you can use various PDF formats to distribute a graphically rich report with lots of tables and pictures for printing or viewing on a computer monitor, and then “repurpose” that same content for viewing in a Web page or on a hand-held device where such graphics are prohibitive. This fabulous chameleon act is possible because Adobe PDF files support three basic document struc-ture types: unstructured, structured,and tagged. PDF documents that are cre-ated from these types of documents create the following PDF files:
Unstructured PDF:These PDFs have no logical structure tree to define or further describe the author’s content. All document information is treated as a single unit with just the author’s text and paragraph structure recog-nized. Basic text formatting, tables, and lists are not recogrecog-nized.
Structured PDF:These PDFs recognize the author’s text and paragraph structure but also have a logical structure tree that defines basic text formatting, such as font attributes. Tables and lists are not recognized.
Tagged PDF:These PDFs have a logical structure tree that includes all the attributes of structured PDFs and also includes definitions such as docu-ment styles and stories (this allows tables and lists to be recognized) and dependencies among various document elements that allow the text to be reflowed. (For more information on reflowing text, see Chapter 15.)
To understand document structure types, you need to look under the hood of your favorite word processor or page layout program. As you create your document, these programs can provide a logical structure tree and tags that define how your document appears when printed or viewed on-screen. I say
can providebecause programs such as Notepad in Windows and Macintosh, which are simple text editing programs with no formatting ability, don’t pro-vide for a logical structure tree and so create unstructured documents. You can get an idea of how a document structure tree works using the Document Map feature in Microsoft Word. Open a document and choose View➪Document Map. The program displays the document’s structure tree as hierarchies of head-ings, paragraphs, and so on. Word then adds tags to this tree that define para-graph styles, font types, font attributes, and allow you to use this structure tree to navigate the document by clicking different structure elements.
Accessing PDF Files
In This Chapter
Viewing PDF files with Adobe Reader 6
Viewing PDF files with Acrobat 6
Reading PDF files with Acrobat eBook Reader
Browsing PDF files in your Web browser
A
s this chapter proves, there’s more than one way to open and read a PDF file. You have a choice between using Adobe Reader, which comes in two flavors; Basic and Standard (both of which are free), or if you’ve pur-chased the full-blown Acrobat 6 (which also comes in two versions; Standard or Professional) for creating and editing PDF files, you can, of course, use it as well. In addition, Adobe also introduced a new product this year for the enterprise sector called Acrobat Elements. The program allows you to view and create, but not edit, PDF documents and must be bulk purchased in lots of 1000. See Chapter 5 for more information on creating PDF documents with Acrobat Elements. As if these weren’t enough browsing choices, you can also open and view your PDF files in common Web browsers, such as Internet Explorer and Netscape Navigator on all Windows operating systems and Macintosh OS 9.2.2 and earlier. Note that as of this writing, in order to use the Windows version of Acrobat 6 or Adobe Reader for in-browser viewing of PDF documents, you must have Internet Explorer 5 or later. In-browser viewing of PDF files is also not supported in Mac OS X. As of this writing, Adobe plans to add that functionality in the near future for Mac OS X users. In the meantime, you can configure Acrobat 6 or Adobe Reader as Helper applications in OS X versions of Internet Explorer and Netscape Navigator.Perusing PDF Files in Adobe Reader
most current version of Adobe Reader is version 6.0. Adobe Reader coincides with the release of Acrobat 6 and utilizes many of the same feature enhance-ments and improveenhance-ments to the User Interface (UI) that characterize the latest version of the full-blown product. If you’re using Windows XP or Mac OS X, Adobe Reader is automatically selected when you specify your operating system on the Adobe download page. Note that the Macintosh version of Adobe Reader (and also Acrobat 6 Standard and Professional versions) only runs on the Jaguar version of Mac OS X, because the minimum system require-ment for the Macintosh version is 10.2.2.
Adobe Reader can open and read all PDF files created with earlier versions of Acrobat. Be aware, however, that earlier versions of Acrobat Reader cannot open and read PDF files created with the later versions of Adobe Acrobat unless you specify compatibility with earlier versions when you create a PDF. Consequently, you also lose newer Acrobat functionalities when you create backward compatible PDF files. See Chapter 4 for more information on creat-ing PDF documents. As Table 2-1 indicates, each version of Adobe Acrobat creates its own version of PDF files. Later versions of Acrobat can read files created in earlier versions, but not vice versa.
Table 2-1
Versions of Acrobat and Their PDF Files
Acrobat Version PDF File Version Created Year ReleasedAcrobat 1.0 PDF 1.0 1993
Acrobat 2.0 PDF 1.1 1994
Acrobat 3.0 PDF 1.2 1996
Acrobat 4.0 PDF 1.3 1999
Acrobat 5.0 PDF 1.4 2001
Acrobat 6.0 PDF 1.5 2003
As you can see in Table 2-1, you can tell which version of Acrobat produced a particular PDF file version because the sum of the digits in the PDF file version equals the number of the Adobe Acrobat version that created it. For example, you know that a PDF file in version 1.3 was likely created with Acrobat 4 because the sum of its file version numbers, 1 and 3, is 4.
the list box in the PDF Information area of the Description palette and you find the PDF version. Note that the file version listed will not always tally with the version of Acrobat that created the file because engineering a PDF for backward compatibility is possible.
When creating a PDF file with the Acrobat Distiller in Acrobat 6, you can make it possible for viewers using earlier versions of Acrobat Reader to open your files by selecting a Compatibility setting in the Adobe PDF Settings dialog box for an earlier version of Acrobat. This setting provides compatibility with Acrobat versions 3.0 through 6.0 and their corresponding PDF versions, which ensures that your files will reach a wider audience.
Downloading and launching
Adobe Reader 6
Adobe Reader 6 (formerly Acrobat Reader) is available in two flavors: Basic and Full. The Full version gives you the added functionality of local, network, or Internet PDF searches, Accessibility features, eBook support, and
Multimedia enhancements.
All you have to do to get the appropriate version of Adobe Reader for your current operating system is point your Web browser to the following page on the Adobe Systems Web site:
www.adobe.com/products/acrobat/readstep2.html
This URL takes you to the Download Adobe Reader page, where all you have to do is make a selection from each of three drop-down lists provided in the Step 1 of 2 dialog box:
1. Select the Language of the Adobe Reader (English in most cases).
2. Select the Platform (or operating system) that your computer uses (that is, Windows Me, Windows NT, Windows 2000/XP, Mac 8.6, Mac 9.x, OS X, and so on).
3. Choose a Connection speed that you use to access the Internet (dial-up or broadband).
current operating system is compatible with Adobe Reader 6 and you chose dial-up as your connection speed, you are offered two choices: either the Basic or Full version. If you chose broadband as your connection speed, only the Full version is offered. Earlier platform/operating system choices that are not compatible with Adobe Reader provide the appropriate version of the older Acrobat Reader program for download.
The Basic version of Adobe Reader is 8.7MB in size and can typically take up to 30 minutes or more to download with a 56K modem. The Full version of Adobe Reader has enhanced features described in the Step 2 of 2 dialog box and weighs in at a hefty 15.3MB (20.9MB for the Mac version). Downloading the Full version is not a big deal if you have broadband Internet access, but it may be worth considering the Basic version if you use a modem to download from the Web.
After choosing your desired version of Adobe Reader, click the Download button, select a download location in the Browse for Folder dialog box, and wait until the Adobe Reader file is downloaded on your computer. Then double-click its installer icon to decompress the Reader files and install them on your hard drive (on the Mac, the Adobe Reader Installer actually down-loads the Reader files and installs them when you double-click the Adobe Reader Installer icon).
After installing Adobe Reader on your hard drive, you can launch the Reader with or without also opening a PDF file. To launch the program without also opening a PDF on the Windows platform, choose Start➪Programs➪Adobe Reader (Start➪All Programs➪Adobe Reader in Windows XP).
To launch Adobe Reader on the Macintosh in OS X, follow these steps:
1. Click the Finder icon on the Dock to open the Finder and click the Applications button on the Finder toolbar.
2. Double-click the Adobe Reader file icon in the Applications folder.
After you launch Adobe Reader , you can then open PDF files for viewing and printing by choosing File➪Open and selecting the PDF file to open in its Open dialog box.
To create such a desktop shortcut on the Macintosh (where it’s called an
alias), click to select the Adobe Reader icon (located in the Applications folder on your hard drive), press Ô+M to create an Adobe Reader 6.0 alias, and then drag this alias icon onto the Macintosh desktop.
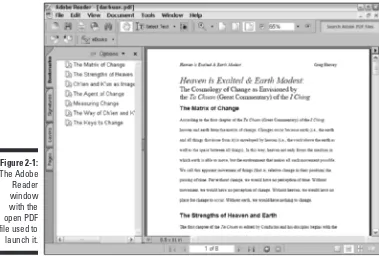
Figure 2-1 shows you how the Adobe Reader window appears on a Windows computer when you launch the Reader and simultaneously open a PDF file within it. Note that in this particular case, the PDF file that opens takes up the full width of the program window up to the Navigation pane, which displays the bookmarks in this document.
You can have more than one PDF file open at a time in Adobe Reader 6. To open multiple files when launching Adobe Reader 6, Ctrl+click individual PDF file icons or lasso a group of them and then drag the entire selection onto the Adobe Reader desktop shortcut (alias). To do this from the Open dialog box, Ctrl+click or lasso the group before you click the Open button.
Figure 2-1:
The Adobe Reader window
As you can see in Figure 2-2, the Adobe Reader window is divided into three areas:
Menu and toolbars at the top of the screen
Document pane with scroll bars to the right and bottom and a status bar to immediate left at the bottom
Navigation pane with tabs for its four palettes: Bookmarks, Signatures, Layers, and Pages.
Menu bar
Navigation pane Toolbars
Document pane
Figure 2-2:
The menu bar contains standard application menus: File through Help. To select a menu and display its items, you click the menu name (or you can press the Alt key plus the underlined letter in the menu name, the so-called
hot key,in the Windows version). To select a menu item, you drag down to highlight it and then press Enter, or you click it (in the Windows version, you can also select an item by typing its hot key). Menus on the Macintosh ver-sion display hot keys with the cloverleaf symbol that represents the Command key. You can select these commands simply by holding down the Command key plus the appropriate hot key without opening the menu.
The Adobe Reader toolbars
Directly beneath the menu bar, you see a long toolbar with an almost solid row of buttons. The toolbar may appear on two rows, depending on your screen resolution, when you install and open Adobe Reader for the first time. As Figure 2-3 indicates, this toolbar is actually five separate toolbars, File through Tasks. Note the Tasks toolbar is a single button with a pop-up menu for acquiring, opening, or accessing help on eBooks. This is one example (and the only one you see in Adobe Reader 6) of several new single-button Tasks toolbars. The rest are covered in the section about toolbars in Chapter 3.
The File toolbar, shown in Figure 2-3, displays buttons and labels. You can gain more space on the upper toolbar area by hiding the File Toolbar labels. To do so, right-click the toolbar area and choose Tool Button Labels to remove the checkmark from the context menu.
Four of the buttons shown in the toolbars in this figure sport downward-pointing shaded triangles. These downward-downward-pointing triangles (formerly titled More Tools in previous versions of Acrobat) are buttons that, when clicked, display a pop-up menu with additional related tools or commands. In Adobe Reader, these buttons, from left to right, are as follows:
File toolbar
Rotate View toolbar
Basic toolbar Zoom toolbar
Tasks toolbar
Figure 2-3:
The Select Text tool:Right next to the Hand tool in the Basic toolbar, its pop-up menu button enables you to choose either Text or Image and also the Expand This Button option to add both menu items as buttons on the toolbar.
The Zoom In tool:The first button in the Zoom toolbar. Its pop-up menu button enables you to select the Zoom In tool if you’re using one of the other Zoom tools, the Zoom Out tool (Shift+Z) for zooming out on an area, or a new Dynamic Zoom tool that enables you to dynamically (without incremental changes) zoom in and out by clicking on a viewing area and dragging the mouse up or down.
The Viewing button:Shows the current page magnification setting as a percentage in the Zoom toolbar.
The Read an eBook tool:The only button on the Tasks toolbar. Its pop-up menu lets you open an eBook in your library (called My Bookshelf) and display an online guide to reading eBooks in the How To window.
Another similar option you may encounter on these pop-up menus is the Show (insert name) Toolbar command that displays, by default, all the menu commands in a floating toolbar window that can be docked anywhere in the toolbar area. To hide this floating toolbar, click its Close button. If the toolbar has been docked, uncheck the Show Toolbar command on the original tool-bar button pop-up menu to hide it. The next time you select this command, the toolbar will appear in its last displayed state, either floating or docked.
Users of Acrobat Reader 5 or earlier may notice that Adobe has consolidated the Find and Search tools into a single Search tool button on the File Toolbar. I find this most gratifying, because I can never remember the difference between a Find and a Search. The Acrobat 6 Search feature is very clear. It enables you to do fast text searches in either the current PDF document, a PDF file on your computer or local network, and even on the Internet when you’re using the Full version of Adobe Reader. Clicking the button opens the Search PDF pane in the How To window, where you specify search criteria and then click the Search button. Search results are then displayed in the Search PDF pane. See the “Adobe Reader Document pane” section, later in this chapter, to find out more on the new How To window.
Table 2-2 lists the buttons on each of these toolbars and describes their functions.
Table 2-2
The Toolbars of Adobe Reader 6
Toolbar Icon Name Use It To . . .
Toolbar Icon Name Use It To . . .
Save a Copy Display the Save a Copy dialog box.
Print Open the Print dialog box.
E-mail Open your e-mail client and attach the current PDF to a new e-mail.
Search Open the Search PDF pane in the How To window.
Basic Hand tool (H) Move the PDF document to different areas of the viewing window or of the document itself, depending on your zoom setting; the Hand tool changes to an arrow over menus and buttons, and to a pointing finger over hyperlinks.
Select Text tool (V) Select text or images in the document for copying to the Clipboard.
Snapshot tool Select text or graphics in the docu-ment for copying to the Clipboard by drawing a marquee around your selection.
Zoom Zoom In tool (Z) Zoom in on the area that you point to with the magnifying glass icon.
Actual Size Resize the zoom magnification setting to 100%.
Fit in Window Resize the zoom magnification setting so that you see the entire document.
Fit Width Resize the zoom magnification setting so that the width of the document fills the entire Document pane.
Zoom Out Decrease the magnification (to see more of the entire document) by set intervals of 25% or less.
Magnification Level Display the current magnification level as a percentage of the actual size (100%). To change the magnification, type a number in the Magnification Level text box or select a preset zoom value from the pop-up menu.
Table 2-2
(continued)
Toolbar Icon Name Use It To . . .
Zoom In Increase the magnification (to see more detail and less of the entire docu-ment) by set intervals of 25% or less.
Tasks Read an eBook Go online to acquire eBooks.
Rotate View Rotate Clockwise Reorient the current page by rotating it 90 degrees to the right (clockwise).
Rotate Counter- Reorient the current page by clockwise rotating it 90 degrees to the left
(counterclockwise).
Navigation First Page Jump to the beginning of a multipage document.
Previous Page Jump to the previous page in a multi-page document.
Next Page Jump to the subsequent page in a multipage document.
Last Page Jump to the end of a multipage document.
View History Previous View Go to the last page you visited.
Next View Go back to the page that was current when you clicked the Previous View button.
The Adobe Reader Document pane
The Adobe Reader Document pane is where your PDF files load for viewing. How much document text and graphics appear in this pane depends upon a number of factors:
The size of the pages in the document (displayed in the Page Size indica-tor in the status bar at the bottom of the Document pane — see Figure 2-4)
The size of your computer monitor
Click the Navigation Pane button (the double-headed arrow) at the beginning of the status bar in the Document pane to open or close the Navigation Pane.
Press F6 (Windows or Mac).
Note that you can manually resize the Navigation pane to make it wider or nar-rower. Position the Hand tool mouse pointer on its border or on the Navigation Pane button at the beginning of the Status bar. When the tool changes to a double-headed arrow, drag right (to make the pane wider) or left (to narrow it). Adobe Reader remembers any width changes that you make to the Navigation pane, so that the pane resumes the last modified size each time you use the Reader.
You might be tempted to increase the width of the Navigation pane because it isn’t wide enough to display all the text in the headings in the Bookmarks palette. Rather than reduce the precious real estate allotted to the Document pane in order to make all the headings visible, you can read a long heading by hovering the Hand tool mouse pointer over its text. After a second or two, Acrobat displays the entire bookmark heading in a highlighted box that appears on top of the Navigation pane and extends as far as necessary into the Document pane. As soon as you click the bookmark link or move the Hand tool off the bookmark, this highlighted box disappears. You can also choose Wrap Long Bookmarks on the Options menu at the top of the Bookmarks pane which automatically adjusts the width of bookmark text to the current width of the Navigation pane.
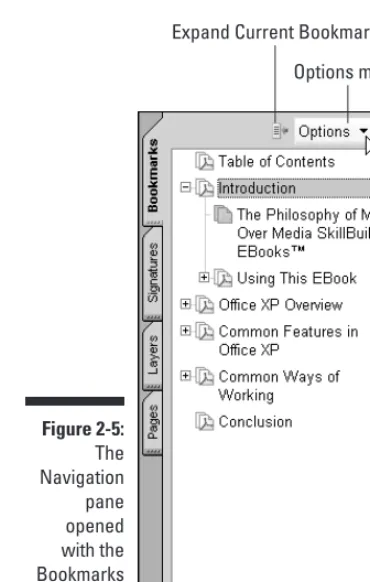
Using the Bookmarks palette
The Bookmarks palette gives you an overview of the various sections in many PDF documents (see Figure 2-5). Adobe Reader indicates the section of the document that is currently being displayed in the Document pane by highlight-ing the page icon of the correspondhighlight-ing bookmark in the Bookmarks palette.
When you expand a particular bookmark heading, all its subordinate topics appear in an indented list in the Bookmarks palette, and the Expand button becomes a Collapse button (indicated by a box with a minus sign in it in Windows and by a downward-pointing shaded triangle on the Mac). To hide the subordinate topics and tighten up the bookmark list, click the topic’s Collapse button. You can also collapse all open subordinate topics by select-ing Collapse Top-Level Bookmarks on the Options menu.
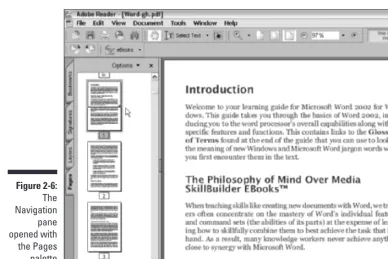
Using the Pages palette
The Pages palette shows you tiny versions of each page in the PDF document you’re viewing in Adobe Reader (see Figure 2-6). You can use the Navigation pane’s vertical scroll bar to scroll through these thumbnails to get an overview of the pages in the current document, and sometimes you can even use them to locate the particular page to which you want to go (especially if that page contains a large, distinguishing graphic).
Expand Current Bookmark
Options menu
Figure 2-5:
Note that Adobe Reader displays the number of each page immediately beneath its thumbnail image in the Pages palette. The program indicates the current page that you’re viewing by highlighting its page number underneath the thumbnail. The program also indicates how much of the current page is being displayed in the Document pane on the right with the use of a red out-lining box in the current thumbnail (this box appears as just two red lines when the box is stretched as wide as the thumbnail).
You can zoom in and out and scroll up and down through the text of the cur-rent page by manipulating the size and position of this red box. To scroll the current page’s text up, position the Hand tool on the bottom edge of the box and then drag it downward (and, of course, to scroll the current page’s text down, you drag this outline up). To zoom in on the text of the page in the Document pane, position the Hand tool on the sizing handle located in the lower-right corner of the red box (causing it to change to a double-headed diagonal arrow) and then drag the corners of the box to make the box smaller so that less is selected. To zoom out on the page, drag the corner to make the box wider and taller. Of course, if you stretch the outline of the red box so that it’s as tall and wide as the thumbnail of the current page, Adobe Reader responds by displaying the entire page in the Document pane, the same as if you selected the Fit in Window view.
Figure 2-6:
By default, Adobe Reader displays what it considers to be large thumbnails (large enough that they must be shown in a single column within the Pages palette). To display more thumbnails in the Pages palette, choose Reduce Page Thumbnails on the Options menu at the top of the Pages palette. When you select this command, the displayed thumbnails are reduced in 33% incre-ments. This means that if you want to reduce the thumbnail display substan-tially, you have to repeatedly select the Reduce Page Thumbnails command. To increase the size of the thumbnails, choose Enlarge Page Thumbnails on the Options menu.
Using the Article palette
Acrobat 6 supports a feature called articlesthat enables the author or editor to control the reading order when the PDF document is read online. This fea-ture is useful when reading text that has been set in columns, as are many magazine and newspaper articles, because it enables you to read the text as it goes across columns and pages as though it were set as one continuous column. Otherwise, you end up having to do a lot of zooming in and out and scrolling, and you can easily lose your place.
To see if the PDF file you’re reading has any articles defined for it, choose View➪Navigation Tabs➪Articles. Doing this opens a floating Articles palette in its own dialog box that lists the names of all the articles defined for the document. If this dialog box is empty, then you know that the PDF document doesn’t use articles. Note that you can dock this palette on the Navigation pane and add its tab beneath the one for the Pages palette by dragging the Articles tab displayed in the dialog box and dropping it on the Navigation pane.
To change the magnification used in reading an article in a PDF file, before you start reading the article, choose Edit➪Preferences or press Ctrl+K (Ô+K on the Mac). In the Preferences dialog box that appears, click Page Display in the left window, and then select a new magnification setting from the Max Fit Visible Zoom drop-down list. Click OK to close the Preferences dialog box and change the magnification.
Navigating PDF documents
Between the buttons on the Navigation toolbar at the top, the navigation but-tons on the status bar, the Bookmarks and Pages palettes in the Navigation pane to the left, and the scroll bars on the Document pane to the right, you have quite a few choices in how you navigate a PDF document in Adobe Reader. The following list describes the most popular ways to move through the pages of a PDF document:
To move a page at a time:Press the →or ←key, click the Next Page button in the Navigation toolbar or the status bar to move forward, or click the Previous Page button to move back.
To move to the last page:Press the End key or click the Last Page button in the Navigation toolbar or the status bar.
To move to the first page:Press the Home key or click the First Page button in the Navigation toolbar or the status bar.
To move to a specific page:Drag the scroll button in the Document pane’s vertical scroll bar until the page number appears in the ScreenTip; click the Current Page indicator in the status bar, type the page number, and press Enter; or scroll to the page’s thumbnail in the Pages palette and click it.
To scroll through sections of text (about half a page at a time):Press the Page Down key (to move forward) or the Page Up key (to move back).
To scroll continuously through the text:Click and hold down the down (to move forward) and up (to move back) scroll arrows on the vertical scroll bar in the Document pane.
Changing the page viewing mode
single-page to continuous-page viewing, click the Continuous button on the right side of the status bar or choose View➪Continuous.
As part of continuous paging, you can also display facing pages (with verso or left-hand pages on the left, and recto or right-hand pages on the right). To display a PDF document with continuous facing pages, click the Continuous -Facing button on the status bar or choose View➪Page Layout➪Continuous -Facing. A new addition to the status bar is the Facing button that displays two full pages side by side in the document window.
Reading text in full-screen mode
If you’re like me and your computer isn’t equipped with a mega-size monitor, you may want to make the most of your screen real estate by viewing the PDF document in full-screen mode. When you switch to full-screen viewing, the program removes all the screen controls, including the menu bar, toolbars, Navigation pane, status bar, and yes, even the ubiquitous Windows taskbar.
To view a PDF document in full-screen mode, press Ctrl+L (Ô+L on the Macintosh), or choose View➪Full Screen. To get out of full-screen mode and return to your regular viewing settings (replete with menus, toolbars, and so on), press the Escape key (usually marked Esc on your keyboard) or press Ctrl+L again.
Note that when viewing a PDF document in full-screen mode, Adobe Reader always displays a single page at a time (no matter what page viewing mode you were using prior to selecting full-screen mode). Because full-screen mode hides all menus and toolbars, you normally need to rely on keystroke short-cuts to alter the magnification and move through the document text. Here are some of the more useful keystroke shortcuts for doing just that:
Ctrl++ (Ctrl plus the plus key) and Ctrl+– (Ctrl plus the minus key): Increase magnification by 25% by pressing Ctrl++; decrease magnification by 25% by pressing Ctrl+–.
Ctrl+0:Select the Fit in Window view.
Ctrl+1:Select the Actual Size view.
Ctrl+2:Select the Fit Width view.
Ctrl+3:Select the Fit Visible view (this enlarges the document so that it takes up as much of the screen width as possible).
Page Down or Ctrl+↓:Scroll down the text (and move to the next page in the Fit in Window view).
Note that if you use Fit Visible, the view that enlarges the document to the highest degree, you can use the arrow keys to scroll either up, down, left, or right through the document.
Reading text in the fit-visible viewing mode
Reading a PDF document in full-screen viewing mode is fine as long as you don’t mind having to navigate the pages with keystroke shortcuts. If, how-ever, you prefer using the various Adobe Reader screen controls (including the scroll bars and the navigating