wxPython in Action
NOEL RAPPIN
ROBIN DUNN
M A N N I N G
For more information, please contact: Special Sales Department Manning Publications Co.
209 Bruce Park Avenue Fax: (203) 661-9018
Greenwich, CT 06830 email: [email protected]
©2006 by Manning Publications Co. All rights reserved.
No part of this publication may be reproduced, stored in a retrieval system, or transmitted, in any form or by means electronic, mechanical, photocopying, or otherwise, without prior written permission of the publisher.
Many of the designations used by manufacturers and sellers to distinguish their products are claimed as trademarks. Where those designations appear in the book, and Manning Publications was aware of a trademark claim, the designations have been printed in initial caps or all caps.
Recognizing the importance of preserving what has been written, it is Manning’s policy to have the books they publish printed on acid-free paper, and we exert our best efforts to that end.
Manning Publications Co. Copyeditor: Elizabeth Martin 209 Bruce Park Avenue Typesetter: Denis Dalinnik Greenwich, CT 06830 Cover designer: Leslie Haimes
ISBN 1-932394-62-1
Printed in the United States of America
To every Jane and Joe Programmer,
vii
P
ART
1
I
NTRODUCTION TO WXP
YTHON...
1
1 ■ Welcome to wxPython 3
2 ■ Giving your wxPython program a solid foundation 29
3 ■ Working in an event-driven environment 56
4 ■ Making wxPython easier to handle with PyCrust 83
5 ■ Creating your blueprint 116
6 ■ Working with the basic building blocks 146
P
ART
2
E
SSENTIAL WXP
YTHON...
183
7 ■ Working with the basic controls 185
8 ■ Putting widgets in frames 224
9 ■ Giving users choices with dialogs 258
10 ■ Creating and using wxPython menus 293
11 ■ Placing widgets with sizers 323
12 ■ Manipulating basic graphical images 356
P
ART
3
A
DVANCED WXP
YTHON...
391
13 ■ Building list controls and managing items 393
14 ■ Coordinating the grid control 425
15 ■ Climbing the tree control 460
16 ■ Incorporating HTML into your application 485 17 ■ The wxPython printing framework 504
ix
preface xix
acknowledgments xxii
about this book xxiv
P
ART1
I
NTRODUCTION TOWXP
YTHON... 1
1
Welcome to wxPython 3
1.1 Getting started with wxPython 5
1.2 Creating the bare-minimum wxPython program 7
Importing wxPython 9 ■ Working with applications
and frames 11
1.3 Extending the bare-minimum wxPython program 12
1.4 Creating the final hello.py program 15 1.5 What can wxPython do? 17
1.6 Why choose wxPython? 19
Python programmers 19 ■ wxWidget users 20 ■ New users 20
1.7 How wxPython works 21
The Python language 21 ■ The wxWidgets toolkit 22
Putting it together: the wxPython toolkit 25
1.8 Summary 27
2
Giving your wxPython program a solid foundation 29
2.1 What do I need to know about the required objects? 30 2.2 How do I create and use an application object? 31Creating a wx.App subclass 31 ■ Understanding the application
object lifecycle 34
2.3 How do I direct output from a wxPython program? 35
Redirecting output 35 ■ Modifying the default redirect
behavior 37
2.4 How do I shut down my wxPython application? 38
Managing a normal shutdown 38 ■ Managing an emergency
shutdown 39
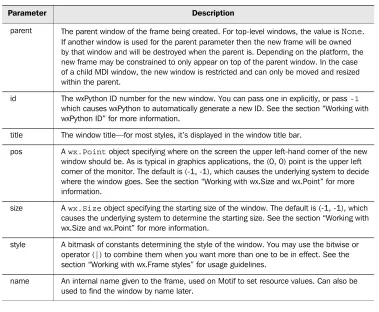
2.5 How do I create and use the top-level window object? 39
Working with wx.Frame 40 ■ Working with wxPython IDs 42
Working with wx.Size and wx.Point 43 ■ Working with
wx.Frame styles 44
2.6 How do I add objects and subwindows to a frame? 47
Adding widgets to a frame 47 ■ Adding a menubar, toolbar,
or status bar to a frame 49
2.7 How can I use common dialogs? 51
2.8 What are some common errors with application objects and frames? 53
2.9 Summary 54
3
Working in an event-driven environment 56
3.1 What terminology do I need to understand events? 57 3.2 What is event-driven programming? 58
Coding event handlers 60 ■ Designing for event-driven
programs 61 ■ Event triggers 62
3.3 How do I bind an event to a handler? 63
CONTENTS xi
3.4 How are events processed by wxPython? 68
Understanding the event handling process 69 ■ Using the
Skip() method 75
3.5 What other event properties are contained in the application object? 77
3.6 How can I create my own events? 77
Defining a custom event for a custom widget 78
3.7 Summary 81
4
Making wxPython easier to handle with PyCrust 83
4.1 How do I interact with a wxPython program? 84 4.2 What are the useful features of PyCrust? 86Autocompletion 87 ■ Calltips and parameter defaults 88
Syntax highlighting 89 ■ Python help 90 ■ Command
recall 91 ■ Cut and paste 92 ■ Standard shell
environment 93 ■ Dynamic updating 94
4.3 What do the PyCrust notebook tabs do? 95
Namespace tab 95 ■ Display tab 97 ■ Calltip tab 97
Session tab 98 ■ Dispatcher tab 98
4.4 How can I wrap PyCrust around my wxPython application? 99
4.5 What else is in the Py package? 104
Working with the GUI programs 104 ■ Working with the
support modules 105
4.6 How can I use modules from the Py package in my wxPython programs? 112
4.7 Summary 115
5
Creating your blueprint 116
5.1 How can refactoring help me improve my code? 117
A refactoring example 118 ■ Starting to refactor 121
More refactoring 122
5.2 How do I keep the Model and View separate in my program? 126
What is a Model-View-Controller system? 126 ■ A wxPython
5.3 How do you unit-test a GUI program? 140
The unittest module 140 ■ A unittest sample 141
Testing user events 143
5.4 Summary 145
6
Working with the basic building blocks 146
6.1 Drawing to the screen 148How do I draw on the screen? 148
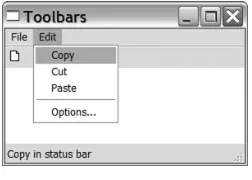
6.2 Adding window decorations 155
How do I add and update a status bar? 155 ■ How do I include
a submenu or checked menu? 158 ■ How do I include
a toolbar? 161
6.3 Getting standard information 165
How do I use standard file dialogs? 165 ■ How do I use a
standard color picker? 169
6.4 Making the application look nice 170
How do I lay out widgets? 170 ■ How do I build an
about box? 178 ■ How do I build a splash screen? 180
6.5 Summary 181
P
ART2
E
SSENTIALWXP
YTHON... 183
7
Working with the basic controls 185
7.1 Displaying text 186How do I display static text? 186 ■ How can I get the user to
enter text? 189 ■ How do I change the text without
user input? 192 ■ How do I create a multi-line or styled
text control? 193 ■ How do I create a font? 196 ■ Can I have
styled text if my platform doesn’t support rich text? 197 ■ What if
my text control doesn’t match my string? 198 ■ How do I respond
to text events? 199
7.2 Working with buttons 199
How do I make a button? 200 ■ How do I make a button with
a bitmap? 201 ■ How do I create a toggle button? 202
CONTENTS xiii
7.3 Entering and displaying numbers 205
How do I make a slider? 205 ■ How can I get those
neat up/down arrow buttons? 208 ■ How can I make
a progress bar? 210
7.4 Giving the user choices 211
How do I create a checkbox? 211 ■ How can I create a group of
radio buttons? 212 ■ How can I create a list box? 216 ■
Can I combine a checkbox and a list box? 219 ■ What if I want
a pull-down choice? 220 ■ Can I combine text entry
and a list? 221
7.5 Summary 222
8
Putting widgets in frames 224
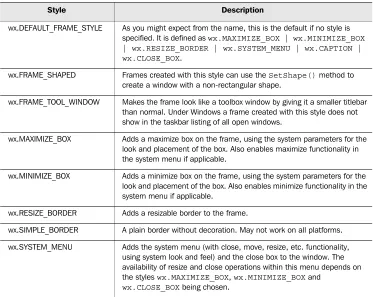
8.1 The life of a frame 225How do I create a frame? 225 ■ What are some different
frame styles? 227 ■ How do I create a frame with extra style
information? 230 ■ What happens when I close a frame? 232
8.2 Using frames 234
What are the methods and properties of wx.Frame? 234
How do I find a subwidget of a frame? 237 ■ How do I create a
frame with a scrollbar? 238
8.3 Alternative frame types 242
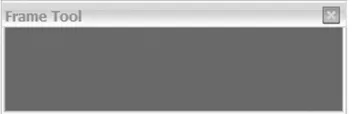
How do I create an MDI frame? 242 ■ What’s a mini-frame
and why would I use it? 244 ■ How do I make a
non-rectangular frame? 245 ■ How can I drag a frame
without a title bar? 248
8.4 Using splitter windows 250
Creating a splitter window 250 ■ A splitter example 251
Changing the appearance of the splitter 253 ■ Manipulating
the splitter programmatically 254 ■ Responding
to splitter events 255
8.5 Summary 256
9
Giving users choices with dialogs 258
9.1 Working with modal dialogs 259How do I create a modal dialog? 259 ■ How do I create an
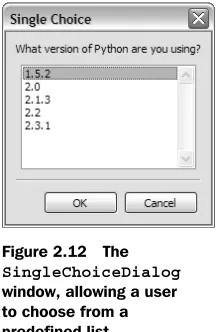
How can I display a list of choices in a dialog? 266 ■ How can I
display progress? 267
9.2 Using standard dialogs 269
How can I use a file picker? 269 ■ How can I use
a font picker? 273 ■ How can I use a color picker? 275
Can I allow the user to browse images? 277
9.3 Creating a wizard 278 9.4 Showing startup tips 281
9.5 Using validators to manage data in a dialog 282
How do I use a validator to ensure correct data? 282 ■ How do
I use a validator to transfer data? 286 ■ How do I validate data
as it is entered? 288
9.6 Summary 291
10
Creating and using wxPython menus 293
10.1 Creating Menus 294
How do I create a menu bar and attach it to a frame? 295 How do I create a menu and attach it to the menu bar? 295
How do I add items to a pull-down menu? 297 ■ How do I
respond to a menu event? 301
10.2 Working with menu items 303
How do I find a specific menu item in a menu? 303 ■ How do I
enable or disable a menu item? 306 ■ How do I associate a menu
item with a keyboard shortcut? 307 ■ How do I create a toggle
menu item with a checkbox or radio button? 311
10.3 Sprucing up your menus 313
How do I create a submenu? 313 ■ How do I create a
pop-up menu? 315 ■ How can I create fancier menus? 317
10.4 Usability guidelines for menus 319
Keeping menus uniform in length 319 ■ Creating logical
item groups 319
10.5 Summary 321
11
Placing widgets with sizers 323
11.1 What’s a sizer? 324
11.2 Basic sizers with the grid sizer 326
What is a grid sizer? 327 ■ How do you add or remove children
CONTENTS xv
alignment of their children? 331 ■ Can I specify a minimum size
for my sizer or its children? 334 ■ How do sizers manage the
border around each child? 336
11.3 Using the other sizer types 337
What’s a flex grid sizer? 337 ■ What’s a grid bag sizer? 341
What’s a box sizer? 345 ■ What’s a static box sizer? 349
11.4 Can I see a real-world example of sizers in action? 350 11.5 Summary 354
12
Manipulating basic graphical images 356
12.1 Working with images 357
How do I load images? 357 ■ What can I do with
an image? 361 ■ How can I change cursors? 364
12.2 Dealing with device contexts 367
What is a device context, and how can I create one? 367
How do I draw to a device context? 371 ■ How do I draw images
to the context? 376 ■ How can I draw text to the context? 379
12.3 Graphics manipulation 381
How do I manage the foreground drawing pen? 381 How do I manage the background drawing brush? 384
How can I manage logical and physical device coordinates? 385 What color names are predefined? 387
12.4 Summary 388
P
ART3
A
DVANCED WXP
YTHON... 391
13
Building list controls and managing items 393
13.1 Building a list control 394What is icon mode? 394 ■ What is small icon mode? 395
What is list mode? 396 ■ What is report mode? 397
How do I create a list control? 398
13.2 Managing items in a list 400
What is an image list and how do I add images to it? 400 How can I add and delete items from a list? 402
13.3 Responding to users 405
How can I respond to a user selection in a list? 405 ■ How can
13.4 Editing and sorting list controls 411
How can I edit a label? 411 ■ How can I sort my list? 413
How can I learn more about list controls? 416
13.5 Creating a virtual list control 420 13.6 Summary 423
14
Coordinating the grid control 425
14.1 Creating your grid 426How do I create a simple grid? 426 ■ How do I create a grid with
a grid table? 429
14.2 Working with your grid 432
How do I add and delete rows, columns, and cells? 432 How do I manage the row and column headers of a grid? 433 How can I manage the size of grid elements? 436
How can I manage which cells are selected or visible? 440 How do I change the color or font of a grid cell? 442
14.3 Custom renderers and editors 445
How do I use a custom cell renderer? 445 ■ How do I edit
a cell? 449 ■ How do I use a custom cell editor? 450
14.4 Capturing user events 455
How can I capture user mouse selections? 455 ■ How can I
capture user keyboard navigation? 457
14.5 Summary 458
15
Climbing the tree control 460
15.1 Creating tree controls and adding items 461
How do I add a root? 463 ■ How do I add more items
to the tree? 463 ■ How do I manage items? 464
15.2 What styles control the display of the tree control? 465 15.3 Sorting elements of a tree control 467
15.4 Controlling the image for each item 468 15.5 Navigating the tree programmatically 471 15.6 Managing the tree selection 472
CONTENTS xvii
15.9 Responding to other user events from a tree control 478 15.10 Using a tree list control 480
15.11 Summary 482
16
Incorporating HTML into your application 485
16.1 Displaying HTML 486
How can I display HTML in a wxPython window? 486 How can I display HTML from a file or URL? 488
16.2 Manipulating the HTML window 490
How can I respond to a user click on an active link? 490 How can I change an HTML window programmatically? 491 How can I display the page title in a frame’s title bar? 493 How can I print an HTML page? 495
16.3 Extending the HTML window 496
How does the HTML parser work? 496 ■ How can I add
support for new tags? 498 ■ How can I support other
file formats? 501 ■ How can I get a more fully featured
HTML Widget? 502
16.4 Summary 503
17
The wxPython printing framework 504
17.1 How do I print in wxPython? 505
Understanding the printout lifecycle 506 ■ Print framework
in action 507 ■ Working with wx.Printout methods 511
17.2 How do I display the print dialog? 512
Creating a print dialog 512
17.3 How do I display the page setup dialog? 515
Creating a page setup dialog 515 ■ Working with page
setup properties 516
17.4 How do I print something? 518
17.5 How can I perform a print preview? 519 17.6 Summary 520
18
Using other wxPython functionality 521
18.1 Putting objects on the clipboard 522
Getting data in the clipboard 522 ■ Manipulating data
clipboard 524 ■ The clipboard in action 524 ■ Passing other
data formats 526
18.2 Being the source of a drag and drop 527
Dragging in action 529
18.3 Being the target of a drag and drop 530
Using your drop target 531 ■ Dropping in action 533
18.4 Transferring custom objects 534
Transferring a custom data object 534 ■ Retrieving
a custom object 535 ■ Transferring an object in
multiple formats 535
18.5 Setting timed events using wx.Timer 536
Generating EVT_TIMER events 536 ■ Learning other
timer uses 539
18.6 Creating a multithreaded wxPython application 539
Working with the global function wx.CallAfter() 540 Managing thread communication with the queue object 543 Developing your own solution 543
18.7 Summary 544
xix
preface
The wxPython part of the story actually begins in 1995, with Harri Pasanen and Robin Dunn. Robin, who is one of the co-authors of the book, wrote the following about the history of wxPython, and we decided that it was a story better told in his own voice than paraphrased:In 1995 I was working on a project that needed a GUI to be deployed on HP-UX systems, but my boss also wanted to show something at a trade show on his Windows 3.1 laptop in a few weeks’ time. So I started searching for a cross platform C++ GUI toolkit to do a prototype with. In those days it wasn’t easy without Google, but I found that there were several commercial alternatives available (none of which is still available today) and lots of tool-kits with freely available source.
the developers in the immediate vicinity and showing them the cool new thing I had discovered.
Instead of working on my prototype, I started working with Harri Pasanen in Finland to advance the Python bindings for wxWidgets, otherwise known as wxPython 0.2, with some help from Edward Zimmerman. The mailing list announcement of that release is archived here: (http://www.google.com/ groups?selm=PA.95Jul27032244%40ok.tekla.fi&oe=UTF-8). We got it to be functional enough that I could build the prototype for my boss using Python, but wxPython was a nightmare to maintain and to enhance because everything (C++ extension module code, Python proxy modules, build system, etc.) was done by hand, and little changes or enhancements to wxWidgets would often require changes to several places in wxPython code to add the support for the enhancement or fix to wxPython. When it reached many tens of thousands of lines of code it became very awkward and fragile to continue working in that manner. Add to that the fact that there was no central source code repository (this was also before SourceForge’s time) so we were emailing code changes to each other—you can get an inkling of the difficulties involved.
About that time, I had to start doing “real” work again as my main project was building up from a gleam in the eye to a full-force development project with several developers under my control with design meetings and deadlines, and I found myself fully back in the C++ world again, although I was able to use Python for some of the build and test scripts for the project. Harri wasn’t able to spend any time on it either, so wxPython development slowed to less than a crawl and eventually stopped.
PREFACE xxi
since. The first announcement is archived here: (http://groups.yahoo.com/ group/python-announce-list/message/95).
The rest is, as they say, history. It’s important to note that SWIG is allowing me to easily create and maintain literally hundreds of thousands of lines of code, so much of the credit for the vastness of wxPython’s feature set deserves to go to David Beazley and the other developers contributing to that project.
xxii
Our work on this book has been aided by a number of people, in ways both obvious and subtle.
Patrick O’Brien was instrumental in getting this project off the ground and Marjan Bace, our publisher at Manning Publications, gave us the chance to make it happen. Jackie Carter was our first editor at Manning and Lianna Wlasiuk came in at a crucial juncture, and, like a great bullpen pitcher, earned the save. We would like to thank our production team at Manning and every-one who worked behind the scenes on the book, especially our copyeditor Elizabeth Martin and our typesetter Denis Dalinnik. Big thanks also to our agent Laura Lewin for her help and understanding.
We’ve benefited a great deal from the generosity of programmers world-wide in creating the technologies used in this book. First on that list is the crew who developed the wxWidgets foundation of wxPython: Julian Smart, Vadim Zeitlin, Robert Roebling, and the rest of the core wxWidgets team, as well as many contributors. Of course, without Guido van Rossum and other members of the Python language development team, there would be no “Python” in “wxPython.” A large part of this book was written using the jEdit text editor and the images were manipulated using the GIMP.
ACKNOWLEDGMENTS xxiii
Mike Stok, Jean Baltus, Thomas Palmer, Jack Herrington, Peter Damoc, Nick Coghlan, Pim Van Heuven, John Paulson, Ian Brown, Stefan Neis, Chris Mellon, Kevin Ollivier, and Doug Tillman. Special thanks to Clint Howarth who was our technical proofreader.
NOEL RAPPIN My wife, Erin, makes my life better every day. Thank you for your strength, your intelligence, and your love. I also want to thank my parents Donna and Donnie and my sister Michelle for supporting me fully and com-pletely. Matt Cohen helped this effort by entertaining me via IM while I was try-ing to write. Finally, I want to thank my daughter Emma, who is now old enough to be excited to see her name in a book, and my son Elliot, in anticipation of the day he will also be glad to see his name.
xxiv
Who should read this book?
Naturally, we’d love everybody to read this book. If you are reading this in the bookstore, trying to decide whether to purchase it, we say, go for it! Buy one for the people next to you too—they’ll thank you later.
That said, we did have certain assumptions about you, the reader, in mind as we wrote this book. We assume that you don’t need us to explain the basics of the Python programming language. We present a lot of Python code in this book. We think Python code is pretty easy to understand, but we want to let you know up front that we don’t have a tutorial on Python basics. If you’d like a Python tutorial, we recommend Manning’s The Quick Python Book, by Daryl Harms and Kenneth McDonald.
We also assume that you are at least familiar with the basic terms describing graphical interface objects, and have at least some familiarity with graphical interfaces from a user’s perspective. More advanced user interface concepts, or less familiar user interface display elements, will be described as they come up.
ABOUT THIS BOOK xxv
How this book is organized
We’ve divided wxPython In Action into three parts. The first part is an introduc-tion to wxPython concepts, a tutorial on how to get started with wxPython, and some information on wxPython best practices. The chapters in part 1 are:
Chapter 1, Welcome to wxPython
In this chapter, we introduce wxPython, explain to you why it’s the greatest thing since sliced bread, and give some background on the technologies used to create wxPython.
Chapter 2, Giving your wxPython program a solid foundation
The two most important objects in wxPython are discussed. Every application must have an application object and a top-level window. This chapter will show you how to start a wxPython program, and how to manage its lifecycle. Chapter 3, Working in an event-driven environment
Like all GUI toolkits, control in wxPython is managed by events. This chapter discusses how events are handled, and how you can use them as hooks to drive your functionality.
Chapter 4, Making wxPython easier to handle with PyCrust
PyCrust is a Python shell written in wxPython that contains many advanced and useful features. Not only can you use PyCrust for your wxPython develop-ment, you can wrap your program inside it for debugging purposes, and you can reuse the PyCrust components in your own applications.
Chapter 5, Creating your blueprint
This chapter discusses best practices in three areas that are often difficult for
GUI programmers. We show how to use refactoring to improve the structure and maintainability of your code. The Model/View/Controller design pattern is explored, and we’ll show you how to unit test our GUI code to minimize errors. Chapter 6, Working with the basic building blocks
This chapter is a bridge between parts one and two. Building on the basic ideas already shown, we give hints of some of the features discussed in parts 2 and 3 as we build a sketchpad application.
Chapter 7, Working with the basic controls
This chapter covers the API for the basic widget set, including text fields, but-tons, list boxes, and the like.
Chapter 8, Putting widgets in frames
All your wxPython widgets will be inside a frame or a dialog. In this chapter we cover how frames work, what kind of frames there are, and how to manage widgets within a frame.
Chapter 9, Giving users choices with dialogs
Dialogs behave slightly differently than frames. We cover how modal dialog boxes work, as well as the standard predefined wxPython dialogs. We’ll also show you how to use wxPython validators to help mange the data in a dialog. Chapter 10, Creating and using wxPython menus
Most windowed applications have a menu. We’ll show you how to add menus to the menu bar, and menu items to a menu. Specialized menus, such as checkboxes, and radio menus will also be covered. We’ll also discuss keyboard shortcuts and some usability guidelines for using menus effectively.
Chapter 11, Placing widgets with sizers
In wxPython, sizers are used to spare you the drudgery of placing your wid-gets manually. There are several useful sizers that are part of wxPython, and we’ll show you how to use them, and what kind of layout is best suited to each. Chapter 12, Manipulating basic graphical images
The most basic purpose of any UI toolkit is to draw lines and shapes to the screen. In wxPython, there is a rich set of drawing tools available for your use. There is also a powerful abstraction called a device context which allows you to draw to a target without caring whether the target is a window, a printer, or a file.
Part 3 contains a detailed look at more advanced portions of wxPython. It starts with a description of the three most complex wxPython widgets, and continues with a discussion of various print and display mechanisms, closing out with a tour of useful items that didn’t quite earn their own chapter. The chapters in part 3 are:
Chapter 13, Building list controls and managing items
ABOUT THIS BOOK xxvii
Chapter 14, Coordinating the grid control
If you want something that looks like a spreadsheet, the wxPython grid control is a full-featured widget that will meet your needs. It allows full control over the display and behavior of the grid, and allows for complete customization. Chapter 15, Climbing the tree control
The wxPython tree control allows for compact display of hierarchical data, including, but not limited to a directory tree or class hierarchy. You can also allow the user to edit entries on the fly.
Chapter 16, Incorporating HTML into your application
Within wxPython, you can use HTML to simplify the display and printing of styled text. The HTML engine inside wxPython can also be customized to fit your special needs.
Chapter 17, The wxPython printing framework
Printing is managed from a wxPython application through several dedicated print, print data, and print preview objects. In this chapter, we explore how all of them work together.
Chapter 18, Using other wxPython functionality
In this chapter, we cover some important features that are not quite long enough to justify a chapter on their own, including cut and paste, drag and drop, and multithreading.
How to use this book
How you use this book will depend on your wxPython knowledge. We designed this book to be useful for both experts and novices, but we expect that different parts of the book will have more or less resonance for users at different levels.
If you are a wxPython beginner, you definitely want to start in part 1. Chap-ters 1–3 will give you a solid grounding in wxPython concepts, and chapter 6 will give you a nice overview of the steps in building a reasonably sized program. Chapter 5 will introduce you to some methods for making your code easy to manage, and chapter 4 will have some tools to help you debug and write wxPy-thon applications. As you start writing your own wxPywxPy-thon programs, you’ll also start using the API discussions in part 2—we tried to organize them by function-ality to make it easy to find useful topics.
code samples in that section tend to be longer and more integrated than in the other sections.
The examples in this book were written against Python version 2.3.x—we don’t think we included any of the new 2.4 language features—and wxPython 2.5.x. The 2.6.x release of wxPython came out too late for coverage in this book; how-ever, it was largely a bug fix release, numbered for compliance with wxWidgets.
There is one other point that we need to make before we begin. This book is not intended to be a complete reference to every nook and cranny of wxPython. We expect that it will be a useful reference to the features that you are most likely to need to know about, but it is not 100% feature-complete. In the interests of time and space, we had to choose some elements to focus on and others, well, not to. For instance, there are a number of wxPython features inherited from the C++
wxWidgets toolkit that are replicated in the standard Python library—we chose not to cover those features. Also, if you are working in a Windows operating system whose name includes a date in the 1990s, you’ll probably find that some features don’t work exactly as described in some cases and we didn’t have the space to enumerate all of those exceptions. Finally, there were some features of the core widgets set that we determined were either not often used or that we did not have the space to do justice.
Typographical conventions
The following conventions are used throughout the book:
■ Courier typeface is used in all code listings. ■ Italics are used to introduce new terms.
■ CourierBold is sometimes used to draw your attention to a section of code. ■ Code annotations are used when directing your attention to a particular
line of code. Annotations are marked with bullets, such as
b
.■ Courier typeface is used in text for code words, wxPython class and
method names, or snippets of Python code.
Code downloads
Source code for all of the examples used in this book is available for download from the publisher’s website at www.manning.com/rappin.
Where to get more help
ABOUT THIS BOOK xxix
for insight into your problem. The official online documentation is at http://www. wxpython.org/docs/api/. A collaborative wiki site is available at http://wiki.wxpy-thon.org/, and there are mailing lists that you can subscribe to at http://www.wxpy-thon.org/maillist.php.
Author Online
Help is also available from the Author Online forum, a private web discussion board run by Manning Publications. You are encouraged to use this forum to make comments about the book, ask technical questions, and receive help from the authors and other readers. Use your browser to navigate to www.man-ning.com/rappin to take advantage of this free service. The forum’s welcome page gives you all the information you need to sign up and get going.
The Author Online forum is one of the ways Manning remains committed to readers. The authors’ participation in the forum is voluntary and without a specified level of commitment. The forum is a great way to share ideas and learn from each other. The Author Online forum will remain accessible from the publisher’s website as long as the book is in print.
about the title
By combining introductions, overviews, and how-to examples, the In Action books are designed to help learning and remembering. According to research in cognitive science, the things people remember are things they discover during self-motivated exploration.
Although no one at Manning is a cognitive scientist, we are convinced that for learning to become permanent it must pass through stages of exploration, play, and, interestingly, retelling of what is being learned. People understand and remember new things, which is to say they master them, only after actively exploring them. Humans learn in action. An essential part of an In Action guide is that it is example-driven. It encourages the reader to try things out, to play with new code, and explore new ideas.
about the cover illustration
The figure on the cover of wxPython in Action is a “Soldat Japonais,” a Japanese soldier. The illustration is taken from a French travel book, Encyclopedie des Voy-ages by J. G. St. Saveur, published in France in 1796. Travel for pleasure was a relatively new phenomenon at the time and travel guides such as this one were popular, introducing both the tourist as well as the armchair traveler to the inhabitants of other regions of France and abroad.
The diversity of the drawings in the Encyclopedie des Voyages speaks vividly of the uniqueness and individuality of the world’s towns and provinces just 200 years ago. This was a time when the dress codes of two regions separated by a few dozen miles identified people uniquely as belonging to one or the other. The travel guide brings to life a sense of isolation and distance of that period and of every other historic period except our own hyperkinetic present.
Dress codes have changed since then and the diversity by region, so rich at the time, has faded away. It is now often hard to tell the inhabitant of one continent from another. Perhaps, trying to view it optimistically, we have traded a cultural and visual diversity for a more varied personal life. Or a more varied and interesting intellectual and technical life.
Part 1
Introduction to wxPython
W
e start right off by introducing you to wxPython in chapter 1, “Wel-come to wxPython,” which explains how wxPython came to be, and what makes it so great that you should drop everything and start using it. We’ll show a little bit of sample code, some cool screenshots, and contrast wxPython with its wxWidgets parent project. In chapter 2, “Giving your wxPython pro-gram a solid foundation,” we discuss the two objects required in all wxPython applications. The first, the application object, manages the event loop and oversees the application lifecycle. The second, the top-level window, is the focal point of user interaction with your program. We’ll show you how to use both, and offer troubleshooting tips.In chapter 3, “Working in an event-driven environment,” we’ll focus on the wxPython event cycle, covering what events are and how they are generated. We’ll take a detailed run through the process by which an event is associated with the code that should be generated in response. You’ll also see how to cre-ate your own custom events. Chapter 4, “Making wxPython easier to handle with PyCrust,” is an introduction to the PyCrust interactive shell, as well as the related Py package of useful applications. We’ll show you how to wrap your own application in a PyCrust shell for easier debugging, and also how to use the Py objects as part of your applications.
3
Welcome to wxPython
This chapter covers
■ Getting started with wxPython
■ Creating a minimum wxPython program
■ Importing wxPython
■ Learning the Python programming language
Here’s a simple wxPython program. It creates a window with one text box that displays the position of the mouse pointer. Counting white space, it’s about 20 lines long.
#!/bin/env python import wx
class MyFrame(wx.Frame):
def __init__(self):
wx.Frame.__init__(self, None, -1, "My Frame", size=(300, 300)) panel = wx.Panel(self, -1)
panel.Bind(wx.EVT_MOTION, self.OnMove)
wx.StaticText(panel, -1, "Pos:", pos=(10, 12))
self.posCtrl = wx.TextCtrl(panel, -1, "", pos=(40, 10))
def OnMove(self, event): pos = event.GetPosition()
self.posCtrl.SetValue("%s, %s" % (pos.x, pos.y))
if __name__ == '__main__': app = wx.PySimpleApp() frame = MyFrame() frame.Show(True) app.MainLoop()
What can we say about the program in listing 1.1? It’s very short, for one thing. Admittedly, it doesn’t do a whole lot, but still, creating a window, populat-ing it, gettpopulat-ing it to respond to mouse events—that’s not bad for 20 lines. It’s not an exaggeration to say this example could easily be three or four times longer in some, more caffeinated, programming languages. Figure 1.1 shows the running program.
The code sample is quite readable. Even if you don’t know the details of Python or wxPython, if you have any experience with interface program-ming you likely have a sense of what words like
Frame, __init__, EVT_MOTION, TextCtrl, and Main-Loop mean. The indentation might seem a bit weird
if you aren’t used to Python (where are all those closing braces, anyway?), and you probably don’t know what all the arguments mean (what’s with those -1s?), but
Listing 1.1 A working wxPython program in a mere 20 lines
Getting started with wxPython 5
you could quite easily come to some rough understanding of the code without much help.
In this book, we’ll show you why wxPython is one of the easiest, most powerful ways of building a real graphical user interface (GUI) program that there is. Most toolkits that make the building of the interface itself easier (such as a Visual Basic style tool) don’t have an implementation language with the clarity, flexibility, and power of Python. Most of the toolkits that have the functionality of wxPython force you to use a language that is ill-suited to rapid development. You’ll find wxPython right in the sweet spot, where you get the maximum bang for your development buck. Even better, wxPython is an open-source project, with both the source code and the binary installations distributed under a license that allows it to be freely used in both commercial and open source development.
By the time you’ve reached the end of this book, you’ll know how to build a state-of-the-art GUI using the wxPython toolkit. You’ll be able to create and manipulate common interface elements such as buttons and menus, as well as less common ones such as trees and HTML editors. So there’s quite a bit of ground for us to cover. In this chapter, we’ll get you started with wxPython, and discuss what wxPython does and why you might choose it for your programming needs.
A good interface allows the user to access the functionality of the application as simply and cleanly as possible, with a stylish look that is attractive to the users. A bad interface can keep users from finding the functionality in the program, and can even cause people to assume that a perfectly working program is malfunc-tioning. In wxPython, you can create the interface you want with less effort than you’d expect.
1.1 Getting started with wxPython
We’re going to start by working on a real wxPython program, albeit a simple one. We won’t create anything complicated, yet. For now, we’re going to lead you step-by-step through the process of creating your very first wxPython program. Let’s begin by making sure you’ve got everything installed. Table 1.1 shows everything you’ll need in order to run wxPython.
Once the installations are complete, get ready to type. We’re going to create a program that displays a single image file. This will happen in three steps:
1 We’ll start with the bare minimum required for a working wxPython program. 2 We’ll make that code more structured and sophisticated.
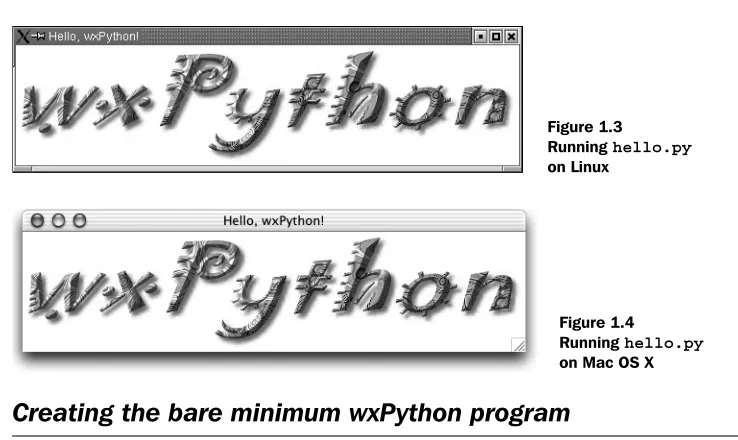
Figures 1.2, 1.3, and 1.4 illustrate what the final program will look like, depend-ing on your platform.
Table 1.1 Everything you’ll need to run wxPython on your own computer
Tool Notes
The right operating system
This is an easy one—you have a lot of options. Specifically, you must be running one of the following:
• Any Microsoft Windows 32-bit operating system—meaning anything from Windows 98 onward (and you can get it going under Windows 95 if you must, but you’ll need to download some extras).
• Any Unix or Linux system capable of running the Gnome Toolkit (GTK). • A Macintosh running Mac OS X 10.2.3 or higher.
The Python programming language
Available for download at www.python.org. Any version 2.3 or higher will work. Many Linux distributions include a version of Python, as does Mac OS X 10.3 or higher. Even so, you might still want to download the latest version.
The wxPython Toolkit
Available for download at www.wxpython.org.
There are different versions, depending on your operating system and Python version. Be sure to download the runtime installer that matches your platform, Python version, and Unicode preference. Download the packages for the demos and documentation as well.
If you’ve installed other software on your system, you should find that installing the wxPython packages works very similarly. Again, recent versions of Mac OS X and some Linux distributions already include wxPython, but you should download the latest version if you can.
A text editor We recommend an editor that recognizes Python syntax and can do things like
colorize the code to make it more readable. Most of the popular editors have support for Python code, so use the editor you prefer.
If you have no strong feelings for any particular editor, try IDLE, the integrated development environment included with Python, which includes a source code editor, interactive shell, debugger, and other tools.
The Python web site has a list of Python-aware editors at www.python.org/editors.
Figure 1.2 Running hello.py
Creating the bare minimum wxPython program 7
1.2 Creating the bare minimum wxPython program
Let’s begin with the simplest possible wxPython program that will run success-fully. Create a file named “bare.py” and type in the following code. Remember, in Python, the spacing at the start of each line is significant.
import wx
class App(wx.App):
def OnInit(self):
frame = wx.Frame(parent=None, title='Bare') frame.Show()
return True app = App()
app.MainLoop()
There’s not much to it, is there? Even at only eight lines of code (not counting blank lines) this program might seem like a waste of space, as it does little more than display an empty frame. But bear with us, as we’ll soon revise it, making it something more useful.
The real purpose of this program is to make sure you can create a Python source file, verify that wxPython is installed properly, and allow us to introduce more complex aspects of wxPython programming one step at a time. So humor us: create a file, type in the code, save the file with a name “bare.py,” run it, and make sure it works for you.
The mechanism for running the program depends on your operating system. You can usually run this program by sending it as a command line argument to
Figure 1.3 Running hello.py
on Linux
Figure 1.4 Running hello.py
the Python interpreter from an operating system prompt, using one of the follow-ing commands:
python bare.py
pythonw bare.py
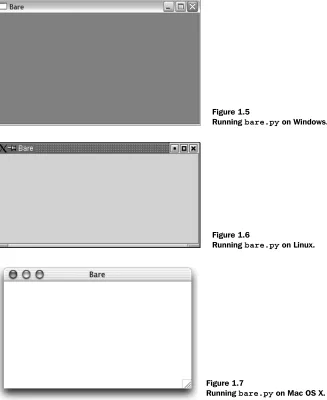
Figures 1.5, 1.6, and 1.7 show what the program looks like running on various operating systems.
Figure 1.5
Running bare.py on Windows.
Figure 1.6
Running bare.py on Linux.
Figure 1.7
Creating the bare minimum wxPython program 9
When most people look at this running program, they see something they would call a “window.” However, wxPython does not call this a win-dow. It calls this a “frame.” In wxPython,“window” is the generic term for any object that displays on the screen (what other toolkits might call a “widget”). So, a wxPython programmer will often refer to objects such as buttons or text boxes as “windows.” This may seem confusing, but the usage dates to the earliest days of the original C++ toolkit, and it’s unlikely to change now. In this book, we’ll try to avoid the use of window as a generic term, because it’s confusing and also because it’s the name of a big product from a major corporation. We’ll use widget as the generic term. When we’re specifically referring to the operating system of similar name, we’ll do it with a capital “W.”
While this bare-minimum program does little more than create and display an empty frame, all of its code is essential; remove any line of code and the program will not work. This basic wxPython program illustrates the five basic steps you must complete for every wxPython program you develop:
1 Import the necessary wxPython package 2 Subclass the wxPython application class 3 Define an application initialization method 4 Create an application class instance
5 Enter the application’s main event loop
Let’s examine this bare minimum program step-by-step to see how each one was accomplished.
1.2.1 Importing wxPython
The first thing you need to do is import the main wxPython package, which is named wx:
import wx
Once that package is imported, you can refer to wxPython classes, functions, and constants using the wx package name as a prefix, like this:
class App(wx.App):
During the writing of this book the name of the wxPython package changed. Since the old naming convention is still supported, you will probably encounter wxPython code written in the old style. So, we’ll digress briefly to explain the older style and why it was changed. The old
JARGON: IT LOOKS LIKE A WINDOW...
package name was wxPython and it contained an internal module named wx. There were two common ways to import the needed code— you could import the wx module from the wxPython package:
from wxPython import wx #DEPRECATED—DON'T DO THIS ANY MORE
Or, you could import everything from the wx module directly. from wxPython.wx import * #DEPRECATED—DON'T DO THIS ANY MORE
Both import methods had serious drawbacks. Using the second method of import* is generally discouraged in Python because of the possibility of namespace conflicts. The old wx module avoided this problem by putting a wx prefix on nearly all of its attributes. Even with this safe-guard, import * still had the potential to cause problems, but many wxPython programmers preferred this style, and you’ll see it used quite often in older code. One downside of this style was that class names began with a lowercase letter, while most of the wxPython methods begin with an uppercase letter—the exact opposite of the normal Python programming convention.
However, if you tried to avoid the namespace bloat caused by import*
by doing fromwxPythonimportwx, you now had to type “wx” twice for each class, function, or constant name—once as the package prefix and once as the “normal” prefix, such as wx.wxWindow. This got old fast. Many wxPython programmers saw this dilemma as a wart that should be removed, and eventually, it was. If you’re interested, you can search the wxPython mailing list archives to read more of the details surrounding this change.
One more thing to know about importing wxPython: you must import wx before
you import anything else from wxPython. In general, the order of imports in Python is irrelevant, meaning you can import modules in any order. However, wxPython, although it looks like a single module, is actually a complex set of modules (many of which are automatically generated by a tool called the Simpli-fied Wrapper and Interface Generator, or SWIG) that wrap the functionality pro-vided by the underlying wxWidgets C++ toolkit (we’ll discuss wxWidgets in more detail in section 1.7). When you import the wx module for the first time,
wxPy-thon performs some initialization that is vital to other wxPywxPy-thon modules. As a result, some of the wxPython subpackages, such as the xrc module, might not
work properly unless the wx module has already been imported:
Creating the bare minimum wxPython program 11
This requirement applies only to the wxPython modules; you can still import other Python modules as you always have, and those modules can be imported before or after the wxPython modules. For instance, this example is valid:
import sys import wx import os
from wx import xrc import urllib
1.2.2 Working with applications and frames
Once you’ve imported the wx module, you can create your application and frame
objects. Every wxPython program must have one application object and at least one frame object. These objects will be discussed in detail in chapter 2. For now, you just need to know that the application object must be an instance of wx.App or of a
sub-class you define where you declare an OnInit() method. The OnInit() method will
be called by the wx.App parent class when your application starts.
Subclass the wxPython application class
Here is how we defined our wx.App subclass:
class MyApp(wx.App):
def OnInit(self):
frame = wx.Frame(parent=None, id=-1, title="Bare") frame.Show()
return True
We named our class “MyApp,” which is a common convention, but any valid Python class name would do.
The OnInit() method is where you’ll most often create frame objects. But you
won’t usually directly create instances of wx.Frame as we did here. Instead, you’ll
define your own wx.Frame subclass the same way we defined our own wx.App
sub-class. (You’ll see an example in the next section.) We’ll explore frames in detail in the next chapter, so for now we’ll simply point out that the wx.Frame constructor
accepts several parameters. Of the three we supplied, only the first is required, while the rest have default values.
Invoking the Show() method makes the frame visible. If we had left that out,
the frame would have been created, but we wouldn’t be able to see it. We can tog-gle the frame’s visibility by calling Show() with a Boolean parameter:
frame.Show(False) # Make the frame invisible.
Define an application initialization method
Notice that we didn’t define an __init__() method for our application class. In
Python, this means that the parent method, wx.App.__init__(), is automatically
invoked on object creation. This is a good thing. If you define an __init__()
method of your own, don’t forget to call the __init__() of the base class, like this:
class App(wx.App):
def __init__(self):
# Call the base class constructor. wx.App.__init__(self)
# Do something here...
If you forget to do so, wxPython won’t be initialized and your OnInit() method
won’t get called.
Create an application class instance and enter its main event loop
The final step is to create an instance of the wx.App subclass, and invoke its Main-Loop() method:
app = App() app.MainLoop()
That’s it. Once the application’s main event loop processing takes over, control passes to wxPython. Unlike procedural programs, a wxPython GUI program pri-marily responds to the events taking place around it, mostly determined by a human user clicking with a mouse and typing at the keyboard. When all the frames in an application have been closed, the app.MainLoop() method will
return and the program will exit.
1.3 Extending the bare-minimum wxPython program
We showed you a bare-minimum wxPython program to give you a comfortable start, but something that small isn’t useful for anything but discussion. By over-simplifying the code, we produced a Python program that was easy to under-stand, but difficult to extend—which is not how we would encourage you to create serious wxPython programs.
Extending the bare-minimum wxPython program 13
#!/usr/bin/env python
"""Spare.py is a starting point for a wxPython program."""
import wx
class Frame(wx.Frame): pass
class App(wx.App):
def OnInit(self):
self.frame = Frame(parent=None, title='Spare') self.frame.Show()
self.SetTopWindow(self.frame) return True
if __name__ == '__main__': app = App()
app.MainLoop()
This version is still quite small, only 14 lines of code, but we added several impor-tant items that get us closer to what we would consider good, solid code.
The first line in the file is now a shebang line. It looks like a Python comment, which it is, but on some operating systems, such as Linux and Unix, the shebang tells the operating system how to find the interpreter that will execute the pro-gram file. If this propro-gram file was then given executable privileges (using the
chmod command, for example) we could run the program from the operating
sys-tem command line by simply supplying the program name:
% spare.py
The shebang line is a convenience for Unix and Mac OS X users and is simply ignored on other platforms. Even if you aren’t using one of those systems, it’s polite to include it on a script that might be executed cross-platform.
We added a module docstring (documentation string). When the first statement in a module is a string, that string becomes the docstring for the module and is stored in the module’s __doc__ attribute. You can access the docstring in your
code, some development environments, and even the Python interpreter run-ning in interactive mode:
>>> import spare
>>> print spare.__doc__
Spare.py is a starting point for simple wxPython programs. >>>
Listing 1.2 The spare version of our minimal program.
b
c
d
e
f
g
b
Docstrings are but one example of Python’s powerful introspection capabilities, and we will encourage you to provide them for modules, classes, methods, func-tions, and any other place that Python supports. Python development tools, such as PyCrust, are able to use the docstring to provide useful information to a devel-oper while you are coding.
We changed the way we created the frame object. The “bare” version of this pro-gram simply created an instance of the wx.Frame class. In the “spare” version we
defined our own Frame class as a subclass of wx.Frame. At this point it hasn’t made
any difference to the final results, but you’ll want your own Frame class if you want
anything interesting, such as text, buttons, and menus, to appear in your frame. Introducing your own custom Frame class now sets the stage for future iterations.
In fact, once your Frame class becomes complicated, you’ll probably want to move
it into its own module and import it into your main program.
We added a reference to the frame instance as an attribute of the application class instance. Again, we’re setting the stage for things to come, as well as demonstrat-ing how easy it is to add attributes to Python classes. It makes no difference that the attribute is a reference to a complex, graphical object, such as a frame. To Python, an object is an object is an object.
Inside the OnInit() method we called the App class’s own SetTopWindow()
method, passing it our newly created frame instance. We didn’t have to define the
SetTopWindow() method because it was inherited from the wx.App parent class. It’s
an optional method that lets wxPython know which frame or dialog should be considered the main one. A wxPython program can have several frames, with one designated as the top window for the application. In this case the choice was easy since we have but one frame.
The final addition to the program represents a common idiom in Python pro-grams used to test whether the module is being run as a program or was imported by another module. We do that by examining the module’s __name__ attribute:
if __name__ == '__main__': app = App()
app.MainLoop()
If the module was imported, its __name__ attribute will be the same as its filename
(without the extension), like this:
>>> import spare >>> spare.__name__ 'spare'
>>>
But if the module is being executed, rather than imported, Python overrides the default naming convention and sets the module’s __name__ attribute to
d
e
f
Creating the final hello.py program 15
'__main__', giving us the chance to have the module behave differently when
executed directly. We take advantage of this feature by creating an application instance and entering its main event-loop only if the module is being executed as a program.
If we didn’t perform this test, and created an application instance even when this module was imported, it could conflict with code in the module doing the importing—especially if the importing module has already started the wxPython event loop. It would also be quite difficult to test (especially since there can only be one application instance active at one time in a wxPython program, and once we enter the event loop, control passes to wxPython.) By not starting our own application when the module is imported, we make our frame and app classes readily available to other Python programs, facilitating the reuse of existing code.
1.4 Creating the final hello.py program
Now that you’ve got the basics under your belt, let’s create the final version of the program we showed at the beginning of this chapter. Create a file named
hello.py and enter in the code shown in listing 1.3.
#!/usr/bin/env python
"""Hello, wxPython! program."""
import wx
class Frame(wx.Frame):
"""Frame class that displays an image."""
def __init__(self, image, parent=None, id=-1, pos=wx.DefaultPosition,
title='Hello, wxPython!'):
"""Create a Frame instance and display image."""
temp = image.ConvertToBitmap() size = temp.GetWidth(), temp.GetHeight() wx.Frame.__init__(self, parent, id, title, pos, size) self.bmp = wx.StaticBitmap(parent=self, bitmap=temp)
class App(wx.App):
"""Application class."""
def OnInit(self):
image = wx.Image('wxPython.jpg', wx.BITMAP_TYPE_JPEG) self.frame = Frame(image)
Listing 1.3 The final hello.py
b
ShebangDocstring describes the code
Import the wxPackage
wx.Frame subclass
c
d
Image parameterDisplaying the image
e
wx.App subclass
f
g
self.frame.Show()
self.SetTopWindow(self.frame) return True
def main(): app = App() app.MainLoop()
if __name__ == '__main__': main()
The shebang line allows this program to be an executable script under Linux and other Unix-like operating systems.
Defining a custom Frame class that subclasses wx.Frame lets us more easily control
the Frame’s contents and appearance.
We added an image parameter to our Frame’s constructor. This value is provided by our application class when it creates a Frame instance. As long as we can pass the required values to wx.Frame.__init__(), there’s no reason we can’t add more
parameters to our subclass’s constructor.
We’re going to display the image in a wx.StaticBitmap control, which requires a
bitmap. So we convert the image to a bitmap. We also create a size tuple, using the width and height of the bitmap. The size tuple is supplied to the wx.Frame.__ init__() call, so that the frame size matches the bitmap size.
Defining a wx.App subclass with an OnInit() method is a minimum requirement
for any wxPython application.
We create an image object, using a wxPython.jpg file stored in the same directory
as hello.py. You can get this file from the Manning web site, or substitute one of
your own. A more sophisticated version of this program would accept the name of a file from the command line. We pass our image object as a parameter when we create the frame.
The main() function creates an application instance and starts the wxPython
event loop.
Checking if this module is the main module allows it to be used in two different ways: run from the command line or imported by another module.
What happened when you ran your version of hello.py? Did you see a frame
sized to match the graphic you provided? If not, brush yourself off and try again. If so, congratulations! You’re ready to move on to the next exciting steps.
But before you rush into the next chapter, we’re going to talk about wxPython a little more broadly, what it’s capable of, and how it came to be. If that doesn’t
main()
function
h
Import vs. execute
i
b
c
d
e
f
g
h
What can wxPython do? 17
interest you, feel free to jump to the next chapter and continue coding—the rest of the introduction will still be here.
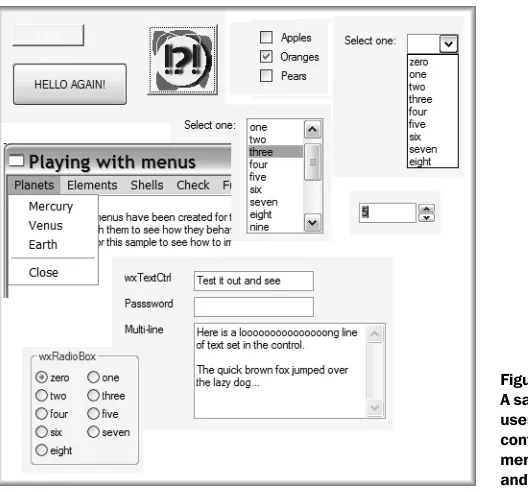
1.5 What can wxPython do?
Nearly all of your interface needs can be filled by wxPython. In this section, we’ll show you what some of the wxPython toolkit looks like, using pictures from ele-ments of the wxPython demo application. Figure 1.8 is a composite image show-ing all the basic widgets you’d expect: buttons, checkboxes, a combo box, menus, list box, a spinner control, text controls and radio buttons.
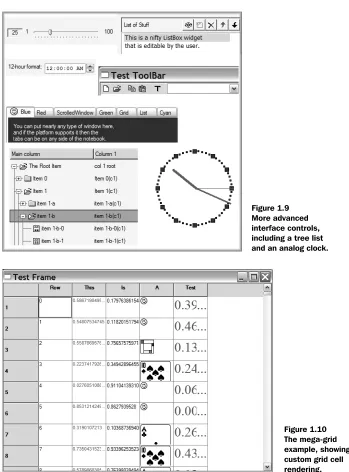
Figure 1.9 shows less common, but very useful widgets, including a slider con-trol, an editable list box, a time selector, a toolbar, a notebook concon-trol, a tree list control, and an analog clock.
The grid control is one of wxPython’s most flexible widgets, allowing custom rendering and editing of cells. Figure 1.10 shows an example of many of the fea-tures of the grid control.
And that’s not all—you also get a quite fully featured HTML-rendering widget that you can use for static styled text, as the base of a simple web browser, as a help system, or anything else you might want to display HTML for. An example is shown in figure 1.11.
Figure 1.9 More advanced interface controls, including a tree list and an analog clock.
Why choose wxPython? 19
We’ve only just scratched the surface. The wxPython library also includes tools for image animation. You also get clipboard and drag-and-drop support, support for MIME types and audio, all the standard dialogs offered by your system, the ability to specify an interface definition in an XML file, full control over the layout of your windows, and more.
1.6 Why choose wxPython?
The most powerful benefit of wxPython depends on your needs and expertise. While we think that all user interface (UI) programmers would benefit from using wxPython, the specific features that are most helpful will vary from case to case.
1.6.1 Python programmers
If you are already a Python programmer, you’ve probably noticed that Tkinter, the interface toolkit distributed with Python, has some problems:
■ Tkinter is based on the Tk toolkit, which is somewhat out-of-date in terms of the kinds of widgets it supports. By default, it doesn’t support more com-plex widgets such as tree controls or tabbed windows. It also doesn’t have a particularly rich set of predefined dialogs.
■ The Tk toolkit does not use native widget support, resulting in an applica-tion that looks foreign on all platforms. In wxPython, dialogs and widgets will look like those that are standard on the underlying operating system. Your Tk user will find that buttons, fonts, and menus all look slightly differ-ent from what might be expected.
■ Many programmers find Tkinter itself somewhat clunky to work with. In
particular, the process by which events are translated to actions in wxPy-thon is more flexible and powerful.
You’ll find that wxPython solves these problems. The toolkit in wxPython is vastly more complete and extensive than that of Tkinter and the native widget support means your application will look at home in your operating system. Additionally, the Python language support is more fluid in wxPython, making for a somewhat nicer programming experience.
1.6.2 wxWidget users
If you are already using wxWidgets, then what wxPython has to offer you is the Python language itself. With its clear syntax, dynamic typing, and flexible object model, Python can improve your productivity dramatically. Python has a very extensive standard library that is easily incorporated into your application, and Python programs tend to be shorter and less error-prone than C++ programs. There are also a number of Python-only additions to the wxWidgets tool set.
1.6.3 New users
How wxPython works 21
In the next section, you’ll learn about the component pieces of wxPython: the Python language itself, and the wxWidgets toolkit. You’ll also learn about the ratio-nale and implementation of wxPython itself.
1.7 How wxPython works
In the previous section, we talked about what wxPython can do. In this section, we’ll take a closer look at how wxPython works. Internally, wxPython is a wrapper or interface for a popular C++ interface toolkit called wxWidgets. The wxWid-gets project has a long history and is the source of most of the functionality of wxPython. Using wxPython allows you to get the benefits of the wxWidgets tool-kit, while being able to use Python rather than C++.
The wxPython toolkit is the combination of two distinct pieces of software, which have over 25 years of development between them. In addition, the wxPython toolkit itself was the result of a significant amount of work. To make wxPython go, a tool called SWIG is used to generate wrapper functions, or glue code, which allow a Python program to use the C++ wxWidgets library just as if it were any old Python library. Although SWIG does a lot of the work, there’s still some hand-tooling needed to make the wxPython objects look and act like other Python objects. There have also been several additional widgets written directly in wxPython that are not available in the C++ version of the tool—you’ll encounter several of them along the