CentreVu®
Visual Vectors
0Version 8.0
Installation and Getting Started
585-210-933
Comcode 108502238 Issue 1
in accordance with applicable agreements, contracts or licensing, without the express written consent of Global Learning Solutions’ Information Development organization and the business management owner of the material. For permission to reproduce or distribute, contact: Product Development Manager 1 888-LTINFO6
Notice
Every effort was made to ensure that the information in this book was complete and accurate at the time of printing. However, information is subject to change.
Your Responsibility for Your System’s Security
Toll fraud is the unauthorized use of your telecommunica-tions system by an unauthorized party, for example, per-sons other than your company’s employees, agents, subcontractors, or persons working on your company’s behalf. Note that there may be a risk of toll fraud associated with your telecommunications system and, if toll fraud occurs, it can result in substantial additional charges for your telecommunications services.
You and your system manager are responsible for the secu-rity of your system, such as programming and configuring your equipment to prevent unauthorized use. The system manager is also responsible for reading all installation, instruction, and system administration documents pro-vided with this product in order to fully understand the fea-tures that can introduce risk of toll fraud and the steps that can be taken to reduce that risk. Lucent Technologies does not warrant that this product is immune from or will pre-vent unauthorized use of common-carrier telecommunica-tion services or facilities accessed through or connected to it. Lucent Technologies will not be responsible for any charges that result from such unauthorized use.
Lucent Technologies Fraud Intervention
If you suspect that you are being victimized by toll fraud and you need technical support or assistance, call Technical Ser-vice Center Toll Fraud Intervention Hotline at 1-800-643-2353.
Trademarks
CentreVu and DEFINITY are registered trademarks of Lucent Technologies.
INTEL and Pentium are registered trademarks of Intel Corpora-tion.
Microsoft, MS, MS-DOS, Windows and Windows NT are regis-tered trademarks of Microsoft Corp.
Sun, Sun Microsystems, the Sun Logo, Solaris and Ultra are trademarks or registered trademarks of Sun Microsystems, Inc. in the United States and other countries.
All SPARC trademarks are used under license and are trademarks or registered trademarks of SPARC International, Inc. in the United States and other countries. Products bearing SPARC trade-marks are based upon an architecture developed by Sun Microsys-tems, Inc.
All other product names mentioned herein are the trademarks of their respective owners.
Write: Lucent Technologies Publications Center 2855 N. Franklin Road
Indianapolis, IN 46219 U.S.A.
Order: Comcode 108502238 Document No.585-210-933 Issue 1, December 1999
For additional documents, refer to the section titled “Related Documents” in the Preface.
You can be placed on a Standing Order list for this and other documents you may need. Standing Order will enable you to automatically receive updated versions of individual documents or document sets, billed to account information that you provide. For more information on Standing Orders, or to be put on a list to receive future issues of this document, please contact the Lucent Technologies Publica-tions Center.
Lucent Technologies National Customer Care Center
Lucent Technologies provides a telephone number for you to use to report problems or to ask questions about your call center. The support telephone number is 1-800-242-2121. For technical support, customers outside the United States should call their Lucent Technologies Representative or Dis-tributor.
European Union Declaration of Conformity
Lucent Technologies Business Communications Systems declares that the equipment specified in this document con-forms to the referenced European Union (EU) Directives and Harmonized Standards listed below:
EMC Directive 89/336/EEC Low Voltage Directive 73/23/EEC
The “CE” mark affixed to the equipment means that it conforms to the above Directives.
Heritage Statement
Lucent Technologies - formed as a result of AT&T’s planned restructuring—designs, builds, and delivers a wide range of public and private networks, communication systems and software, consumer and business telephone systems, and microelectronics components. The world-renowned Bell Laboratories is the research and development arm for the company.
Comments
To comment on this document, return the comment card at the front of the document.
Acknowledgment
Client Software License Agreement
DEFINITIONS ●
“Lucent” means Lucent Technologies Inc.
●
“You”, “Your”, or “Licensee” means the person or business entity who purchased this License to use this Client Software or for whom such License was purchased.
●“Client Software” means a software application that operates on a computer system that
provides resources to Client Software.
●“Documentation” means the manual and any other printed material provided by Lucent with
the Client Software.
●“License” means the License purchased and granted pursuant to this Agreement.
LICENSE AND PROTECTION
1. License Grant. Lucent grants to You, subject to the following terms and conditions, a nonexclusive, nontransferable right to use the Client Software on multiple single user devices, maximum simultaneous users of the Client Software being limited to the number Licensed and authorized by Lucent. THE SERVER SOFTWARE AUTOMATICALLY PREVENTS SIMULTANEOUS USE BY MORE THAN THE AUTHORIZED NUMBER OF USERS. Lucent reserves all rights not expressly granted to You.
2. Protection of Software. You agree to take all reasonable steps to protect the Client Software and Documentation from unauthorized copy or use. The Client Software source code represents and embodies trade secrets of Lucent and/or its licensors. The source code and embodied trade secrets are not licensed to You and any modification, addition, or deletion is strictly prohibited. You agree not to disassemble, decompile, or otherwise reverse engineer the Client Software in order to discover the source code and/or the trade secrets contained in the source code or for any other reason.
To the extent that the Client Software is located in a Member State of the European Community and You need information about the Client Software in order to achieve interoperability of an independently created software program with the Client Software, You shall first request such information from Lucent. Unless Lucent refuses to make such information available, You shall not take any steps, such as reverse assembly or reverse compilation, to derive a source code equivalent to the Client Software. Lucent may charge You a reasonable fee for the provision of such information.
3. Copies. You may make multiple copies of the Client Software, provided You do not receive any payment, commercial benefit, or other consideration for reproduction or use. You may not copy Documentation unless it carries a statement that copying is permitted. All proprietary rights notices must be faithfully reproduced and included on all copies.
5. Restrictions. You agree not to rent, lease, sublicense, modify or time share the Client Software or Documentation.
6. Termination. This Agreement shall automatically terminate if You breach any of the terms or conditions of this Agreement. You agree to destroy the original and all copies of the Client Software and Documentation, or to return them to Lucent, upon Termination of this License.
LIMITED WARRANTY AND LIMITED LIABILITY
1. Compatibility. The Client Software is only compatible with certain computers and operating systems. THE SOFTWARE IS NOT WARRANTED FOR NONCOMPATIBLE SYSTEMS. 2. Software. Lucent warrants that if the Client Software fails to substantially conform to the
specifications in the Documentations and if the Client Software is returned to the place from which it was purchased within one (1) year from the date purchased, then Lucent will either replace the Client Software or offer to refund the License Fee to You upon return of all copies of the Client Software and Documentation to Lucent. In the event of a refund, the License shall terminate.
3. DISCLAIMER OF WARRANTIES. Lucent makes NO WARRANTY, REPRESENTATION OR PROMISE NOT EXPRESSLY SET FORTH IN THIS AGREEMENT. LUCENT DISCLAIMS AND EXCLUDES ANY AND ALL IMPLIED WARRANTIES OF
MERCHANTABILITY OR FITNESS FOR A PARTICULAR PURPOSE. LUCENT DOES NOT WARRANT THAT THE CLIENT SOFTWARE OR DOCUMENTATION WILL SATISFY YOUR REQUIREMENTS OR THAT THE CLIENT SOFTWARE OR
DOCUMENTATION ARE WITHOUT DEFECT OR ERROR OR THAT THE OPERATION OF THE SOFTWARE WILL BE UNINTERRUPTED. Some states or countries do not allow the exclusion of implied warranties or limitations on how long an implied warranty lasts, so the above limitation may not apply to You. This warranty gives You specific legal rights which vary from state to state.
GENERAL CONDITIONS.
1. Governing Law. This Agreement shall be governed by, and interpreted in accordance with, the substantive laws of the State of New Jersey of the United States of America.
2. Entire Agreement. This Agreement sets forth the entire understanding and agreement between You and Lucent and may be amended only in a writing or writings signed by You and Lucent. NO VENDOR, DISTRIBUTOR, DEALER, RETAILER, SALES PERSON OR OTHER PERSON IS AUTHORIZED TO MODIFY THIS AGREEMENT OR TO MAKE ANY WARRANTY, REPRESENTATION OR PROMISE WHICH IS DIFFERENT THAN, OR IN ADDITION TO, THE REPRESENTATIONS OR PROMISES OF THIS
AGREEMENT ABOUT THE SOFTWARE.
3. Export. Licensee hereby agrees that it will not knowingly, directly or indirectly, without prior written consent, if required, of the Office of Export Licensing of the U.S. Department of Commerce, Washington D.C. 20230, export or transmit any of the Products to any group Q, S, W, Y, or Z country specified in the Export Administration Regulations issued by the U.S. Department of Commerce or to any country which such transmission is restricted by applicable regulations or statues.
4. U.S. Government Restricted Rights. Use, duplication, or disclosure by the United States Government is subject to restrictions as set forth in FAR 52.227-14 (June 1987) Alternate III (g)(3) (June 1987), FAR 52.227-19 (June 1987), or DFARS 52.227-7013 (c)(1)(ii) (June 1988), as applicable Contractor/Manufacturer is Lucent Technologies Inc. 11900 North Pecos Street, Westminster, Colorado 80234.
5. Assignment. Lucent may without your consent or notice to You, assign this Agreement to an entity to which it transfers ownership of the Client Software. Upon the effective date of such assignment, You agree that Lucent shall be released and discharged from all obligations and liabilities under this Agreement.
Table of Contents
CentreVu Visual Vectors
Preface . . . P-1 Overview . . . P-1 Contents of This Document. . . P-3 Conventions Used in This Document . . . P-5 Related Documents. . . P-6
1 Introduction . . . 1-1 About CentreVu Visual Vectors . . . 1-1 About CentreVu CMS . . . 1-2 About CentreVu Visual Vectors Server . . . 1-2 Installation Support and Tips. . . 1-3 Online Help . . . 1-3 Checking Package Contents . . . 1-4 What You Need on Your Computer . . . 1-5 CentreVu Visual Vectors Server Requirements . . . 1-6 System Capacities . . . 1-7 Number of Visual Vectors Windows Allowed . . . 1-7 Number of PCs Allowed to Run Visual Vectors . . . 1-7 Performance . . . 1-8 Reliability/Availability . . . 1-8 Security. . . 1-8 Data Migration . . . 1-9
2 Installing CentreVu Visual Vectors from a CD-ROM . . . 2-1 Overview . . . 2-1 Installation Procedures . . . 2-2
3 Installation on a Network Drive Shared by Client PCs . . . 3-1 Overview . . . 3-1 Installation Procedures . . . 3-2 Network Setup . . . 3-2 Prerequisite Administration . . . 3-2 Installation Procedure. . . 3-2 Client Setup . . . 3-13
4 Installing CentreVu Visual Vectors on a
5 Uninstalling CentreVu Visual Vectors . . . 5-1 Overview . . . 5-1 Performing the Uninstall . . . 5-2
6 Getting Started with CentreVu Visual Vectors . . . 6-1 Call Center World Overview . . . 6-2 Overview . . . 6-2 Terms You Need to Know . . . 6-2 Adding and Deleting Objects in the Call Center World . . . 6-5 Overview . . . 6-5 Basic Framework Window Features . . . 6-6 Basic Navigator Window Features . . . 6-11 Using Visual Vectors Windows . . . 6-15 Adding New CentreVu CMS Servers . . . 6-16 Adding objects . . . 6-17 Selecting objects and performing actions . . . 6-19 Deleting objects . . . 6-20 Renaming objects . . . 6-21 Changing other properties . . . 6-23 Rules for Field Entry . . . 6-25 Call Center World Objects . . . 6-26 Overview . . . 6-26 Objects in Your Call Center World . . . 6-26 Call Center World Object Properties . . . 6-34 Overview . . . 6-34 Properties of Objects . . . 6-34
7 Troubleshooting . . . 7-1 Overview . . . 7-1 Troubleshooting FAQ. . . 7-2 Installation, Uninstallation and Importance of the HOME variable . . 7-3
There are several different installation programs. What are the differences? Which one (or more) should I run?. . . 7-3 Why can’t I re-install Visual Vectors software? . . . 7-3 Why are my previous settings and offline objects missing? . . . 7-3 Why can’t I uninstall from Control Panel’s Add/Remove
Programs dialog box?. . . 7-4 Why do I get a warning message about not having set
the HOME environment variable on Windows NT? . . . 7-5 Startup . . . 7-6 Why won’t Visual Vectors start? . . . 7-6 Connectivity . . . 7-7 Why can’t I log into the CMS/Visual Vectors server? . . . 7-7 I don’t get a login prompt at all. Why can’t I connect to a
Navigator . . . 7-8 Why can’t I see (or select) some of the options on the
context menu? . . . 7-8 My offline objects are missing, where are they? . . . 7-8 Why can’t I view my vector as ASCII text? . . . 7-8 Vector Editor. . . 7-9
Where are the step properties and comments in my
vector printout? . . . 7-9 Why are the ASCII and graphical versions of my vector
different? . . . 7-9 Why isn’t “Save” enabled in the Vector Editor? . . . 7-9 Why can’t I zoom in/out further? . . . 7-9 When I save my vector, all the open property boxes
disappear. What happened? . . . 7-9 Why can’t I drag floating comments with vector steps? . . . 7-10 What can I do if I am editing a vector and the connection
is lost? . . . 7-10 VDN Assignment Wizard . . . 7-10 Why can’t I see my VDNs from the filtered list? . . . 7-10 Why can’t I see the ACD that I want? . . . 7-11 CentreVu Supervisor Integration . . . 7-11
Why isn’t the CentreVu Supervisor icon displayed on the CentreVu Framework toolbar, when I have a local installation of Supervisor software on the same PC as
the Visual Vectors software? . . . 7-11 Why isn’t the CentreVu Supervisor icon displayed on
the CentreVu Framework toolbar if I have a client installation of the Supervisor software on the same PC
as the Visual Vectors software? . . . 7-12 Performance Issues . . . 7-13 Why isn’t the application more responsive?. . . 7-13 Why isn’t deleting an object in the Navigator instantaneous? . . 7-13 Why isn’t viewing the VDNs for an ACD in the Navigator
instantaneous?. . . 7-13 Miscellaneous Issues . . . 7-14
Why does the software seem to hang, with the cursor in
the wait state? . . . 7-14 Why does Visual Vectors need Microsoft Internet
Explorer 3.02 or later to work? . . . 7-14 Why doesn’t Visual Vectors Help appear to work? . . . 7-14 Why does the application fail to repaint the screen or
General PC Issues . . . 7-16 Why is accessing my hard drive so slow? . . . 7-16 Why is it necessary to access my hard drive so much? . . . 7-16 Do you think I might have some kind of virus? . . . 7-16
GL Glossary . . . GL-1
CentreVu Visual Vectors
Preface
Overview
1The CentreVu® Visual Vectors Installation and Getting Started guide
includes the following information:
● Instructions for installing CentreVu Visual Vectors client software
(Visual Vectors) on a PC from a CD-ROM
● Instructions for installing a configuration of CentreVu Visual Vectors
that resides on a shared network drive that can be accessed by multiple PCs.
● Instructions for installing CentreVu Visual Vectors client software
(Visual Vectors) on a PC from the network
● Procedures for uninstalling CentreVu Visual Vectors
● Instructions for adding a new CentreVu CMS to your Call Center
World and begin using Visual Vectors
● Guidelines for responding to error messages that may be displayed
This guide is intended for anyone who is installing the CentreVu Visual Vectors software. It assumes that you are familiar with your computer and the Microsoft* Windows†95/98 or Windows NT 4.0 operating systems, including standard Windows conventions.
The following sections are included in this Preface:
● Contents of this Document
● Conventions Used in this Document
● Related Documents.
Contents of This Document
1The guide is organized into the following chapters:
Chapter 1 Introduction
This chapter introduces the CentreVu Visual Vectors Setup. It provides information on the following:
● The language-versions that Visual Vectors
supports for each Windows operating system
● Installation support and tips
● Online Help information
● The items provided in the CentreVu Visual Vectors
package
● The equipment required to run CentreVu Visual
Vectors
● Helpline numbers
Chapter 2 Installing CentreVu Visual Vectors from a CD-ROM
This chapter describes the steps required to install CentreVu Visual Vectors onto a PC using a CD-ROM.
Chapter 3 Installation on a Network Drive Shared by Client PCs
Chapter 4 Installing CentreVu Visual Vectors on a PC from the Network
This chapter walks you through the process of installing CentreVu Visual Vectors onto a PC from a network drive.
Chapter 5 Uninstalling CentreVu Visual Vectors
This chapter describes the steps required to uninstall the CentreVu Visual Vectors software.
Chapter 6 Getting Started with CentreVu Visual Vectors
This chapter walks you through the process of starting Visual Vectors, connecting to a CMS server, logging out of a CMS server, and exiting Visual Vectors. It also teaches you how to change your connection settings, and gives you information about getting help with the Visual Vectors product.
Chapter 7 Troubleshooting
Conventions Used in This Document
1The following conventions are used in this document:
*Whenever you are asked to click or double click the mouse button, click button 1 (the left-most mouse button or primary button), unless button 2 (the right-most button or secondary button) is specified.
Convention Description
Bold Text Menu names, options, and icon names are shown
in bold text (for example, choose Save from the File menu).
Initial Capital Letters
Names of windows, dialog boxes, and keyboard keys. For example: This field is in the Manual Login window.
Courier
Text
Text you are asked to enter and system
commands. For example: Enter this
command.
< > Variable text is marked by less-than/greater-than signs (for example, Couldn’t create <filename>.
KEY+KEY Key combinations for which you must press and
hold down one key and then press another. For example, ALT+4.
Italic Text References to other documents, trademarks, and
for emphasis.
“ “ Sections and chapters that are referenced. For
example: See Chapter 1, “Introduction,” for an outline of the information in this book.
Click and Double click
*Button 1 (left-most mouse button or primary button).
Microsoft Windows or Windows
Related Documents
1The following documents include additional information about the CentreVu® CMS/Visual Vectors clients or servers:
● CentreVu® Visual Vectors Version 8 User Guide, Issue 1 (585-210-932)
● CentreVu® CMS R3V8 Administration, Issue 1 (585-210-910)
● Lucent Call Center Release 8 Change Description, Issue 1 (585-210-925)
● CentreVu® CMS R3V8 Upgrades and Migration, Issue 1 (585-210-913)
● CentreVu® CMS R3V8 Software Installation and Maintenance
(585-210-941, Issue 1)
CentreVu Visual Vectors
Introduction
1About CentreVu Visual Vectors
1The Lucent Technologies CentreVu Visual Vectors software gives users the ability to add, modify and delete vectors in a GUI environment. The CentreVu Visual Vectors software that allows you to work with vectors include: Navigator, VDN Assignment Wizard, and Vector Editor.
Visual Vectors include other useful features. The CentreVu Supervisor Version 6 or later software application can be launched from the CentreVu Framework toolbar. The CentreVu Supervisor software toolsets include the Framework window, CMS Login and Advanced Debugging.
Your Call Center World comprises the following:
● a Default Scratchpad on your local machine
● one or more CentreVu CMS servers that you have logged into before
● any non-default scratchpads you may have created before
● any entities (such as Vectors, VDNs, Announcements, Splits/Skills,
About CentreVu CMS
1The CentreVu Call Management System (CMS) is a software product used by customers who have the Lucent Technologies DEFINITY®
Enterprise Communications Server (ECS) Release 6 or later Lucent telecommunications switches and receive a large volume of telephone calls that are processed through the Automatic Call Distribution (ACD) feature of the switch. The CMS server collects call-traffic data, formats management reports, and provides an administrative interface to the ACD feature in the switch.
About CentreVu Visual Vectors Server
1Installation Support and Tips
1If you have difficulty installing CentreVu Framework, refer to the following sources:
● System requirements in “What You Need on Your Computer” on
page 1-5.
● The online Help option provided with the installation program.
● The readme.txt file on the CD-ROM. Use a text editor such as
Microsoft Windows Notepad to read the file.
● Chapter 7, “Troubleshooting.”
If you have further questions and you are a U.S. customer, you should contact the Lucent Technologies National Customer Care Center on 1-800-242-2121. If you have further questions and you are in any other other country, you should call your Lucent representative or distributor for assistance.
The CD-ROM in your package includes a graphical installer to help you install your copy of CentreVu Visual Vectors. The CD-ROM supports the Windows AutoPlay feature.
You can cancel the installation of CentreVu Visual Vectors at any time by selecting “Close” from the system menu, pressing Alt+F4, or clicking the X icon in the upper right-hand corner. You can also cancel the
installation by selecting the Cancel button at the bottom of the window. The installation program will exit installation and remove any files that were built by the program.
The database format has changed with this version of Visual Vectors. If old data is detected, you will be asked if you want to convert the data the first time you run the new version of Visual Vectors.
Online Help
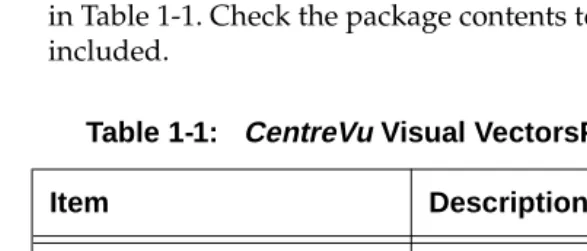
1Checking Package Contents
1The CentreVu Visual Vectors software package includes the items listed in Table 1-1. Check the package contents to be sure all items are included.
If any of the items are missing or damaged, U.S. customers should contact your Lucent Account Team. Customers in other countries should contact your Lucent Representative or Distributor.
Table 1-1: CentreVu Visual VectorsPackage Contents
Item Description
CentreVu Visual Vectors Client Software
CD-ROM
CentreVu® Visual Vectors
Installation and Getting Started guide
What You Need on Your Computer
1To install and run CentreVu Visual Vectors client software, you need the following minimum PC configuration:
● Pentium or compatible processor running at 300 MHz or faster.
● A hard disk drive with 40 MB of free space before installing Visual
Vectors software.
● A CD-ROM drive (not needed if the user has network installation
capability).
● 64 MB RAM or 96 MB RAM if co-resident with CentreVu Supervisor.
● A video monitor and graphics adapter supporting 16-bit color (64K)
or higher, set to 800x600 resolution or higher.
● Microsoft Windows 95, Microsoft Windows 98, or Windows NT 4.0 (with
Service Pack 3 or later) operating system.
● Microsoft Explorer3.0.2 or higher.
● A mouse or other pointing device compatible with the supported
Windows operating systems.
● For Network Connection:
CentreVu Visual Vectors Server Requirements
1To install and run CentreVu Visual Vectors, you need the following:
● Sun* computer required for the CentreVu CMS R3V6 or later
software
● Solaris† 2.7 operating system
● Sun Common Desktop Environment‡ 1.0.2
● SunLink** X.25 Network Interface 9.1 (if using an X.25 connection to
the switch)
● An appropriate load of CMS R3V6 or later. See your server
documentation for the supported loads.
● An appropriate load of the Supplemental Services CD. Refer to the
readme file for more specific information.
● CentreVu Visual Vectors Server Software CD.
The requirements for server connectivity are as follows:
● For a network connection to the server, the Visual Vectors software
connects using the native Ethernet port on the Sun computer. The native Ethernet port is built into Sun computers and does not require any additional hardware. However, the FSBE/S or Sunswift card may be used for a separate LAN interface to balance LAN traffic.
*Sun is a registered trademark of Sun Microsystems, Inc. †Solaris is a registered trademark of Sun Microsystems, Inc.
System Capacities
1The CentreVu CMS system capacities are unchanged by Visual Vectors software. When you put your CentreVu Visual Vectors users on a LAN, then your network must support the additional network traffic.
Number of Visual Vectors Windows Allowed
1Visual Vectors allows users to open many windows simultaneously. The limit depends only on the amount of memory available in Windows. The ability to launch windows and the performance of these tools depends upon the memory and speed of the PC and the other applications active on the PC.
The CentreVu Visual Vectors software can connect to as many as 20 CMS servers. Once a user has connected to a CMS, that server appears in the user’s Call Center World.
Number of PCs Allowed to Run Visual Vectors
1Performance
1When you are using Visual Vectors you may experience slightly slower response times for some actions. This could be for a variety of reasons. The following are a few possible reasons for slower performance:
● Any client/server software running in a LAN environment will
generate additional network traffic. Therefore, ensure that your LAN has been engineered appropriately.
● In a LAN environment, network backups could cause congestion on
the network, adversely affecting its performance.
● If the CentreVu Visual Vectors software is running simultaneously
with other applications, performance of Visual Vectors could be affected by those other applications.
● Each additional CentreVu Visual Vectors window that is open can
cause slightly slower user response time.
Reliability/Availability
1A customer with multiple LANs can access Visual Vectors using any IP address on the server if the LANs are interconnected. If they are not interconnected, the customer must access Visual Vectors using the default IP address of the Visual Vectors Server.
If serial links or LAN connectivity drop, the CentreVu Visual Vectors software will automatically attempt to restore the connection to the appropriate server if you attempt to access that server’s data again.
Security
1Data Migration
1The format of the user database changed between versions one and eight of Visual Vectors. You can migrate a version one user database to a version eight user database using the migrate.bat tool. You cannot migrate a version eight user database into a version one user database.
Migrate.bat uses your home environment variable to detect the user database and convert it into a new database. If HOME is not set, Location XX is tried.
NOTE:
CentreVu
Visual Vectors
Installing CentreVu
Visual Vectors
from a CD-ROM
2Overview
2This section describes how to install CentreVu Visual Vectors software from a CD-ROM. You can install all files necessary to run Visual Vectors on a stand-alone client PC. You must have the appropriate user
Installation Procedures
2To install CentreVu Visual Vectors, do the following:
1. Before starting the installation, close all running programs on the computer.
2. Insert the CentreVu Visual Vectors CD-ROM into the CD-ROM drive. One of the following will occur:
● If AutoPlay is enabled, setup starts automatically when you
insert the CD-ROM. The Type of Install screen will appear. Go to step 4.
● If AutoPlay is not enabled, proceed with this step. Choose Run
from the Start menu. The Run dialog box appears.
After a short wait, the CentreVu Visual Vectors Installation Type of Install window appears.
5. Select Install.
NOTE:
If MS Internet Explorer, version 3.02 or higher, is not installed on your PC, the following warning window appears:
a. In this case, select OK and CentreVu Visual Vector Install closes.
After a short wait, the CentreVu Visual Vectors Installation Welcome window appears.
A. If a previous version of CentreVu Visual Vectors is installed on your PC, the following window appears:
● If you want to install the latest version of CentreVu Visual
Vectors over the existing version, click on the radio button labeled Upgrade and go to step 14.
● If you want to install the latest version of CentreVu Visual
B. If you have several versions installed, the following screen appears.
● If you want to add another version of CentreVu Visual Vectors,
click on the radio button labeled Add and select Next.
● If you want to abort the installation of another version of
C. The following screen could appear if a previous installation attempt failed.
7. The Select Location dialog box appears.
Choose one of the following:
If you want to install the Visual Vectors files in the default installation path displayed, click next, then go to step 10.
8. Use the Browse option to display the Select Destination Folder dialog box.
9. In the Select Destination Folder dialog box, do one of the following:
● Use the down arrow to navigate to the drive and folder where
you want the files installed. Double click on the folder to select it.
● Type the drive and folder where you want to install the files. If
10. After you select the location, the Type of installation dialog box appears. Select the type of install you want.
12. TheSelect Languages dialog box appears. The default language is based on your operating system’s language. Use this screen to change the language or to add languages.
NOTE:
13. The Select Folder dialog box appears.
The Select Folder dialog box lets you select a folder in which to put CentreVu Visual Vectors shortcuts. Do one of the following:
● If you want to put the shortcut in the folder indicated in the text
box, go to step14.
● If you want to put the CentreVu Visual Vectors shortcuts in a
14. Select Next.
15. Select Install to begin the installation. A progress indicator shows what percentage of the files have been copied.
NOTE:
The following warning window may appear:
If this happens, ask the person who helps you administer your PC to set the HOME environment variable on your PC. Refer to the “Troubleshooting” section for more information.
16. Do one of the following:
● Select Readme if you want to see the readme.txt file. The file
may contain useful information about the product that could not be included in the printed documentation or help files. To exit the ReadMe file, click on OK or Cancel.
● Select Finish to return to your desktop.
CentreVu Visual Vectors
Installation on a
Network Drive
Shared by Client
PCs
3Overview
3This type of installation allows multiple PCs to act as clients of the shared network drive. The Visual Vectors executable and program files reside on the network drive. The client computers that share the network drive will have a minimal program that allows them to work with the Visual Vectors program and data on the shared network drive.
After doing the network setup, you need to set up clients to access the Visual Vectors software over the network. Client setup installs only a program group and icons on the client’s PC, and these icons point to the Visual Vectors software files which reside on the network drive.
You can do this installation from the network installation folder or from a CD-ROM.
This chapter includes the following topics:
● Installation Procedures
● Network Setup
Installation Procedures
3Installing CentreVu Visual Vectors to a shared application folder is a two-step process that consists of the following:
● Performing the network setup
● Performing a client setup at each client computer.
The network installation does not result in a client/server relationship.
Network Setup
3The network setup expands all program files into the network directory. In addition, this setup transfers a client setup program and its associated files to the network directory. In this type of configuration, users can select the language of their choice through the client.
Prerequisite Administration
3You need the following in order to perform a network setup:
● administrator/file access privileges
● PCs connected to shared network drive
● logged in at the server that is running Windows.
Installation Procedure
3Perform these steps directly on the server. Do not use remote access.
1. Before starting the installation, close all running programs on the computer.
2. Insert the CentreVu Visual Vectors CD-ROM into the CD-ROM drive. One of the following will occur:
● If AutoPlay is enabled, setup starts automatically when you
insert the CD-ROM. Go to step 9.
3. Choose Run from the Start menu. The Run dialog box appears.
5. Select Next to continue with the installation.
The Type of Install dialog box appears.
7. Select Install.
8. Select Next. At this point, which screen appears depends on what you already have on your computer.
A. If a previous version of CentreVu Visual Vectors is installed on
your PC, the following window appears:
● If you want to install the latest version of CentreVu Visual
Vectors over the existing version, click on the radio button labeled Upgrade and go to step 14.
● If you want to install the latest version of CentreVu Visual
B. If you have several versions installed, the following screen appears.
● If you want to add another version of CentreVu Visual Vectors,
click on the radio button labeled Add and select Next.
● If you want to abort the installation of another version of
9. Select Next.
The Select Network Location dialog box appears.
NOTE:
The setup program places all program files into the network directory specified in this dialog box. If you do not want to use the default location, you can use the Browse button to select your preferred location.
10. Click Next if you want to keep the default location. Otherwise, continue with step 10.
11. Assure that you have enough disk space to install the application to the specified drive.
NOTE:
12. In the Select Network Location dialog box, select the Browse button.
The Select Destination Folder window appears.
13. Navigate to the drive and folder containing the folder you want.
14. Double-click on the folder to select it.
The drive and folder where Visual Vectors will be installed appears in the Select Destination Folder dialog box.
16. Select Next. If you’re upgrading, refer to the “Upgrade” section.
The Ready to Install dialog box appears. 3
18. When setup is complete, the Install Successful dialog box appears.
Client Setup
3NOTE:
If MS Internet Explorer, version 3.02 or higher, is not installed on your PC, the following warning window appears:
a. In this case, select OK and CentreVu Visual Vector Install closes.
b. Install MS Internet Explorer, version 3.02 or higher, on your PC and begin this installation procedure again.
The client setup program allows clients to access CentreVu Visual Vectors software from the network server.
Note: You cannot not remotely install this client setup on a PC. If you try to install the client setup on a PC by accessing it through another computer; it won’t work.
1. In Windows Explorer or Network Neighborhood (Windows 95/98 or Windows NT 4.0), navigate to the directory where CentreVu Visual Vectors software is installed on the server.
2. Locate and then double-click on the setupclient.exe file. The Welcome window appears.
A. If a previous version of CentreVu Visual Vectors is installed on your PC, the following window appears:
● If you want to install the latest version of CentreVu Visual
Vectors over the existing version, click on the radio button labeled Upgrade and go to step 14.
● If you want to install the latest version of CentreVu Visual
B. If you have several versions installed, the following screen appears.
● If you want to add another version of CentreVu Visual Vectors,
click on the radio button labeled Add and select Next.
● If you want to abort the installation of another version of
C. The following screen could appear if a previous installation attempt failed.
● Click Next to continue with the CentreVu Visual Vectors setup.
NOTE:
Different screens can be displayed at this point. You will see a different screen for the following scenarios:
● where no previous version of Visual Vectors exists
● where Visual Vectors 1.0 exists
● This screen appears when a previous version of CentreVu Visual
Vectors is installed on your PC.
If you want to install the latest version of CentreVu Visual Vectors over the existing version, click on the radio button labeled Upgrade and go to step 10.
The Select Location dialog box appears.
NOTE:
This dialog box lets you choose where you want to install user-specific files. If a previous user file location is not detected, the default location is C:\Programs Files\Lucent\CentreVu Visual Vectors 8.0 - Client (if C: is your Windows drive). If a previous user file location is detected, client setup displays the user file path that was used for the previous installation.
4. Choose one of the following:
● If you want to install the Visual Vectors files in the default
installation path displayed, go to step 8.
● If you want to install the CentreVuVisual Vectors files in a
5. Use the Browse option to display the Select Destination Directory dialog box.
6. In the Select Destination Directory dialog box, do one of the following:
● Navigate to the drive and folder where you want to install the
files. Double click on the folder to select it.
● Type the drive and folder where you want to install the files. If
the folder does not exist, the Setup program creates it.
NOTE:
The user files can be located on the client’s local drive or on the network.
8. Select Next.
The Select Folder dialog box appears.
9. The Select Folder dialog box lets you select a folder in which to put CentreVu Visual Vectors software shortcuts. Do one of the following:
● Do not change the default folder displayed in the text box.
● Enter a different folder name in the text box. If you enter a name
10. Select Next.
The Ready to Install dialog box appears.
11. Select Install to begin the setup. A progress indicator shows what percentage of the files have been installed.
13. Do one of the following:
● Select Readme if you want to see the readme.txt file. The file
may contain useful information about the product that could not be included in the printed documentation or help files. To exit the ReadMe file, click on OK.
● Select Finish to return to your desktop.
CentreVu
Visual Vectors
Installing CentreVu
Visual Vectors on a
PC from a Network
folder
4Overview
4Sometimes the administrator stores the CentreVu Visual Vectors software files for a stand-alone client PC in a network folder instead of a CD-ROM. This section will show you how to install a stand-alone version of CentreVu Visual Vectors.
You must have the appropriate user and network permissions on your PC (for example, administrator privileges in the WindowsNT 4.0 operating system) to install CentreVu Visual Vectors onto your computer.
This section includes the following sections:
● Installation Procedures
● Preparing the Network Folder
Installation Procedures
4Use these procedures to install CentreVu Visual Vectors on a computer that will run the software from a local disk drive. If you are installing Visual Vectors software on each computer using the network, start with the “Preparing the Network Folder” section below. If you are installing Visual Vectors software on each computer using the CD-ROM, see the “Installing CentreVu Visual Vectors from a CD-ROM” section.
NOTE:
The CentreVu Visual Vectors CD-ROM supports the Microsoft Windows AutoPlay feature. If AutoPlay is enabled on the computer, insert the CD-ROM into the drive and the CentreVu Visual Vectors Installation
program will start automatically. See your system administrator for information on how to enable or disable AutoPlay on your computer.
Preparing the Network Folder
4Installing CentreVu Visual Vectors over a network is a two-step process that consists of preparing the installation folder and then installing Visual Vectors software on each computer.
To prepare the installation folder, do the following:
1. At any computer that is connected to the network, insert the CentreVuVisual Vectors CD-ROM into the CD-ROM drive.
NOTE:
The CentreVu Visual Vectors CD-ROM supports the Microsoft Windows AutoPlay feature. If AutoPlay is enabled on the computer, the CentreVu Visual Vectors Installation program will start
automatically after you insert the CD-ROM into the drive. Choose the Cancel button in the window that displays, and then continue with Step 2.
2. Open Windows Explorer.
4. Using the Copy command or drag-and-drop, copy the contents of the CD-ROM to the folder you created in step 3. Be sure to copy all of the files.
5. Verify that the network drive where you copied the contents of the distribution medium is connected to each computer that wi1l be installing Framework from the network.
6. Go to “Setting Up the Computer.”
Setting Up the Computer
4To install CentreVu Visual Vectors software from the network drive, sit down at the PC onto which you want to install CentreVu Visual Vectors and do the following:
NOTE:
Before starting the installation, close all running programs on the computer.
1. Click Start on the taskbar and select Run. The Run dialog box appears.
3. Select OK.
In the following example, the “X:” drive is selected. If you are not sure of the location of the software, continue with Step 4. If you are sure of the location, select OK and go to step 7.
4. In the Run dialog box, select the Browse button. The browse dialog box appears.
6. Locate and double-click on the setup.EXE file to begin the installation.
After a short wait, the CentreVu Visual Vectors Installation Type of Install window appears.
8. Select Install.
NOTE:
If MS Internet Explorer, version 3.02 or higher, is not installed on your PC, the following warning window appears:
a. In this case, select OK and CentreVu Visual Vector Install closes.
9. Select Next.
NOTE:
There are cases where no previous version of Visual Vectors exists, where Visual Vectors 1.0 exists, and where multiple versions of Visual Vectors are detected. These scenarios display different screens. If a previous version of CentreVu Visual Vectors is installed on the *network*, not on your PC (because this is a network
installation), the following window appears.:
● If you want to install the latest version of CentreVu Visual Vectors
over the existing version, click on the radio button labeled Upgrade, select Next and go to step 16.
● If you want to install the latest version of CentreVu Visual Vectors in
10. Choose one of the following:
● If you want to install the Visual Vectors files in the default
installation path displayed, go to Step 14.
● If you want to install the CentreVuVisual Vectors files in a
different drive or folder, go to Step 11.
11. Use the Browse option to display the Select Destination Folder dialog box.
12. In the Select Destination Folder dialog box, do one of the following:
● Navigate to the drive and folder where you want to install the
files. Double click on the folder to select it.
● Type the drive and folder where you want to install the files. If
the folder does not exist, the Setup program creates it.
14. Select Next.
The Select Folder dialog box appears.
15. The Select Folder dialog box lets you select a folder in which to put CentreVu Visual Vectors shortcuts. Do one of the following:
● If you want to put the shortcut in the folder indicated in the text
box, go to step16.
● If you want to put the CentreVu Visual Vectors shortcuts in a
16. Select Next.
17. Select Install to begin the installation. A progress indicator shows what percentage of the files have been copied.
18. Do one of the following:
● Select Readme if you want to see the readme.txt file. The file
may contain useful information about the product that could not be included in the printed documentation or help files. To exit the ReadMe file, click on OK or Cancel.
● Select Finish to return to your desktop.
CentreVu Visual Vectors
Uninstalling
CentreVu Visual
Vectors
5Overview
5You can easily uninstall the CentreVu Visual Vectors software using the supplied Uninstall program, or through the Microsoft Windows
Add/Remove Programs wizard. To use the Windows process, refer to your Windows documentation. The Uninstall removes Visual Vectors files and folders from the computer. The Uninstall does not remove the following:
● core components
● registry entries that are used by other applications
● files that are used by other applications
● any new files added after installation
● a folder that is not empty.
NOTE:
A registry is a Windows database that holds information about the system and its applications, including system settings, client, and server information.
Performing the Uninstall
5To uninstall the CentreVu Visual Vectors software, do the following:
1. Close all running programs on the computer.
2. From the Windows Start menu, select Programs and then the name of the folder in which you installed Lucent CentreVu Visual Vectors shortcuts.
3. Select Uninstall.
The Select Uninstall Method window appears.
4. Click on the radio button labeled Automatic (This is the recommended selection).
5. Select Next.
The Perform Uninstall dialog box appears.
6. Select Finish to perform the uninstall.
A progress indicator indicates the percentage of the files that have been removed. You can select Cancel at any time to abort the uninstall process and cancel the uninstall program.
NOTE:
If you select Cancel, the Uninstall program tries to clean up. Note that Visual Vectors may not work correctly after canceling Uninstall; you may need to reinstall the CentreVu Visual Vectors software.
NOTE:
If you try to uninstall Visual Vectors after the cancellation of a previous uninstallation attempt, your second attempt at uninstalling Visual Vectors will fail.
CentreVu Visual Vectors
Getting Started
with CentreVu
Visual Vectors
6This chapter explains how to set up the Call Center World seen in the Navigator.
It is divided into the following sections:
● Call Center World Overview
● Adding and Deleting Objects in the Call Center World
● Call Center World Objects
● Object Properties.
Call Center World Overview
5Overview
5To use CentreVu Framework and Visual Vectors software, you need to set up a Call Center World. A number of ACD, CentreVu CMS and CentreVu Supervisor terms must be understood to set up your Call Center World.
Terms You Need to Know
5Terms
5Before you begin using the software, you should know the meaning of several terms. These terms, as well as others, are also defined in the Glossary.
Accelerator Keys
Keys that provide shortcuts to actions available on the menu.
CentreVu Visual Vectors window
The window in which you are currently working (usually indicated by a highlighted title bar). Visual Vectors has a Framework window and windows for each of the tools, including Navigator, Vector Editor, and VDN Assignment.
Container
An object in your Call Center World that logically contains other entities or objects. For example, each CMS object in your Call Center World can contain as many as 8 ACD objects, each of which contains entity folders (for announcements, split or skill objects, trunk groups, VDNs, and vectors).
Context menu
Entity
A generic term that refers to one of the following: Announcement, Split/Skill, Trunk Group, VDN, or Vector. Entities that CentreVu Visual Vectors can view or administer include Vectors and VDNs. Entity names are obtained from the CentreVu CMS Dictionary; renaming entities using Visual Vectors results in changes to the CMS Dictionary.
Folder
An object in the Navigator tool that contains entities (announcements, splits/skills, trunk groups, VDNs, and vectors). Folders are used to visually group all entities of a specific type for an ACD.
Input field
An area in a window into which you enter one or more valid values. Valid values may be integers, for example, or names assigned in the CentreVu CMS Dictionary.
Menu bar
A menu bar is under the title bar of most windows. The menu bar shows the menu names available for that particular window (for example, File and Help). You select an item from one of these drop-down menus.
Navigator
A window that displays after you select it from the Tools menu or toolbar in the CentreVu Framework window. It consists of two panes: a hierarchical “tree” view of your Call Center World on the left and a list of objects or entities on the right.
Object
Any item which may appear in your Call Center World through the Navigator tool. Objects can be containers of other objects or entities (VDNs folder), or an object may be an administrable entity itself (VDN).
Status bar
Title bar
A title bar is across the top of most windows. The title bar shows the name of that particular window (for example, Navigator). Titles of open tool windows will be listed on the Window menu of CentreVu
Framework.
Toolbar
A toolbar is under the menu bar of most windows. Toolbar icons represent actions you can perform.
Tooltips
Tooltips are available in most windows by placing the mouse cursor over an item for two seconds. Tooltips usually describe the actions performed by selecting an icon. Tooltips can be disabled on the Preferences window accessed from the Tools menu of CentreVu Framework.
VDN Assignment
The window that displays after you select it from the Tools menu or toolbar in the CentreVu Framework window. It consists of several dialog boxes in sequence; for example, one filters and selects the VDNs you wish to assign, and another performs the assignment(s).
Vector Editor
Adding and Deleting Objects in the Call Center
World
5Overview
5This section describes how you add or delete objects in your Call Center World.
In this section
5Topics in this section include:
● Basic Framework window features
● Basic Navigator features
● Using Visual Vectors window features
● Adding objects
● Selecting objects and performing actions
● Deleting objects
● Renaming objects
● Changing other object properties
● Completing input fields
Basic Framework Window Features
5Overview
5This section describes the features of the CentreVu Framework window in the Visual Vectors software.
System menu box
5A common convention. The system menu box enables you to perform basic operations, such as closing the current window or software program.
Title bar
5A common convention. The title bar shows the name of the tool. When a vector is open in the Vector Editor, its name is shown.
Minimize, maximize/restore, and close buttons
5A common convention. The buttons adjust the size of the current window, or close it.
Toolbar
5These buttons appear on the toolbar.
Status bar
5The status bar is located at the bottom of the CentreVu Framework and Vector Editor windows. Framework displays a brief description of what actions are occurring; Vector Editor displays the number of steps in the current vector.
Menu bar
5A common convention. The menu bar lists the available drop-down menus. This section identifies the menus that are available before you log into the CMS server: File, Tools, Window, and Help.
Button Function
Connect Initiates a connection to a CMS server.
Disconnect Disabled until you are connected to a CMS server.
Navigator Accesses the window for the Navigator tool.
Vector Editor Accesses the window for the Vector Editor tool.
VDN Assignment
Accesses the first of a series of windows for the VDN Assignment Wizard tool.
CentreVu Supervisor
Launches CentreVu Supervisor Version 6, if that program is installed correctly. If not, this button does not appear.
Help Contents Launches the Help application window for Visual
File Menu
5From this menu, you can initiate or discontinue a connection to a CMS server. The menu has the following items.
Connect
Displays the Connect to server window.
Disconnect
Displays the Disconnect window listing servers to which you are connected.
Highlight the server(s) from which you wish to disconnect and select the Disconnect button or press the Enter key.
Exit
Tools Menu
5Select the Tools menu to access the following items.
Navigator
Opens the window for the Navigator. You can view, add, delete, or move objects in your Call Center World using this window.
Vector Editor
Opens the window for the Vector Editor. You can create new or edit existing vectors in this window, and then save them to an ACD (if you have the needed permissions) or the scratchpad on your PC.
VDN Assignment Wizard
Opens the first of a series of windows for the VDN Assignment Wizard. This tool enables you to assign VDNs to vectors and VDN skill
preferences. You can also view which VDNs are assigned to which vectors and, if necessary, change those assignments.
CentreVu Supervisor (if installed correctly)
Launches a separate session of your CentreVu Supervisor application software. Other than this shortcut, the two programs are autonomous.
Preferences...
Opens the Preferences window, from which you can view or modify settings such as Locale and whether Tooltips are enabled.
Advanced Debugging...
Used for debugging. Do not change the settings on the Advanced window unless you are instructed to do so by a Lucent Technologies assistant.
Window Menu
5Select Window from the menu bar to choose from the following items.
Close All
Closes the windows of all open tools, but leaves the CentreVu Framework window open and Visual Vectors software running.
Window List
Help Menu
5Press the F1 key or select the Help button to display help on a window or tool. Select Help from the menu bar to choose from the following options.
Help Contents
Opens the Help window, and displays the Visual Vectors table of contents.
About…
Displays the About CentreVu Visual Vectors… window, which shows the software build number.
Basic Navigator Window Features
5Overview
5Whether you are logged into a CMS server and your CentreVu
CMS/Visual Vectors user permissions determines the objects shown in Navigator and the menu items and toolbar buttons available to you for those objects.
Navigator Toolbar
5The default Navigator toolbar buttons are as follows:
Button Function
Up One Level Makes the parent of the current object the new current object.
New Creates a new object (scratchpad or vector) within the
current object.
Delete Deletes the currently selected object.
Rename Enters the edit mode on the name property of the
selected object.
Properties Displays the Property window for the current object(s).
Undo Undoes the last action performed in this window.
Redo Performs the last action undone in this window.
Cut Removes the selected object(s) to be pasted later.
Copy Copies the selected object(s) to be pasted later.
Paste Pastes the previously cut or copied object(s) into the current folder and over the current selection (if there is one).
Details Changes the view in the right-hand pane from a list of object icons to one row of data per object.
List Changes the view in the right-hand pane from one
row of data per object to a list of object icons.
Status indicators
5These indicators in the Navigator tell you about the state of a CMS server and its measured ACDs.
Menu bar
5This section identifies the four menus that are available after you log into a CMS server: File, Edit, View, and Help.
File Menu
5The File menu has the following items.
New
Creates a new object in your Call Center World.
Delete
Removes an object from your Call Center World.
Rename
Enters the editing mode for the name property of the selected object.
Properties
Accesses the Properties window for the selected object.
Close
Closes the current window.
This indicator Displays …
Login status The icon for the CMS object in Navigator displays a black screen if you are not connected.
Edit Menu
5The Edit menu has the following items.
Undo
Undoes the last action performed in this Navigator session.
Redo
Redoes the last action that was undone in this Navigator session.
Cut
Removes the selected object to be pasted later.
Copy
Copies the selected object to be pasted later.
Paste
Pastes the object that was previously cut or copied.
View Menu
5The View menu has the following items.
Up One Level
Highlights the “parent” object of the selected object in the left pane, displaying the parent object's contents in the right pane.
Details
Changes the information displayed in the right pane for objects selected in the left pane. Details view is the default, showing one row for each object contained in the object selected in the left pane. Each row contains columns for the Name, Type, and your read/write Permissions of the object.
List
Changes the information displayed in the right pane for objects selected in the left pane. List view shows one named icon for each object
contained in the object that is selected in the left pane.
Refresh
Help Menu
5Press the F1 key or select the Help button to display help on a window or tool. Select Help from the menu bar to choose from the following items.
Help Contents
Opens the Help window, and displays the Visual Vectors table of contents.
About…
Displays the About CentreVu Visual Vectors… window, which shows the software build number.
Using Visual Vectors Windows
5Overview
5This section describes how to use features that are common to all Visual Vectors windows: the menus, toolbars, and Help system.
Visual Vectors menus
5To select a menu item, choose any of the following methods:
● Click on the item.
● Use the arrow keys to highlight the item and then press the Enter key.
● Hold down the Alt key and press the underlined letter in the menu item
you want to select
● Press the key or combination of keys (usually the Alt key or the Ctrl key
and a letter key) assigned to the operation. For example, use Ctrl+C to copy.
Visual Vectors toolbars
5Help system
5Press the F1 key or select the Help button to display help for a window. Select Help from the menu bar to choose from the help options
described in the CentreVu Visual Vectors User Guide.
Adding New CentreVu CMS Servers
5Procedure
5T